用React做一个音乐播放器
介绍
任何正在学习 React 并想使用 React 构建项目的人。有各种博客和文章可以为开发人员指导此类项目。我确实浏览过这些文章,但其中总是缺少一种项目。缺少的项目是音乐播放器和视频播放器。这两个项目都会让您有机会处理音频和视频。您将学到很多东西,例如处理播放和暂停音频的音频。
今天,我们将在 React 中构建一个音乐播放器。我们将研究以下主题:
- 设置环境
- 播放/暂停音频
- 音频处理时间(以当前时间和音频完整时长表示)
- 为音频时间线添加范围滑块
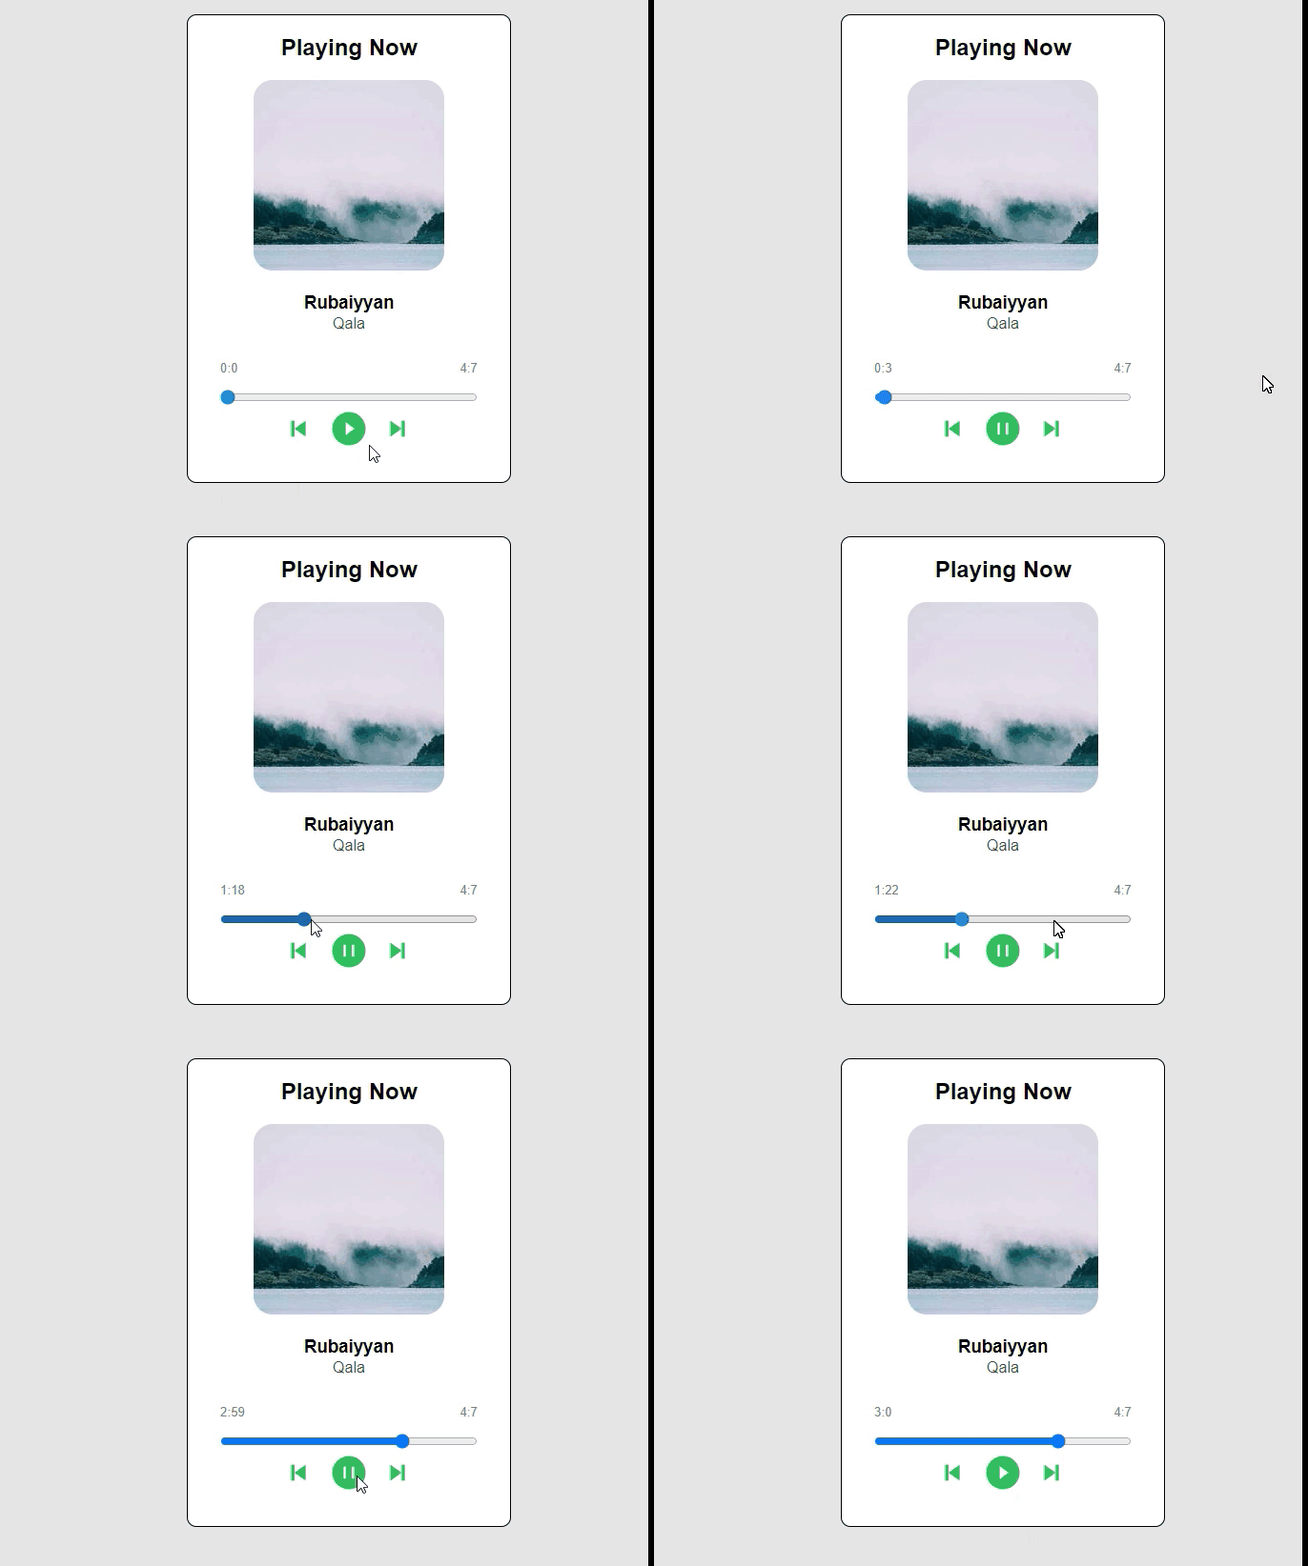
完成该项目后,我们的音乐播放器将如下所示。
如果这让您兴奋,那么让我们开始吧。
先决条件和设置环境
我假设您具备以下技术知识作为先决条件:
- JavaScript
- HTML/CSS
- 基础反应
环境设置很简单。您应该预先安装node.js以便在终端中运行与节点相关的命令。
导航到要在其中创建项目的目录。现在,运行终端并输入以下命令来安装 React 项目。
npx create-react-app react-music-player
删除所有样板文件和不必要的代码。我们现在可以开始了。
依赖关系
我们需要将以下库安装到我们的项目中:
- 使用声音:这将处理音频文件。它将加载、播放和暂停音频以及其他功能。
使用以下命令安装:
npm i use-sound
- react-icons:用于将播放、暂停、下一个和上一个图标添加到我们的播放器中。
使用以下命令安装它:
npm i react-icons
播放器.js
在文件夹中创建一个component目录src。在其中创建一个名为Player.js. 这个组件将是我们的音乐播放器。
进口
根据要在文件中导入的库。您可以在这里查看:
import { useEffect, useState } from "react";
import useSound from "use-sound"; // for handling the sound
import qala from "../assets/qala.mp3"; // importing the music
import { AiFillPlayCircle, AiFillPauseCircle } from "react-icons/ai"; // icons for play and pause
import { BiSkipNext, BiSkipPrevious } from "react-icons/bi"; // icons for next and previous track
import { IconContext } from "react-icons"; // for customazing the icons
您可以查看评论以了解导入的解释。
播放和暂停音频
让我们实现正在播放和暂停音频的播放器的强制性功能。
在顶部,我们有一个isPlaying用于存储玩家当前状态的状态。这将有助于根据播放器的状态有条件地呈现播放/暂停图标。
const [isPlaying, setIsPlaying] = useState(false);
我们需要useSound用音频初始化。它将返回播放、暂停、持续时间和声音方法。
const [play, { pause, duration, sound }] = useSound(qala);
playpause用于播放和暂停音频。duration是以毫秒为单位的轨道长度。sound将为我们提供声音的howler.js方法。
创建一个函数来处理播放和暂停按钮。这是它的代码。
  const playingButton = () => {
    if (isPlaying) {
      pause(); // this will pause the audio
      setIsPlaying(false);
    } else {
      play(); // this will play the audio
      setIsPlaying(true);
    }
  };
现在,是时候将播放器的 UI 组件添加到return. 这是它的代码。
  return (
    <div className="component">
      <h2>Playing Nowh2>
      <img
        className="musicCover"
        src="https://picsum.photos/200/200"
      />
      <div>
        <h3 className="title">Rubaiyyanh3>
        <p className="subTitle">Qalap>
      div>
      <div>
        <button className="playButton">
          <IconContext.Provider value={{ size: "3em", color: "#27AE60" }}>
            <BiSkipPrevious />
          IconContext.Provider>
        button>
        {!isPlaying ? (
          <button className="playButton" onClick={playingButton}>
            <IconContext.Provider value={{ size: "3em", color: "#27AE60" }}>
              <AiFillPlayCircle />
            IconContext.Provider>
          button>
        ) : (
          <button className="playButton" onClick={playingButton}>
            <IconContext.Provider value={{ size: "3em", color: "#27AE60" }}>
              <AiFillPauseCircle />
            IconContext.Provider>
          button>
        )}
        <button className="playButton">
          <IconContext.Provider value={{ size: "3em", color: "#27AE60" }}>
            <BiSkipNext />
          IconContext.Provider>
        button>
      div>
    div>
  );
对于封面图片,我使用Loren Picsum生成随机图像。
您可以在此处查看文件的 CSS:
body {
  background-color: #e5e5e5;
}

.App {
  font-family: sans-serif;
  text-align: center;
}

.component {
  background-color: white;
  width: 25%;
  max-width: 600px;
  margin: 1em auto;
  padding-bottom: 2em;
  border: 0.1px solid black;
  border-radius: 10px;
}

.musicCover {
  border-radius: 10%;
}

.playButton {
  background: none;
  border: none;
  align-items: center;
  justify-content: center;
}

.subTitle {
  margin-top: -1em;
  color: #4f4f4f;
}

.time {
  margin: 0 auto;
  width: 80%;
  display: flex;
  justify-content: space-between;
  color: #828282;
  font-size: smaller;
}

.timeline {
  width: 80%;
  background-color: #27ae60;
}

input[type="range"] {
  background-color: #27ae60;
}

@media (max-width: 900px) {
  .component {
    width: 50%;
  }
}
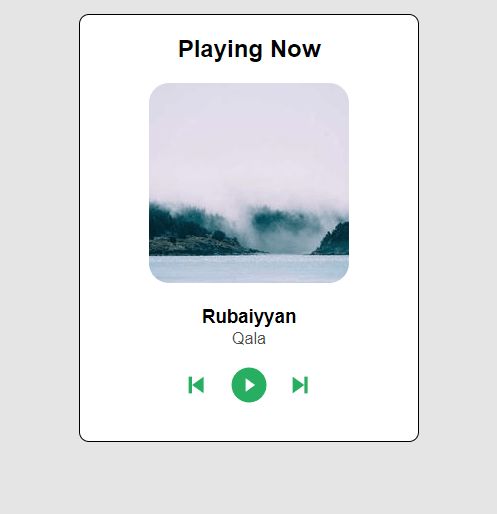
运行反应服务器。如果一切顺利,您将能够看到下面的屏幕。
单击播放按钮播放音频。
使用音频的当前时间和持续时间添加音频时间线
现在,让我们将时间轴添加到播放器。时间线将由用户控制。对其进行任何更改都会更改音频的当前位置。
让我们看看我们正在使用的状态。您会看到对每个状态的解释的注释。
  const [currTime, setCurrTime] = useState({
    min: "",
    sec: "",
  }); // current position of the audio in minutes and seconds

  const [seconds, setSeconds] = useState(); // current position of the audio in seconds
我们正在从useSound. 由于持续时间以毫秒为单位提供,我们已将其转换为分钟和秒。
useEffect(() => {
  const sec = duration / 1000;
  const min = Math.floor(sec / 60);
  const secRemain = Math.floor(sec % 60);
  const time = {
    min: min,
    sec: secRemain
  };
现在,对于音频的当前位置,我们有了sound.seek([])方法。我们每秒都在运行这个函数来改变音频的当前位置。在获得以秒为单位的音频位置后。我们将其转换为分钟和秒。转换后,我们用当前值设置状态。这是它的代码。
useEffect(() => {
    const interval = setInterval(() => {
      if (sound) {
        setSeconds(sound.seek([])); // setting the seconds state with the current state
        const min = Math.floor(sound.seek([]) / 60);
        const sec = Math.floor(sound.seek([]) % 60);
        setCurrTime({
          min,
          sec,
        });
      }
    }, 1000);
    return () => clearInterval(interval);
  }, [sound]);
现在返回。这是代码。
      <div>
        <div className="time">
          <p>
            {currTime.min}:{currTime.sec}
          p>
          <p>
            {time.min}:{time.sec}
          p>
        div>
        <input
          type="range"
          min="0"
          max={duration / 1000}
          default="0"
          value={seconds}
          className="timeline"
          onChange={(e) => {
            sound.seek([e.target.value]);
          }}
        />
      div>
范围输入的值是second状态。它将为我们提供音频的当前位置。在用户更改范围时。我们正在调用该soud.seek()方法来更改音频的当前位置。
输出
成功完成项目后,您将能够看到以下输出。
注意:音乐正在进入我的扬声器。
我创建了一个codesandbox。您可以查看它以获得包含代码和输出的完整项目。
注意:我使用的歌曲是Qala的Rubaaiyaan。一切归功于创作者。
附加的功能
您可以在音乐播放器上添加更多功能,例如:
- 它目前播放一首歌曲并加载多首歌曲。使用下一个和上一个图标来更改音频。
- 根据歌曲更改音频的名称和专辑。
- 添加更多您希望音乐播放器应具备的功能。
结论
我们已经创建了自己的音乐播放器。该项目将帮助您在 React 中处理音频文件。我们在函数中添加了播放和暂停功能。还添加了带有范围输入的音频时间线。用户可以使用时间线更改音频的当前位置。随意向项目添加更多功能。
我希望这个项目能帮助你理解在 React 中处理音乐的方法。如果您也想要视频播放器教程,请在评论中告诉我。感谢您阅读博文。

