Windows系统下使用Mingw编译并运行opencv教程
一、编译环境
系统:Windows10旗舰版
cmake版本下载:3.9.2
QtMingw版本下载:qt-opensource-windows-x86-5.11.0.exe,太大了只能放网盘
opencv版本下载:opencv331_mingw
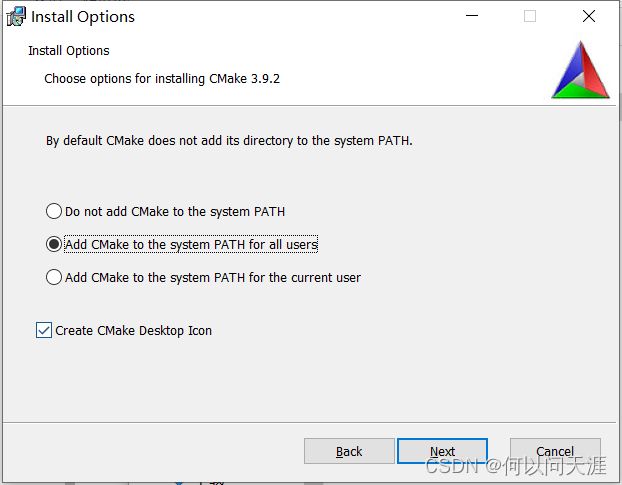
二、CMAKE安装
三、OpenCV解压与编译
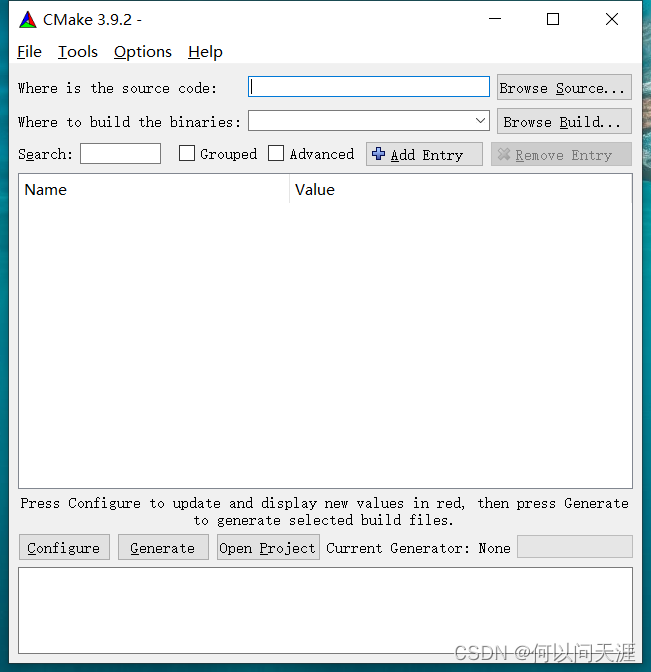
将下载的opencv解压。并且进入其目录。新建一个文件夹名为opencv331_mingwBuild

点击左下角configure,弹出对话框,选择MinGw Makefiles和Use default native compilers,点击Finish
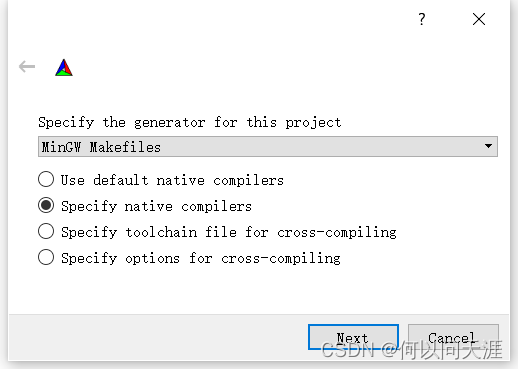
c写对应的F:/Qt/Qt5.11.0/Tools/mingw530_32/bin/gcc.exe
c++写对应的F:/Qt/Qt5.11.0/Tools/mingw530_32/bin/g++.exe
![]()
又出现了报错
CMake Error: CMake was unable to find a build program corresponding to “MinGW Makefiles”. CMAKE_MAKE_PROGRAM is not set. You probably need to select a different build tool.
CMake Error: CMake was unable to find a build program corresponding to “MinGW Makefiles”. CMAKE_MAKE_PROGRAM is not set. You probably need to select a different build tool.
CMake Error: CMAKE_CXX_COMPILER not set, after EnableLanguage
CMake Error: CMAKE_C_COMPILER not set, after EnableLanguage

其中CMake Error: CMake was unable to find a build program corresponding to “MinGW Makefiles”. CMAKE_MAKE_PROGRAM is not set. You probably need to select a different build tool.
解决方案如下:
勾选Grouped,Advanced
将CMAKE_MAKE_PROGRAM项后面的路径设置为Qt安装路径下的路径如下所示:F:/Qt/Qt5.11.0/Tools/mingw530_32/bin/mingw32-make.exe,重新点击Configure,问题解决。
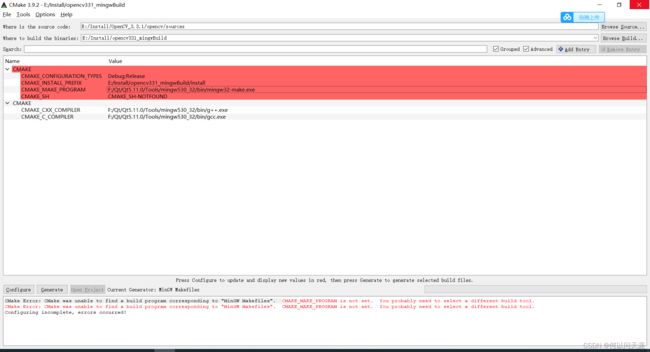
正在编译中:

保持默认勾选项:
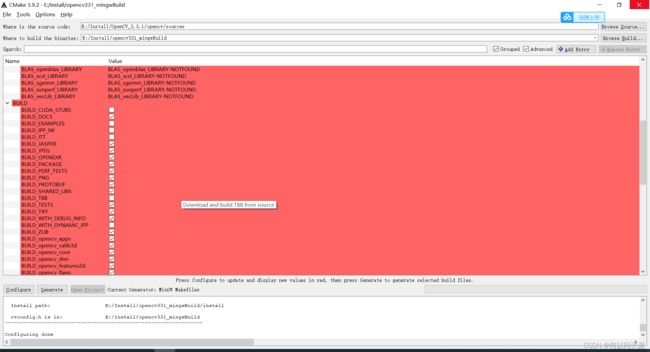
在Search搜索框里面输入ENABLE_CXX11,找到ENABLE_CXX11项,勾选,启用c++11新特性,否则之后编译会出错:

清空搜索框,输入WITH_OPENCL_D3D11_NV,找到WITH_OPENCL_D3D11_NV项,如果不需要d3d功能,将其取消勾选,否则编译时有可能出错
其他选项说明:
BUILD_OPENCV_WORLD:开启后会包含opencv_world模块,将各个模块编译成一个opencv_worldxxx.lib文件,而不是十几个lib库文件。方便之后的部署和使用
CMAKE_BUILD_TYPE:指定编译的类型为Debug还是Release
BUILD_JAVA:开启java支持
取消勾选ENABLE_PRECOMPILED_HEADERS
之后重新点击configure,直到红颜色消失

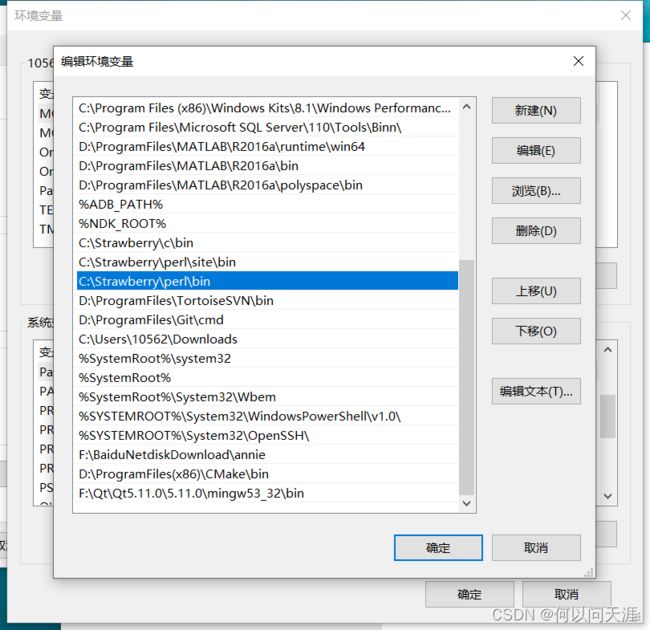
添加Qt环境变量:F:\Qt\Qt5.11.0\5.11.0\mingw53_32\bin
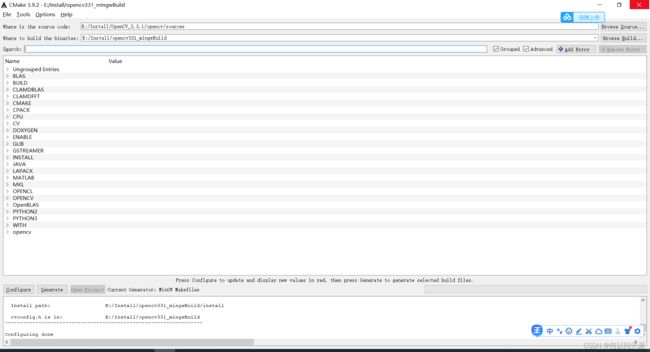
config,勾选WITH_QT

设置路径:
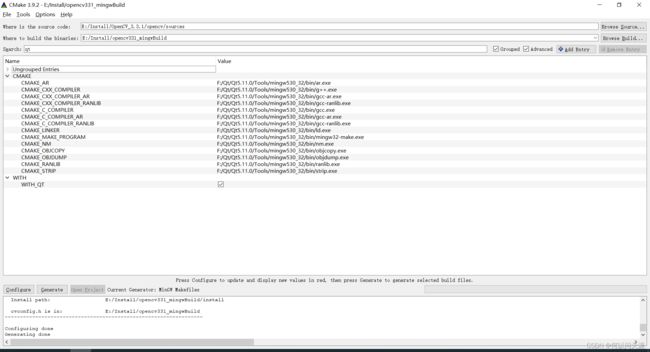
设置 QT_MAKE_EXECUTABLE 为 F:/Qt/Qt5.11.0/5.11.0/mingw53_32/bin/qmake.exe
设置 Qt5Concurrent_DIR 为 F:/Qt/Qt5.11.0/5.11.0/mingw53_32/lib/cmake/Qt5Concurrent
设置 Qt5Core_DIR 为F:/Qt/Qt5.11.0/5.11.0/mingw53_32/lib/cmake/Qt5Core
设置 Qt5Gui_DIR 为 F:/Qt/Qt5.11.0/5.11.0/mingw53_32/lib/cmake/Qt5Gui
设置 Qt5Test_DIR 为F:/Qt/Qt5.11.0/5.11.0/mingw53_32/lib/cmake/Qt5Test
设置 Qt5Widgets_DIR 为 F:/Qt/Qt5.11.0/5.11.0/mingw53_32/lib/cmake/Qt5Widgets
设置 Qt5OpenGL_DIR 为F:/Qt/Qt5.11.0/5.11.0/mingw53_32/lib/cmake/Qt5OpenGL
设置 CMAKE_BUILD_TYPE 为 Release 或者 RelWithDebInfo
点击generate产生makefile文件
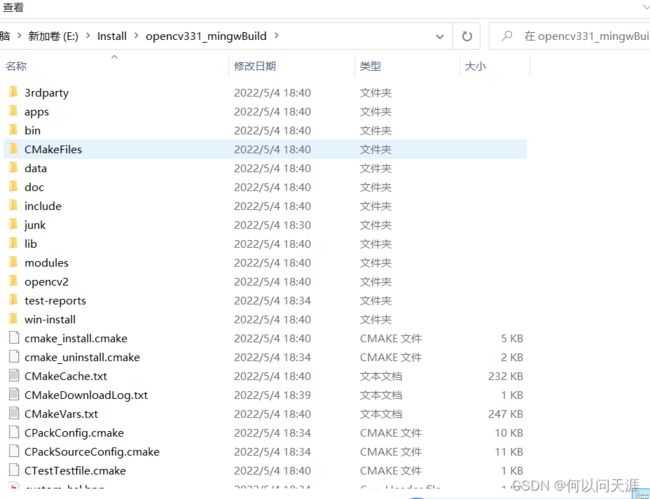
在空白处按shift+右键,点击在此处打开命令窗口打开cmd,输入make+回车进行编译,之后等待进度到100编译成功。不要使用-j选项进行多线程编译,因为容易编译出错
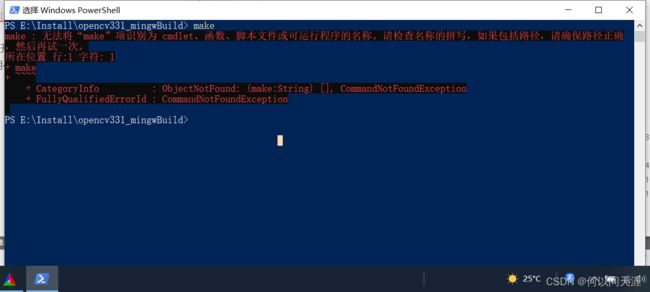
打开终端进行编译:
cd E:\OpenCV_3.3.1\opencv-build
mingw32-make
mingw32-make install
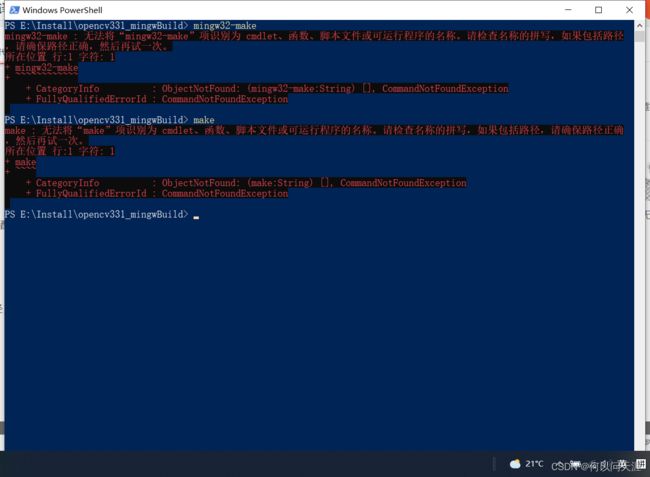
解决方法:
mingw32-make 不是内部或外部命令,原因,没有配置环境变量。
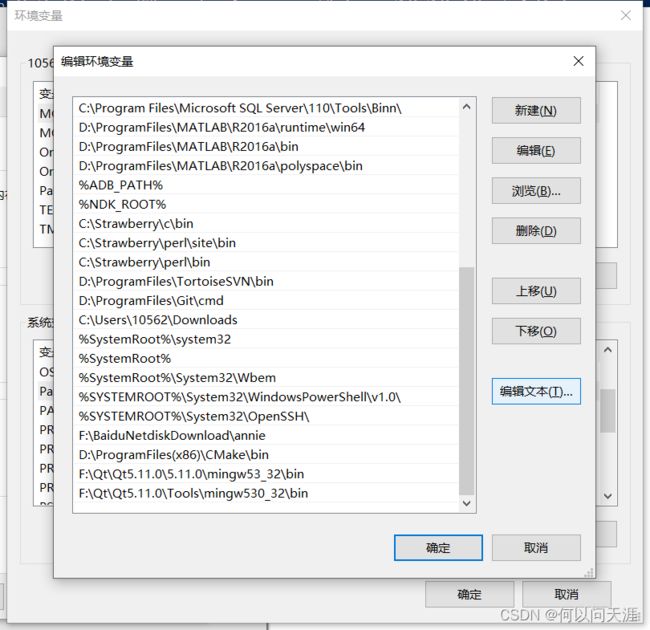
方法:
用everything搜索mingw32-make.exe。将它的路径,添加到path环境变量中。重启电脑,或者等待一会。在cmd中,mingw32-make就成为有效的命令了。
编译报错:

注意CMAKE不要安装在X86路径下!!!!!
重新安装后解决!!!!!
又出幺蛾子:
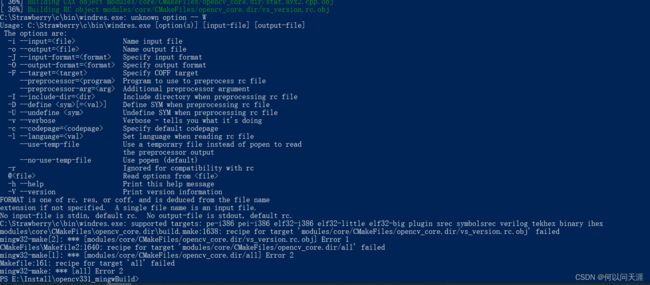
C:\Strawberry\c\bin\windres.exe: unknown option – W
Usage: C:\Strawberry\c\bin\windres.exe [option(s)] [input-file] [output-file]
The options are:
-i --input= Name input file
-o --output= Name output file
-J --input-format= Specify input format
-O --output-format= Specify output format
-F --target= Specify COFF target
–preprocessor= Program to use to preprocess rc file
–preprocessor-arg= Additional preprocessor argument
-I --include-dir=
-D --define [=] Define SYM when preprocessing rc file
-U --undefine Undefine SYM when preprocessing rc file
-v --verbose Verbose - tells you what it’s doing
-c --codepage= Specify default codepage
-l --language= Set language when reading rc file
–use-temp-file Use a temporary file instead of popen to read
the preprocessor output
–no-use-temp-file Use popen (default)
-r Ignored for compatibility with rc
@ Read options from
-h --help Print this help message
-V --version Print version information
FORMAT is one of rc, res, or coff, and is deduced from the file name
extension if not specified. A single file name is an input file.
No input-file is stdin, default rc. No output-file is stdout, default rc.
C:\Strawberry\c\bin\windres.exe: supported targets: pe-i386 pei-i386 elf32-i386 elf32-little elf32-big plugin srec symbolsrec verilog tekhex binary ihex
modules\core\CMakeFiles\opencv_core.dir\build.make:1638: recipe for target ‘modules/core/CMakeFiles/opencv_core.dir/vs_version.rc.obj’ failed
mingw32-make[2]: *** [modules/core/CMakeFiles/opencv_core.dir/vs_version.rc.obj] Error 1
CMakeFiles\Makefile2:1640: recipe for target ‘modules/core/CMakeFiles/opencv_core.dir/all’ failed
mingw32-make[1]: *** [modules/core/CMakeFiles/opencv_core.dir/all] Error 2
Makefile:161: recipe for target ‘all’ failed
mingw32-make: *** [all] Error 2
解决方案:
在cmake中 取消勾选 ENABLE_PRECOMPILED_HEADERS
编译成功:

mingw32-make install
四、Qt使用OpenCV
只需要在pro配置中写好路径:
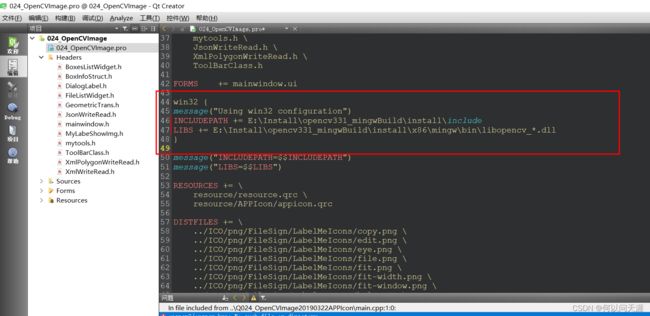
起不来。。。。。。
需要勾选CMAKE_BUILD_TYPE:指定编译的类型为Debug模式,重新编译。。。。
改为debug版本,编译报错

sprintf_instead_use_StringCbPrintfA_or_StringCchPrintfA错误
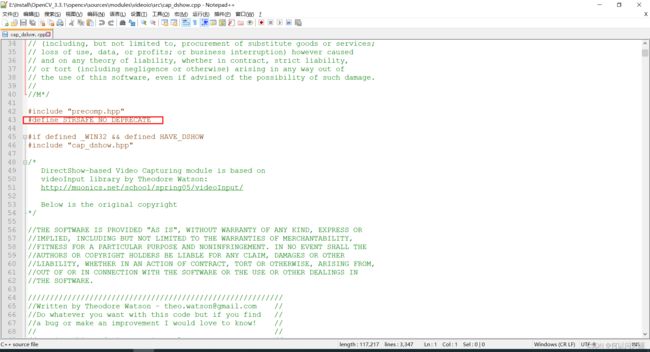
…opencv/sources/modules/videoio/src/cap_dshow.cpp…
…‘sprintf_instead_use_StringCbPrintfA_or_StringCchPrintfA’ was not declared inthis scope …
解决方式:
在cap_dshow.cpp(目录在上面) 添加一行:
#define STRSAFE_NO_DEPRECATE
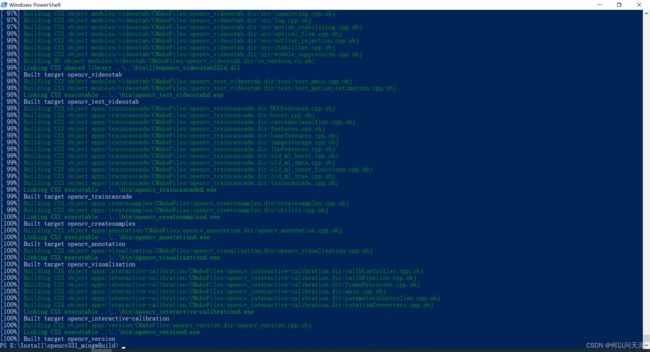
Running Windows Runtime device detection.
No winrtrunner.exe found.
系统找不到指定的路径。
系统找不到指定的路径。
运行闪退,debug提示:during startup program exited with code 0xc0000135
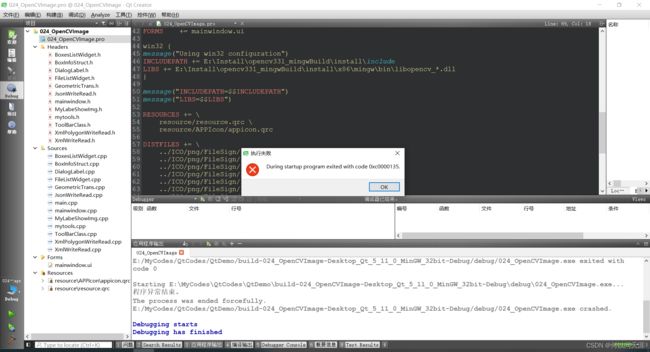
需要将E:\Install\opencv331_mingwBuild\install\x86\mingw\bin拷贝到工程E:\MyCodes\QtCodes\QtDemo\build-024_OpenCVImage-Desktop_Qt_5_11_0_MinGW_32bit-Debug\debug下
成功运行demo
我的Qt图像标签demo博客:
Qt C++版深度学习图像标注工具
【参考文献】
1.Cmake 编译opencv缺少出现下载ffmpeg相关库解决方案 - it610.com
https://www.it610.com/article/1281192054168240128.htm
2.(197条消息) OpenCV使用CMake和MinGW的编译安装及其在Qt配置运行_辉哈的博客-CSDN博客_mingw编译opencv
https://blog.csdn.net/huihut/article/details/78701814
3.(197条消息) idea启动tomcat出现‘D:\Programfiles‘ 不是内部或外部命令,也不是可运行的程序_Maxiao1204的博客-CSDN博客
https://blog.csdn.net/Maxiao1204/article/details/112014217
4.(197条消息) opencv 用minggw编译时,遇到的坑_竹叶青水的博客-CSDN博客
https://blog.csdn.net/JimBraddock/article/details/88579809
5.(197条消息) c++ 编译OpenCV-3.3.0过程及遇到的问题_Alex_z0897的博客-CSDN博客_c++ opencv 编译
https://blog.csdn.net/zoeou/article/details/79559189
6.(197条消息) Qt5配置opencv3.4.5_菜鸟小郭( ̄▽ ̄)的博客-CSDN博客
https://blog.csdn.net/weixin_38846780/article/details/116129164
