MySql+SpringBoot+Vue 搭建一个完整的前后端分离项目
文章目录
- 完整项目搭建流程
-
- 数据库
-
- 1. **连接 admin**
- 2. **新建数据库**
- 3. **为这个数据库,专门建一个用户**
- 4. **为这个用户,授予对应数据库的全部权限**
- 5. **对当前用户,建立连接**
- 后端
-
- 1. 新建 SpringBoot 项目
- 2. 更改启动类位置
- 3. IDEA 数据库配置
- 4. 配置 MyBatis
- 5. MVC 包建立
- 5. 测试 Mybatis 配置
- 6. MyBatis 代码生成器
- 7. 测试代码生成器
- 8. 解决前后端跨域问题
- 9. 添加雪花算法工具类
- 10. 添加 AOP
- 11. 解决前后端 Long 精度丢失问题
- 12. 新建 req resp 包
- 13. CommonResp
- 14. 自定义异常
- 13. 统一异常处理
- 14. 添加日志记录 logback
- 15. 自定义 banner
- 前端
-
- 1. 创建 Vue-cli项目
- 2. 运行测试
- 3. 修改项目
- 4. 引入 elementPlus
- 5. 引入 axios
- 6. 添加自定义工具类
- 7. 不要用懒加载
- 8. Vue 组件的 ts 配置
- 9. 配置vuex + sessionStorage
- 小结
完整项目搭建流程
虽说 SpringBoot 相较于 SSM 框架,大大减轻了配置的繁琐,但是,要整合 MyBatis ,统一异常处理,Vue等一系列东西,还是要费一番劲的。
这次将创建的整个流程记录下来,方便以后的项目搭建。
要搭建一个完成的前后端分离项目,分为这么几个部分:数据库、后端、前端
如果是为微信小程序搭建一个后端服务,那就只要看到数据库、后端就可以了
数据库
一般在新建项目的时候,我们会选择专门为这个项目新建一个用户,并为这个用户,赋予只属于这一个项目的所有权限
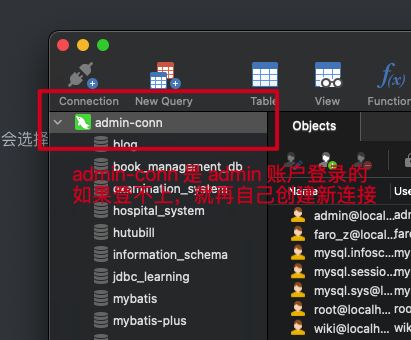
1. 连接 admin
只有 admin 有所有权限
我的数据库 admin 的账户名和密码是:
**账户:**admin
**密码:**123
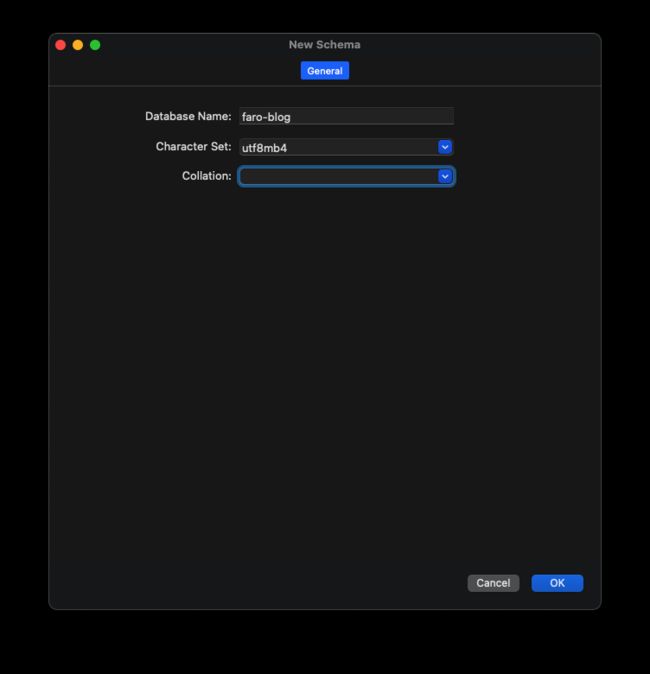
2. 新建数据库
其字符类型一定要选择utf8mb4,这才是真正的 utf8,支持表情符号
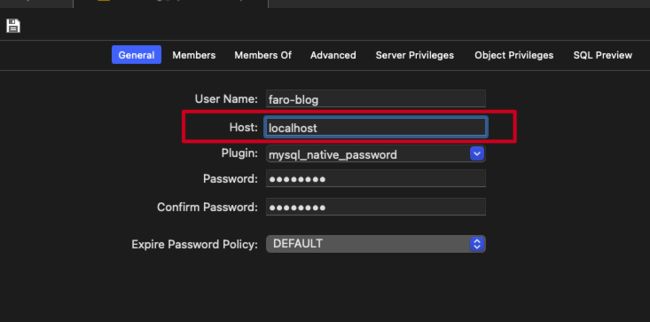
3. 为这个数据库,专门建一个用户
开发环境中,就将密码和用户名设置成一样的,这样不会忘记
host 设置为 localhost
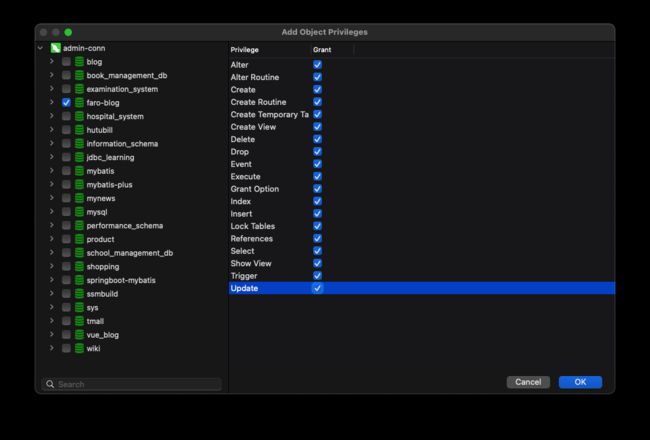
4. 为这个用户,授予对应数据库的全部权限

5. 对当前用户,建立连接
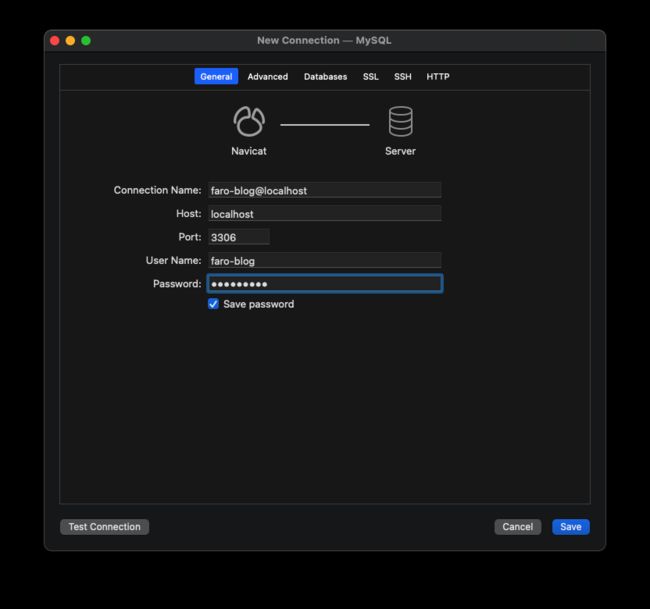
后端
关于 Maven、tomcat 的下载配置,这里就不费笔墨去讲解了。如有需要,可以自行百度查找。
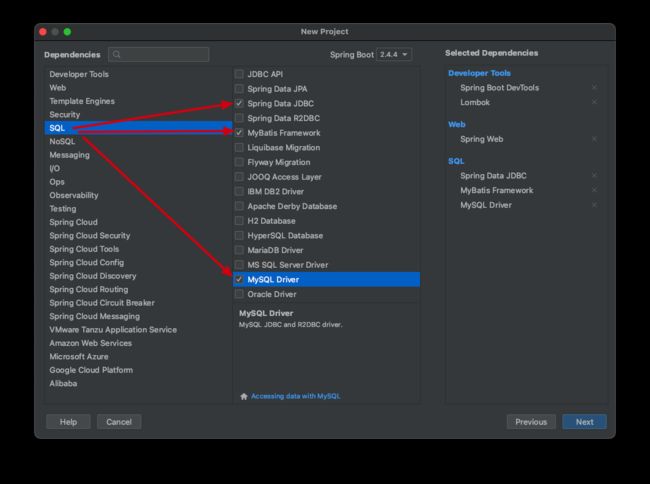
1. 新建 SpringBoot 项目
- 点击
SpringInitiallizr,新建项目
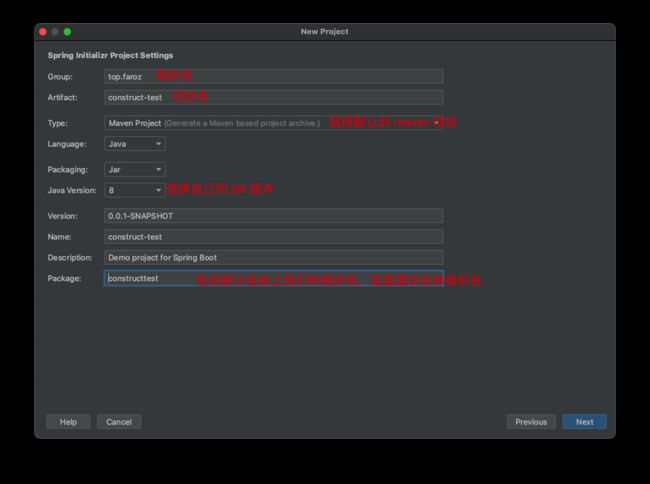
- 选择默认依赖的包


- 选择存放路径

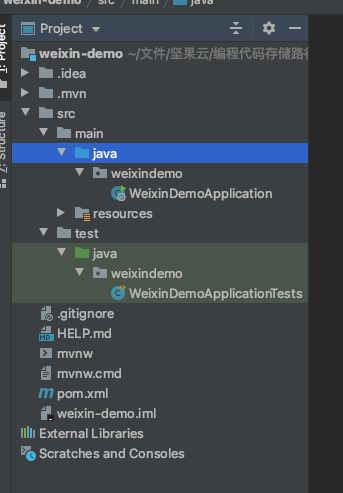
- 新建完成后,项目目录如下
2. 更改启动类位置
- 新建 config 包,将启动类放进去

- 为启动类添加注解
注解内的信息,是项目名称
@ComponentScan("weixindemo")

3. IDEA 数据库配置
- IDEA 连接数据库


- 添加 sql 脚本
新建 sql 文件夹,建立all.sql文件

我们在 sql 脚本中添加测试用数据,并执行
# 测试表
drop table if exists `test`;
create table `test` (
  `id` bigint not null comment 'id',
  `name` varchar(50) comment '名称',
  `password` varchar(50) comment '密码',
  primary key (`id`)
) engine=innodb default charset=utf8mb4 comment='测试';

insert into `test` (id, name, password) values (1, '测试', 'password');
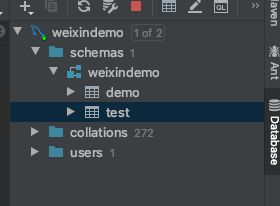
可以看到,数据库已建立
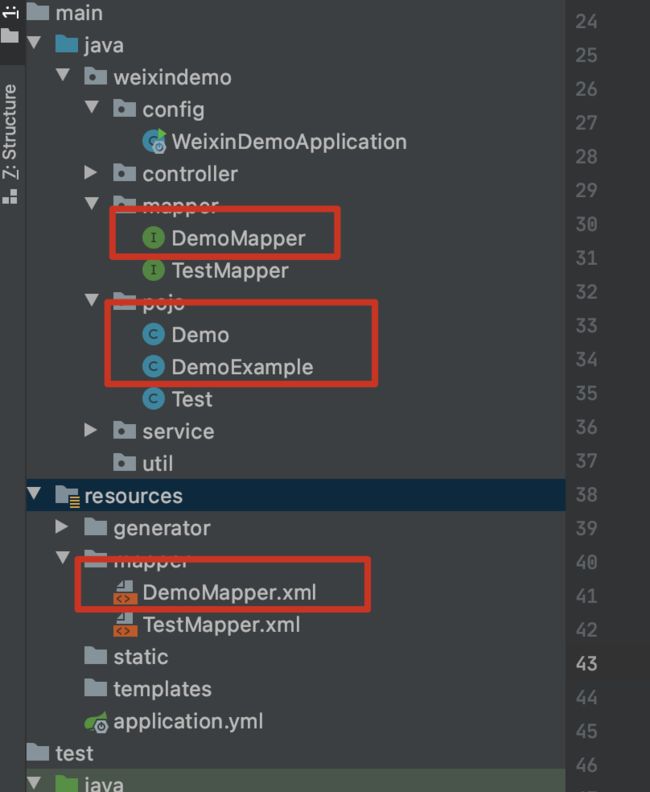
4. 配置 MyBatis
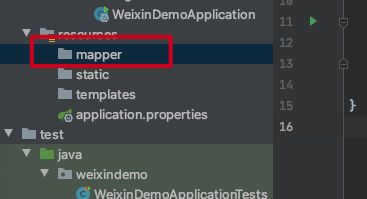
- 在
resource文件夹下,新建mapper文件夹
这是用来存放 MyBatis 的实现的
- 新建 pojo 包
pojo 包用来存放实体类

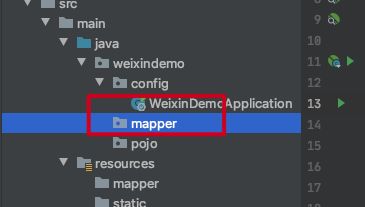
- 在项目下,新建 mapper 包,用来存放接口
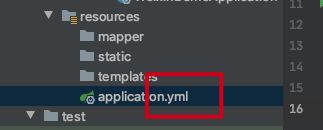
- 将配置文件后缀改为
.yml
我个人习惯使用.yml进行位置
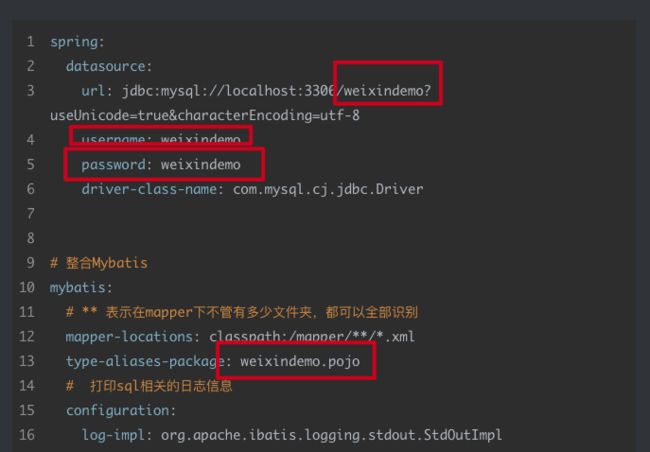
- 添加
Mybatis配置
这里,要添加数据源,和 MyBatis 的配置,部分地方,要根据实际项目,进行修改
spring:
  datasource:
    url: jdbc:mysql://localhost:3306/weixindemo?useUnicode=true&characterEncoding=utf-8
    username: weixindemo
    password: weixindemo
    driver-class-name: com.mysql.cj.jdbc.Driver


# 整合Mybatis
mybatis:
  # ** 表示在mapper下不管有多少文件夹,都可以全部识别
  mapper-locations: classpath:/mapper/**/*.xml
  type-aliases-package: weixindemo.pojo
  #  打印sql相关的日志信息
  configuration:
    log-impl: org.apache.ibatis.logging.stdout.StdOutImpl
- 添加端口配置
因为 vue 也是用的8080端口,我们不能和它重了
server:
  port: 8880
- 启动类添加
mapper接口扫描路径
@MapperScan("weixindemo.mapper") //mybatis mapper接口扫描

5. MVC 包建立
我们还要建立 service,util,controller包

![]()
5. 测试 Mybatis 配置
配置到这一步,要对之前的配置,进行一个测试
- pojo 中,新建 Test 实体类

@Data
@AllArgsConstructor
@NoArgsConstructor
public class Test {
    private Integer id;
    private String name;
}
- mapper 包中,新建 TestMapper 接口
![]()
@Repository
@Mapper
public interface TestMapper {
    List<Test> getList();
}
-
resources 下的 mapper 文件夹中,增加 TestMapper.xml 实现

具体内容,要根据实际项目修改
<mapper namespace="weixindemo.mapper.TestMapper">

    <select id="getList" resultType="weixindemo.pojo.Test">
        select * from test
    select>

mapper>

- 在 service 包下,新建 TestService

别忘了加上 @Service 注解
@Service
public class TestService {

    @Autowired
    private TestMapper mapper;

    public List<Test> getList() {
        return mapper.getList();
    }
}
- 在 controller包下,新建 TestController
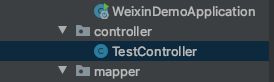
@RestController
public class TestController {

    @Autowired
    private TestService testService;


    @RequestMapping("/test/list")
    public List<Test> list() {
        return testService.getList();
    }

}
-
重启项目
-
新建 http 文件,编写 http 测试脚本,执行

GET http://localhost:8880/test/list
Accept: application/json

###
最后成功从接口中获取数据库中的数据,说明我们之前配置的都没有错误,可以进行下面的操作

6. MyBatis 代码生成器
我们不可能去写所有持久层的实现,业务中,这部分都是自动生成的
- 导入 Maven 依赖
注意,是放在plugiuns下面的
            <plugin>
                <groupId>org.mybatis.generatorgroupId>
                <artifactId>mybatis-generator-maven-pluginartifactId>
                <version>1.4.0version>
                <configuration>
                    <configurationFile>src/main/resources/generator/generator-config.xmlconfigurationFile>
                    <overwrite>trueoverwrite>
                    <verbose>trueverbose>
                configuration>
                <dependencies>
                    <dependency>
                        <groupId>mysqlgroupId>
                        <artifactId>mysql-connector-javaartifactId>
                        <version>8.0.22version>
                    dependency>
                dependencies>
            plugin>
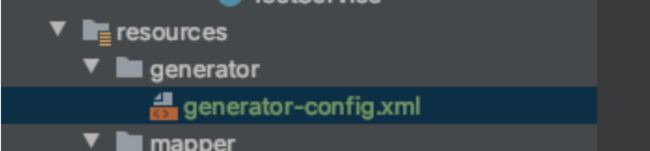
- 建立代生成器位置
pom文件中,显示了要创建的代码生成器的位置src/main/resources/generator/generator-config.xml
<configurationFile>
  src/main/resources/generator/generator-config.xml
configurationFile>
- 代码生成器代码
从jdbcConnection开始,别忘了根据项目进行修改
<generatorConfiguration>
    <context id="Mysql" targetRuntime="MyBatis3" defaultModelType="flat">


        <property name="autoDelimitKeywords" value="true"/>
        <property name="beginningDelimiter" value="`"/>
        <property name="endingDelimiter" value="`"/>


        <plugin type="org.mybatis.generator.plugins.UnmergeableXmlMappersPlugin" />

        <plugin type="org.mybatis.generator.plugins.ToStringPlugin"/>


        <commentGenerator>
            <property name="suppressAllComments" value="true"/>
        commentGenerator>

        <jdbcConnection driverClass="com.mysql.cj.jdbc.Driver"
                        connectionURL="jdbc:mysql://localhost:3306/wiki?useUnicode=true&characterEncoding=utf-8"
                        userId="wiki"
                        password="123456">
        jdbcConnection>


        <javaModelGenerator targetProject="src/main/java"
                            targetPackage="top.faroz.pojo"/>


        <sqlMapGenerator targetProject="src/main/resources"
                         targetPackage="mapper"/>


        <javaClientGenerator targetProject="src/main/java"
                             targetPackage="top.faroz.mapper"
                             type="XMLMAPPER"/>

        <table tableName="demo" domainObjectName="Demo"/>


    context>
generatorConfiguration>
- 新建一个maven启动项

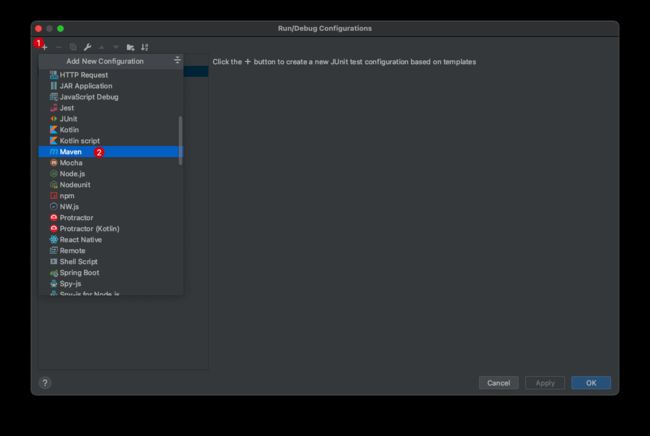
mybatis-generator:generate -e

7. 测试代码生成器
代码生成器的工作原理,是从数据库中取出表信息,然后根据表信息,去构造持久层代码,所以,我们要再去建一个表
- all.sql 添加 demo 表的增加 SQL 语句,并执行
# demo列表
drop table if exists `demo`;
create table `demo` (
    `id` bigint not null comment 'id',
    `name` varchar(50) comment '名称',
    primary key (`id`)
) engine=innodb default charset =utf8mb4 comment '测试';

insert into `demo` (id,name) values(2,'测试2');
- 在代码生成器最后的部分,填上要生成的表名

- 执行

- 执行成功,会生成 4 个新文件
- 我们模仿 Test,去写 Demo的 Service 和 Controller 代码
@RestController
public class DemoController {

    @Autowired
    private DemoService demoService;

    @RequestMapping("/demo/list")
    public List<Demo> list() {
        return demoService.getList();
    }
}
@Service
public class DemoService {

    @Resource
    private DemoMapper demoMapper;

    public List<Demo> getList() {
        List<Demo> list = demoMapper.selectByExample(null);
        return list;
    }
}
- 添加 demo 的 http 测试脚本
GET http://localhost:8880/demo/list
Accept: application/json

###
测试成功,说明我们用代码生成器生成的代码没有问题

8. 解决前后端跨域问题
虽然现在还没有构建前端项目,但是后面,会出现跨域问题
- 新建 CorsConfig 类

- 代码如下
不用改动,直接用,别忘了加上==@Configuration==注解
@Configuration
public class CorsConfig implements WebMvcConfigurer {

    @Override
    public void addCorsMappings(CorsRegistry registry) {
        registry.addMapping("/**")
                .allowedOriginPatterns("*")
                .allowedHeaders(CorsConfiguration.ALL)
                .allowedMethods(CorsConfiguration.ALL)
                .allowCredentials(true)
                .maxAge(3600); // 1小时内不需要再预检(发OPTIONS请求)
    }
}
9. 添加雪花算法工具类
雪花算法,用来生成唯一 ID
- 新建 SnowFlake 工具类

- 代码如下
别忘了加上 @Component 注解
@Component
public class SnowFlake {
    /**
     * 起始的时间戳
     */
    private final static long START_STMP = 1609459200000L; // 2021-01-01 00:00:00

    /**
     * 每一部分占用的位数
     */
    private final static long SEQUENCE_BIT = 12; //序列号占用的位数
    private final static long MACHINE_BIT = 5;   //机器标识占用的位数
    private final static long DATACENTER_BIT = 5;//数据中心占用的位数

    /**
     * 每一部分的最大值
     */
    private final static long MAX_DATACENTER_NUM = -1L ^ (-1L << DATACENTER_BIT);
    private final static long MAX_MACHINE_NUM = -1L ^ (-1L << MACHINE_BIT);
    private final static long MAX_SEQUENCE = -1L ^ (-1L << SEQUENCE_BIT);

    /**
     * 每一部分向左的位移
     */
    private final static long MACHINE_LEFT = SEQUENCE_BIT;
    private final static long DATACENTER_LEFT = SEQUENCE_BIT + MACHINE_BIT;
    private final static long TIMESTMP_LEFT = DATACENTER_LEFT + DATACENTER_BIT;

    private long datacenterId = 1;  //数据中心
    private long machineId = 1;     //机器标识
    private long sequence = 0L; //序列号
    private long lastStmp = -1L;//上一次时间戳

    public SnowFlake() {
    }

    public SnowFlake(long datacenterId, long machineId) {
        if (datacenterId > MAX_DATACENTER_NUM || datacenterId < 0) {
            throw new IllegalArgumentException("datacenterId can't be greater than MAX_DATACENTER_NUM or less than 0");
        }
        if (machineId > MAX_MACHINE_NUM || machineId < 0) {
            throw new IllegalArgumentException("machineId can't be greater than MAX_MACHINE_NUM or less than 0");
        }
        this.datacenterId = datacenterId;
        this.machineId = machineId;
    }

    /**
     * 产生下一个ID
     *
     * @return
     */
    public synchronized long nextId() {
        long currStmp = getNewstmp();
        if (currStmp < lastStmp) {
            throw new RuntimeException("Clock moved backwards.  Refusing to generate id");
        }

        if (currStmp == lastStmp) {
            //相同毫秒内,序列号自增
            sequence = (sequence + 1) & MAX_SEQUENCE;
            //同一毫秒的序列数已经达到最大
            if (sequence == 0L) {
                currStmp = getNextMill();
            }
        } else {
            //不同毫秒内,序列号置为0
            sequence = 0L;
        }

        lastStmp = currStmp;

        return (currStmp - START_STMP) << TIMESTMP_LEFT //时间戳部分
                | datacenterId << DATACENTER_LEFT       //数据中心部分
                | machineId << MACHINE_LEFT             //机器标识部分
                | sequence;                             //序列号部分
    }

    private long getNextMill() {
        long mill = getNewstmp();
        while (mill <= lastStmp) {
            mill = getNewstmp();
        }
        return mill;
    }

    private long getNewstmp() {
        return System.currentTimeMillis();
    }

    // public static void main(String[] args) throws ParseException {
    //     // 时间戳
    //     // System.out.println(System.currentTimeMillis());
    //     // System.out.println(new Date().getTime());
    //     //
    //     // String dateTime = "2021-01-01 08:00:00";
    //     // SimpleDateFormat sdf = new SimpleDateFormat("yyyy-MM-dd hh:mm:ss");
    //     // System.out.println(sdf.parse(dateTime).getTime());
    //
    //     SnowFlake snowFlake = new SnowFlake(1, 1);
    //
    //     long start = System.currentTimeMillis();
    //     for (int i = 0; i < 10; i++) {
    //         System.out.println(snowFlake.nextId());
    //         System.out.println(System.currentTimeMillis() - start);
    //     }
    // }

}
10. 添加 AOP
AOP 用来打印接口日志,方便后期调试
- Maven 中引入 fastjson,因为 我们的类中要用
<dependency>
  <groupId>com.alibabagroupId>
  <artifactId>fastjsonartifactId>
  <version>1.2.70version>
dependency>
- Maven 引入 AOP
<dependency>
  <groupId>org.springframework.bootgroupId>
  <artifactId>spring-boot-starter-aopartifactId>
dependency>
- 添加 RequestContext 工具类
这个是后期为了打印 WebSocket 日志的
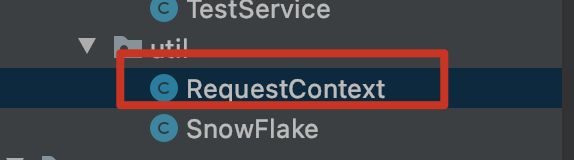
public class RequestContext implements Serializable {
    private static ThreadLocal<String> remoteAddr = new ThreadLocal<>();

    public static String getRemoteAddr() {
        return remoteAddr.get();
    }

    public static void setRemoteAddr(String remoteAddr) {
        weixindemo.util.RequestContext.remoteAddr.set(remoteAddr);
    }
}
- 新建 aspect 包,并新建 LogAspect 类
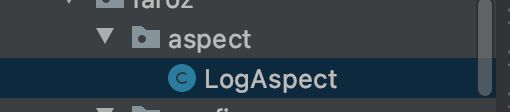
LogAspect 代码如下:
切点的代码,我们要依据项目修改

@Aspect
@Component
public class LogAspect {
    private final static Logger LOG = LoggerFactory.getLogger(weixindemo.aspect.LogAspect.class);

    @Resource
    private SnowFlake snowFlake;

    /** 定义一个切点 */
    @Pointcut("execution(public * weixindemo.controller..*Controller.*(..))")
    public void controllerPointcut() {}

    // @Resource
    // private SnowFlake snowFlake;

    @Before("controllerPointcut()")
    public void doBefore(JoinPoint joinPoint) throws Throwable {

        // 增加日志流水号
        MDC.put("LOG_ID", String.valueOf(snowFlake.nextId()));

        // 开始打印请求日志
        ServletRequestAttributes attributes = (ServletRequestAttributes) RequestContextHolder.getRequestAttributes();
        HttpServletRequest request = attributes.getRequest();
        Signature signature = joinPoint.getSignature();
        String name = signature.getName();

        // 打印请求信息
        LOG.info("------------- 开始 -------------");
        LOG.info("请求地址: {} {}", request.getRequestURL().toString(), request.getMethod());
        LOG.info("类名方法: {}.{}", signature.getDeclaringTypeName(), name);
        LOG.info("远程地址: {}", request.getRemoteAddr());

        RequestContext.setRemoteAddr(getRemoteIp(request));

        // 拿到所有的参数
        Object[] args = joinPoint.getArgs();
        // LOG.info("请求参数: {}", JSONObject.toJSONString(args));

        Object[] arguments  = new Object[args.length];
        for (int i = 0; i < args.length; i++) {
            if (args[i] instanceof ServletRequest
                    || args[i] instanceof ServletResponse
                    || args[i] instanceof MultipartFile) {
                continue;
            }
            arguments[i] = args[i];
        }
        // 排除字段,敏感字段或太长的字段不显示
        String[] excludeProperties = {"password", "file"};
        PropertyPreFilters filters = new PropertyPreFilters();
        PropertyPreFilters.MySimplePropertyPreFilter excludefilter = filters.addFilter();
        excludefilter.addExcludes(excludeProperties);
        LOG.info("请求参数: {}", JSONObject.toJSONString(arguments, excludefilter));
    }

    @Around("controllerPointcut()")
    public Object doAround(ProceedingJoinPoint proceedingJoinPoint) throws Throwable {
        long startTime = System.currentTimeMillis();
        Object result = proceedingJoinPoint.proceed();
        // 排除字段,敏感字段或太长的字段不显示
        String[] excludeProperties = {"password", "file"};
        PropertyPreFilters filters = new PropertyPreFilters();
        PropertyPreFilters.MySimplePropertyPreFilter excludefilter = filters.addFilter();
        excludefilter.addExcludes(excludeProperties);
        LOG.info("返回结果: {}", JSONObject.toJSONString(result, excludefilter));
        LOG.info("------------- 结束 耗时:{} ms -------------", System.currentTimeMillis() - startTime);
        return result;
    }

    /**
     * 使用nginx做反向代理,需要用该方法才能取到真实的远程IP
     * 当我们发布上线后,因为前端、后端都是用80端口,会冲突
     * 所以用户访问的时候,需要先去访问 nginx,然后,让 nginx 去反向代理,找我们要访问的路径
     * @param request
     * @return
     */
    public String getRemoteIp(HttpServletRequest request) {
        String ip = request.getHeader("x-forwarded-for");
        if (ip == null || ip.length() == 0 || "unknown".equalsIgnoreCase(ip)) {
            ip = request.getHeader("Proxy-Client-IP");
        }
        if (ip == null || ip.length() == 0 || "unknown".equalsIgnoreCase(ip)) {
            ip = request.getHeader("WL-Proxy-Client-IP");
        }
        if (ip == null || ip.length() == 0 || "unknown".equalsIgnoreCase(ip)) {
            ip = request.getRemoteAddr();
        }
        return ip;
    }
}
11. 解决前后端 Long 精度丢失问题
我们后期会用到 MD5 加密,到时候后端传到前端的时候,因为 javascript number 的精度问题,会出现数据丢失
- 配置文件新增 JacksonConfig 类
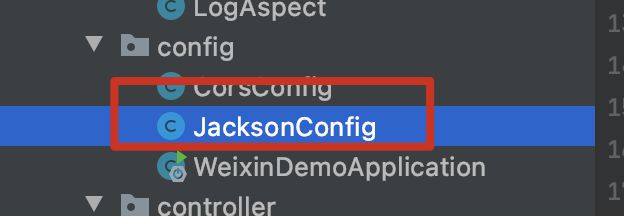
- 代码如下
@Configuration
public class JacksonConfig {

    @Bean
    public ObjectMapper jacksonObjectMapper(Jackson2ObjectMapperBuilder builder) {
        ObjectMapper objectMapper = builder.createXmlMapper(false).build();
        SimpleModule simpleModule = new SimpleModule();
        // simpleModule.addSerializer(Long.class, ToStringSerializer.instance);
        simpleModule.addSerializer(Long.class, ToStringSerializer.instance);
        objectMapper.registerModule(simpleModule);
        return objectMapper;
    }
}
12. 新建 req resp 包
我们要将请求与返回包装

13. CommonResp
为了方便前端调用,后端的 resp,我们写一个统一的返回 CommonResp

代码如下:
@Data
@AllArgsConstructor
@NoArgsConstructor
public class CommonResp<T> {
    /**
     * 返回是否成功
     */
    private boolean isSuccess=true;

    /**
     * 返回失败时,返回的错误信息
     */
    private String message;

    /**
     * 返回成功的时候,返回的内容
     */
    private T content;
}
14. 自定义异常
- 新建异常类
BusinessException和异常信息枚举BusinessExceptionCode

BusinessException代码
public class BusinessException extends RuntimeException{
    private BusinessExceptionCode code;

    public BusinessException (BusinessExceptionCode code) {
        /**
         * 父类有个成员变量  private String desc
         * 需要为这个成员变量赋值
         */
        super(code.getDesc());
        this.code = code;
    }

    public BusinessExceptionCode getCode() {
        return code;
    }

    public void setCode(BusinessExceptionCode code) {
        this.code = code;
    }

    /**
     * 不写入堆栈信息,提高性能
     */
    @Override
    public Throwable fillInStackTrace() {
        return this;
    }
}
BusinessExceptionCode代码
public enum BusinessExceptionCode {
    USER_LOGIN_NAME_EXIST("登录名已存在"),
    LOGIN_USER_ERROR("用户名不存在或密码错误"),
    VOTE_REPEAT("您已点赞过"),
    ;

    private String desc;

    BusinessExceptionCode(String desc) {
        this.desc = desc;
    }

    public String getDesc() {
        return desc;
    }

    public void setDesc(String desc) {
        this.desc = desc;
    }
}
13. 统一异常处理
我们所有异常,都通过这个类来捕获,并生成一个返回错误信息的 CommonResp
- 新建 ControllerExceptionHandler 类
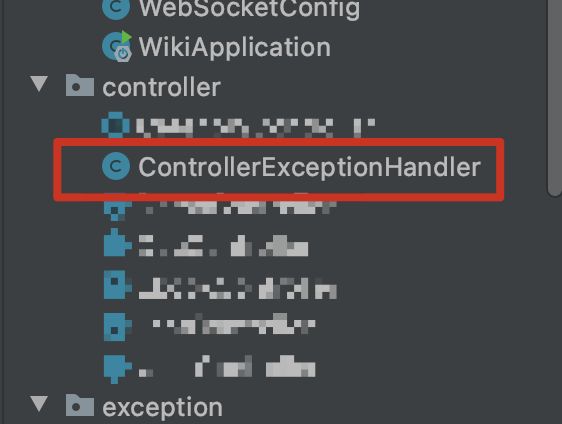
- 代码如下
logger 要根据项目改一下
/**
 * 统一异常处理、数据预处理等
 * 该类用于捕获系统弹出的异常
 * 将异常包装成一个 CommonResp
 * 从而方便前端调用,显示错误信息
 */
@ControllerAdvice
public class ControllerExceptionHandler {
    private static final Logger LOG = LoggerFactory.getLogger(top.faroz.controller.ControllerExceptionHandler.class);

    /**
     * 校验异常统一处理
     * @param e
     * @return
     */
    @ExceptionHandler(value = BindException.class)
    @ResponseBody
    public CommonResp validExceptionHandler(BindException e) {
        CommonResp commonResp = new CommonResp();
        LOG.warn("参数校验失败:{}", e.getBindingResult().getAllErrors().get(0).getDefaultMessage());
        commonResp.setSuccess(false);
        commonResp.setMessage(e.getBindingResult().getAllErrors().get(0).getDefaultMessage());
        return commonResp;
    }

    /**
     * 校验异常统一处理
     * @param e
     * @return
     */
    @ExceptionHandler(value = BusinessException.class)
    @ResponseBody
    public CommonResp validExceptionHandler(BusinessException e) {
        CommonResp commonResp = new CommonResp();
        LOG.warn("业务异常:{}", e.getCode().getDesc());
        commonResp.setSuccess(false);
        commonResp.setMessage(e.getCode().getDesc());
        return commonResp;
    }

    /**
     * 校验异常统一处理
     * @param e
     * @return
     */
    @ExceptionHandler(value = Exception.class)
    @ResponseBody
    public CommonResp validExceptionHandler(Exception e) {
        CommonResp commonResp = new CommonResp();
        LOG.error("系统异常:", e);
        commonResp.setSuccess(false);
        commonResp.setMessage("系统出现异常,请联系管理员");
        return commonResp;
    }
}
14. 添加日志记录 logback
- 在 resource 下,新建logback-spring.xml 文件
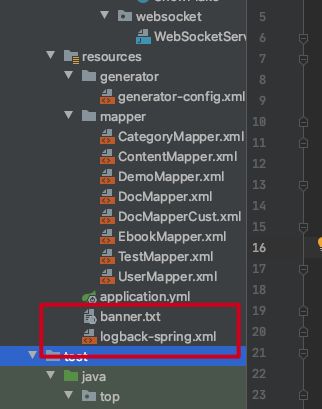
- 写入内容
<configuration>

    <property name="PATH" value="./log">property>

    <appender name="STDOUT" class="ch.qos.logback.core.ConsoleAppender">
        <encoder>
            <Pattern>%d{yyyy-MM-dd HH:mm:ss.SSS} %highlight(%-5level) %blue(%-50logger{50}:%-4line) %thread %msg%nPattern>

        encoder>
    appender>

    <appender name="TRACE_FILE" class="ch.qos.logback.core.rolling.RollingFileAppender">
        <file>${PATH}/trace.logfile>
        <rollingPolicy class="ch.qos.logback.core.rolling.TimeBasedRollingPolicy">
            <FileNamePattern>${PATH}/trace.%d{yyyy-MM-dd}.%i.logFileNamePattern>
            <timeBasedFileNamingAndTriggeringPolicy class="ch.qos.logback.core.rolling.SizeAndTimeBasedFNATP">
                <maxFileSize>10MBmaxFileSize>
            timeBasedFileNamingAndTriggeringPolicy>
        rollingPolicy>
        <layout>
            <pattern>%d{yyyy-MM-dd HH:mm:ss.SSS} %-5level %-50logger{50}:%-4line %green(%-18X{LOG_ID}) %msg%npattern>
        layout>
    appender>

    <appender name="ERROR_FILE" class="ch.qos.logback.core.rolling.RollingFileAppender">
        <file>${PATH}/error.logfile>
        <rollingPolicy class="ch.qos.logback.core.rolling.TimeBasedRollingPolicy">
            <FileNamePattern>${PATH}/error.%d{yyyy-MM-dd}.%i.logFileNamePattern>
            <timeBasedFileNamingAndTriggeringPolicy class="ch.qos.logback.core.rolling.SizeAndTimeBasedFNATP">
                <maxFileSize>10MBmaxFileSize>
            timeBasedFileNamingAndTriggeringPolicy>
        rollingPolicy>
        <layout>
            <pattern>%d{yyyy-MM-dd HH:mm:ss.SSS} %-5level %-50logger{50}:%-4line %green(%-18X{LOG_ID}) %msg%npattern>
        layout>
        <filter class="ch.qos.logback.classic.filter.LevelFilter">
            <level>ERRORlevel>
            <onMatch>ACCEPTonMatch>
            <onMismatch>DENYonMismatch>
        filter>
    appender>

    <root level="ERROR">
        <appender-ref ref="ERROR_FILE" />
    root>

    <root level="TRACE">
        <appender-ref ref="TRACE_FILE" />
    root>

    <root level="INFO">
        <appender-ref ref="STDOUT" />
    root>
configuration>
15. 自定义 banner
resources 下新建 banner.txt

里面放上自定义 banner
 ********     **     *******     *******         ********
/**/     ****   /****   **/**       //**
/**         **//**  /**   /**  **     //**           **
/*******   **  //** /*******  /**      /**          **
/**   **********/**///**  /**      /**         **
/**      /**//**/**  //** //**     **         **
/**      /**     /**/**   //** //*******   ***** ********
//       //      // //     //   ///   /
前端
前端我们使用 vue 框架,对于 node,vue 等的下载,这里就不展开了,这里主要展示怎么创建 vue 项目
1. 创建 Vue-cli项目
不要使用 root 权限创建,如果使用 root 创建,创建的文件会上锁
- 打开 IDEA 的命令行,默认定位的就是当前项目的位置,用如下命令,创建一个名为 web 的 vue 项目
vue create web

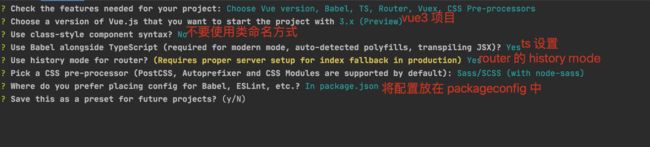
- 选择安装的内容
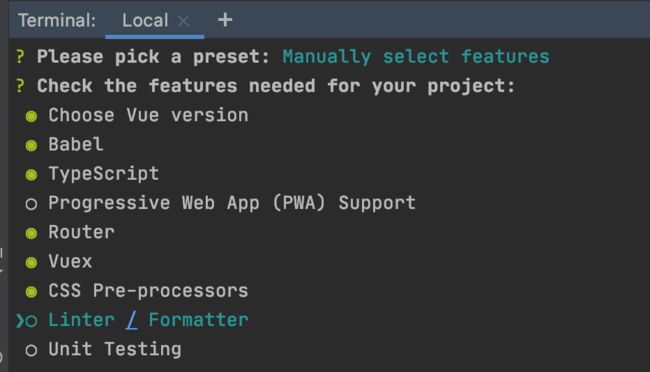
- 接下来几个部分,按照这个配置来选
2. 运行测试
进入我们创建的 web 文件件,执行npm run serve指令

出现如下窗口,说明创建成功

3. 修改项目
创建完后,有些地方是不符合我们需求的,我们要修改一下
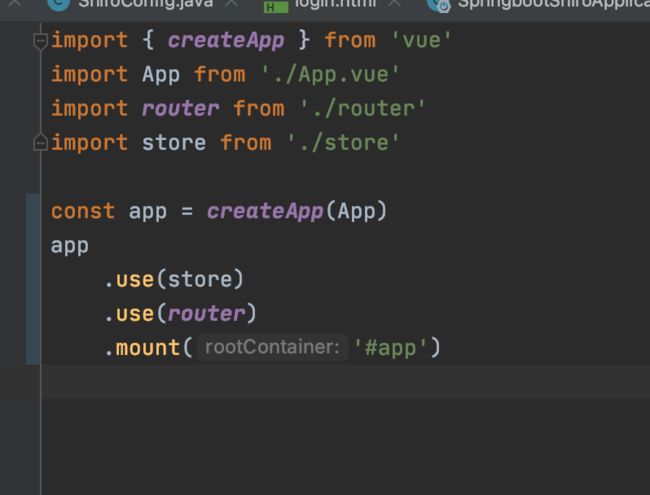
- 修改 main.ts
修改创建方式,方便后期引用其他组件
- 添加开发环境和生产环境的配置
在 web 目录下,新建 .env.dev和.env.prod两个文件
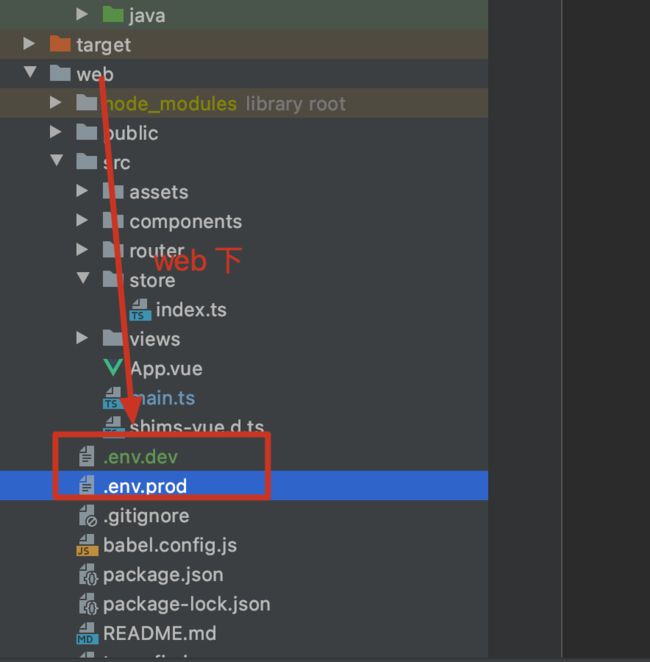
.env.dev:
NODE_ENV=development
VUE_APP_SERVER=http://127.0.0.1:8880
VUE_APP_WS_SERVER=ws://127.0.0.1:8880
.env.prod:
NODE_ENV=production
VUE_APP_SERVER=http://faroz.top
VUE_APP_WS_SERVER=ws://faroz.top
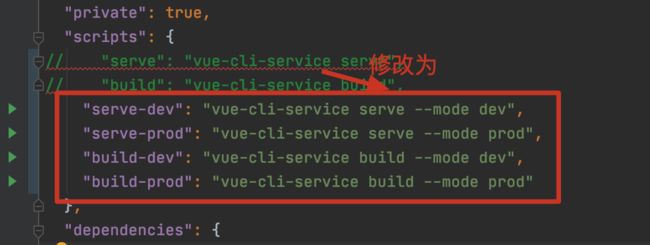
修改 package.json 文件
开启 idea 的 npm 启动
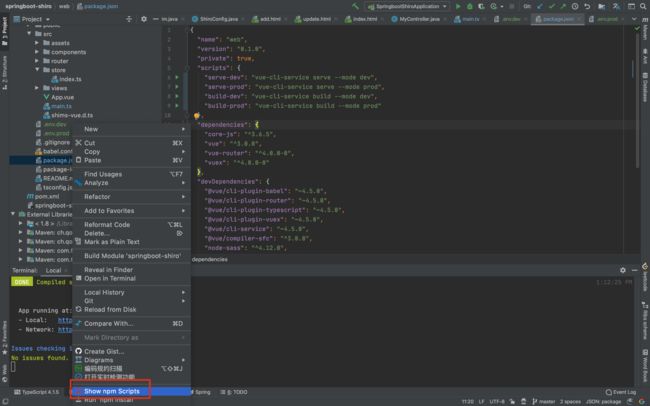
出现下面这四个启动项,说明成功

4. 引入 elementPlus
elementui 是一个很火的前端项目,其支持 vue3 的版本,是 elementPlus
官方文档如下:https://element-plus.gitee.io/#/zh-CN/component/installation
- 安装 elementPlus
npm install element-plus --save
- main.ts 中引入
import ElementPlus from 'element-plus';
import 'element-plus/lib/theme-chalk/index.css';
.use(ElementPlus)
- 测试
随便找个地方引入 elementPlus 组件,看页面是否发生变化
5. 引入 axios
axios 是异步请求工具,功能类似于ajax
- 安装
npm install axios --save
- main.ts 中导入
import axios from 'axios'
- 修改 axios 的 baseURL
也是在 mian.ts 中添加如下内容
// 修改axios的baseUrl,这样axios就不用每次都在请求中填写 VUE_APP_SERVER  了
axios.defaults.baseURL=process.env.VUE_APP_SERVER;
6. 添加自定义工具类
工具类中,包含 empty 判断,内容复制能内容,帮助我们班开发
- 在 src 下,新建 util 文件夹,新建 Tool.ts 文件
- Tool.ts 代码如下
export class Tool {
    /**
     * 空校验 null或""都返回true
     */
    public static isEmpty (obj: any) {
        if ((typeof obj === 'string')) {
            return !obj || obj.replace(/\s+/g, "") === ""
        } else {
            return (!obj || JSON.stringify(obj) === "{}" || obj.length === 0);
        }
    }

    /**
     * 非空校验
     */
    public static isNotEmpty (obj: any) {
        return !this.isEmpty(obj);
    }

    /**
     * 对象复制
     * @param obj
     */
    public static copy (obj: object) {
        if (Tool.isNotEmpty(obj)) {
            return JSON.parse(JSON.stringify(obj));
        }
    }

    /**
     * 使用递归将数组转为树形结构
     * 父ID属性为parent
     * 当初始调用的时候,因为所有的一级标签的parentID都是0,所以parentID要传入0
     */
    public static array2Tree (array: any, parentId: number) {
        // 终止条件
        if (Tool.isEmpty(array)) {
            return [];
        }

        // const result = [];
        const result: any[]=[];
        for (let i = 0; i < array.length; i++) {
            const c = array[i];
            if (Number(c.parent) === Number(parentId)) {
                // 找出一级标签节点
                result.push(c);
                // 找出所有父节点是一级标签的节点
                const children = Tool.array2Tree(array, c.id);
                // 如果获取的 children 数组非空,就将其塞给其父节点
                if (Tool.isNotEmpty(children)) {
                    // js真jb乱来,可以往对象里面随便塞其他对象
                    c.children = children;
                }
            }
        }
        return result;
    }


    /**
     * 随机生成[len]长度的[radix]进制数
     * @param len
     * @param radix 默认62
     * @returns {string}
     */
    public static uuid (len: number, radix = 62) {
        const chars = '0123456789ABCDEFGHIJKLMNOPQRSTUVWXYZabcdefghijklmnopqrstuvwxyz'.split('');
        const uuid = [];
        radix = radix || chars.length;

        for (let i = 0; i < len; i++) {
            // @ts-ignore
            uuid[i] = chars[0 | Math.random() * radix];
        }

        return uuid.join('');
    }
}
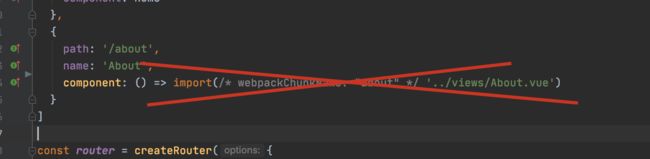
7. 不要用懒加载
中小型项目中,就无所谓用不用懒加载了
我发现,使用懒加载的话,使用路由跳转功能会有 BUG

8. Vue 组件的 ts 配置
如果要在 vue 组件的