Datawhale 图神经网络 Task01简单图论与环境配置与PyG库
1.简单图论
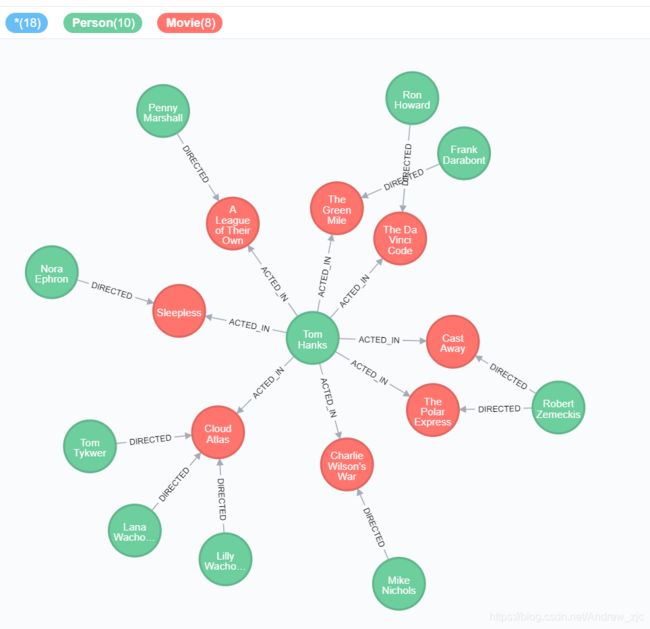
用neo4j生成了一张图用以简单的了解图以及其背后的知识。
首先,这张图有两种元素构成,节点和边,对应的就是实体和关系。
然后节点油分为两类,一类是人,另一类是电影。
图其实就是把语言以图的形式表现出来,重点是强调各个个体之间的关系,在这个万物互联的时代,图显得更加贴切实际了。
自然而然的想到,图会包含节点属性,边属性,行走连同等等方面的特点,这都是为了充分考虑图的特性。
当我们把自然语言或者实际情况表现成图之后,接下来就是要把图以最简单的数字语言表达出来,这又回到了矩阵,图的矩阵为邻接矩阵,为了防止数据发散,一开始就使用了归一化进行操作。
2.环境配置
“工欲善其事,必先厉其器”。
先来讲环境配置吧,为了学习图神经网络,我主要完成了三个环境的配置,分别是linux中的neo4j,linux中的pytorch,win中的pytorch。linux的环境配置是在最近买的阿里云轻量级服务器里,然后用网页浏览器登录即可实现对neo4j和pytorch的操作,win的配置就是笔记本电脑。
linux的neo4j:
知识图谱neo4j安装及python调用
网页使用效果:

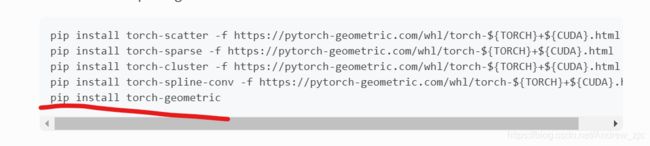
linux的pytorch配置
主要参照pytorch和torch-geometry官网的安装方法,
pytorch
torch-geometric
我是在pip install torch-geometric时出了问题,幸好得到群友的帮助,先pip install pytest-runner然后就可以安装torch-geometric了,虽然不知道为什么,win中是没有这个操作的,但是还是觉得很厉害。
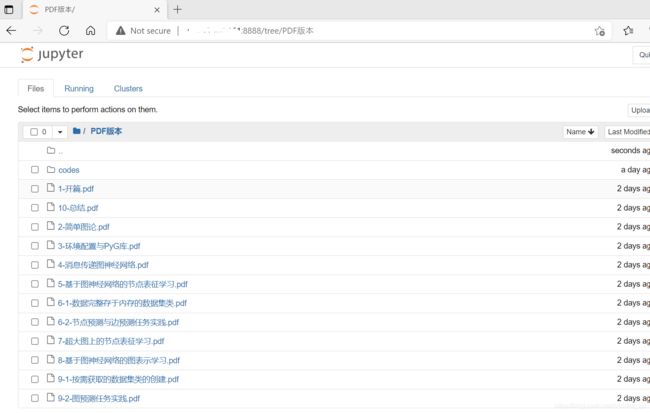
与neo4j相似,阿里云服务器后台运行jupyter notebook。就可以随时随地远程登录私有的jupyter notebook,并且不害怕电脑跑发烫,爽歪歪。
nohup jupyter notebook --allow-root > jupyter.log 2>&1 &
效果如下:
win的pytorch配置
相比较而言,win的pytorch配置省心很多,类似linux的pytorch配置,一步步来就可以了。
但是,还是有但是……
我在调用函数的时候一不小心又掉坑里了……
哈哈编程的快乐也许就是掉坑和爬坑吧……
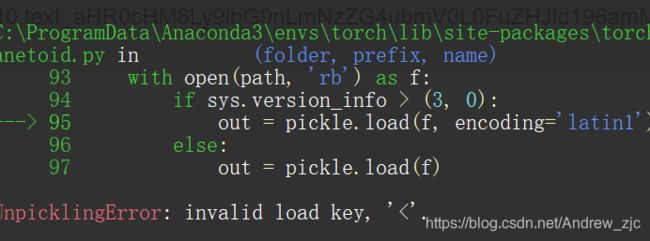
具体是这样的,运行如下的代码,
报了“UnpicklingError: invalid load key, ‘<’.”的错误,查来查去,原来是我的路径中有下划号** _ **
from torch_geometric.datasets import Planetoid
dataset = Planetoid(root='Cora', name='Cora')

3.PyG库
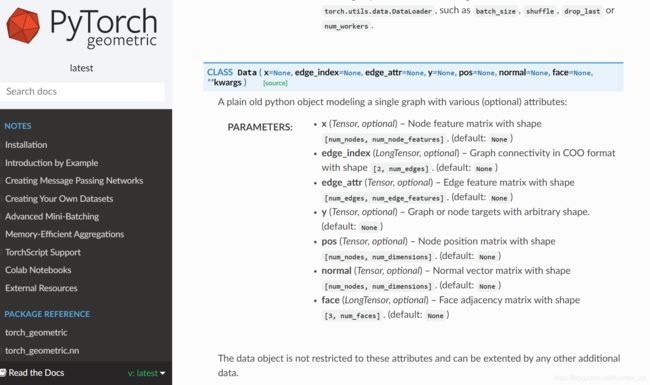
torch_geometric.data.Data是一个类方法,用于构造图数据。一开始很纳闷为什么要这样调用,后来想想是因为图数据的复杂性,不能像普通的机器学习一样用numpy甚至list直白的表示,所以需要用类提前造个轮子,有则用之无则改之,方便构造自己的图数据。
PyTorch geometric的官方对Data类的描述如下,其中具有代表性的一句话是“A plain old python object modeling a single graph with various (optional) attributes”,意思大概是一种使用多特征(可选)描述单个图的古朴的面向对象的python方法,编者大概是想说我造了个牛哄哄的轮子,而且是用最普通的材料造出来的。
那这个轮子到底不呢,现在我没法说,也许见识广了之后就会感叹作者很吧。
用这个轮子来尝试完成作业:
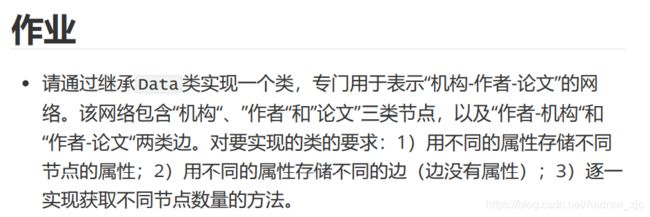
from torch_geometric.data import Data

class IAP(Data):
	def __init__(self, x=None, edge_index=None, edge_attr=None, y=None, pos=None, normal=None, face=None, **kwargs):
		super(Data,self).__init__(x,edge_index,edge_attr,y,pos,normal,face)
        for key, item in kwargs.items():
            if key == 'num_nodes':
                self.__num_nodes__ = item
            else:
                self[key] = item

    @property
    def num_nodes(self):
        r"""Returns or sets the number of nodes in the graph.

        .. note::
            The number of nodes in your data object is typically automatically
            inferred, *e.g.*, when node features :obj:`x` are present.
            In some cases however, a graph may only be given by its edge
            indices :obj:`edge_index`.
            PyTorch Geometric then *guesses* the number of nodes
            according to :obj:`edge_index.max().item() + 1`, but in case there
            exists isolated nodes, this number has not to be correct and can
            therefore result in unexpected batch-wise behavior.
            Thus, we recommend to set the number of nodes in your data object
            explicitly via :obj:`data.num_nodes = ...`.
            You will be given a warning that requests you to do so.
        """
        if hasattr(self, '__num_nodes__'):
            return self.__num_nodes__
        for key, item in self('x', 'pos', 'normal', 'batch'):
            if isinstance(item, SparseTensor):
                return item.size(0)
            else:
                return item.size(self.__cat_dim__(key, item))
        if hasattr(self, 'adj'):
            return self.adj.size(0)
        if hasattr(self, 'adj_t'):
            return self.adj_t.size(1)
        if self.face is not None:
            logging.warning(__num_nodes_warn_msg__.format('face'))
            return maybe_num_nodes(self.face)
        if self.edge_index is not None:
            logging.warning(__num_nodes_warn_msg__.format('edge'))
            return maybe_num_nodes(self.edge_index)
        return None