robomaster比赛大小符识别之使用pytorch卷积神经网络
ROBOMASTER 机甲大师赛是国内首个激战类机器人竞技比赛,参赛队伍需自行研制多种类型的机器人进行协同作战。在2018 年比赛的能量机关激活环节,也称大小神符环节,全向移动步兵射击机器人通过读取地上固定的RFID 卡,激活其正前方的触摸屏屏幕。触摸屏屏幕上方为数码管密码显示区域,下方为九宫格手写数字或火焰字显示区域,具体见图1。机器人在本体的固定位置上安装有识别摄像头,以第一视角获取前方图像。
比赛时,机器人需要通过摄像头先识别数码管区域的5 个密码数字,然后控制射击机构依照顺序用塑料子弹击打九宫格区域内对应的数字。九宫格区域内的手写数字每隔固定时间更新一次,每次只有一个手写数字与数码管密码区内的某个数字一致。步兵射击机器人只有正确识别两类数字,并按照数码管数字顺序连续5 次成功击打九宫格内的手写数字,才算成功完成这项任务。比赛在室内场馆进行,光照强度适中,分布相对均匀,但也有一定的明暗变化。显然,击打大小符的首要任务是各类数字的定位与识别。
一.数据集的采集
1.五位数码管识别
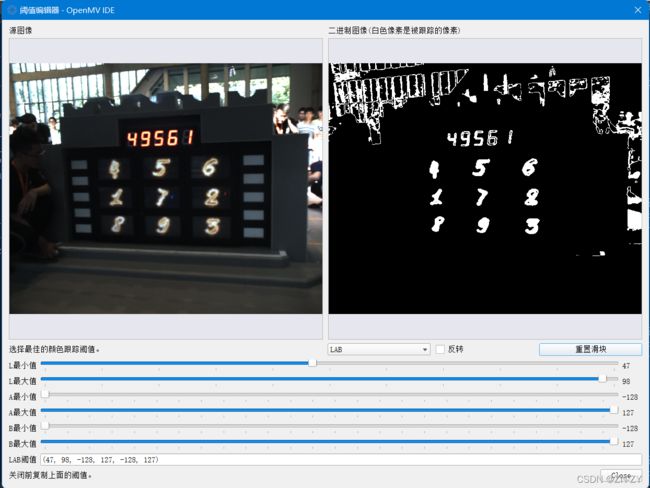
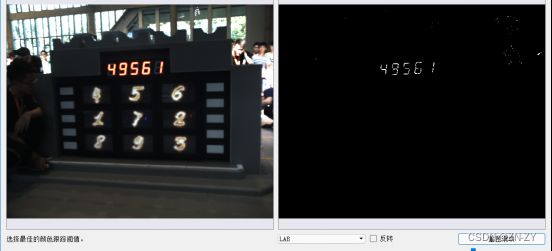
已有48张大符数据集,使用LAB色域进行目标识别,使用openmv自带的LAB色域检测,如图
在此基础上找到五位数码管的色域值,考虑到opencv与这个的上下限的区别,最终变化得到色域
然后使用色域检测代码,如图:
使用色域检测:
得到所需的目标区域。
2.寻找九宫格
然后我们寻找9宫格区域,此次在LAB识别有难度,在阈值调节器中,因为背景的强光与白色区域,导致无法准确查找目标位置,所以我们使用另一种方法:
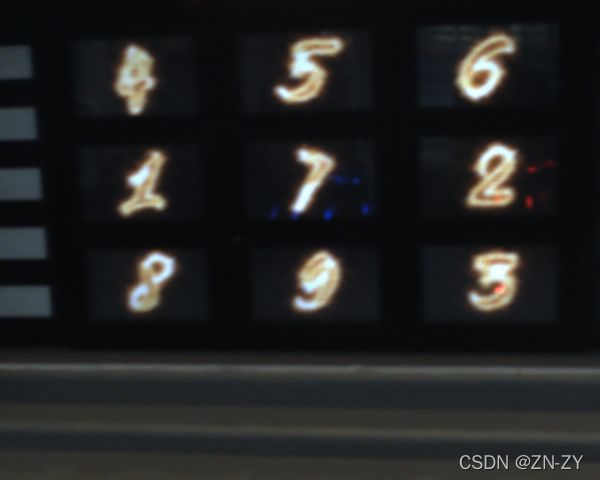
根据五位数码管数字位置与九宫格的相对位置,找出目标区域。
得到图像:
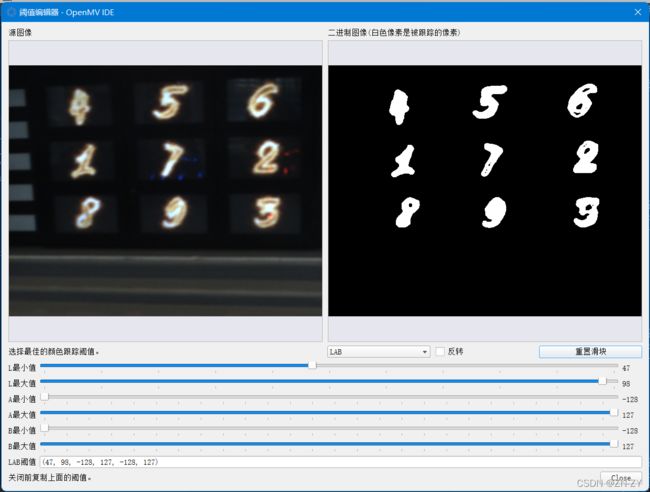
再使用LAB阈值分析器,找出目标色域
3.得到目标的数据集
转化为128*128的图像备用。
二:使用卷积神经网络进行训练
详见我的另一个博客卷积神经网络进行数字识别
在此基础上改进了一部分:加入了val集并且使用了一种branch方法:
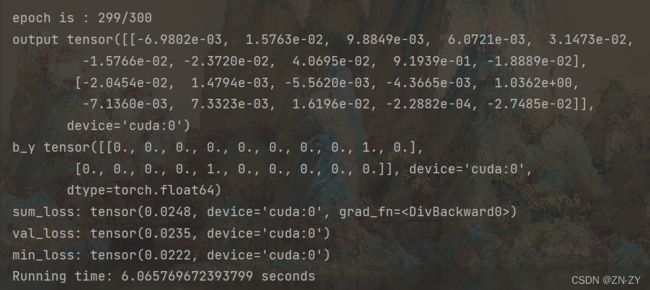
接着训练模型,将模型保存:
三:将神经网络运用到数据中
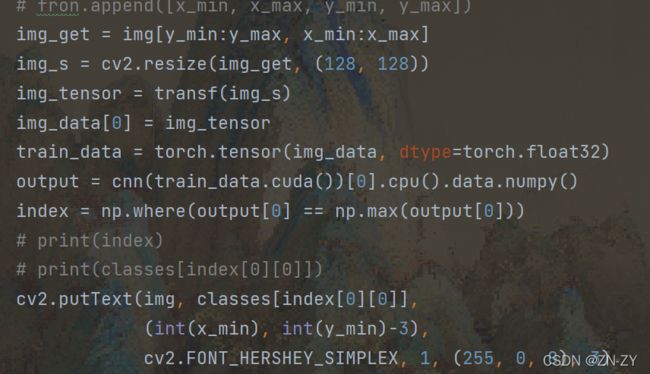
运用到之前的得到数据集的函数:
最终得到的结果如下
效果还行,只是数据集太少。
数据集和深度学习训练程序已经上传csdn
课程结束更新代码和模型
——————————————————————————————————
分隔线,考试结束,更新识别部分代码:
第一步:lab阈值分隔
ball_color = 'five'
color_dist = {'five': {'Lower': np.array([int(67 * 255 / 100), -8 + 127, 39 + 127]),
                       'Upper': np.array([int(100 * 255 / 100), 42 + 127, 55 + 127])},
              'nine': {'Lower': np.array([int(52 * 255 / 100), -14 + 127, -18 + 127]),
                       'Upper': np.array([int(98 * 255 / 100), 13 + 127, 28 + 127])}
              }
five是数码管 nine是九宫格
1.识别部分:
for name in list_name:
    print('-' * 20)
    print('big/' + name)
    img = cv2.imread('big/' + name)
    [X, Y, D] = img.shape
    lab = cv2.cvtColor(img, cv2.COLOR_BGR2LAB)  # 化为lab色
    inRange_hsv = cv2.inRange(lab, color_dist[ball_color]['Lower'], color_dist[ball_color]['Upper'])  # 测
    # 闭运算去噪
    kernel = np.ones((5, 5), np.uint8)
    result = cv2.morphologyEx(inRange_hsv, cv2.MORPH_CLOSE, kernel)  #
    # 区域查找
    cnts = cv2.findContours(result.copy(), cv2.RETR_EXTERNAL, cv2.CHAIN_APPROX_SIMPLE)[-2]
# 五位数码管提取
for i in cnts:
rect = cv2.minAreaRect(i) # 最小框提取
area = cv2.contourArea(i) # 得到框的面积
if area > 150: # 面积去噪
num1 += 1
# print(area)
box = cv2.boxPoints(rect)
x = [box[0][0], box[1][0], box[2][0], box[3][0]] # 提取框的x坐标
y = [box[0][1], box[1][1], box[2][1], box[3][1]] # 提取框的y坐标
mean_x += sum(x) / 4
mean_y += sum(y) / 4
# 提取区域位置
x_min = int(min(x) - 10) if (int(min(x) - 10 > 0)) else 0
x_max = int(max(x) + 10) if (int(max(x) + 10) < Y) else Y
y_min = int(min(y) - 10) if (int(min(y) - 10) > 0) else 0
y_max = int(max(y) + 10) if (int(max(y) + 10) < X) else X
# fron.append([x_min, x_max, y_min, y_max])
img_get = img[y_min:y_max, x_min:x_max] # 提取图像
img_s = cv2.resize(img_get, (128, 128)) # resize变换
img_tensor = transf(img_s) # 转化为tensor
img_data[0] = img_tensor
train_data = torch.tensor(img_data, dtype=torch.float32) # 训练输入
output = cnn(train_data.cuda())[0].cpu().data.numpy() # 放入网络
# 结果分析得到类别
index = np.where(output[0] == np.max(output[0]))
five_num_detect.append(classes[index[0][0]])
five_mean_detect.append(sum(x) / 4)
# print(index)
# print(classes[index[0][0]])
cv2.putText(img, classes[index[0][0]],
(int(x_min), int(y_min) - 3),
cv2.FONT_HERSHEY_SIMPLEX, 1, (255, 0, 0), 3)
# 采集数据集
# cv2.imshow('camera', img_s)
# cv2.waitKey(1000)
# num = input("enter: ")
# cv2.imwrite('img1/' + str(num) + '_' + str(epo) + '.jpg', img_s)
# print([np.int0(box)], np.int0([[x_min, y_min], [x_max, y_min], [x_max, y_max], [x_min, y_max]]))
# 在图中标注
cv2.drawContours(img, [np.int0([[x_min, y_min], [x_max, y_min], [x_max, y_max], [x_min, y_max]])], -1,
(0, 0, 255), 2)
# epo += 1 # 采集数据集注:其中有注释部分是提取数据集部分
同理:由上面部分可知大小符相对的九宫格位置,提取方法如上面的数码管,可以下载也可以自己写写看。
2.数据集增强:
数据集太少了,所以为了防止过拟合,加入数据增强的方法:加噪声,旋转小角度,平滑等等。
import os
import random
import cv2
import numpy as np
import imutils
# D:\Desktop\yolo\out\more_img/
def sp_noise(noise_img, proportion):
height, width = noise_img.shape[0], noise_img.shape[1]#获取高度宽度像素值
num = int(height * width * proportion) #一个准备加入多少噪声小点
for i in range(num):
w = random.randint(0, width - 1)
h = random.randint(0, height - 1)
if random.randint(0, 1) == 0:
noise_img[h, w] = 0
else:
noise_img[h, w] = 255
return noise_img
def gaussian_noise(img, mean, sigma):
# 将图片灰度标准化
img = img / 255
# 产生高斯 noise
noise = np.random.normal(mean, sigma, img.shape)
# 将噪声和图片叠加
gaussian_out = img + noise
# 将超过 1 的置 1,低于 0 的置 0
gaussian_out = np.clip(gaussian_out, 0, 1)
# 将图片灰度范围的恢复为 0-255
gaussian_out = np.uint8(gaussian_out*255)
# 将噪声范围搞为 0-255
# noise = np.uint8(noise*255)
return gaussian_out# 这里也会返回噪声,注意返回值
def random_noise(image, noise_num):
# cv2.imshow("src", img)
rows, cols, chn = image.shape
# 加噪声
for i in range(noise_num):
x = np.random.randint(0, rows)#随机生成指定范围的整数
y = np.random.randint(0, cols)
image[x-1:x+1, y-1:y+1, :] = 255
return image
path = r'big'
save_path = r'D:\Desktop\yolo\out\more_img/'
path_list = os.listdir(path)
for i in path_list:
img_path = path+'/'+i
img = cv2.imread(img_path)
rot1 = gaussian_noise(img, 0, 0.15) # 高斯噪声
rot2 = random_noise(img, 100)
rot3 = sp_noise(img, 0.025)
# rot1 = imutils.rotate_bound(img, 5)
# rot2 = imutils.rotate_bound(img, -5)
# rot3 = imutils.rotate_bound(img, 15)
# rot4 = imutils.rotate_bound(img, -15)
img1 = cv2.resize(rot1, (128, 128))
img2 = cv2.resize(rot2, (128, 128))
img3 = cv2.resize(rot3, (128, 128))
# img4 = cv2.resize(rot4, (128, 128))
# cv2.imwrite(save_path + i.split('.')[0] + 'fl.jpg', img_re)
cv2.imwrite(save_path + i.split('.')[0] + 'gn.jpg', img1)
# cv2.imwrite(save_path + 'kai_' + i, result)
# cv2.imwrite(save_path + 'gs_' + i, img_gs)
cv2.imwrite(save_path + i.split('.')[0] + 'rn.jpg', img2)
cv2.imwrite(save_path + i.split('.')[0] + 'sn.jpg', img3)
# cv2.imwrite(save_path + i.split('.')[0] + 'r165.jpg', img4)
print(i + ' have saved more img')
# cv2.waitKey(0)
3.网络训练:
训练使用torch卷积神经网络,使用inception和残差结构,增加数据纬度,使用train val数据集分开,使用matplot画出loss和percision.
网络结构:
class branch(nn.Module):
def __init__(self, input_channel, out_channe):
super(branch, self).__init__()
self.conv1x1 = nn.Conv2d(input_channel, out_channe // 4, 1, 1, 0)
self.conv5x5_1 = nn.Conv2d(input_channel, 32, 1, 1, 0)
self.conv5x5_2 = nn.Conv2d(32, out_channe // 4, 5, 1, 2)
self.conv3x3_1 = nn.Conv2d(input_channel, 32, 1, 1, 0)
self.conv3x3_2 = nn.Conv2d(32, 48, 3, 1, 1)
self.conv3x3_3 = nn.Conv2d(48, out_channe // 4, 3, 1, 1)
self.branch_pool = nn.Conv2d(input_channel, out_channe // 4, kernel_size=1)
def forward(self, x):
branch1x1 = self.conv1x1(x)
branch5x5 = self.conv5x5_1(x)
branch5x5 = self.conv5x5_2(branch5x5)
branch3x3 = self.conv3x3_1(x)
branch3x3 = self.conv3x3_2(branch3x3)
branch3x3 = self.conv3x3_3(branch3x3)
branch_pool = F.avg_pool2d(x, kernel_size=3, stride=1, padding=1)
branch_pool = self.branch_pool(branch_pool)
output = [branch1x1, branch3x3, branch5x5, branch_pool]
output = torch.cat(output, dim=1)
return output # return x for visualization
class CNN(nn.Module):
def __init__(self):
super(CNN, self).__init__()
self.conv1 = nn.Sequential( # input shape (3, 128, 128)
nn.Conv2d(
in_channels=3, # input height
out_channels=24, # n_filters
kernel_size=3, # filter size
stride=1, # filter movement/step
padding=1,
# if want same width and length of this image after Conv2d, padding=(kernel_size-1)/2 if stride=1
), # output shape (16, 128, 128)
nn.BatchNorm2d(24, eps=0.001, momentum=0.03, affine=True, track_running_stats=True),
nn.ReLU(), # activation
nn.MaxPool2d(kernel_size=2), # choose max value in 2x2 area, output shape (16, 64, 64)
)
self.conv2 = nn.Sequential( # input shape (16, 64, 64)
nn.Conv2d(24, 64, 3, 1, 1), # output shape (32, 64, 64)
nn.BatchNorm2d(64, eps=0.001, momentum=0.03, affine=True, track_running_stats=True),
nn.ReLU(), # activation
nn.MaxPool2d(2), # output shape (32, 32, 32)
)
self.conv21 = nn.Sequential( # input shape (16, 64, 64)
nn.Conv2d(24, 64, 4, 4, 0), # output shape (32, 64, 64)
nn.BatchNorm2d(64, eps=0.001, momentum=0.03, affine=True, track_running_stats=True),
nn.ReLU(), # activation
nn.MaxPool2d(2), # output shape (32, 32, 32)
)
self.conv3 = nn.Sequential( # input shape (32, 32, 32)
nn.Conv2d(64, 64, 5, 1, 2), # output shape (48, 32, 32)
nn.BatchNorm2d(64, eps=0.001, momentum=0.03, affine=True, track_running_stats=True),
nn.SiLU(), # activation
nn.MaxPool2d(2), # output shape (48, 16, 16)
)
self.branch1 = branch(input_channel=64, out_channe=256)
self.conv4 = nn.Sequential( # input shape (48, 16, 16)
nn.Conv2d(256, 128, 3, 1, 1), # output shape (64, 16, 16)
nn.BatchNorm2d(128, eps=0.001, momentum=0.03, affine=True, track_running_stats=True),
nn.ReLU(), # activation
nn.MaxPool2d(2), # output shape (64, 8, 8)
)
self.hidden = torch.nn.Linear(192 * 8 * 8, 256) # 隐藏层线性输出
self.out = nn.Linear(256, len(classes)) # fully connected layer, output 10 classes
def forward(self, x):
x = self.conv1(x)
x1 = self.conv2(x)
x2 = self.conv21(x)
x = self.conv3(x1)
x = self.branch1(x)
x = self.conv4(x)
output = [x, x2]
output = torch.cat(output, dim=1)
x = output.view(output.size(0), -1) # flatten the output of conv2 to (batch_size, 32 * 7 * 7)
x = F.silu(self.hidden(x)) # 激励函数(隐藏层的线性值)
output = self.out(x)
return output, x # return x for visualization
读取图像与标签:
def get_img2torch(files):
name_data = os.listdir(files)
length = len(name_data)
arr = np.arange(length)
np.random.shuffle(arr)
name = []
for i in range(0, length):
name.append(name_data[arr[i]])
label = np.ones((1, length))
img_data = np.zeros((length, 3, 128, 128))
for i in range(0, length):
img = cv2.imread(files + '/' + name[i])
img = cv2.resize(img, (128, 128))
img_tensor = transf(img)
img_data[i] = img_tensor
label[0][i] = name[i].split('_')[0]
# label[0][i] = classes.index([''.join(list(g)) for k, g in groupby(name[i], key=lambda x: x.isdigit())][0])
return img_data, label, length数据预处理:
if __name__ == "__main__":
# data_label, y_label, l = get_img2torch(file_name)
name_data = os.listdir(file_name)
length = len(name_data)
print(length)
arr = np.arange(length)
np.random.shuffle(arr)
y = np.zeros((length, len(classes)))
img_data = np.zeros((length, 3, 128, 128))
for i in range(0, length):
img = cv2.imread(file_name + '/' + name_data[arr[i]])
img_tensor = transf(img)
img_data[i] = img_tensor
y[i][classes.index(name_data[arr[i]].split('_')[0])] = 1
# cv2.imshow('1', img)
# print(y[i])
# cv2.waitKey(0)
divide_num = int(length * 0.9)
train_data = torch.tensor(img_data[0:divide_num], dtype=torch.float32)
Y_train_tensor = torch.tensor(y[0:divide_num], dtype=torch.float64)
test_x = torch.tensor(img_data[divide_num:length], dtype=torch.float32)
test_y = torch.tensor(y[divide_num:length], dtype=torch.float64)
# print(Y_train_tensor.shape)
predict_num = test_y.shape[0]
torch_dataset = Data.TensorDataset(train_data, Y_train_tensor)
torch_testset = Data.TensorDataset(test_x, test_y)
# 把 dataset 放入 DataLoader
loader = Data.DataLoader(
dataset=torch_dataset, # torch TensorDataset format
batch_size=BATCH_SIZE, # mini batch size
shuffle=True, # 要不要打乱数据 (打乱比较好)
num_workers=2, # 多线程来读数据
)
test_data = Data.DataLoader(
dataset=torch_testset, # torch TensorDataset format
batch_size=BATCH_SIZE, # mini batch size
shuffle=True, # 要不要打乱数据
num_workers=2 # 多线程来读数据
)
cnn = CNN().cuda()
print(cnn)
# cnn.load_state_dict(torch.load('net_cnn_big.pkl'))
optimizer = torch.optim.Adam(cnn.parameters(), lr=LR) # optimize all cnn parameters
loss_func = nn.MSELoss() # the target label is not one-hotted
print("start epoch")
min_loss = 0.5
x_label = []
y_label = []
p_label = []放入网络训练
for epoch in range(EPOCH):
sum_loss = 0
val_loss = 0
x_label.extend([epoch])
start = time.time()
for step, (x, y) in enumerate(loader): # gives batch data, normalize x when iterate train_loader
b_x = x.cuda() # Tensor on GPU
b_y = y.cuda() # Tensor on GPU
output = cnn(b_x)[0]
# print(output, b_y)
loss = loss_func(output.float(), b_y.float())
sum_loss += loss
optimizer.zero_grad()
loss.backward()
optimizer.step()
if step / 400 == 0:
precision = 0
with torch.no_grad():
for step1, (val_x, val_y) in enumerate(test_data):
x_val = val_x.cuda()
y_val = val_y.cuda()
test_output = cnn(x_val)[0]
loss_val = loss_func(test_output.float(), y_val.float())
val_loss += loss_val
pre = test_output.data.cpu().numpy()
for lens in range(0, y_val.shape[0]):
x = np.where(pre[lens] == np.max(pre[lens]))[0]
if pre[lens][x] > 0.7 and val_y[lens][x] == 1:
precision += 1
print("epoch is :", epoch, end='/' + str(EPOCH) + '\n')
print("output", test_output)
print("b_y", y_val)
print("sum_loss: ", sum_loss / divide_num)
y_label.extend([val_loss.data.cpu().numpy() / (length - divide_num)])
p_label.extend([precision / predict_num])
print("val_loss: ", val_loss / (length - divide_num))
print("precision: ", precision / predict_num, ' sum:', predict_num)
if val_loss / (length - divide_num) < min_loss:
min_loss = val_loss / (length - divide_num)
torch.save(cnn.state_dict(), 'net_cnn_big.pkl')
print("min_loss:", min_loss)
end = time.time()
epoch_time = end - start
print("Running time: %s seconds" % epoch_time)
print('-' * 20)
# print(x_label, y_label)
plt.subplot(2, 1, 1)
plt.plot(x_label, y_label, linewidth=1, color='red')
plt.subplot(2, 1, 2)
plt.plot(x_label, p_label, linewidth=1, color='blue')
plt.show()4.定位与检测
由此再回到提取部分,可以自由发挥,下面为示例(就是提取部分):
for name in list_name:
print('-' * 20)
print('big/' + name)
img = cv2.imread('big/' + name)
[X, Y, D] = img.shape
lab = cv2.cvtColor(img, cv2.COLOR_BGR2LAB) # 化为lab色
inRange_hsv = cv2.inRange(lab, color_dist[ball_color]['Lower'], color_dist[ball_color]['Upper']) # 测
# 闭运算去噪
kernel = np.ones((5, 5), np.uint8)
result = cv2.morphologyEx(inRange_hsv, cv2.MORPH_CLOSE, kernel) #
# 区域查找
cnts = cv2.findContours(result.copy(), cv2.RETR_EXTERNAL, cv2.CHAIN_APPROX_SIMPLE)[-2]
mean_x = 0
mean_y = 0
num1 = 0
five_num_detect = []
five_mean_detect = []
nine_num_detect = []
nine_mean_detect_x = []
nine_mean_detect_y = []
    # 五位数码管提取
    for i in cnts:
        rect = cv2.minAreaRect(i)  # 最小框提取
        area = cv2.contourArea(i)  # 得到框的面积
        if area > 150:  # 面积去噪
            num1 += 1
            # print(area)
            box = cv2.boxPoints(rect)
            x = [box[0][0], box[1][0], box[2][0], box[3][0]]  # 提取框的x坐标
            y = [box[0][1], box[1][1], box[2][1], box[3][1]]  # 提取框的y坐标
            mean_x += sum(x) / 4
            mean_y += sum(y) / 4
            # 提取区域位置
            x_min = int(min(x) - 10) if (int(min(x) - 10 > 0)) else 0
            x_max = int(max(x) + 10) if (int(max(x) + 10) < Y) else Y
            y_min = int(min(y) - 10) if (int(min(y) - 10) > 0) else 0
            y_max = int(max(y) + 10) if (int(max(y) + 10) < X) else X
            # fron.append([x_min, x_max, y_min, y_max])
            img_get = img[y_min:y_max, x_min:x_max]  # 提取图像
            img_s = cv2.resize(img_get, (128, 128))  # resize变换
            img_tensor = transf(img_s)  # 转化为tensor
            img_data[0] = img_tensor
            train_data = torch.tensor(img_data, dtype=torch.float32)    # 训练输入
            output = cnn(train_data.cuda())[0].cpu().data.numpy()   # 放入网络
            # 结果分析得到类别
            index = np.where(output[0] == np.max(output[0]))
            five_num_detect.append(classes[index[0][0]])
            five_mean_detect.append(sum(x) / 4)
            # print(index)
            # print(classes[index[0][0]])
            cv2.putText(img, classes[index[0][0]],
                        (int(x_min), int(y_min) - 3),
                        cv2.FONT_HERSHEY_SIMPLEX, 1, (255, 0, 0), 3)

            # 采集数据集
            # cv2.imshow('camera', img_s)
            # cv2.waitKey(1000)
            # num = input("enter: ")
            # cv2.imwrite('img1/' + str(num) + '_' + str(epo) + '.jpg', img_s)
            # print([np.int0(box)], np.int0([[x_min, y_min], [x_max, y_min], [x_max, y_max], [x_min, y_max]]))

            # 在图中标注
            cv2.drawContours(img, [np.int0([[x_min, y_min], [x_max, y_min], [x_max, y_max], [x_min, y_max]])], -1,
                             (0, 0, 255), 2)
            # epo += 1  # 采集数据集
mean_x /= num1
mean_y /= num1
# print(mean_x, mean_y, num1)
# 提取九宫格数字
if num1 == 5:
x_min = int(mean_x - 300) if (int(mean_x - 300) > 0) else 0
x_max = int(mean_x + 300) if (int(mean_x + 300) < Y) else Y
y_min = int(mean_y + 40) if (int(mean_y + 40) > 0) else 0
y_max = int(mean_y + 520) if (int(mean_y + 520) < X) else X
img_new = img[y_min:y_max, x_min:x_max]
# cv2.imwrite('img_new/' + name.split('.')[0] + '_' + '.bmp', img_new)
[X, Y, D] = img_new.shape
lab = cv2.cvtColor(img_new, cv2.COLOR_BGR2LAB)
inRange_hsv = cv2.inRange(lab, color_dist['nine']['Lower'], color_dist['nine']['Upper'])
kernel = np.ones((5, 5), np.uint8)
result = cv2.morphologyEx(inRange_hsv, cv2.MORPH_CLOSE, kernel)
cnts = cv2.findContours(result.copy(), cv2.RETR_EXTERNAL, cv2.CHAIN_APPROX_SIMPLE)[-2]
for i in cnts:
rect = cv2.minAreaRect(i)
area = cv2.contourArea(i)
if area > 150:
num1 += 1
# print(area)
box = cv2.boxPoints(rect)
x = [box[0][0], box[1][0], box[2][0], box[3][0]]
y = [box[0][1], box[1][1], box[2][1], box[3][1]]
mean_x += sum(x) / 4
mean_y += sum(y) / 4
x_min_r = int(min(x) - 10) if (int(min(x) - 10 > 0)) else 0
x_max_r = int(max(x) + 10) if (int(max(x) + 10) < Y) else Y
y_min_r = int(min(y) - 10) if (int(min(y) - 10) > 0) else 0
y_max_r = int(max(y) + 10) if (int(max(y) + 10) < X) else X
img_get = img_new[y_min_r:y_max_r, x_min_r:x_max_r]
img_s = cv2.resize(img_get, (128, 128))
img_tensor = transf(img_s)
img_data[0] = img_tensor
train_data = torch.tensor(img_data, dtype=torch.float32)
output = cnn(train_data.cuda())[0].cpu().data.numpy()
index = np.where(output[0] == np.max(output[0]))
nine_num_detect.append(classes[index[0][0]])
nine_mean_detect_x.append(sum(x) / 4)
nine_mean_detect_y.append(sum(y) / 4)
# print(index)
# print(classes[index[0][0]])
cv2.putText(img, classes[index[0][0]],
(int(x_min + x_min_r), int(y_min + y_min_r) - 3),
cv2.FONT_HERSHEY_SIMPLEX, 1, (255, 0, 0), 3)
# [np.int0([[x_min, y_min], [x_max, y_min], [x_max, y_max], [x_min, y_max]])]
cv2.drawContours(img, [np.int0([[x_min + x_min_r, y_min + y_min_r], [x_min + x_max_r, y_min + y_min_r],
[x_min + x_max_r, y_min + y_max_r],
[x_min + x_min_r, y_min + y_max_r]])], -1,
(0, 0, 255), 2)
# cv2.imshow('camera', img_get)
# cv2.waitKey(100)
# num = input("enter: ")
# cv2.imwrite('img1/' + str(num) + '_' + str(epo) + '.jpg', img_s)
# epo+=1
# 确定数码管与九宫格的数字顺序
five_mean_detect, five_num_detect = zip(*sorted(zip(five_mean_detect, five_num_detect)))
print(five_num_detect)
# print(five_mean_detect)
mean_x = sum(nine_mean_detect_x) / 9
mean_y = sum(nine_mean_detect_y) / 9
detect = np.zeros((3, 3))
for i in range(0, 9):
if nine_mean_detect_x[i] - mean_x < -10:
x = -1
elif nine_mean_detect_x[i] - mean_x > 10:
x = 1
else:
x = 0
if nine_mean_detect_y[i] - mean_y < -10:
y = -1
elif nine_mean_detect_y[i] - mean_y > 10:
y = 1
else:
y = 0
detect[y + 1][x + 1] = nine_num_detect[i]
print(detect)
cv2.imshow('img', img)
cv2.imwrite('img_new/' + name, img)
cv2.waitKey(500)
cv2.destroyAllWindows()!!!!!!!!!!!!!!!!!!!!!!!!!!!
此为图像处理与模式识别课设,希望你能有所改进。切勿完全一致。
下面为全部代码部分,可以下载,也可以白嫖
github链接github
觉得不错点个赞
