tensorflow验证码识别
目录
- 代码参考
- 准备模型开发环境
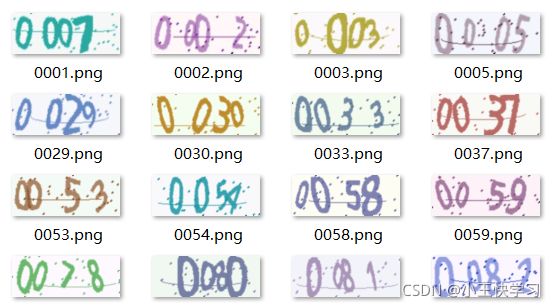
- 生成验证码数据集
- 输入与输出数据处理
- 模型结构设计
- 模型损失函数设计
- 模型训练过程分析
- 模型部署与效果演示
代码参考
https://github.com/wang-404/tensorflowStudy/tree/main/image
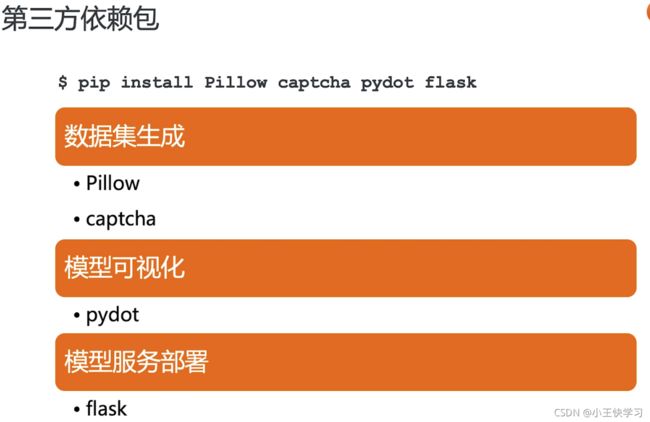
准备模型开发环境
生成验证码数据集
#引入第三方包
from captcha.image import ImageCaptcha
import random
import numpy as np
import tensorflow.gfile as gfile
import matplotlib.pyplot as plt
import PIL.Image as Image
#定义常量和字符集
NUMBER = ['0', '1', '2', '3', '4', '5', '6', '7', '8', '9']
LOWERCASE = ['a', 'b', 'c', 'd', 'e', 'f', 'g', 'h', 'i', 'j', 'k', 'l', 'm', 'n', 'o', 'p', 'q', 'r', 's', 't', 'u',
            'v', 'w', 'x', 'y', 'z']
UPPERCASE = ['A', 'B', 'C', 'D', 'E', 'F', 'G', 'H', 'I', 'J', 'K', 'L', 'M', 'N', 'O', 'P', 'Q', 'R', 'S', 'T', 'U',
           'V', 'W', 'X', 'Y', 'Z']

CAPTCHA_CHARSET = NUMBER # 验证码字符集
CAPTCHA_LEN = 4 # 验证码长度
CAPTCHA_HEIGHT = 60 # 验证码高度
CAPTCHA_WIDTH = 160 # 验证码宽度

TRAIN_DATASET_SIZE = 5000 # 验证码数据集大小
TEST_DATASET_SIZE = 1000 #
TRAIN_DATA_DIR = "./train_data/" # 验证码数据集目录
TEST_DATA_DIR = "./test_data/"
# 生成随机字符的方法
def gen_random_text(charset=CAPTCHA_CHARSET,length = CAPTCHA_LEN):
    text = [random.choice(charset) for _ in range(length)]
    return ''.join(text)
# 创建并保存验证码数据集的方法
def create_captcha_dataset(size = 100,data_dir = './data/',height=60,width=160,image_format='.png'):
    # 如果保存验证码图像,先清空data_dir 目录
    if gfile.Exists(data_dir):
        gfile.DeleteRecursively(data_dir)
    gfile.MakeDirs(data_dir)

    # 创建ImageCaptcha 实例 captcha
    captcha = ImageCaptcha(width = width,height= height)

    for _ in range(size):
        # 生成随机的验证码字符
        text = gen_random_text(CAPTCHA_CHARSET,CAPTCHA_LEN)
        captcha.write(text,data_dir+text+image_format)

    return None
#创建并保存训练集
create_captcha_dataset(TRAIN_DATASET_SIZE,TRAIN_DATA_DIR)
# 创建并保存测试集
create_captcha_dataset(TEST_DATASET_SIZE,TEST_DATA_DIR)
# 生成并返回验证码数据集的方法
def gen_captcha_dataset(size = 100,height=60,width=160,image_format='.png'):
    # 创建ImageCaptcha实例captcha
    captcha = ImageCaptcha(width=width,height=height)

    #创建图像和文本数据
    images,texts = [None]*size,[None]*size
    for i in range(size):
        # 生成随机的验证码字符
        texts[i]= gen_random_text(CAPTCHA_CHARSET,CAPTCHA_LEN)
        # 使用PIL。Image.open()识别新生成的验证码图像
        # 然后,将图像转换为形如(CAPTCHA_WIDTH,CAPTCHA_HEIGHT,3)的numpy数组
        images[i] = np.array(Image.open(captcha.generate(texts[i])))
    return images,texts
#生成100张验证码图像和字符
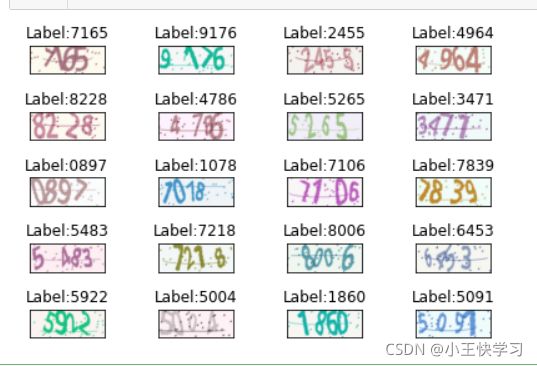
images, texts = gen_captcha_dataset()
plt.figure()
for i in range(20):
    plt.subplot(5,4,i+1)#绘制前20个验证码  以5行4列子图形式展示
    plt.tight_layout() # z自动适配子图尺寸
    plt.imshow(images[i])
    plt.title("Label:{}".format(texts[i])) # 设置标签为子图标题
    plt.xticks([]) # 删除x轴标记
    plt.yticks([]) # 删除y轴标记
plt.show()
输入与输出数据处理
# 引入第三方包
from PIL import Image
from keras import backend as K
import random
import glob
import numpy as npa
import tensorflow.gfile as gfile
import matplotlib.pyplot as plt
# 定义超参数和字符集
NUMBER = ['0', '1', '2', '3', '4', '5', '6', '7', '8', '9']
LOWERCASE = ['a', 'b', 'c', 'd', 'e', 'f', 'g', 'h', 'i', 'j', 'k', 'l', 'm', 'n', 'o', 'p', 'q', 'r', 's', 't', 'u',
            'v', 'w', 'x', 'y', 'z']
UPPERCASE = ['A', 'B', 'C', 'D', 'E', 'F', 'G', 'H', 'I', 'J', 'K', 'L', 'M', 'N', 'O', 'P', 'Q', 'R', 'S', 'T', 'U',
           'V', 'W', 'X', 'Y', 'Z']

CAPTCHA_CHARSET = NUMBER # 验证码字符集
CAPTCHA_LEN = 4 # 验证码长度
CAPTCHA_HEIGHT = 60 # 验证码高度
CAPTCHA_WIDTH = 160 # 验证码宽度

TRAIN_DATA_DIR = "./train_data/" # 验证码数据集目录
# 读取训练集前100张图片,并通过文件名解析验证码(标签)
image = []
text = []
count = 0
for filname in glob.glob(TRAIN_DATA_DIR+'*.png'):
    image.append(np.array(Image.open(filname)))
    text.append(filname.lstrip(TRAIN_DATA_DIR).rstrip('.png'))
    count +=1
    if count >= 100:
        break
# 数据可视化
plt.figure()
for i in range(20):
    plt.subplot(5,4,i+1) # 绘制前20个验证码,以5行4列形式展示
    plt.tight_layout() # z自动适配子图尺寸
    plt.imshow(image[i])
    plt.title("Label:{}".format(text[i])) # 设置标签为子图标题
    plt.xticks([]) # 删除x轴标记
    plt.yticks([]) # 删除y轴标记
plt.show()
image = np.array(image,dtype=np.float32)
print(image.shape)
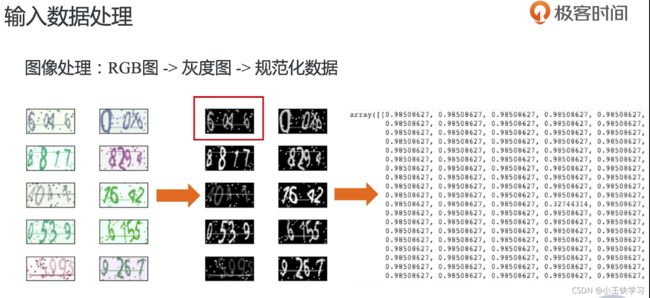
# 将RGB验证码图像转为灰度图
def rgb2gray(img):
    # Y' = 0.299 R + 0.587 G + 0.114 B
    # https://en.wikipedia.org/wiki/Grayscale#Converting_color_to_grayscale
    return np.dot(img[...,:3], [0.299, 0.587, 0.114])
image = rgb2gray(image)
print(image.shape)
plt.figure()
for i in range(20):
    plt.subplot(5,4,i+1) # 绘制前20个验证码,以5行4列形式展示
    plt.tight_layout() # z自动适配子图尺寸
    plt.imshow(image[i],cmap='Greys')
    plt.title("Label:{}".format(text[i])) # 设置标签为子图标题
    plt.xticks([]) # 删除x轴标记
    plt.yticks([]) # 删除y轴标记
plt.show()
# 数据规范化
image = image / 255
image[0]
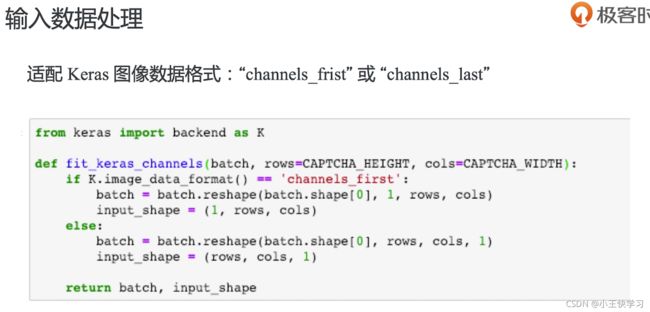
# 适配keras图像数据格式
def fit_keras_channels(batch,rows = CAPTCHA_HEIGHT,cols = CAPTCHA_WIDTH):
    if K.image_data_format() == 'channels_first':
        batch = batch.reshape(batch.shape[0],1,rows,cols)
        input_shape = (1,rows,cols)
    else:
        batch = batch.reshape(batch.shape[0],rows,cols,1)
        input_shape = (rows,cols,1)
    return batch,input_shape
image,input_shape = fit_keras_channels(image)
print(image.shape)
print(input_shape)
# 对验证码中每个字符进行one-hot编码
def text2vec(text, length=CAPTCHA_LEN, charset=CAPTCHA_CHARSET):
    text_len = len(text)
    # 验证码长度校验
    if text_len != length:
        raise ValueError('Error: length of captcha should be {}, but got {}'.format(length, text_len))

    # 生成一个形如(CAPTCHA_LEN*CAPTHA_CHARSET,) 的一维向量
    # 例如,4个纯数字的验证码生成形如(4*10,)的一维向量
    vec = np.zeros(length * len(charset))
    for i in range(length):
        # One-hot 编码验证码中的每个数字
        # 每个字符的热码 = 索引 + 偏移量
        vec[charset.index(text[i]) + i*len(charset)] = 1
    return vec
text = list(text)
for i in range(len(text)):
    text[i]=text[i][1:5]
vec = [None]*len(text)
for i in range(len(vec)):
    vec[i] = text2vec(text[i])
vec[0]
text[0]
# 将验证码向量解码为对应字符
def vec2text(vector):
    if not isinstance(vector,np.ndarray):
        vector = np.asarray(vector)
    vector = np.reshape(vector,[CAPTCHA_LEN,-1])
    text = ''
    for item in vector:
        text += CAPTCHA_CHARSET[np.argmax(item)]
    return text
# 模型对 ‘3935’ 验证码推理的输出值
yy_vec = np.array([[2.0792404e-10, 4.3756086e-07, 3.1140310e-10, 9.9823320e-01,
                    5.1135743e-15, 3.7417038e-05, 1.0556480e-08, 9.0933657e-13,
                    2.7573466e-07, 1.7286760e-03, 1.1030550e-07, 1.1852034e-07,
                    7.9457263e-10, 3.4533365e-09, 6.6065012e-14, 2.8996323e-05,
                    7.6345885e-13, 3.1817032e-16, 3.9540555e-05, 9.9993122e-01,
                    5.3814397e-13, 1.2061575e-10, 1.6408040e-03, 9.9833637e-01,
                    6.5149628e-08, 5.2246549e-12, 1.1365444e-08, 9.5700288e-12,
                    2.2725430e-05, 5.2195204e-10, 3.2457771e-13, 2.1413280e-07,
                    7.3547295e-14, 4.4094882e-06, 3.8390007e-07, 9.9230206e-01,
                    6.4467136e-03, 3.9224533e-11, 1.2461344e-03, 1.1253484e-07]],
                  dtype=np.float32)
yy = vec2text(yy_vec)
img = rgb2gray(np.array(Image.open('3935.png')))
plt.figure()
plt.imshow(img,cmap="Greys")
plt.title("Label:{}".format(yy))  # 设置标签为图标题
plt.xticks([]) # 删除x轴标记
plt.yticks([]) # 删除y轴标记
plt.show()
