图像分割之-MASK_RCNN
图像分割之-MASK_RCNN
自己正在学习图像分割,下面分享下自己的经验,从标注数据开始。
修改的参数可以参考以下网址:https://blog.csdn.net/weixin_43758528/article/details/88621481
一、Labelme的安装
参考博客:https://blog.csdn.net/u012746060/article/details/81871733
**一、安装环境:**windows10,anaconda3,python3.5
二、安装过程:
1、管理员身份打开 anaconda prompt
2、输入命令:conda create --name=labelme python=3.5 (这个根据自己的版本来,我的事python 3.5)
3、输入命令:activate labelme ,会出现以下报错,不用管

4、输入命令:pip install pyqt5,pip install pyside2,在安装 pyside2 的时候超级慢
5、输入命令:pip install labelme
6、输入命令:labelme 即可打开labelme。如下:
或者直接使用图片标记工具的代码:
图片标记工具基于开源项目:https://github.com/wkentaro/labelme
二、标注自己的数据集
一、建立数据集
对于数据集编号问题,可以下载使用 Total Commander 软件,很好用
使用labelme 标记自己的数据集,本文主要参考这位大神的操作方法
https://blog.csdn.net/qq_29462849/article/details/81037343
1)首先制作数据集

根据需求将数据集分为4个文件,这是people文件夹下(本人将标注好的.json跟原图片放在一起了,主要目的在于方便查看标注是否正确,方便,修改)

2)json 与此同时,将标注好的文件复制粘贴到 json 文件夹下。
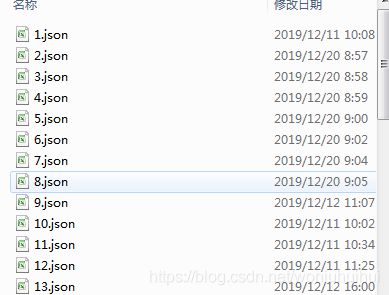
三、使用labelme_json_to_dataset.exe
labelme保存的都是xxx.json文件,需要用labelme_json_to_dataset.exe转换一下,本人主要是使用以下程序进行批量转换的。
import os
path = './json/'  # path为json文件存放的路径
json_file = os.listdir(path)
os.system("activate labelme")
for file in json_file:
    os.system("labelme_json_to_dataset.exe %s"%(path + '/' + file))
转换完成后,转换完的数据出现在json 文件夹下,如下所示:
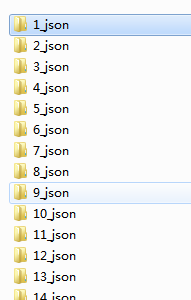
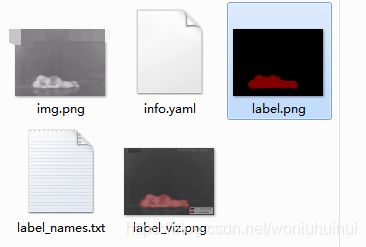
这样会生成一个同名文件夹,里面包含了我们需要的mask文件,label.png,不过这个文件是16bit点,而cv2中使用的都是8bit点,所以需要转换一下。说明:这样转换后,打开转换后的图片一片漆黑,如果想看效果可以把"img = Image.fromarray(np.uint8(np.array(img)))"改成“img = Image.fromarray(np.uint8(np.array(img)) * 20 )”,不过这样不符合mask rcnn的要求,看看效果即可,后面运行还是需要不乘倍数的!
from PIL import Image
import numpy as np
import os

src_dir = r'./labelme_json'
dest_dir = r'./cv2_mask'
for child_dir in os.listdir(src_dir):
    new_name = child_dir.split('_')[0] + '.png'
    old_mask = os.path.join(os.path.join(src_dir, child_dir), 'label.png')
    img = Image.open(old_mask)
    img = Image.fromarray(np.uint8(np.array(img)) * 20 )
    new_mask = os.path.join(dest_dir, new_name)
    img.save(new_mask)
最后,把得到的文件统一一下,便于后续程序执行,最后文件夹如下:
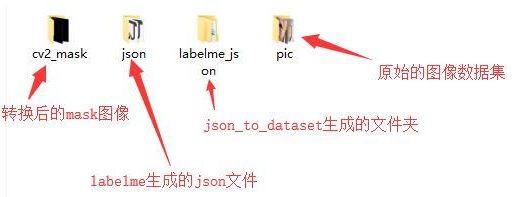
四、 修改mask rcnn
在mask rcnn的根目录下,新建两个文件夹“models”和“logs” ,models用于保存已经预训练好的coco模型,mask_rcnn_coco.h5;
logs用于保存训练产生的模型。在samples文件夹下新建一个“people”文件夹,创建people.py,代码中的 init_with = “last” 第一次训练时请改成 init_with = “coco”
五、训练程序
关于训练过程的参数设置,可在config.py文件中修改,但是本人直接在程序中修改的,没有修改config.py,这个根据自己的要求啦~官方也给出了修改建议:
https://github.com/matterport/Mask_RCNN/wiki
可修改的主要有:
BACKBONE = “resnet50” ;这个是迁移学习调用的模型,分为resnet101和resnet50,电脑性能不是特别好的话,建议选择resnet50,这样网络更小,训练的更快。
model.train(…, layers=‘heads’, …) # Train heads branches (least memory)
model.train(…, layers=‘3+’, …) # Train resnet stage 3 and up
model.train(…, layers=‘4+’, …) # Train resnet stage 4 and up
model.train(…, layers=‘all’, …) # Train all layers (most memory)#这里是选择训练的层数,根据自己的要求选择
1、
IMAGE_MIN_DIM = 800
IMAGE_MAX_DIM = 1024#设置训练时的图像大小,最终以IMAGE_MAX_DIM为准,如果电脑性能不是太好,建议调小,但是尺寸为32倍数
2、
GPU_COUNT = 1
IMAGES_PER_GPU = 2#这个是对GPU的设置,如果显存不够,建议把2调成1(虽然batch_size为1并不利于收敛)
3、
基础设置
dataset_root_path = r"F:\2019.11\code\Mask_RCNN-master\Mask_RCNN-master\train_data"
后面的路径需要设置为自己的路径,train_data下的文件一般为:
训练代码为:
import os
import sys
import numpy as np
import cv2
import matplotlib.pyplot as plt

import yaml
from PIL import Image

# Root directory of the project
ROOT_DIR = os.path.abspath("../../")
sys.path.append(ROOT_DIR)  # To find local version of the library

from mrcnn.config import Config
from mrcnn import utils
from mrcnn import model as modellib

# logs 用来保存训练好的模型
MODEL_DIR = os.path.join(ROOT_DIR, "logs")

iter_num = 0

# 读入预训练的权重
COCO_MODEL_PATH = os.path.join(ROOT_DIR, "mask_rcnn_coco.h5")
# Download COCO trained weights from Releases if needed
if not os.path.exists(COCO_MODEL_PATH):
    utils.download_trained_weights(COCO_MODEL_PATH)


class ShapesConfig(Config):
    """Configuration for training on the toy shapes dataset.
    Derives from the base Config class and overrides values specific
    to the toy shapes dataset.
    """
    # Give the configuration a recognizable name
    NAME = "shapes"

   # 每次迭代GPU上训练的图片数量,如果gpu显存为12GB,一般可同时训练2个图片
    GPU_COUNT = 1
    IMAGES_PER_GPU = 1

    # 目标检测的类别数量,包含背景色
    NUM_CLASSES = 1 + 5  # background + 1 class

    # 修改为自己图片的尺寸
    IMAGE_MIN_DIM = 320
    IMAGE_MAX_DIM = 384

    # Use smaller anchors because our image and objects are small
    RPN_ANCHOR_SCALES = (8 * 6, 16 * 6, 32 * 6, 64 * 6, 128 * 6)  # 根据自己情况设置anchor大小

    # Reduce training ROIs per image because the images are small and have
    # few objects. Aim to allow ROI sampling to pick 33% positive ROIs.
    TRAIN_ROIS_PER_IMAGE = 100

    # 每个epoch的训练迭代次数
    STEPS_PER_EPOCH = 100

    # use small validation steps since the epoch is small
    VALIDATION_STEPS = 50


config = ShapesConfig()
config.display()

class DrugDataset(utils.Dataset):
    # 得到该图中有多少个实例(物体)
    def get_obj_index(self, image):
        n = np.max(image)
        return n

    # 解析labelme中得到的yaml文件,从而得到mask每一层对应的实例标签
    def from_yaml_get_class(self, image_id):
        info = self.image_info[image_id]
        with open(info['yaml_path']) as f:
            temp = yaml.load(f.read())
            labels = temp['label_names']
            del labels[0]
        return labels

    # 重新写draw_mask
    def draw_mask(self, num_obj, mask, image, image_id):

        # print("draw_mask-->",image_id)
        # print("self.image_info",self.image_info)

        info = self.image_info[image_id]
        # print("info-->",info)
        # print("info[width]----->",info['width'],"-info[height]--->",info['height'])
        for index in range(num_obj):
            for i in range(info['width']):
                for j in range(info['height']):
                    # print("image_id-->",image_id,"-i--->",i,"-j--->",j)
                    # print("info[width]----->",info['width'],"-info[height]--->",info['height'])
                    at_pixel = image.getpixel((i, j))
                    if at_pixel == index + 1:
                        mask[j, i, index] = 1
        return mask


    def load_shapes(self, count, img_floder, mask_floder, imglist, dataset_root_path):
        """Generate the requested number of synthetic images.
        count: number of images to generate.
        height, width: the size of the generated images.
        """
        # 此处根据分类的类别进行修改
        self.add_class("shapes", 1, "XX1")  # 修改成5类
        self.add_class("shapes", 2, "XX2")
        self.add_class("shapes", 3, "XX3")
        self.add_class("shapes", 4, "XX4")
        self.add_class("shapes", 5, "XX5")


        for i in range(count-1):
            # 获取图片宽和高
            filestr = imglist[i].split(".")[0]
#            print(imglist[i],"-->",cv_img.shape[1],"--->",cv_img.shape[0])
#            print("id-->", i, " imglist[", i, "]-->", imglist[i],"filestr-->",filestr)
#             filestr = filestr.split("_")[1]
#            mask_path = mask_floder + "/" + filestr + ".png"
            mask_path = dataset_root_path + "/labelme_json/" + filestr + "_json/label.png"
            yaml_path = dataset_root_path + "/labelme_json/" + filestr + "_json/info.yaml"
            print(dataset_root_path + "/labelme_json/" + filestr + "_json/img.png")
            cv_img = cv2.imread(dataset_root_path + "/labelme_json/" + filestr + "_json/img.png")

            self.add_image("shapes", image_id=i, path=img_floder + "/" + imglist[i],
                           width=cv_img.shape[1], height=cv_img.shape[0], mask_path=mask_path, yaml_path=yaml_path)

    # 重写load_mask
    def load_mask(self, image_id):
        """Generate instance masks for shapes of the given image ID.
        """
        global iter_num
        print("image_id", image_id)
        info = self.image_info[image_id]
        count = 1  # number of object
        img = Image.open(info['mask_path'])
        num_obj = self.get_obj_index(img)
        mask = np.zeros([info['height'], info['width'], num_obj], dtype=np.uint8)
        mask = self.draw_mask(num_obj, mask, img, image_id)
        occlusion = np.logical_not(mask[:, :, -1]).astype(np.uint8)
        for i in range(count - 2, -1, -1):
            mask[:, :, i] = mask[:, :, i] * occlusion

            occlusion = np.logical_and(occlusion, np.logical_not(mask[:, :, i]))
        labels = []
        labels = self.from_yaml_get_class(image_id)
        labels_form = []
        for i in range(len(labels)):  #修改此处
            if labels[i].find("XX1") != -1:
                # print "box"
                labels_form.append("XX1")
            elif labels[i].find("XX2") != -1:
                labels_form.append("XX2")
            elif labels[i].find("XX3") != -1:
                labels_form.append("XX3")
            elif labels[i].find("XX4") != -1:
                labels_form.append("XX4")
            elif labels[i].find("XX5") != -1:
                labels_form.append("XX5")

        class_ids = np.array([self.class_names.index(s) for s in labels_form])
        return mask, class_ids.astype(np.int32)


def get_ax(rows=1, cols=1, size=8):
    """Return a Matplotlib Axes array to be used in
    all visualizations in the notebook. Provide a
    central point to control graph sizes.

    Change the default size attribute to control the size
    of rendered images
    """
    _, ax = plt.subplots(rows, cols, figsize=(size * cols, size * rows))
    return ax


# 基础设置
dataset_root_path = r"F:\2019.11\code\Mask_RCNN-master\Mask_RCNN-master\train_data"
img_floder = os.path.join(dataset_root_path, "people")
mask_floder = os.path.join(dataset_root_path, "cv2_mask")
imglist = os.listdir(img_floder)
count = len(imglist)

# train与val数据集准备
dataset_train = DrugDataset()
dataset_train.load_shapes(count, img_floder, mask_floder, imglist, dataset_root_path)
dataset_train.prepare()

# print("dataset_train-->",dataset_train._image_ids)

dataset_val = DrugDataset()
dataset_val.load_shapes(count, img_floder, mask_floder, imglist, dataset_root_path)
dataset_val.prepare()

# Create models in training mode
model = modellib.MaskRCNN(mode="training", config=config, model_dir=MODEL_DIR)

# 第一次训练时,这里填coco,在产生训练后的模型后,改成last
init_with = "coco"  # imagenet, coco, or last

if init_with == "imagenet":
   model.load_weights(model.get_imagenet_weights(), by_name=True)
elif init_with == "last":
   model.load_weights(COCO_MODEL_PATH, by_name=True,
                           exclude=["mrcnn_class_logits", "mrcnn_bbox_fc",
                                    "mrcnn_bbox", "mrcnn_mask"])
elif init_with == "last":
    checkpoint_file = model.find_last()
    model.load_weights(checkpoint_file, by_name=True)


#Train the head branches
model.train(dataset_train, dataset_val,
                learning_rate=config.LEARNING_RATE,
                epochs=10,
                layers='heads')


model.train(dataset_train, dataset_val,
                learning_rate=config.LEARNING_RATE / 10,
                epochs=10,
                layers="all")
五、 出现的问题
问题1:代码中出现以下错误:
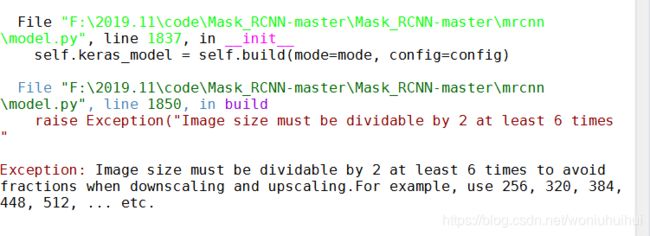
解决:主要修改以下两行代码,图片调整后的宽度和长度必须被64整除才可以。
IMAGE_MIN_DIM = 320
IMAGE_MAX_DIM =256
**问题2:**当出现以下错误时,需要在训练的train.py中,在load_shapes函数中的mask_path地址指向labelme_json文件夹下。也就是 mask_path = dataset_root_path + “labelme_json/” + filestr + “_json/label.png”即可成功

六、测试的源代码
# -*- coding: utf-8 -*-
import os
import sys
import skimage.io

# Root directory of the project
ROOT_DIR = os.path.abspath("../../")
sys.path.append(ROOT_DIR)  # To find local version of the library

from mrcnn.config import Config
from datetime import datetime
from mrcnn import utils
import mrcnn.model as modellib
from mrcnn import visualize

# Directory to save logs and trained model
MODEL_DIR = os.path.join(ROOT_DIR, "logs")

# Local path to trained weights file
COCO_MODEL_PATH = os.path.join(MODEL_DIR ,"shapes20191223T0910\\mask_rcnn_shapes_0033.h5")
# Download COCO trained weights from Releases if needed
if not os.path.exists(COCO_MODEL_PATH):
    utils.download_trained_weights(COCO_MODEL_PATH)
    print("cuiwei***********************")

# Directory of images to run detection on
IMAGE_DIR = os.path.join(ROOT_DIR, "images")

class ShapesConfig(Config):
    NAME = "shapes"
    NUM_CLASSES = 1 + 5  # background + 3 shapes
    IMAGE_MIN_DIM = 320
    IMAGE_MAX_DIM = 384

    RPN_ANCHOR_SCALES = (8 * 6, 16 * 6, 32 * 6, 64 * 6, 128 * 6)  # anchor side in pixels

class InferenceConfig(ShapesConfig):
    GPU_COUNT = 1
    IMAGES_PER_GPU = 1

config = InferenceConfig()

model = modellib.MaskRCNN(mode="inference", model_dir=MODEL_DIR, config=config)

model.load_weights(COCO_MODEL_PATH, by_name=True, exclude=["mrcnn_class_logits", "mrcnn_bbox_fc","mrcnn_bbox", "mrcnn_mask"])
class_names = ['BG',"XX1", 'XX2','XX3','XX4','XX5']
file_names = next(os.walk(IMAGE_DIR))[2]
image = skimage.io.imread("./photo2.jpg")

a=datetime.now()
results = model.detect([image], verbose=1)
b=datetime.now()
print("shijian",(b-a).seconds)
r = results[0]
visualize.display_instances(image, r['rois'], r['masks'], r['class_ids'],
                            class_names, r['scores'])
测试代码上需要修改的如下:
1)
COCO_MODEL_PATH = os.path.join(MODEL_DIR ,"shapes20191223T0910\\mask_rcnn_shapes_0033.h5")
本代码主要含义在于调用训练好的模型,这个根据自己保存的路径进行修改。
2)
NUM_CLASSES = 1 + 5 # background + 3 shapes
根据个人情况来修改,我是分为5类,所以是1+5,背景加上5
3)
IMAGE_MIN_DIM = 320
IMAGE_MAX_DIM = 384
根据个人情况来修改。
4)
image = skimage.io.imread("./photo2.jpg")
路径改为自己需要测试图片的路径
