Flutter智慧城市App
前言
下面将是我使用Flutter对智慧城市APP的实现过程,尽管过程有点繁琐,但这终究只是我的一片记录学习过程的文章,如果有错误的地方,望在评论区留言,给广大的朋友们指条明路…
要求
任务 1:引导页功能模块描述:
- App 启动,首先进入引导页,引导页面下方显示 5 个小圆圈标识,提示用户当前引导页面位置。
- 进入最后引导页。
(1)显示“网络设置”按钮,点击弹出服务器 IP 地址(如192.168.1.10)和端口(如 8080)设置对话框,并实现服务器 IP 地
址和端口的保存和修改功能。
(2)显示“进入主页”按钮,点击进入主页面。
任务 2:主页面功能模块描述:
- 主页显示搜索输入框,输入搜索内容后,点击软键盘“搜索”按钮,跳转至搜索结果相关新闻资讯列表页面。
- 显示轮播图,点击轮播图跳转至对应页面。
- 显示智慧城市各领域推荐应用服务入口,以图标和名称为单元宫格方式显示,手机端每行显示 5 个(Pad 端每行显示大于 5 个),按照优先级从高到低排序(ID 数值越大优先级越高),共两行,第 2行最后一个显示“更多服务”,点击“更多服务”进入对应页面。每个领域应用入口布局显示为圆形图标,图标下为名称,点击图标可进入对应的领域应用页面。
- 显示热门主题模块,手机端每行显示 2 个热门主题(Pad 端每行显示 4 个),每个主题入口布局为圆角(20dp)矩形图标,图标下为标题名称,多出的标题名称用省略号显示,点击“热门主题”进入到对应的主题页面。
- 显示新闻专栏,上方标签页方式显示新闻类别,下方显示新闻列表,列表项包括图片、新闻标题、新闻内容缩写(多出的字用省略号显示),评论总数,发布时间等信息。
- 显示底部导航栏,采用图标加文字方式显示,图标在上,文字在下,共五个图标分别为首页、全部服务、智慧党建、新闻、个人中心,点击标签进入对应页面,并颜色标记当前页面所在导航栏。
任务 3:预约检车功能模块描述
在智慧城市 App 主页面上的各领域应用服务入口,点击“预约检车”图标或信息,进入预约检车页面。
预约检车功能显示预约须知、立即预约、我的预约、车辆管理四项底部功能导航,点击上方导航栏“返回”按钮返回智慧城市主页面。
- 默认进入“预约须知”进入预约须知页面,显示车辆预约须知提示等信息。
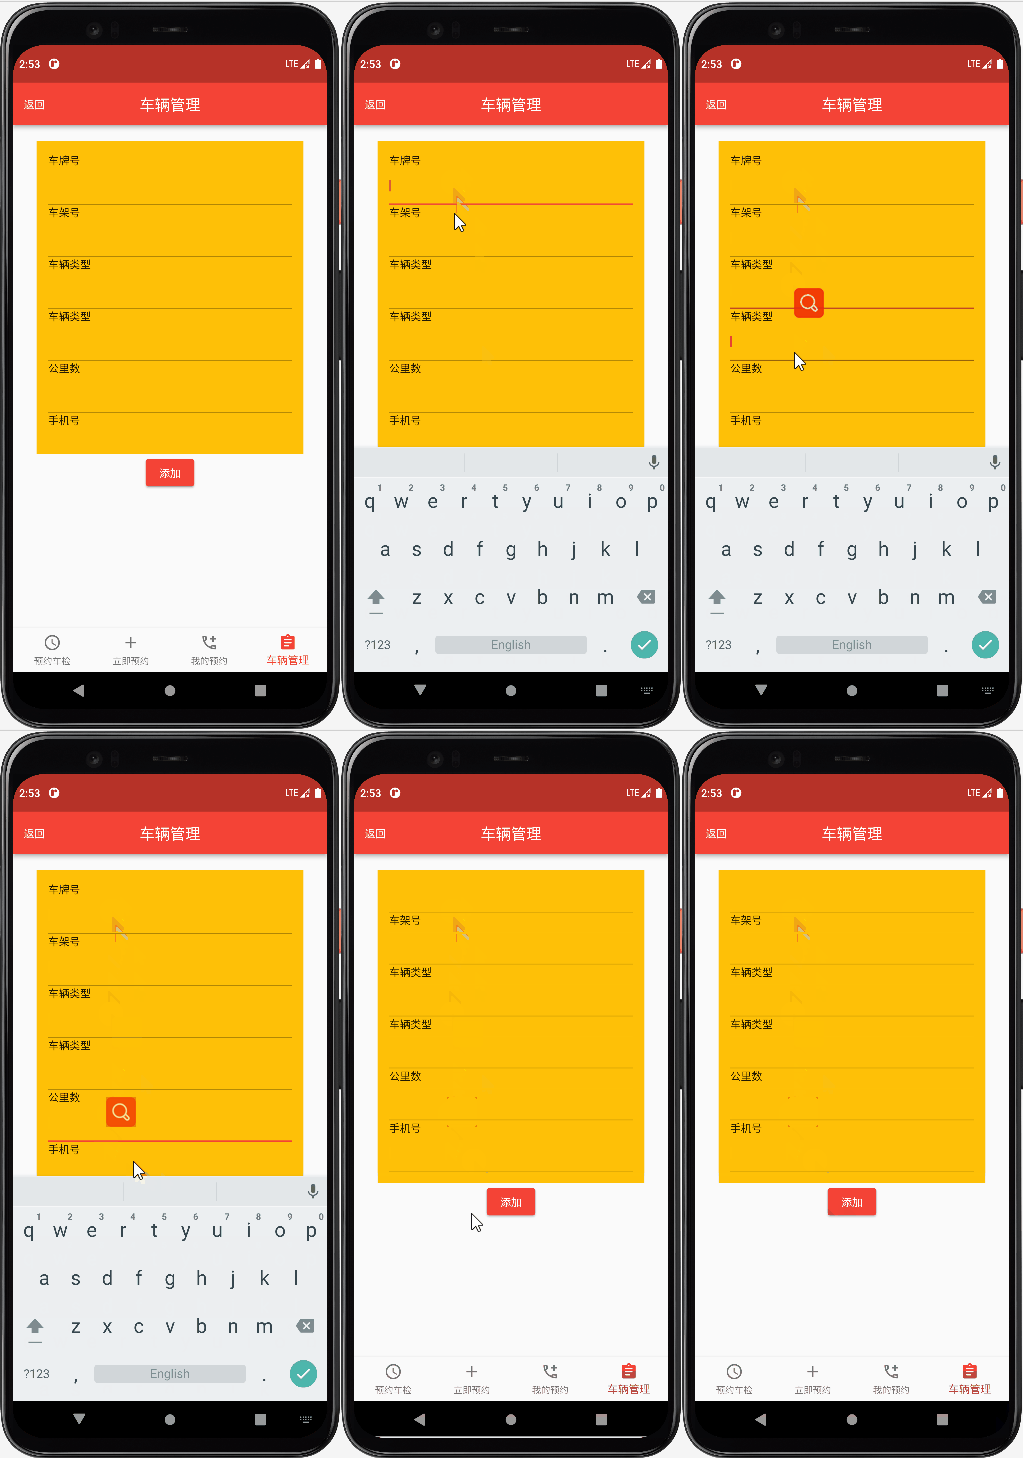
- 点击“车辆管理”进入车辆管理页面,列表显示车牌号、车架号、车辆类型、公里数、手机号等输入框信息,并可编辑。点击“添加”按钮可根据列表项的信息设计添加车辆信息功能。
- 点击“立即预约”,进入立即预约页面,具体如下:
(1)列表显示用户录入的车辆和单选框,单选预约的车辆,如果无车辆信息,则自动跳转至车辆管理页面。
(2)点击“选择时间”弹出时间(日期和小时)弹框,选择时间后点击“确认”获取并显示预约时间。
(3)点击“检车地点”弹出检车地点弹框列表,选择地点后点击“确认”获取检查地点。
(4)点击“预约”按钮,显示预约成功信息后自动跳转至“我的预约”页面。 - 点击“我的预约”进入我的预约页面,列表显示已经预约成功的车辆信息订单,包括车牌号、预约时间、预约检车地点等信息。
任务 4:个人中心功能模块描述
- 首先进入个人中心页面,个人中心页面显示用户头像、账户、个人信息页面入口、订单列表页面入口、修改密码页面入口、意见反馈页面入口,点击“退出”按钮可退出登录。
- 点击个人信息跳转至个人信息页面,标签栏显示本页面标题,点击返回图标可返回到上一页,点击修改可保存修改的信息,可修改内容为:头像、昵称、性别、联系电话,注:证件号只显示前两位与后四位数字其他使用 * 号代替。
- 点击修改密码可进入修改密码页面,标签栏显示本页面标题,点击返回图标可返回到上一页,输入原密码与新密码,点击“确定”按钮可保存修改的信息。
- 点击订单列表可跳转到订单页面,标签栏显示本页面标题,点击返回图标可返回到上一页,页面内容展示所有订单、订单分类数据信息,订单显示信息有:订单号、订单类型、订单生成日期。点击订单可跳转至对应功能模块生成订单的详情页面。
- 点击意见反馈可跳转至意见反馈页面,标签栏显示本页面标题,点击返回图标可返回到上一页,输入反馈的内容,字数限制在 150 字以内,点击提交可提交反馈的意见。
任务 5:找房子功能模块描述(2 分)
在智慧城市 App 主页面上的各领域应用服务入口或全部服务(自行设计)中,点击“找房子”图标或信息,进入找房子页面。
任务说明:
找房子功能主要包括主页和信息详情两个页面,点击上方导航栏“返回”按钮返回智慧城市主页面。
- 主页面,页面包括顶部导航栏目、宣传幻灯片、搜索、功能分类和房源展示板块。具有返回按钮,点击返回按钮可以返回智慧城市主页面。下方搜索在页面搜索框下面显示 4 大分类按钮,分别为:二
手、租房、楼盘、中介,并图文显示。
(1)页面顶部具有返回按钮,点击返回按钮返回智慧城市主页面。
(2)产品功能宣传幻灯片展示。
(3)搜索,根据房源名称模糊查询,结果列表显示在房源展示区。
(4)功能分类,搜索下面显示四大分类,分别为:二手、租房、楼盘、中介,并图文显示。点击四大分类按钮,房源展示区更新该分类相应的房源信息并在页面下方以列表的形式展示,列表项每一房源均显示图片、所在小区或商圈名称、房源面积以及价格、房源简介等内容。
(5)房源展示分类栏目下方,展示默认最新发布的房源列表信
息,列表页每一房源均显示房源图片、所在小区或商圈名称、房源面积以及价格、房源简介等内容。
2.信息详情页,点击房源列表中的某个房源,进入到房源详情页面。详情页面分别展示房源图片、房源名称、建筑面积、房源单价、房源类型、房源介绍等信息。底部展示主页和打电话按钮,点击“主页”,返回找房主主页,点击“打电话”可以直接系统拨号页面,联
系对应详情中的电话号码。
任务 6:新闻功能模块描述(2 分)
- 新闻页面包含:轮播图、新闻分类、新闻列表等内容。轮播图可跳转新闻详情页面;新闻分类展示各类新闻主题;新闻列表根据最新发布时间排序,列表显示新闻图片、新闻名称、观看人数、点赞数等。
- 在新闻列表页面点击新闻名称跳转到新闻详情页面,信息如下:
(1)详情页面顶部栏显示新闻名称,点击“返回”按钮,返回上级目录。
(2)新闻详情内容按照(图片+文字)的形式进行展示,详情页面具有评论和查看评论列表功能,评论列表显示评论条数以及评论内容,用户可以对该新闻进行评论。
(3)详情页面还包括新闻推荐,以列表形式展示 1-3 篇推荐新闻,显示新闻名称、观看数、图片等信息。
材料
这次项目就叫“SmartCity”
图片如下 (iconFont下载的图片,仅供学习使用!) :





任务一 - 引导页实现
制作引导页就需要使用PageView组件实现,对于PageView组件可以去网上学习一下,特别简单…
首先,我们跳转页需要使用到路由配置,下面是Main.dart文件中添加的 路由表:
class MyApp extends StatelessWidget {
  MyApp({Key? key}) : super(key: key);
  @override
  Widget build(BuildContext context) {
    return MaterialApp(
      title: 'SmartCity',
      theme: ThemeData(
        primarySwatch: Colors.blue,
      ),
      home: judge(),
      // 路由表
      routes: {
        "/guidepage":(context) => guidePage(),
        "/indexpage":(context)=>indexPage(),
      },
    );
  }
引导页
在制作引导页的时候,我们需要一些数据,比如图片这些玩意儿,也是我就想到了用面向对象的方式将数据进行封装起来,下面是我制作的数据:
class User {
  // 图片路径
  final List list = [
    "assets/images/1.png",
    "assets/images/2.png",
    "assets/images/3.png",
    "assets/images/4.png",
    "assets/images/5.png",
    "assets/images/5.png",
    "assets/images/6.png",
    "assets/images/7.png",
    "assets/images/8.png",
    "assets/images/9.png",
  ];

  // 图片说明
  final List info = [
    "预约检车",
    "找房子",
    "设备设置",
    "云端管理",
    "政府工作",
    "错误排查",
    "随赠品",
    "火箭发射",
    "协同工作",
    "更多服务"
  ];
}
在需要使用它的时候,在直接创建一个对象,然后就可以使用它了!非常的方便。
// ignore_for_file: prefer_const_constructors

import 'package:flutter/material.dart';
import 'package:smartcity/Constant/constant.dart';
import 'package:smartcity/Page/indexPage/indexpage.dart';

class guidePage extends StatefulWidget {
  guidePage({
    Key? key,
  }) : super(key: key);

  @override
  _guidePageState createState() => _guidePageState();
}

class _guidePageState extends State {
  // 当前位置
  int index = 0;

  // ip地址
  String ipAddress = "192.168.1.10";

  // 端口号
  String portNumber = "8080";

  // 创建我们的数据的对象
  User user = User();

  @override
  Widget build(BuildContext context) {
    Size size = MediaQuery.of(context).size;
    return Scaffold(
    // 安全区,设置不被上面的那玩意儿挡住
      body: SafeArea(
        child: SingleChildScrollView(
          scrollDirection: Axis.vertical,
          child: Column(
            children: [
              Container(
                color: Color(0x55ededed),
                alignment: Alignment.center,
                width: size.width,
                height: size.height * 0.7,
                child: PageView(
                  scrollDirection: Axis.horizontal,
                  onPageChanged: (value) {
                    setState(() {
                      index = value;
                    });
                  },
                  // 用列表的方式快速创建5张 引导页
                  children: List.generate(5, (index) {
                    return PicAndText(user.list[index], user.info[index]);
                  }),
                  // PicAndText(list[3], info[3]),
                ),
              ),
              // 小圆点
              dot()
            ],
          ),
        ),
      ),
    );
  }

// 引导页面设置
  Container PicAndText(String image, String messges) {
    return Container(
      padding: EdgeInsets.all(30),
      color: Colors.grey.withAlpha(50),
      child: Column(
        children: [
          // 使用百分比进行布局
          FractionallySizedBox(
            widthFactor: 1,
            // heightFactor: 0.5,
            child: Container(
              padding: EdgeInsets.all(30),
              height: 500,
              // color: Colors.grey,
              child: Column(
                children: [
                  // 放置图片
                  Container(
                    width: 400,
                    height: 300,
                    margin: EdgeInsets.only(bottom: 20),
                    decoration: BoxDecoration(
                      image: DecorationImage(image: AssetImage(image)),
                      color: Colors.cyan,
                    ),
                  ),
                  // 放置文本
                  Container(
                    width: 400,
                    height: 100,
                    // 当页面在第五页的时候,显示网络设置按钮
                    child: index != 4
                        ? Text(
                            messges,
                            style: TextStyle(fontSize: 18),
                          )
                        : Row(
                            mainAxisAlignment: MainAxisAlignment.spaceAround,
                            children: [
                              // 点击按钮弹出对话框
                              ElevatedButton(
                                  onPressed: () {
                                    // 对话框
                                    showDialog(
                                        context: context,
                                        builder: (context) {
                                          return AlertDialog(
                                            actionsAlignment:
                                                MainAxisAlignment.center,
                                            title: Text('网络配置'),
                                            // 内容部分用容器->Column放置 IP地址和 端口号对话框
                                            content: Container(
                                              height: 160,
                                              child: Column(
                                                crossAxisAlignment:
                                                    CrossAxisAlignment.start,
                                                children: [
                                                  Text("当前ip地址:${ipAddress}"),
                                                  TextField(
                                                    decoration: InputDecoration(
                                                        hintText: "请输入新的IP地址"),
                                                    onChanged: (value) {
                                                      setState(() {
                                                        ipAddress = value;
                                                        print(value);
                                                      });
                                                    },
                                                  ),
                                                  Spacer(),
                                                  Text("当前端口号:${portNumber}"),
                                                  TextField(
                                                    decoration: InputDecoration(
                                                        hintText: "请输入新的端口号"),
                                                    onChanged: (value) {
                                                      setState(() {
                                                        portNumber = value;
                                                        print(value);
                                                      });
                                                    },
                                                  ),
                                                ],
                                              ),
                                            ),
                                            // 放置确认按钮,用于退出这个对话框
                                            actions: [
                                              ElevatedButton(
                                                child: Text('确认'),
                                                onPressed: () {
                                                  Navigator.of(context)
                                                      .pop("ok");
                                                },
                                              ),
                                            ],
                                          );
                                        });
                                  },
                                  child: Text("显示网络设置")),
                              // 进入主页的按钮
                              ElevatedButton(
                                  onPressed: () {
                                    setState(() {
                                      Navigator.of(context)
                                          .pushNamed("/indexpage");
                                    });
                                  },
                                  child: Text("进入主页")),
                            ],
                          ),
                    decoration: BoxDecoration(
                      borderRadius: BorderRadius.all(Radius.circular(20)),
                      color: Colors.white,
                    ),
                    alignment: Alignment.center,
                  ),
                ],
              ),
            ),
          )
        ],
      ),
    );
  }
// 小圆点
  Padding dot() {
    return Padding(
      padding: EdgeInsets.only(top: 20),
      child: Row(
        mainAxisAlignment: MainAxisAlignment.center,
        children: [
          Container(
            width: 10,
            height: 10,
            decoration: BoxDecoration(
                borderRadius: BorderRadius.all(Radius.circular(10)),
                color: index == 0 ? Colors.black : Colors.grey),
          ),
          Container(
            width: 10,
            height: 10,
            decoration: BoxDecoration(
                borderRadius: BorderRadius.all(Radius.circular(10)),
                color: index == 1 ? Colors.black : Colors.grey),
          ),
          Container(
            width: 10,
            height: 10,
            decoration: BoxDecoration(
                borderRadius: BorderRadius.all(Radius.circular(10)),
                color: index == 2 ? Colors.black : Colors.grey),
          ),
          Container(
            width: 10,
            height: 10,
            decoration: BoxDecoration(
                borderRadius: BorderRadius.all(Radius.circular(10)),
                color: index == 3 ? Colors.black : Colors.grey),
          ),
          Container(
            width: 10,
            height: 10,
            decoration: BoxDecoration(
                borderRadius: BorderRadius.all(Radius.circular(10)),
                color: index == 4 ? Colors.black : Colors.grey),
          ),
        ],
      ),
    );
  }
}
效果图如下:
任务二 - 主页实现
输入框
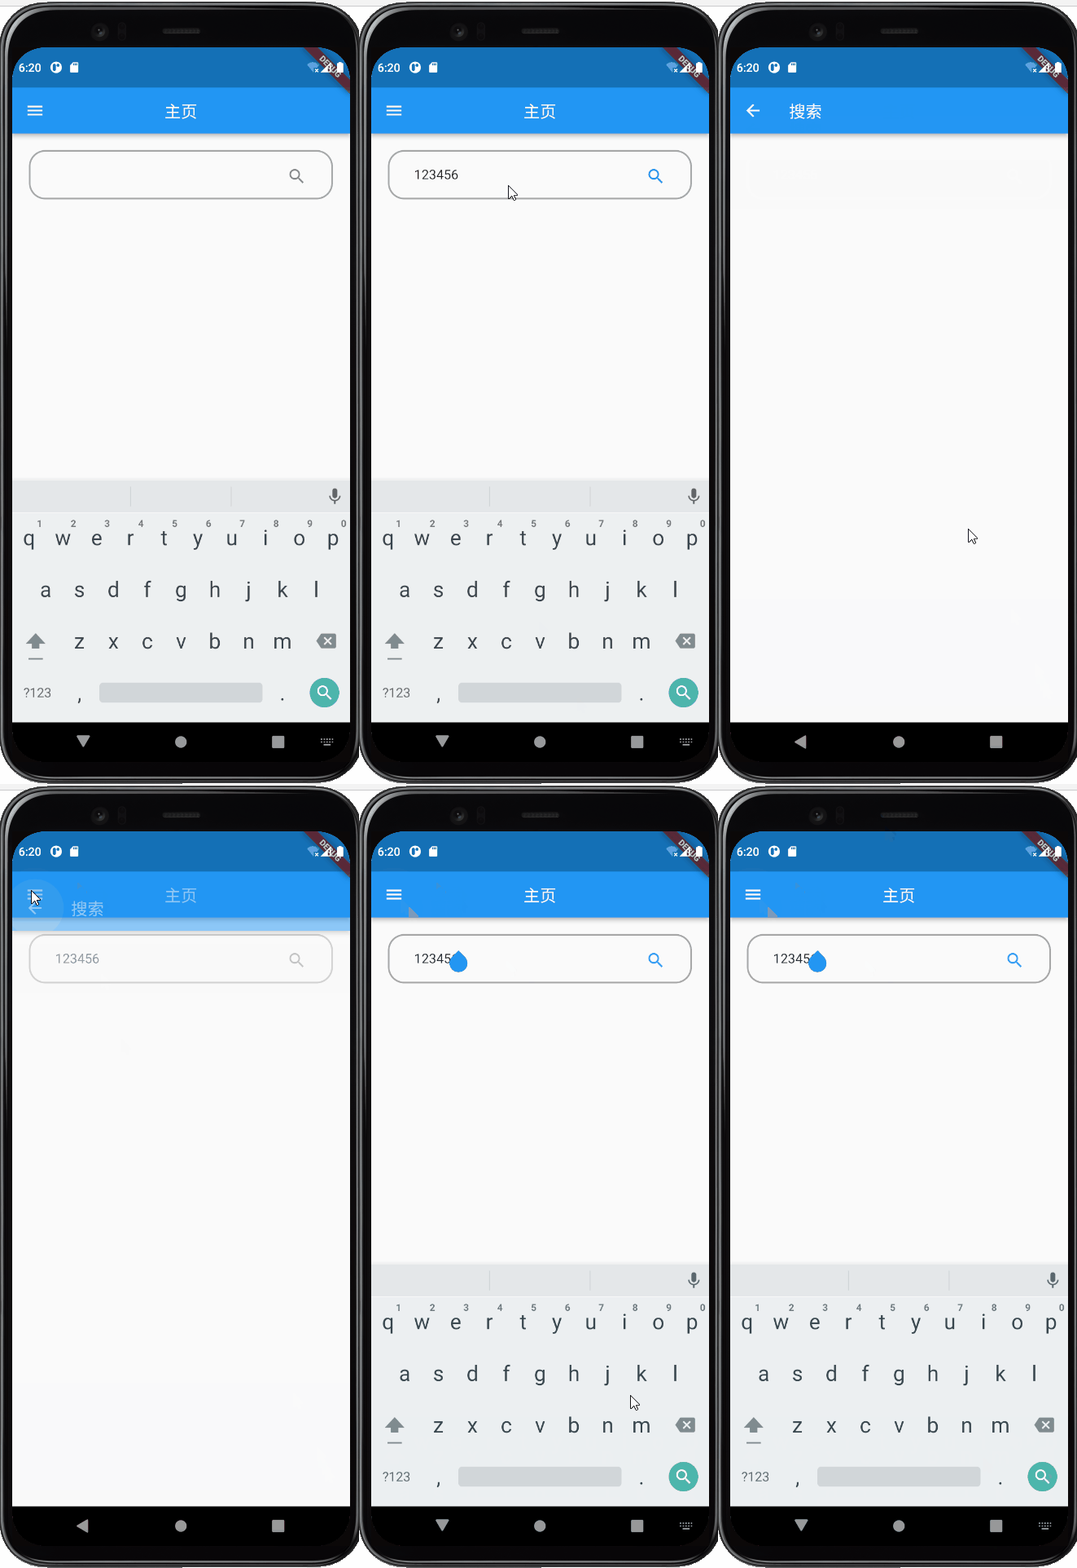
使用TextField组件实现,点击软件的搜索按钮即可跳转到相应页面,我们需要使用到路由的配置,所以需要在MyApp中添加routes:
routes: {
        "/guidepage":(context) => guidePage(),
        "/indexpage":(context)=>indexPage(),
        "/searchpage":(context)=>searchPage(),
      },
下面将输入框的实现
Container(
              alignment: Alignment.center,
              margin: EdgeInsets.all(20),
              padding: EdgeInsets.all(18),
              width: size.width * 0.9,
              height: 60,
              decoration: BoxDecoration(
                  border: Border.all(color: Color(0x55000000), width: 2),
                  borderRadius: BorderRadius.all(Radius.circular(20))),
              child: TextField(
                decoration: InputDecoration(
                    suffixIcon: Icon(Icons.search),
                    // 将输入框内的下滑线变为透明的
                    focusedBorder: OutlineInputBorder(
                        borderSide: BorderSide(color: Color(0x00FF0000))),
                    // 将输入框内的下滑线变为透明的
                    enabledBorder: OutlineInputBorder(
                        borderSide: BorderSide(color: Color(0x00FF0000)))),
                // 设置软件盘的搜索按钮
                textInputAction: TextInputAction.search,
                // 提交回调方法,点击软键盘的搜索按钮时,跳转到相应页面
                onSubmitted: (v) {
                  print(v);
                  // 路由跳转
                  Navigator.of(context).pushNamed("/searchpage");
                },
              ),
            ),
然后searchPage页面代码如下:
import 'package:flutter/material.dart';

class searchPage extends StatefulWidget {
  const searchPage({Key? key}) : super(key: key);

  @override
  _searchPageState createState() => _searchPageState();
}

class _searchPageState extends State<searchPage> {
  @override
  Widget build(BuildContext context) {
    return Scaffold(appBar: AppBar(title: Text("搜索"),),
    body: Container(),);
  }
}
轮播图
在制作轮播的时候,我使用的是PageView组件实现,但是这个组件实现这个轮播的效果没有第三方插件flutter_swiper组件,特别好用!
使用PageVige
在制作轮播图的时候,只需要将图片的路径放置在一个列表当中,将当前下标的索引值和列表的长度进行取余,就可以实现轮播效果。
比如:当前下标值=1,而列表的长度=5,取余就是1;当前下标值=2,而列表的长度=5,取余就是2…当前下标值=5,而列表的长度=5,取余就是0;当前下标值=6,而列表的长度=5,取余就是1…懂我意思吧。
刚刚是如何取图片,现在说
Container(
              width: size.width,
              height: size.height * 0.25,
              child: PageView.builder(
                itemBuilder: (context, index) {
                  return Image.asset(
                    list[index % list.length], // 对当前页面下标进行取余,这样就可以实现无限轮播,
                    fit: BoxFit.cover,
                  );
                },
                onPageChanged: (index) {
                  setState(() {
                    _curIndex = index; // 将当前页面的下标取出,可以搭配进度指示器使用
                  });
                },
              ),
            ),
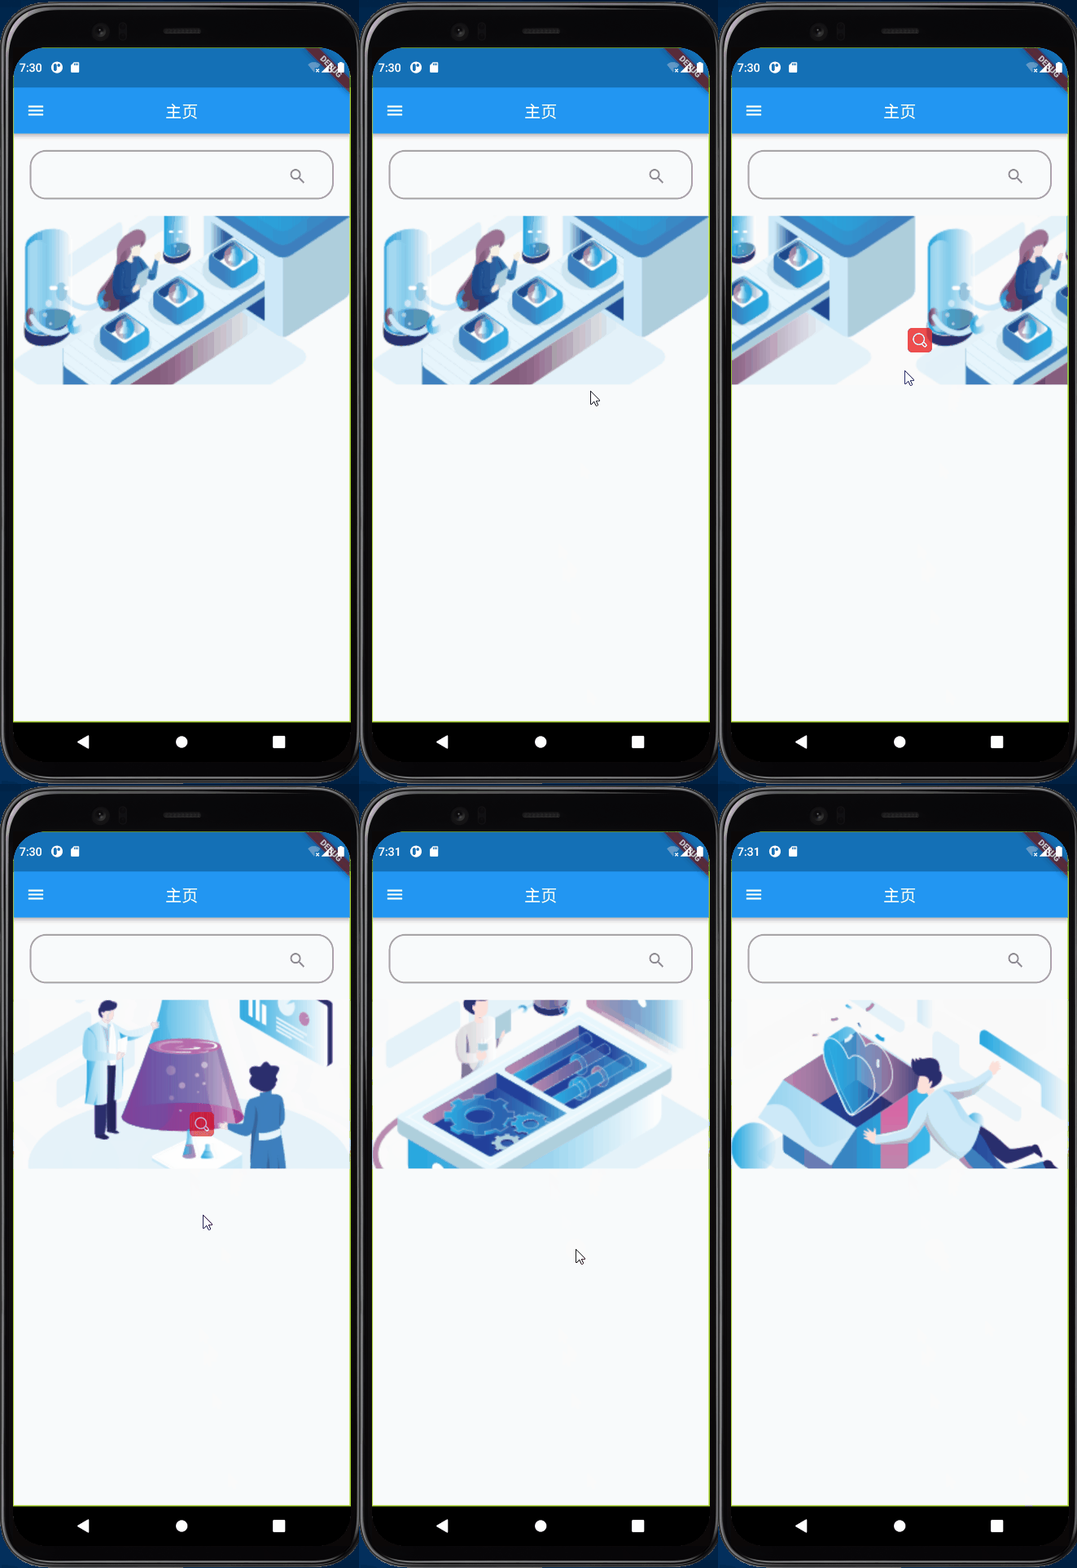
效果如下:
注:请忽略有道翻译的图标,因为作者本人英语差,有些单词需要通过翻译才能知道其意思。
自动轮播
虽然实现了自动轮播的效果,但是开头不能自动轮播,需要去划他一下才可以动,懂我意思吧。
 Container(
   width: size.width,
   height: size.height * 0.25,
   // color: Colors.redAccent,
   child: PageView.builder(
     itemBuilder: (context, index) {
       return GestureDetector(
         onTap: () => Navigator.of(context).pushNamed("/infopage"),
         child: Image.asset(
           list[_curIndex % list.length], // 对当前页面下标进行取余,这样就可以实现无限轮播,
           fit: BoxFit.cover,
         ),
       );
     },
     onPageChanged: (index) {
       setState(() {
         _curIndex = index; // 将当前页面的下标取出
         // 计时器,让播图动起来
         Timer _timer =
             Timer.periodic(new Duration(seconds: 3), (timer) {
           setState(() {
             _curIndex++;
             print(_curIndex);
           });
         });
         if (_curIndex >= 5) {
           setState(() {
             _timer.cancel();
             print("计数器已停止!");
           });
         }
       });
     },
   ),
 )
服务入口
在这里,我是用的是Table实现,顾名思义,就是表格布局,由于后面的任务中的预约车检入口需要单独设置,所以通过判断是是第一个服务入口,
代码如下:
import 'package:flutter/material.dart';
import 'package:smartcity/Constant/constant.dart';
import 'application_service_entrance.dart';
import 'appointmentpage.dart';

// 这里面放置的是服务页面的入口

class applicationSeverce extends StatelessWidget {
  applicationSeverce({Key? key}) : super(key: key);

  // 创建对象
  User user = User();

  @override
  Widget build(BuildContext context) {
    Size size = MediaQuery.of(context).size;
    return Container(
      margin: EdgeInsets.symmetric(vertical: 20),
      width: size.width * 0.8,
      height: 130,
      child: SingleChildScrollView(
        // 使用表格布局
        child: Table(
          children: [
            // 表格的每一行
            TableRow(
                // 创建5个单元格
                children: List.generate(5, (index) {
              return TableCell(
                // 封装了图片和文字描述信息
                child: Column(
                  children: [
                    GestureDetector(
                      onTap: () {

                        // 通过判断是否是第一个页面,如果他的下标不为零,那么就是其他服务页面
                        if (index != 0) {
                          Navigator.push(
                              context,
                              MaterialPageRoute(
                                  builder: (context) =>
                                      applicationServiceEntrance(
                                        // 为对应页面传递相应的页面名称,用下标值取名
                                        text: user.info[index],
                                        appFlag: index == 0 ? true : false,
                                      )));
                        } else {
                          Navigator.push(
                              context,
                              MaterialPageRoute(
                                  builder: (context) => Appointment()));
                        }
                      },
                      child: ClipOval(
                        child: Container(
                          width: 40,
                          height: 40,
                          decoration: BoxDecoration(
                              image: DecorationImage(
                                  image: AssetImage(user.list[index]),
                                  fit: BoxFit.cover)),
                        ),
                      ),
                    ),
                    Text(user.info[index])
                  ],
                ),
              );
            })),
            TableRow(
                // 创建5个单元格
                children: List.generate(5, (index) {
              return TableCell(
                // 封装了图片和文字描述信息
                child: GestureDetector(
                  onTap: () => Navigator.push(
                      context,
                      MaterialPageRoute(
                          builder: (context) => applicationServiceEntrance(
                                // 为对应页面传递相应的页面名称,用下标值取名
                                text: user.info[index + 5],
                                // 设置是否显示服务页面的底部导航栏
                                appFlag: false,
                              ))),
                  child: index != 4
                      ? Column(
                          children: [
                            ClipOval(
                              child: Container(
                                width: 40,
                                height: 40,
                                decoration: BoxDecoration(
                                    image: DecorationImage(
                                        image: AssetImage(user.list[index + 5]),
                                        fit: BoxFit.cover)),
                              ),
                            ),
                            Text(user.info[index + 5])
                          ],
                        )
                      : Container(
                          margin: EdgeInsets.only(top: 20),
                          child: Text(user.info[index + 5])),
                ),
              );
            })),
          ],
        ),
      ),
    );
  }
}
在这里我们需要单独设置除第一个服务页面之外的另外9个服务共同页面:
// ignore_for_file: prefer_const_literals_to_create_immutables, prefer_const_constructors

import 'package:flutter/material.dart';
import 'package:smartcity/Page/page.dart';

// 这里面放置的是除第一个服务页面之外的服务页面

class applicationServiceEntrance extends StatelessWidget {
  applicationServiceEntrance(
      {Key? key, required this.text, required this.appFlag})
      : super(key: key);
  final String text;
  final bool appFlag;

  @override
  Widget build(BuildContext context) {
    return Scaffold(
      appBar: AppBar(
        leading: appFlag == false
            ? null
            : TextButton(
                onPressed: () => Navigator.push(
                    context, MaterialPageRoute(builder: (context) => page())),
                child: Text(
                  "返回",
                  style: TextStyle(color: Colors.white),
                ),
              ),
        title: Text(text),
        centerTitle: true,
      ),
      body: Container(),
    );
  }
}
效果如下:
热门主题模块
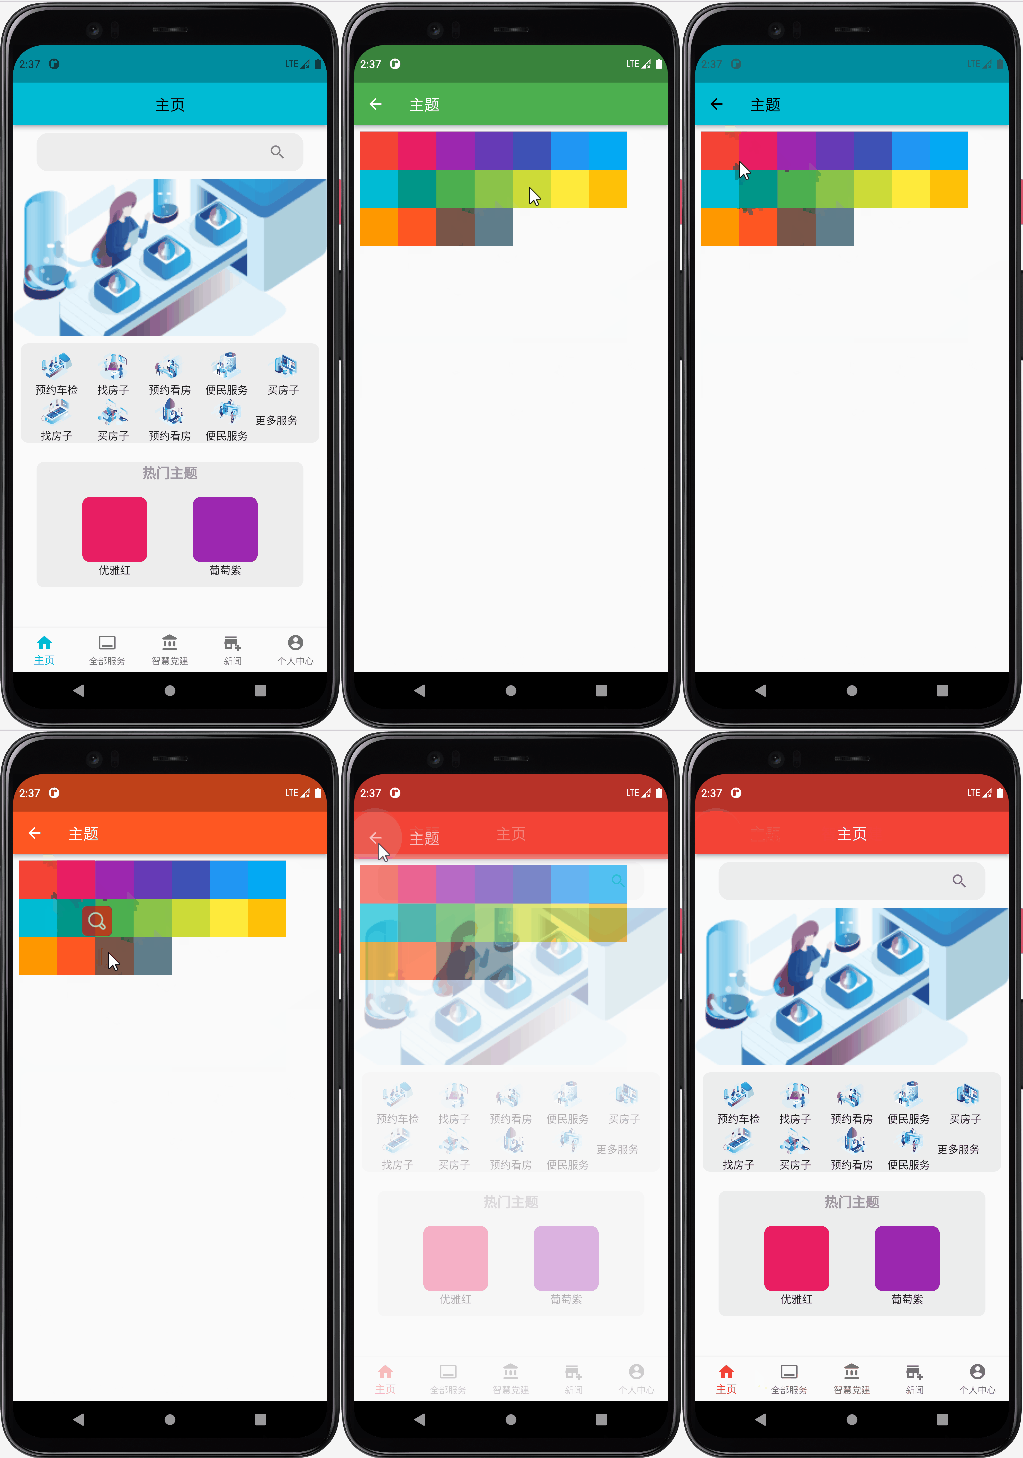
点击热门主题可改变当前的主题颜色,当屏幕宽度大于600时就可以显示4个,这里使用的是LayoutBuilder进行获取屏幕的尺寸,并进行判断。
// 显示热门主题模块
        Container(
          width: size.width * 0.85,
          height: size.height * 0.2,
          padding: EdgeInsets.symmetric(horizontal: 30),
          margin: EdgeInsets.all(15),
          decoration: BoxDecoration(
              borderRadius: BorderRadius.circular(10),
              color: Color(0xffededed)),
          child: GestureDetector(
            onTap: () {
              Navigator.push(context,
                  MaterialPageRoute(builder: (context) => ThemePage()));
            },
            child: Column(
              children: [
                Row(
                  mainAxisAlignment: MainAxisAlignment.center,
                  children: [
                    Text(
                      "热门主题",
                      style: TextStyle(
                          fontSize: 18,
                          color: Colors.grey,
                          fontWeight: FontWeight.w600),
                    )
                  ],
                ),
                LayoutBuilder(builder: (context, constrains) {
                  if (constrains.maxWidth < 600) {
                    return Container(
                      margin: EdgeInsets.only(top: 20),
                      child: Row(
                        mainAxisAlignment: MainAxisAlignment.spaceAround,
                        children: [
                          colorBlock(Colors.primaries[1], "优雅红"),
                          colorBlock(Colors.primaries[2], "葡萄紫"),
                        ],
                      ),
                    );
                  } else {
                    return Container(
                      margin: EdgeInsets.only(top: 20),
                      child: Row(
                        mainAxisAlignment: MainAxisAlignment.spaceAround,
                        children: [
                          colorBlock(Colors.primaries[1], "优雅红"),
                          colorBlock(Colors.primaries[2], "葡萄紫"),
                          colorBlock(Colors.primaries[3], "靛蓝紫"),
                          colorBlock(Colors.primaries[4], "笔墨蓝"),
                        ],
                      ),
                    );
                  }
                }),
              ],
            ),
          ),
        )
我们需要创建一个文件来放置热门主题页面,对于颜色,我还是来所说吧,我使用的是Flutter中的Colors.primaries[index],这是一个颜色列表,里面放置了18种颜色,源码我放在下面。
由于我们需要改变它的状态,所以引进Flutter的状态管理第三方包 - - Provider,
class ThemePage extends StatefulWidget {
  const ThemePage({Key? key}) : super(key: key);

  @override
  _ThemePageState createState() => _ThemePageState();
}

class _ThemePageState extends State<ThemePage> {
  @override
  Widget build(BuildContext context) {
    return Scaffold(
      appBar: AppBar(
        title: Text("主题"),
      ),
      body: Padding(
        padding: const EdgeInsets.all(8.0),
        child: Wrap(children: [
          ...Colors.primaries.map((color) => Material(
                color: color,
                child: InkWell(
                  child: Container(
                    width: 50,
                    height: 50,
                  ),
                  onTap: () {
                  // 通过 context 读取到 ColorThemeProvider 这个类下面的 changeColor 方法
                    context
                        .read<ColorThemeProvider>()
                        .changeColor(color: color);
                  },
                ),
              ))
        ]),
      ),
    );
  }
}
然后,我们需要创建一个类继承自ChangeNotifier这个类,主要用于监听状态是否发生改变。
class ColorThemeProvider extends ChangeNotifier {
  late MaterialColor _color;

  // get 方法
  MaterialColor get color => _color;

  // 构造函数
  ColorThemeProvider() {
    _color = Colors.yellow;
  }

  // 改变颜色,可选命名参数默认为 yellow
  void changeColor({MaterialColor color = Colors.yellow}) {
    _color = color;
    // 调用 通知监听器 进行改变
    notifyListeners();
  }
}
之后我们去改变MaterialApp的primarySwatch。
class MyApp extends StatefulWidget {
  MyApp({Key? key}) : super(key: key);

  @override
  State<MyApp> createState() => _MyAppState();
}

class _MyAppState extends State<MyApp> {
  @override
  Widget build(BuildContext context) {
  	// 变更通知提供者
    return ChangeNotifierProvider<ColorThemeProvider>(
        create: (context) => ColorThemeProvider(),
        child: Consumer<ColorThemeProvider>(
          builder: (context, colorThemeProvider, child) => MaterialApp(

            title: "SmartCity",
            theme: ThemeData(

            // 使用改变之后的颜色,默认是 yellow
              primarySwatch: colorThemeProvider.color,

            ),
            debugShowCheckedModeBanner: false,
            home: Scaffold(
              body: GuidePage(),
              // body: Test(),
            ),
          ),
        ));
  }
}
新闻专栏
制作新闻,我们肯定少不了数据来源,由于懒得找新鲜图片,我们还是将就之前的图片来用,但是用户的评论这些就需要我们来造,懂得都懂,
看下面我造的数据,简洁明了。
import 'package:flutter/material.dart';

class User {
  // 图片路径
  final List list = [
    "assets/images/1.png",
    "assets/images/2.png",
    "assets/images/3.png",
    "assets/images/4.png",
    "assets/images/5.png",
    "assets/images/5.png",
    "assets/images/6.png",
    "assets/images/7.png",
    "assets/images/8.png",
    "assets/images/9.png",
  ];

  // 图片说明
  final List info = [
    "预约检车",
    "找房子",
    "设备设置",
    "云端管理",
    "政府工作",
    "错误排查",
    "随赠品",
    "火箭发射",
    "协同工作",
    "更多服务"
  ];

  // news paper
  List newsPaperMessage = [
    "预约检修,非常安逸,来了的人都说安逸得很,预约检修,非常安逸,来了的人都说安逸得很,很多人都来",
    "找房子,非常安逸,来了的人都说安逸得很,预约检修,非常安逸,来了的人都说安逸得很,很多人都来",
    "预约检修,非常安逸,来了的人都说安逸得很,预约检修,非常安逸,来了的人都说安逸得很,很多人都来",
    "预约检修,非常安逸,来了的人都说安逸得很,预约检修,非常安逸,来了的人都说安逸得很,很多人都来",
    "预约检修,非常安逸,来了的人都说安逸得很,预约检修,非常安逸,来了的人都说安逸得很,很多人都来",
    "预约检修,非常安逸,来了的人都说安逸得很,预约检修,非常安逸,来了的人都说安逸得很,很多人都来",
    "预约检修,非常安逸,来了的人都说安逸得很,预约检修,非常安逸,来了的人都说安逸得很,很多人都来",
    "预约检修,非常安逸,来了的人都说安逸得很,预约检修,非常安逸,来了的人都说安逸得很,很多人都来",
    "预约检修,非常安逸,来了的人都说安逸得很,预约检修,非常安逸,来了的人都说安逸得很,很多人都来",
    "预约检修,非常安逸,来了的人都说安逸得很,预约检修,非常安逸,来了的人都说安逸得很,很多人都来",
  ];
  // 新闻评论
  List newsPaperPerson = [
    "163","663","526","26","566","656","546","496","652","659"
  ];
  // 新闻发布时间,切记时间别当真哈
  List newsPaperTime = [
    "2023/05/26",
    "2026/07/14",
    "2015/08/13",
    "2056/04/24",
    "2012/12/24",
    "2013/11/29",
    "2055/07/24",
    "2046/06/16",
    "2046/05/13",
    "2013/01/26",
  ];

}
下面就是我们的UI代码:
// 显示新闻专栏
          Container(
            decoration: BoxDecoration(
              borderRadius: BorderRadius.all(Radius.circular(18)),
              color: Color(0XFFEDEDED),
            ),
            margin: EdgeInsets.symmetric(vertical: 20),
            padding: EdgeInsets.all(10),
            width: size.width * 0.85,
            // height: size.height * 0.18,
            child: Column(
              crossAxisAlignment: CrossAxisAlignment.start,
              children: [
              Text(
              "新闻专栏",
              style: TextStyle(
                  fontSize: 19,
                  fontWeight: FontWeight.bold,
                  color: Colors.black54),
            ),
            Column(children: List.generate(10, (index) => message(size, index)),)
            ],
          ),
        ),
        ],
      ),
    ),)
    ,
    );
  }

// 封装起来
  Widget message(Size size,int index) {
    return Container(
      padding: EdgeInsets.all(5),
      margin: EdgeInsets.only(top: 15),
      width: size.width * 0.8,
      height: size.height * 0.3,
      decoration: BoxDecoration(
          border: Border.all(color: Colors.white),
          borderRadius: BorderRadius.all(Radius.circular(20))),
      child: ListView(
        children: [
          Container(
            height: 150,
            child: Image.asset(user.list[index]),
          ),
          SizedBox(
            height: 0.01,
          ),
          // 新闻标题
          Text(
            user.info[index],
            style: TextStyle(fontSize: 17),
          ),
          SizedBox(
            height: size.height * 0.01,
            width: 10,
          ),
          // 新闻内容
          Text(
            user.newsPaperMessage[index],
            overflow: TextOverflow.ellipsis,
          ),
          SizedBox(
            height: size.height * 0.01,
            width: 10,
          ),
          // 评论人数和发布日期
          Row(
            mainAxisAlignment: MainAxisAlignment.spaceBetween,
            children: [
              Text("${user.newsPaperPerson[index]}人评论"),
              Text("${user.newsPaperTime[index]}")
            ],
          )
        ],
      ),
    );
  }
样式如下:
底部导航栏
上面那两张图片中可以看到我已经将底部导航栏做出来之后才开始写在这篇博客中的,现在我就做介绍怎么制作的。
由于刚开始写这个App的时候没有考虑好脚手架该放在哪,现在只有靠投机取巧的方式进行拼接,无碍,这只是多了一点逻辑代码而已,不影响我们的操作。
首先,我们需要创建一个文件,里面放置我们的各个页面,如下:
// 放置各个页面
final List<Widget> pages = [
    indexPage(),
    All_Severce(),
    SmartPartyBuilding(),
    NewsPaperPage(),
    PersonPage()
  ];
然后,我们需要分别创建另外四个页面:全部服务、智慧党建、新闻、个人中心。
结构如下:
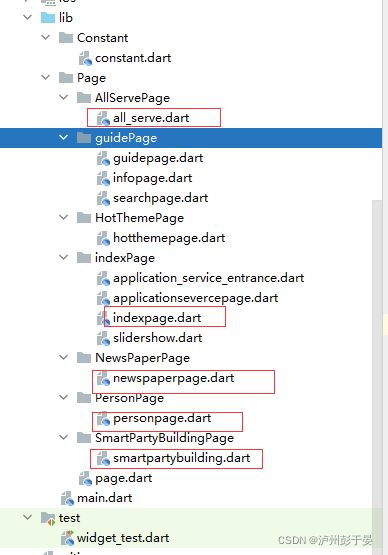
哦,我将主页也划上了圈,大家知道这并不影响我们的代码,对吧。
其次,我们再实现底部导航栏,在这里我又创建了Scaffold,毕竟只有脚手架才能创建底部导航栏:
class _pageState extends State<page> {
  // bottomCurIndex游标位置
  int _bottomCurIndex = 0;

  // 页面列表
  final List<Widget> pages = [
    indexPage(),
    All_Severce(),
    SmartPartyBuilding(),
    NewsPaperPage(),
    PersonPage()
  ];

  @override
  Widget build(BuildContext context) {
    return Scaffold(
    // 根据游标进行显示所需的页面
      body: pages[_bottomCurIndex],
      // 底部导航栏
      bottomNavigationBar: BottomNavigationBar(
      // 这个等会我放两张图片你就懂了
        type: BottomNavigationBarType.fixed,
        // 回调方法
        onTap: (v) {
          setState(() {
          // 回调方法,将回调的结果给 _bottomCurIndex 进行储存
            _bottomCurIndex = v;
          });
        },
        // 放置多个 BottomNavigationBarItem()
        items: const [
          BottomNavigationBarItem(
              icon: Icon(Icons.home),
              label: "首页",
              backgroundColor: Colors.teal),
          BottomNavigationBarItem(
              icon: Icon(Icons.admin_panel_settings),
              label: "全部服务",
              backgroundColor: Colors.teal),
          BottomNavigationBarItem(
              icon: Icon(Icons.assignment),
              label: "智慧党建",
              backgroundColor: Colors.teal),
          BottomNavigationBarItem(
              icon: Icon(Icons.bookmark_outline),
              label: "新闻",
              backgroundColor: Colors.teal),
          BottomNavigationBarItem(
              icon: Icon(Icons.account_box),
              label: "个人中心",
              backgroundColor: Colors.teal),
        ],
        // 当前游标位置
        currentIndex: _bottomCurIndex,
        // showSelectedLabels: true,
        // 显示未选中的标签
        showUnselectedLabels: true,
      ),
    );
  }
}
任务三 - 预约检车功能模块描述
现在开始我们的任务三之旅,预约检车功能模块描述。
预约车检
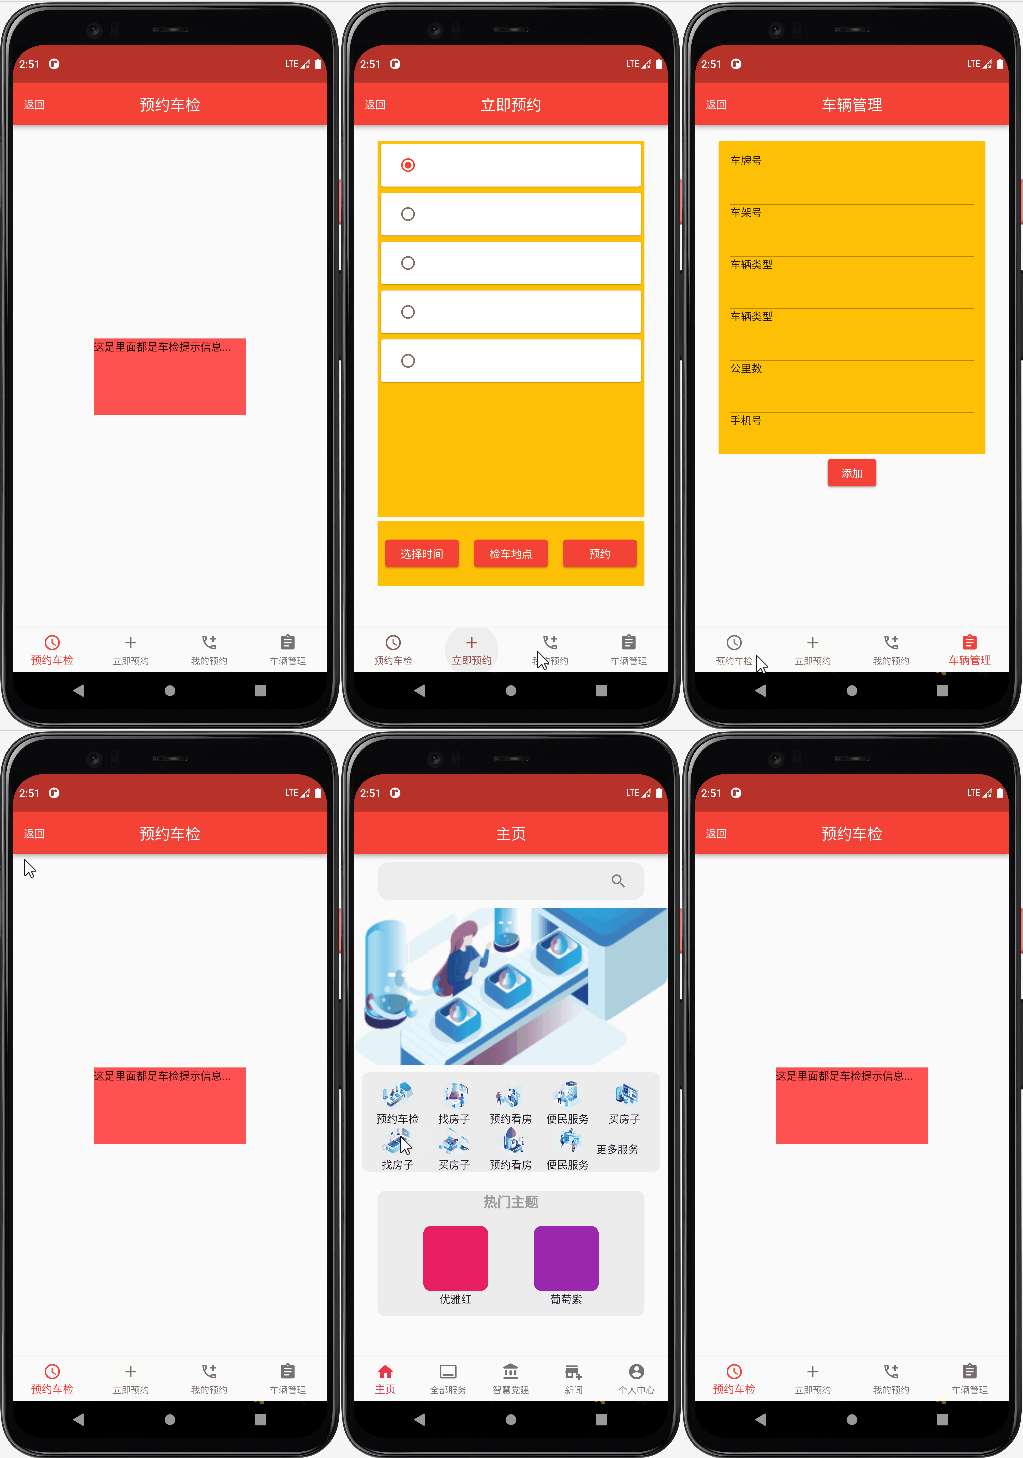
点击主页的预约车检图标入口,就可以进入到我们预约车检的界面,所以我们需要将主页的服务入口进行设置,并且我们还需要创建一个文件进行放置预约车检的页面:
// 服务入口
Container(
  margin: EdgeInsets.all(10),
  decoration: BoxDecoration(
      color: Color(0xffededed),
      borderRadius: BorderRadius.all(Radius.circular(10))),
  alignment: Alignment.center,
  width: size.width,
  height: 130,
  // color: Colors.orange,
  padding: EdgeInsets.all(10),
  child: Table(children: [
    TableRow(
      children: List.generate(
        5,
        (index) => TableCell(
          child: GestureDetector(
            onTap: () {
              if (index == 0) {
                Navigator.push(
                    context,
                    MaterialPageRoute(
                        builder: (context) => ServicePage()));
              } else if (index == 1) {
                Navigator.push(
                    context,
                    MaterialPageRoute(
                        builder: (context) => IndexSearchHouse()));
              } else {
                Navigator.push(
                    context,
                    MaterialPageRoute(
                        builder: (context) => Scaffold(
                              appBar: AppBar(
                                title: Text(user.imageName[index]),
                              ),
                            )));
              }
            },
            child: Column(
              children: [
                ClipOval(
                  child: Container(
                    width: 40,
                    height: 40,
                    decoration: BoxDecoration(
                        image: DecorationImage(
                            image: AssetImage(user.imageList[index]))),
                  ),
                ),
                Text(user.imageName[index])
              ],
            ),
          ),
        ),
      ),
    ),
    TableRow(
        children: List.generate(
            5,
            (index) => TableCell(
                    child: GestureDetector(
                  onTap: () {
                    if (index != 4) {
                      Navigator.push(
                          context,
                          MaterialPageRoute(
                              builder: (context) => Scaffold(
                                    appBar: AppBar(
                                      title: Text(
                                          user.imageName[index + 5]),
                                    ),
                                  )));
                    } else {
                      Navigator.push(
                          context,
                          MaterialPageRoute(
                              builder: (context) => Scaffold(
                                    appBar: AppBar(
                                      title: Text("更多服务"),
                                    ),
                                  )));
                    }
                  },
                  child: index != 4
                      ? Column(
                          children: [
                            Container(
                              alignment: Alignment.center,
                              width: 40,
                              height: 40,
                              decoration: BoxDecoration(
                                  image: DecorationImage(
                                      image: AssetImage(
                                          user.imageList[index + 5]))),
                            ),
                            Text(user.imageName[index + 5])
                          ],
                        )
                      : Container(
                          child: Text("更多服务"),
                          margin: EdgeInsets.only(top: 20),
                        ),
                ))))
  ]),
)
创建一个预约车检的文件,这个文件放置的是第一个服务入口进来的页面。
// 预约车检主页
// ignore_for_file: prefer_const_literals_to_create_immutables, prefer_const_constructors

import 'package:flutter/material.dart';
import 'package:smartcity/Constants/constants.dart';
import 'package:smartcity/Page/ServicePage/car_managepage.dart';

import 'index_appointmentpage.dart';
import 'my_appointmentpage.dart';
import 'promptly_appointmentpage.dart';

class ServicePage extends StatefulWidget {
  const ServicePage({Key? key}) : super(key: key);

  @override
  _ServicePageState createState() => _ServicePageState();
}

int curBtb = 0;

class _ServicePageState extends State<ServicePage> {
  // 创建常量对象
  final User _user = User();

  // 当加载该页面的时候就调用这个方法
  @override
  void initState() {
    _user.getCarData();
  }

  @override
  Widget build(BuildContext context) {
    Size size = MediaQuery.of(context).size;

    // 各个页面
    List<Widget> _btnBody = [
      // 主页
      index_appointmentPage(),
      // 立即预约页面
      promptly_appointmentPage(),
      // 我的预约页面
      my_appointmentPage(),
      // 车辆管理页面
      car_managePage()
    ];

    return Scaffold(
      appBar: AppBar(
        title: Text(_user.appointment_btbName[curBtb]),
        centerTitle: true,
        leading: TextButton(
          onPressed: () {
            Navigator.pop(context);
          },
          child: Text(
            "返回",
            style: TextStyle(color: Colors.white),
          ),
        ),
      ),
      body: _btnBody[curBtb],
      bottomNavigationBar: BottomNavigationBar(
        onTap: (v) {
          setState(() {
            curBtb = v;
          });
        },
        type: BottomNavigationBarType.fixed,
        currentIndex: curBtb,
        items: [
          BottomNavigationBarItem(
              icon: Icon(Icons.access_time_sharp), label: "预约车检"),
          BottomNavigationBarItem(icon: Icon(Icons.add), label: "立即预约"),
          BottomNavigationBarItem(
              icon: Icon(Icons.add_ic_call_outlined), label: "我的预约"),
          BottomNavigationBarItem(
              icon: Icon(Icons.assignment_rounded), label: "车辆管理"),
        ],
      ),
    );
  }
}
车辆管理
import 'package:flutter/material.dart';
import 'package:smartcity/Constants/constants.dart';

class car_managePage extends StatefulWidget {
  const car_managePage({Key? key}) : super(key: key);

  @override
  _car_managePageState createState() => _car_managePageState();
}

class _car_managePageState extends State<car_managePage> {
  String carNum1 = "";
  String carNum2 = "";
  String carNum3 = "";
  String carNum4 = "";
  String carNum5 = "";
  String carNum6 = "";

  //
  final golkey = GlobalKey<FormState>();

  // 创建常量对象
  final User _user = User();

  @override
  Widget build(BuildContext context) {
    Size size = MediaQuery.of(context).size;
    return SingleChildScrollView(
      child: SizedBox(
        width: size.width,
        child: Form(
          key: golkey,
          child: Column(
            children: [
              Container(
                padding: EdgeInsets.all(15),
                margin: EdgeInsets.only(top: 20),
                width: size.width * 0.85,
                height: size.height * 0.5,
                color: Colors.amber,
                child: ListView(
                  children: [
                    Text("车牌号"),
                    TextFormField(
                      onSaved: (v) {
                        // print(v);
                        setState(() {
                          carNum1 = v!;
                        });
                      },
                    ),
                    Text("车架号"),
                    TextFormField(
                      onSaved: (v) {
                        setState(() {
                          carNum2 = v!;
                        });
                      },
                    ),
                    Text("车辆类型"),
                    TextFormField(
                      onSaved: (v) {
                        setState(() {
                          carNum3 = v!;
                        });
                      },
                    ),
                    Text("车辆类型"),
                    TextFormField(
                      onSaved: (v) {
                        setState(() {
                          carNum4 = v!;
                        });
                      },
                    ),
                    Text("公里数"),
                    TextFormField(
                      onSaved: (v) {
                        setState(() {
                          carNum5 = v!;
                        });
                      },
                    ),
                    Text("手机号"),
                    TextFormField(
                      onSaved: (v) {
                        setState(() {
                          carNum6 = v!;
                        });
                      },
                    ),
                  ],
                ),
              ),
              ElevatedButton(
                onPressed: () {
                  golkey.currentState!.save();
                  _user.createFile(carNum1 +
                      "," +
                      carNum2 +
                      "," +
                      carNum3 +
                      "," +
                      carNum4 +
                      "," +
                      carNum5 +
                      "," +
                      carNum6 +
                      "\n");
                },
                child: Text("添加"),
              )
            ],
          ),
        ),
      ),
    );
  }
}
立即预约
class my_appointmentPage extends StatefulWidget {
  const my_appointmentPage({Key? key}) : super(key: key);

  @override
  _my_appointmentPageState createState() => _my_appointmentPageState();
}

late int num;
// 取出值
getData()async{
  SharedPreferences prefs =await SharedPreferences.getInstance();
  num = prefs.getInt("CarInfo") ?? 0;
}

class _my_appointmentPageState extends State<my_appointmentPage> {
  @override
  Widget build(BuildContext context) {
    Size size = MediaQuery.of(context).size;
    return Container(
      alignment: Alignment.center,
      child: Column(
        children: [
          Container(
            width: size.width * 0.85,
            height: size.height * 0.6,
            color: Colors.amber,
            child: ListView(
              children: [
                SizedBox(
                  width: double.infinity,
                  // height: 100,
                  child: Card(
                      child: Container(
                    margin: const EdgeInsets.all(10),
                    child: Column(
                      children: [
                        // Text("车牌号:" + primary_data[CarInfo][0]),
                        // Text("车架号:" + primary_data[CarInfo][1]),
                        // Text("车辆类型:" + primary_data[CarInfo][2]),
                        // Text("手机号:" + primary_data[CarInfo][3]),
                        // Text("公里数:" + primary_data[CarInfo][4]),
                      ],
                    ),
                  )),
                )
              ],
            ),
          )
        ],
      ),
    );
  }
}
