Pytorch学习笔记(一)张量(Tensor)/ 变量(Variable)
基本数据结构:张量
- 张量(Tensor)
-
- Tensor与Variable
- 如何创建张量?
- 张量操作与线性回归
-
- 张量的操作
- 张量的数学运算
- 线性回归模型举例
张量(Tensor)
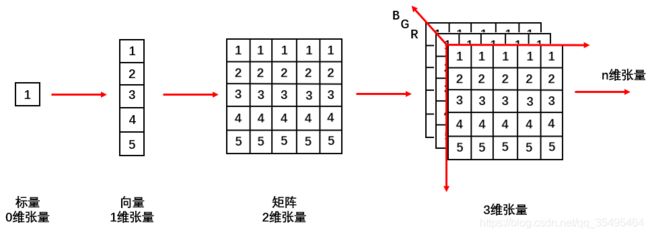
一个多维数组,它是标量、向量、矩阵的高维拓展
如图:
Tensor与Variable
Variable在 Pytorch0.4.0 之后就并入到了Tensor中。
torch.autograd.Variable 中的数据类型,主要用于封装Tensor,进行自动求导
- data:被包装的Tensor
- grad:data的梯度
- grad_fn:创建Tensor时所用的方法function
- requires_grad:指示是否需要梯度
- is_leaf:指示是否是叶子结点(张量)
torch.Tensor:
- dtype:张量的数据类型,如:
- torch.FloatTensor
- torch.cuda.FloatTensor
- torch.DoubleTensor
- torch.ShortTensor
- torch.IntTensor
- torch.LongTensor
- shape:张量的形状,如,(64,3,224,224)
- device:张量所在设备,GPU / CPU,是加速的关键
如何创建张量?
- 直接创建
- 依据数值创建
- 依据概率创建
一、直接创建
(1)torch.tensor():从data创建tensor
- data:数据,可以是list,numpy
- dtype:数据类型,默认与data一致
- device:所在设备,cuda / cpu
- requires_grad:是否需要梯度
- pin_memory:是否存于锁页内存
【CPU / GPU(cuda)上创建张量】
# 通过torch.tensor创建张量 在cpu设备上运行
import torch
import numpy as np
flag = True
if flag:
    arr = np.ones((3,3))
    print('ndarray的数据类型:',arr.dtype)

    # t = torch.tensor(arr,device = 'cuda')
    t = torch.tensor(arr)
    print(t)
# 通过torch.tensor创建张量
import torch
import numpy as np
flag = True
if flag:
    arr = np.ones((3,3))
    print('ndarray的数据类型:',arr.dtype)

    t = torch.tensor(arr,device = 'cuda') # GPU上,cuda
    # t = torch.tensor(arr)
    print(t)
(2)torch.from_numpy(ndarray):从numpy创建tensor
【注】
从tensor.from_numpy创建的tensor在原ndarray共享内存,当修改其中一个的数据,另外一个也将会被改动
flag = True
if flag:
    arr = np.array([[1,2,3],[4,5,6]])
    t = torch.from_numpy(arr)
    print("Numpy array:",arr)
    print("Tensor:",t)
    print()
    arr[0,0] = 7 # 共享内存,numpy和tensor一起变动
    print("Numpy array:", arr)
    print("Tensor:", t)
    print()
    t[0,0] = -2 # 共享内存,numpy和tensor一起变动
    print("Numpy array:", arr)
    print("Tensor:", t)
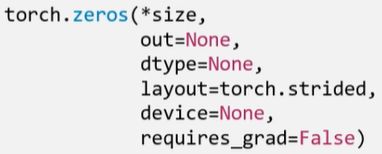
(1)torch.zeros():依size创建全0张量
- size:张量的形状,如,(3,3)、(3,224,224)等
- out:输出的张量
- layout:内存中布局形式,strided(默认),sparse_coo(稀疏张量情况)等
- device:所在设备,GPU / CPU
- requires_grad:是否需要梯度
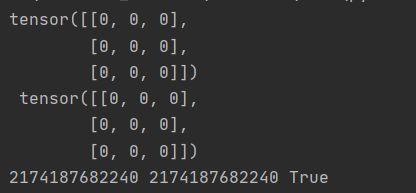
flag = True
if flag:
    out_t = torch.tensor([1])

    t = torch.zeros((3,3),out = out_t)
    print(t,'\t',out_t)
    print(id(t),id(out_t),id(t) == id(out_t)) # 同一个内存地址
(2)torch.zeros_like():依input形状创建全0张量
(3)torch.ones()
(4)torch.ones_like()
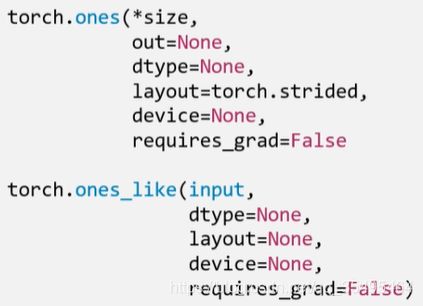
(5)torch.full()

(6)torch.full_like()
- 依input形状创建全(数值几就是全几)张量
- size:张量形状
- fill_value:张量的值
t = torch.full((3,3),1)
    print(t)
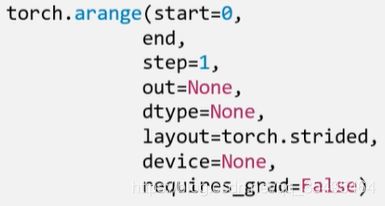
【注】数值区间为[start , end)(左闭右开:右边取不到)
- start:数列起始值
- end:数列“结束值”
- step:数列公差,默认为1
t = torch.arange(2,10,2)
    print(t)
【注】数值区间为[start , end](两边都可以取到)
- start:数列起始值
- end:数列结束值
- steps:数列长度
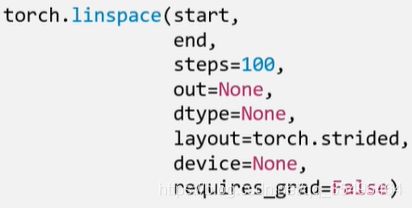
这里的步长s等于 e n d − s t a r t s t e p s − 1 \frac{end-start}{steps-1} steps−1end−start
t = torch.linspace(2,10,6)
    print(t)
![]()
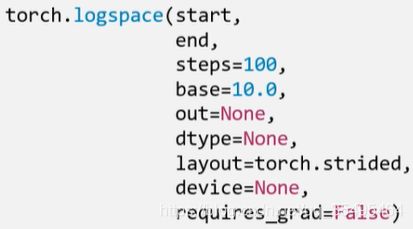
(9)torch.logspace():创建对数均分的1维张量
【注】长度为steps,底为base
- start:数列起始值
- end:数列结束值
- steps:数列长度
- base:对数函数的底,默认为10
t = torch.logspace(2,30,20,10)
    print(t)
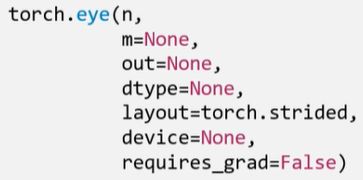
(10)torch.eye():创建单位对角矩阵(2维张量)
【注】默认为方阵
- n:矩阵行数
- m:矩阵列数
t = torch.eye(3,3)
    print(t)
三、依概率分布创建张量
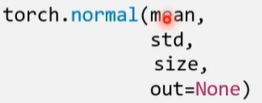
(1)torch.normal():生成正态分布(高斯分布)
- mean:均值
- std:标准差
四种模式:
- mean为标量,std为标量
# mean:标量 std:标量
    t_normal = torch.normal(0.,1.,size = (4,)) # 长度为size的张量
    print(t_normal)
- mean为标量,std为张量
# mean:标量 std:张量
    mean = 0
    std = torch.arange(1, 5, dtype=torch.float)
    t_normal = torch.normal(mean, std)
    print("mean:{}\nstd:{}".format(mean, std))
    print(t_normal)
- mean为张量,std为标量
# mean:张量 std:标量
    mean = torch.arange(1,5,dtype = torch.float)
    std = 1
    t_normal = torch.normal(mean,std)
    print("mean:{}\nstd:{}".format(mean,std))
    print(t_normal)
- mean为张量,std为张量
# mean:张量 std:张量
    mean = torch.arange(1,5,dtype = torch.float)
    std = torch.arange(1, 5, dtype=torch.float)
    t_normal = torch.normal(mean,std)
    print("mean:{}\nstd:{}".format(mean,std))
    print(t_normal)

(2)torch.randn() / torch.randn_like():生成标准正态分布
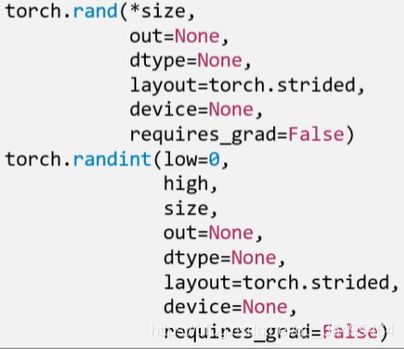
- size:张量形状
(3)torch.randint() / torch.randint_like():区间[low , high]生成整数均匀分布
- size:张量形状
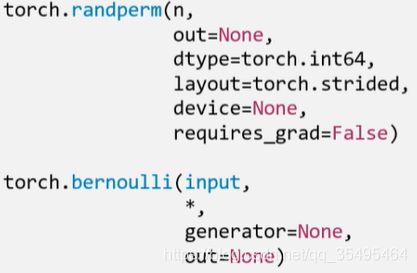
(4)torch.randperm():生成从0~n-1的随机排列
- n:张量的长度
(5)torch.bernoulli():以input为概率,生成伯努利分布(0-1分布、两点分布)
- input:概率值
张量操作与线性回归
张量的操作
- 拼接
- 切分
- 索引
- 变换
一、张量的拼接与切分
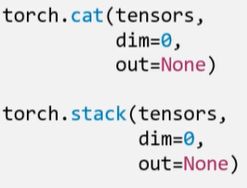
1.torch.cat():将张量按维度dim进行拼接
- tensors:张量序列
- dim:要拼接的维度
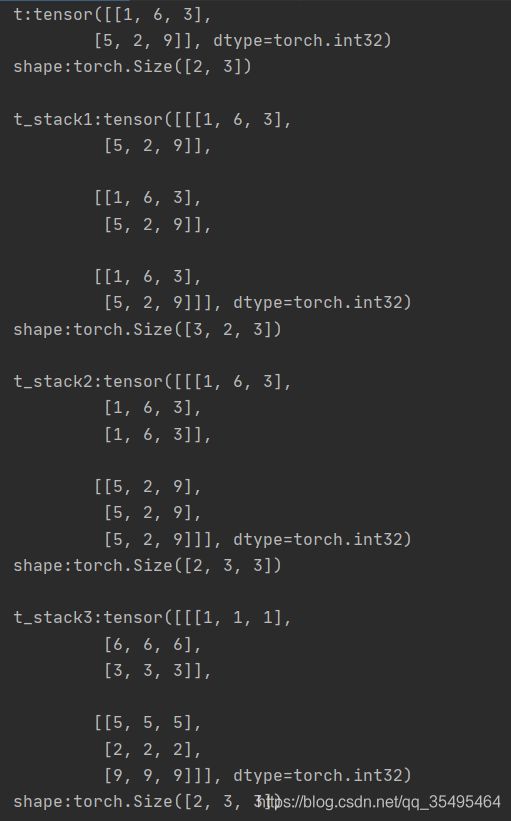
2.torch.stack():在新创建的维度dim上进行拼接(会扩张张量的维度)
t = torch.IntTensor([[1,6,3],[5,2,9]])
t_stack1 = torch.stack([t,t,t],dim = 0) # 在第0维度上增加一个张量维度,然后拼接
t_stack2 = torch.stack([t,t,t],dim = 1) # 在第1维度上增加一个张量维度,然后拼接
t_stack3 = torch.stack([t,t,t],dim = 2) # 在第2维度上增加一个张量维度,然后拼接
print("t:{}\nshape:{}\n".format(t,t.shape))
print("t_stack1:{}\nshape:{}\n".format(t_stack1,t_stack1.shape))
print("t_stack2:{}\nshape:{}\n".format(t_stack2,t_stack2.shape))
print("t_stack3:{}\nshape:{}\n".format(t_stack3,t_stack3.shape))
【stack】

3.torch.chunk():将张量按维度dim进行平均切分,返回一个张量列表
【注】若不能整除,最后一份张量会小于其他张量
- input:要切分的张量
- chunks:要切分的份数
- dim:要切分的维度
# 张量切分
t = torch.ones((2,7))
list_of_tensors = torch.chunk(t,dim = 1,chunks = 3) # 7 / 3 --向上取整

for id,t in enumerate(list_of_tensors):
    print("第{}个张量:{},shape is {}".format(id + 1,t,t.shape))

t = torch.ones((4,3))
list_of_tensors = torch.chunk(t,dim = 0,chunks = 4) # 7 / 3 --向上取整

for id,t in enumerate(list_of_tensors):
    print("第{}个张量:{},shape is {}".format(id + 1,t,t.shape))


4.torch.split():将张量按维度dim进行切分,返回一个张量列表
# 张量切分split
t = torch.ones((2,7))
list_of_tensors = torch.split(t,3,dim = 1)
for id,t1 in enumerate(list_of_tensors):
    print("第{}个张量:{},shape is {}".format(id + 1,t1,t1.shape))

list_of_tensors1 = torch.split(t,[1,4,2],dim = 1)
for id,t2 in enumerate(list_of_tensors1):
    print("第{}个张量:{},shape is {}".format(id + 1,t2,t2.shape))
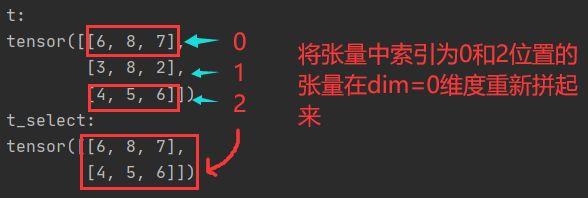
1.torch.index_select():在维度dim上,按index索引数据,返回一个依index索引数据拼接的张量
- input:要索引的张量
- dim:要索引的维度
- index:要索引数据的序号
t = torch.randint(0,9,size = (3,3))
id = torch.tensor([0,2],dtype = torch.long) # 数据类型必须指定long
t_select = torch.index_select(t,dim = 0,index = id)
print("t:\n{}\nt_select:\n{}".format(t,t_select))
2.torch.masked_select():按mask中的True进行索引,返回一维张量
- input:要索引的张量
- mask:与input同形状的布尔类型张量
t = torch.randint(0,9,size = (3,3))
mask = t.ge(5) # ge:大于等于 gt:大于  返回True or False
t_select = torch.masked_select(t,mask)
print("t:\n{}\nmask:\n{}\nt_select:\n{}".format(t,mask,t_select))
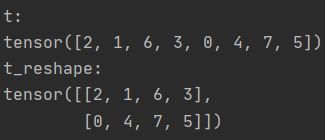
1.torch.reshape():变换张量形状
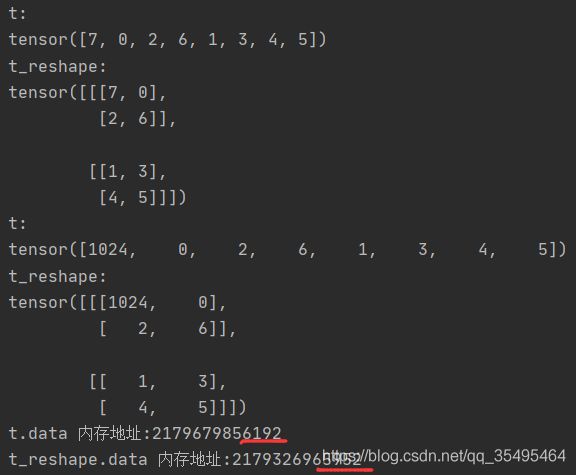
【注】当张量在内存中是连续的时候,新张量与input共享数据内存
- input:要变换的张量
- shape:新张量的形状
t = torch.randperm(8)
t_reshape = torch.reshape(t,(2,4)) # 注意大小要匹配
print("t:\n{}\nt_reshape:\n{}".format(t,t_reshape))
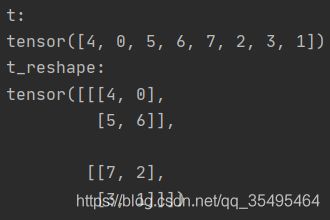
t = torch.randperm(8)
t_reshape = torch.reshape(t,(-1,2,2)) # 注意大小要匹配 -1:维度由其他维度计算出来
print("t:\n{}\nt_reshape:\n{}".format(t,t_reshape))
t = torch.randperm(8)
t_reshape = torch.reshape(t,(-1,2,2)) # 注意大小要匹配 -1:维度由其他维度计算出来
print("t:\n{}\nt_reshape:\n{}".format(t,t_reshape))
t[0] = 1024
print("t:\n{}\nt_reshape:\n{}".format(t,t_reshape))
print('t.data 内存地址:{}'.format(id(t.data)))
print('t_reshape.data 内存地址:{}'.format(id(t_reshape.data)))
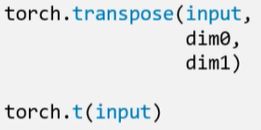
- input:要交换的变量
- dim0:要交换的维度
- dim1:要交换的维度
3.torch.t():
2维张量转置,对矩阵而言,等价于torch.transpose(input , 0 , 1)
t = torch.rand((2,3,4))
t2 = torch.randint(0,5,size = (2,3))
t_transpose = torch.transpose(t,dim0 = 1,dim1 = 2) # c*h*w --> h*w*c 图像预处理
print("t shape:{}\nt_transpose shape:{}".format(t.shape,t_transpose.shape))
t_tt = torch.t(t2) # 矩阵转置
print("t shape:{}\nt_tt shape:{}".format(t_tt.shape,t_tt.shape))

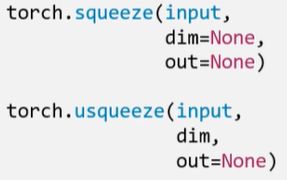
4.torch.squeeze():压缩长度为1的维度(轴)
- dim:
- 若为None,则移除所有长度为1的轴
- 指定维度,当且仅当该轴长为1时,可以被移除
5.torch.unsqueeze():依据dim扩展维度
- dim:扩展的维度
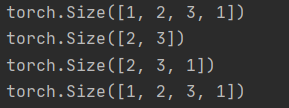
t = torch.rand((1,2,3,1)) # 创建一个四维张量
t_sq = torch.squeeze(t) # 移除长度为1的轴
t_0 = torch.squeeze(t,dim = 0)
t_1 = torch.squeeze(t,dim = 1)
print(t.shape)
print(t_sq.shape)
print(t_0.shape)
print(t_1.shape)
张量的数学运算
- 加减乘除
- 对数、指数、幂函数
- 三角函数

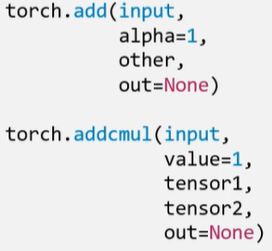
1.torch.add():逐元素计算 input + alpha * other
(深度学习中权重加权和会用到)
- input:第一个张量
- alpha:乘项因子
- other:第二个张量
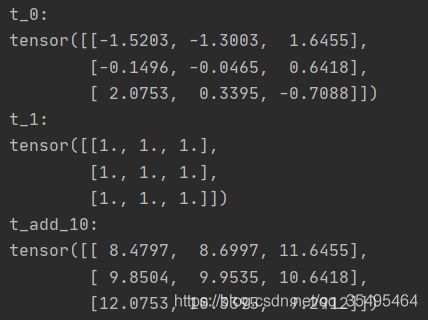
t_0 = torch.randn((3,3))
t_1 = torch.ones_like(t_0)
t_add = torch.add(t_0,10,t_1)
print("t_0:\n{}\nt_1:\n{}\nt_add_10:\n{}".format(t_0,t_1,t_add))
【补】
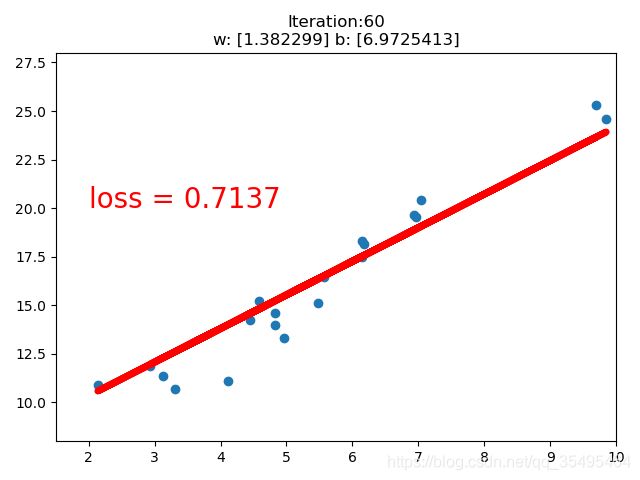
线性回归模型举例
线性回归:分析一个变量与另外一(多)个变量之间关系的方法
- 因变量:y
- 自变量:x
- 关系:线性
- 分析:求解w和b
求解步骤:
- 确定模型:Model: y = w x + b y=wx+b y=wx+b
- 选择损失函数:MSE: 1 m ∑ i = 1 m ( y i − y i ^ ) 2 \frac{1}{m}\sum_{i=1}^m(y_i-\hat{y_i})^2 m1∑i=1m(yi−yi^)2
- 求解梯度并更新w,b:LR (学习率)
w = w − L R ∗ w . g r a d w=w-LR*w.grad w=w−LR∗w.grad
b = b − L R ∗ w . g r a d b=b-LR*w.grad b=b−LR∗w.grad
【训练一个线性回归模型】
#coding=utf-8
import torch
import numpy as np
import matplotlib.pyplot as plt
# 在需要生成随机数据的实验中,每次实验都需要生成数据。
# 设置随机种子是为了确保每次生成固定的随机数,
# 这就使得每次实验结果显示一致了,有利于实验的比较和改进。
torch.manual_seed(10)
lr = 0.01 # 学习率设置

# 创建训练数据 20个点
x = torch.rand(20,1) * 10
y = 2 * x + (5 + torch.randn(20,1)) # w=2 b=5 后面项是噪声

# 构建线性回归参数 (权值初始化)
w = torch.randn((1),requires_grad = True) # 正态分布初始化w
b = torch.zeros((1),requires_grad = True) # 初始化b为0

for iteration in range(1000): # 迭代
    # 前向传播
    wx = torch.mul(w,x)
    y_pred = torch.add(wx,b) # 得到预测值

    # 计算MSE loss  均方差
    loss = (0.5 * (y - y_pred) ** 2).mean() # 0.5为了消去系数而设置

    # 反向传播
    loss.backward()

    # 更新参数 梯度下降法
    b.data.sub_(lr * b.grad)
    w.data.sub_(lr * w.grad)

    # 绘图
    if iteration % 20 == 0: # 20次一轮结果
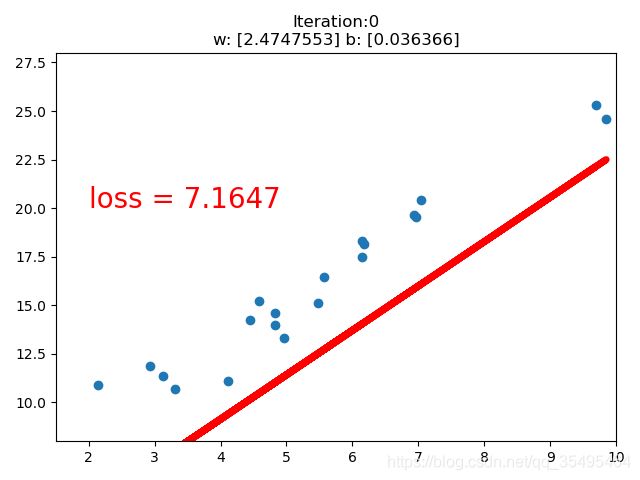
        plt.scatter(x.data.numpy(),y.data.numpy()) # 绘制20个点的散点图
        plt.plot(x.data.numpy(),y_pred.data.numpy(),'r-',lw = 5) # lw(linewidth) 线宽
        plt.text(2,20,'loss = %.4f' % loss.data.numpy(),fontdict = {'size':20,'color':'red'}) # 计算损失函数值
        plt.xlim(1.5,10)
        plt.ylim(8,28)
        plt.title("Iteration:{}\nw: {} b: {}".format(iteration,w.data.numpy(),b.data.numpy()))
        plt.pause(0.5) # 页面暂停时间

        if loss.data.numpy() < 1: # 直到损失函数小于1停止迭代
            break
