CTS camera的基础操作和debug
文章目录
- 手机端
- 1 CTS
- 2 VTS(需要镜像)
-
- 2.1进入fastbootd模式
- 2.2 system.img
- 2.3 boot-debug.img
- 2.4 手机配置
- 2.5 命令
- 3 ITS
-
- 3.1 环境包
- 3.2 手机端
- 3.3 电脑端
- 3.4 场景说明
- 3.5 创建报告
- 4 GTS
- 5 STS
- 6 GSI
手机端
设置永久不锁屏
1 CTS
进入cts目录tools
运行以下命令
./cts-tradefed
adb devices找设备数串
整跑
run cts -m CtsCameraTestCases --skip-preconditions
run cts -m CtsMediaTestCases
单测格式如下 -t 后面是单跑的内容
run cts -m CtsCameraTestCases -t android.hardware.camera2.cts.StillCaptureTest#testAeCompensation --skip-preconditions
查看设备状态
l d
查看报告状态
l r
查看当前命令
l c
打开报告
nautilus ./
run retry --retry
重跑(注意:重跑需要同一个机子同一个版本)
run retry --retry session
run retry --retry 0
以上的是在环境中跑cts.
cts 的本质是下载测试的apk到手机中(在谷歌释放包中CtsCameraTest.apk),这个apk集成了测试相关的内容来调用手机的一些功能完成测试项目
以下命令在终端运行即可,替换成你需要跑的单项和abi
adb shell am instrument -e android.hardware.camera2.cts.CameraDeviceTest#testSessionParametersStateLeak --abi arm64-v8a -w android.camera.cts/androidx.
2 VTS(需要镜像)
vts 需要python 相关的环境包配置,相关命令如下:
sudo apt-get install python-dev
sudo apt-get install python-protobuf
sudo apt-get install protobuf-compiler
sudo apt-get install python-virtualenv
sudo apt-get install python-pip
sudo apt-get install python-numpy
sudo apt-get install python-scipy
sudo apt-get install python-matplotlib
sudo apt-get install python-opencv
2.1进入fastbootd模式
adb unroot
adb reboot fastboot #进入这个模式刷system.img,bootloader模式没有这个分区
2.2 system.img
刷入谷歌 system.img
fastboot flash system system.img
查看gsi版本日期
strings system.img | grep ro.build.version.security_patch
adb shell getprop ro.build.version.security_patch
重新进入fastboot
fastboot reboot bootloader
fastboot -w
2.3 boot-debug.img
vts需要debug的权限,所以需要刷debug的镜像,另外fastboot 的版本不能太旧,太久分区不对,刷system.img会破坏分区,导致无限重启无法进去到系统里面进去.
fastboot flash boot boot-debug.img
fastboot -w
fastboot reboot
2.4 手机配置
进入设置打开开发者模式,usb调试模式,不锁定屏幕,语言设置成英语(这个语言无所谓)
2.5 命令
需要连接外网(电脑)
 ./vts-tradefed
VTS camera 相关的三个模块
run vts -m VtsHalCameraProviderV2_4Target --skip-preconditions
run vts -m VtsHalCameraProviderV2_5Target --skip-preconditions
run vts -m VtsHalCameraServiceV2_0Target --skip-preconditions
单跑
run vts --include-filter VtsHalCameraProviderV2_4Target --include-filter VtsHalCameraProviderV2_5Target --include-filter VtsHalCameraServiceV2_0Target --include-filter VtsVndkDependency -s xxx;
单跑命令
run vts -m xxx -t xxx -s xxx
run vts -s
vts常用命令
列出所有的跑测结果
l r
列出所有渐层到或已知的设备
l d
列出当前运行的模块内容
l i
单跑某个模块
run vts -m <模块>
可用选项
run vts -s --logcat-on-failure --screenshot-on-failure --shard-count
3 ITS
its以来python环境(不建议使用ubuntu20测试,默认python包可能太新,跑不起来)
3.1 环境包
sudo apt install python-numpy
sudo apt install python-scipy
sudo apt install python-matplotlib
sudo apt install python-opencv
3.2 手机端
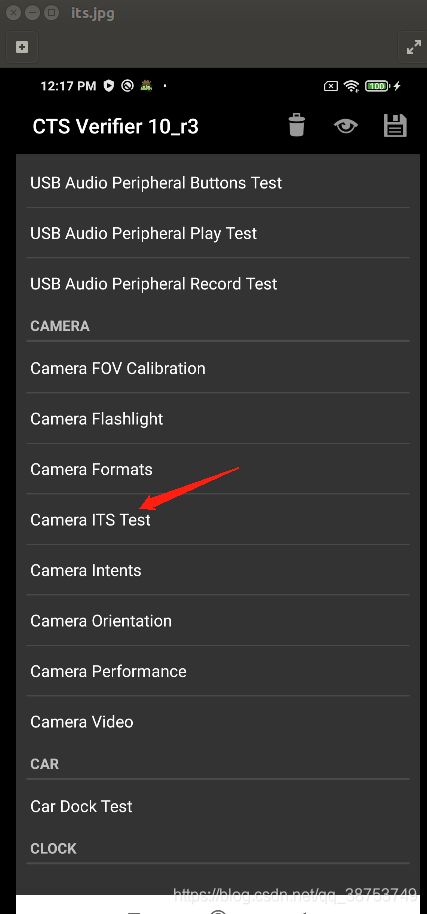
手机需要安装CtsVerifier.apk
adb install CtsVerifier.apk
3.3 电脑端
进入到对应的tools目录下
android-cts-verifier/CameraITS
source ./build/envsetup.sh
整跑命令
python tools/run_all_tests.py device=017650f70401 camera=0 scenes=1
单跑命令
python ./tests/xxx/xxx.py camera=x(执行tests目录下的对应scenes的报错项)。
python tools/run_all_tests.py camera=0 scenes=1
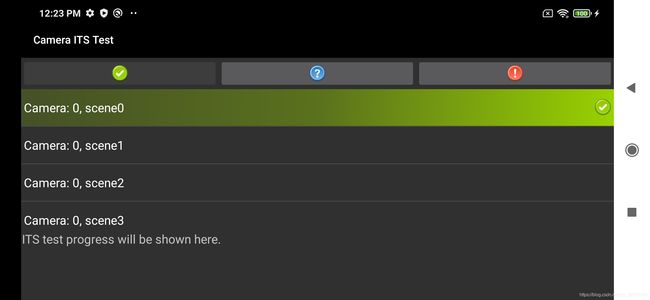
3.4 场景说明
| 场景 | 说明 |
|---|---|
| 场景0 | 无任何要求 |
| 场景1 | 相机位于三脚架上, 指向一个静态场景, 其中包含灰色卡和白色背景, 在恒定 (稳定) 相对明亮的光照源下。这是 CTS 验证程序物理设置上面描述的场景。镜头视野中,灰卡大致放在中间,周围为白色背景 |
| 场景 2 | 这是测试人脸检测的场景。相机位于三脚架上, 指向一张包含3人脸的静态图片, 在恒定 (稳定) 相对明亮的照明光源下。 |
| 场景3 | 这是测试图像清晰度的场景。相机位于三脚架上, 指向包含某些边缘的静态图片, 如打印的 ISO 12233 图表。现场应在一个恒定 (稳定) 相对明亮的照明源。 |
| 场景4 | 这是测试纵横比的场景。相机位于三脚架上, 指向一个静态测试页, 其中包含一个黑色圆圈和一个方块。现场应在一个恒定 (稳定) 相对明亮的照明源 |
| 场景5 | 这是测试镜头着色和颜色均匀性的场景。在摄像机前放置一个扩散器。相机位于三脚架上,指向恒定的 (稳定) 相对地明亮的照明源。 |
| 我们这边就用的一张白色餐巾纸代替了扩散器,将镜头对着光源,用餐巾纸挡住镜头即可。(很好使,反正不用钱)场景的具体说明看its的官方文档 |
3.5 创建报告
单跑是空的,显示在终端上。暂不创建报告
adb shell
appops set com.android.cts.verifier android:read_device_identifiers allow
exit
adb pull /storage/emulated/0/verifierReports ~/桌面/
4 GTS
进入到tool目录下,手机电脑需要挂VPN 连接外网
run gts -m GtsCameraTestCases -s xxx
run gts -m GtsCameraTestCases -s 008bcdcf0405
5 STS
安全补丁包测试以后再说
6 GSI
需要烧录谷歌镜像
进入fastboot模式
adb reboot fastboot
刷入对应的谷歌镜像system.img
fastboot flash system system.img
fastboot reboot bootloader
fastboot -w
fastboot oem unlock
adb reboot bootloader
fastboot reboot
打开开发者选项,打开stay awake和USB debugging
进入vts目录,运行 ./vts-tradefed
全跑
run cts-on-gsi -m CtsCameraTestCases
单跑
run cts-on-gsi --include-filter CtsCameraApi25TestCases --include-filter CtsCameraTestCases -s xxx
run cts-on-gsi -m CtsCameraTestCases -t xxx
run cts-on-gsi -o

