opencv c++ Mat CUDA的编译与使用
Mat
构造函数
cv::Mat img ; //默认 定义了一个Mat
img = cv::imread("image.jpg");//除了直接读取,还有通过大小构造等

cv::Mat img = cv::imread("image.png", IMREAD_GRAYSCALE);
cv::Mat img_novel = img;
转换 Mat::convertTo(Mat& m, int rtype, double alpha=1, double beta=0)
- OpenCV中Mat数据类型及相互转换 CV_8U转为CV_16U
转到数组
// https://www.cnblogs.com/xiaoxiaoyibu/p/9491858.html#
//动态创建二维数组,row行col列
    int **La = new int *[row];
    for (int i = 0; i < row; i ++){
        La[i] = new int[col];
    }
    // 循环二维数组和mat,并将mat对应值赋给二维数组对应值,
    for (int i = 0; i < row; i ++){
        for (int j = 0; j < col; j ++){
            La[i][j] = mat.at<uchar>(i, j);
        }
    }
    // 释放分配空间 (直接创建在栈上double La[row][col];就不用delete了)
    for (int i = 0; i < row; i ++){
        delete []La[i];
    }
    delete [] La;
- cv::Mat的许多操作文档
转到std::vector(注:这个例子将二维图像.reshape(0, 1))
//https://book.mynavi.jp/support/pc/opencv2/c3/opencv_mat.html#cv-vec
#include - 还可以去参考一下这个文章
std::vector<uchar> array;
if (mat.isContinuous()) {
  // array.assign(mat.datastart, mat.dataend); // <- has problems for sub-matrix like mat = big_mat.row(i)
  array.assign(mat.data, mat.data + mat.total()*mat.channels());
} else {
  for (int i = 0; i < mat.rows; ++i) {
    array.insert(array.end(), mat.ptr<uchar>(i), mat.ptr<uchar>(i)+mat.cols*mat.channels());
  }
}
操作
- 操作的官方手册
比如:
cv::Mat中最值和均值的求解

保存mat为图片
		vector<int> compression_params;//可选参数
		compression_params.push_back(IMWRITE_PNG_COMPRESSION); //PNG格式图像压缩标志
		compression_params.push_back(9); //设置最高压缩质量
		bool result = imwrite("alpha.png", _frame2, compression_params);
制作掩膜图像
#include (i,j) https://www.cnblogs.com/ybqjymy/p/15935894.html
{
for (int i = 0; i<image.rows; i++)
{
for (int j = 0; j<image.cols; j++)
{
if (image.at<Vec3b>(i, j)[0] - 0 != 0) {
image.at<Vec3b>(i, j)[0] = 255;
image.at<Vec3b>(i, j)[1] = 255;
image.at<Vec3b>(i, j)[2] = 255;
}
//cout<< image.at(i, j)[0]-0 << endl;//灰度图像元素类型为, 彩色图像元素类型为
}
}
bool result = imwrite("hahaah.png", image);
}
int main(int argc, char** argv) {
Mat src = imread("C:/Users/admin/Desktop/mask.jpg");
colorReduce(src, 3);
waitKey(0);
destroyAllWindows();
return 0;
}
Mat矩阵相乘相关
一个掩膜的例子:
	Mat A = imread("C:/Users/admin/Pictures/mask.jpg");
	Mat B = imread("C:/Users/admin/Pictures/fm.png");
	Mat C = A.mul(B);
	imshow("输入窗口", C);
C++ Opencv split()通道分离函数 merge()通道合并函数 使用操作详解
split(const Mat &src,//输入图像 Mat* mbegin//输出图像的数组)
C++ opencv之图像直方图(calcHist)
绘制
- 点
cv::Point   CvPoint:表示一个坐标为整数的二维点,是一个包含integer类型成员x和y的简单结构体。
cv::scalar   表示四个元素地向量 Scalar(a,b,c) ;//a =blue,b=green,c=red表示RGB的三个通道
- 简单几何
cv::line 线
cv::rectangle 矩形
cv::circle ⚪
CUDA编译
需要有GPU硬件+cudatoolkit+cudnn

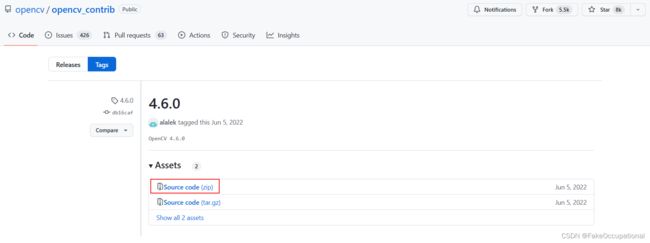
需要的源代码 opencv 编译好的build和source(用source部分) + opencv扩展模块的代码
- opencv扩展模块
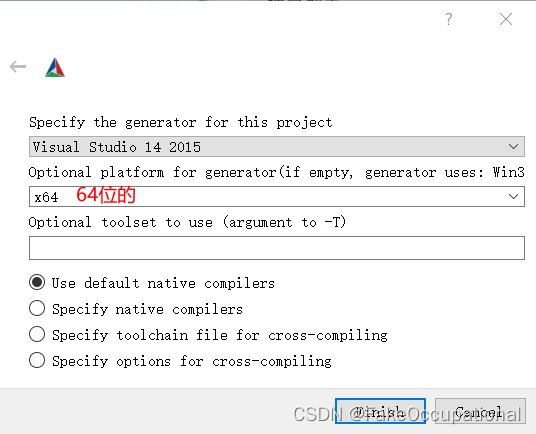
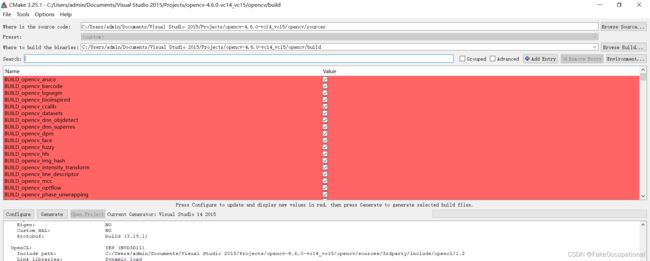
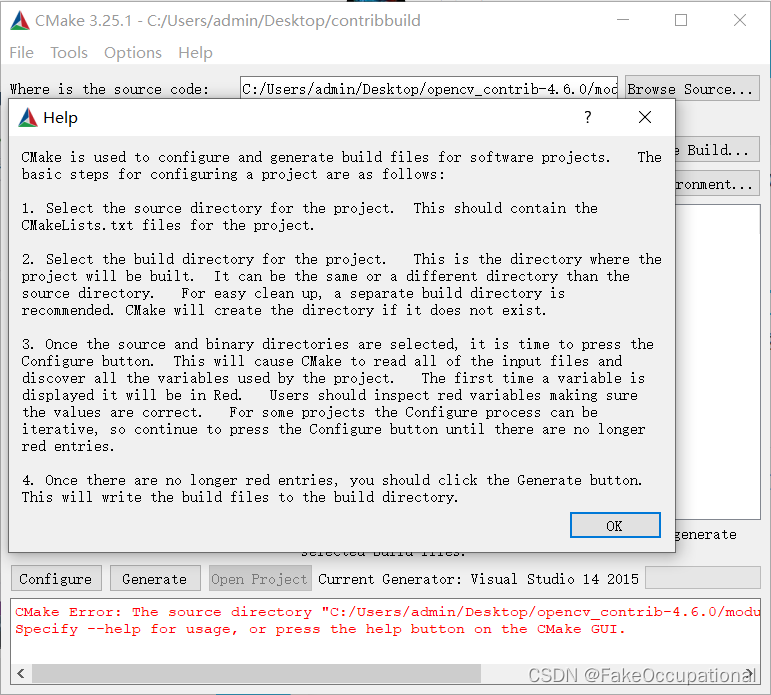
用Cmake编译一下源码,当然官方有编译的教程(并且还有参数细节):
- 在cmake-gui,先选择源码与目标路径

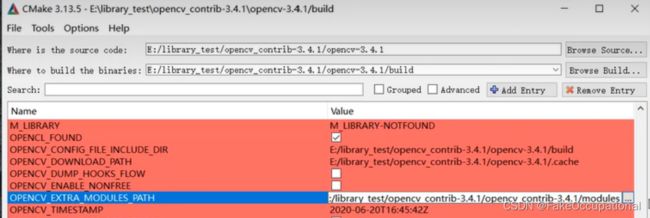
- config选项
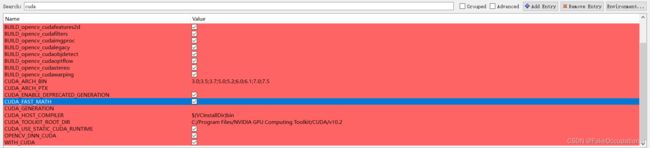
- 设置:OPENCV_EXTRA_MODULES_PATH
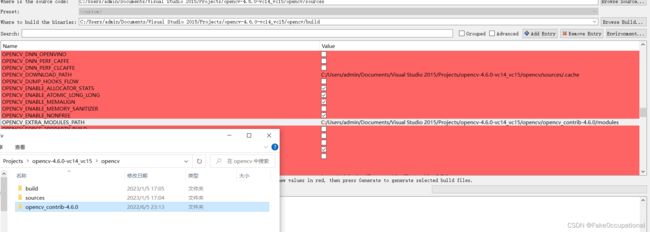
- 勾选与cuda有关的

- 再次点击config

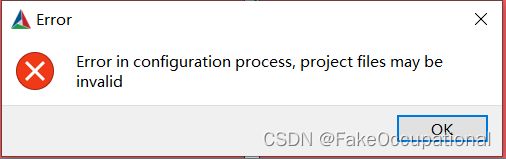
- 好多这个错误
=======================================================================
  Couldn't download files from the Internet.
  Please check the Internet access on this host.
=======================================================================

CMake Warning at cmake/OpenCVDownload.cmake:248 (message):
  IPPICV: Download failed: 6;"Couldn't resolve host name"

  For details please refer to the download log file:

  C:/Users/admin/Documents/Visual Studio
  2015/Projects/opencv-4.6.0-vc14_vc15/opencv/build/CMakeDownloadLog.txt

Call Stack (most recent call first):
  3rdparty/ippicv/ippicv.cmake:37 (ocv_download)
  cmake/OpenCVFindIPP.cmake:259 (download_ippicv)
  cmake/OpenCVFindLibsPerf.cmake:12 (include)
  CMakeLists.txt:733 (include)
-
解决 IPPICV: Downloading ippicv_2020_win_intel64_20191018_general.zip from https://raw.githubusercontent.com/opencv/opencv_3rdparty/a56b6ac6f030c312b2dce17430eef13aed9af274/ippicv/ippicv_2020_win_intel64_20191018_general.zip
-
新增的是关于contribute模块的
-
-
继续config
-
-
最后generate
-

-
有错误手动下载

-
双击 C:\Users\admin\Documents\Visual Studio 2015\Projects\opencv-4.6.0-vc14_vc15\opencv\build\OpenCV.sln


- 然后下边的INSTALL生成

- C:\Users\admin\Documents\Visual Studio 2015\Projects\opencv-4.6.0-vc14_vc15\opencv\build\install
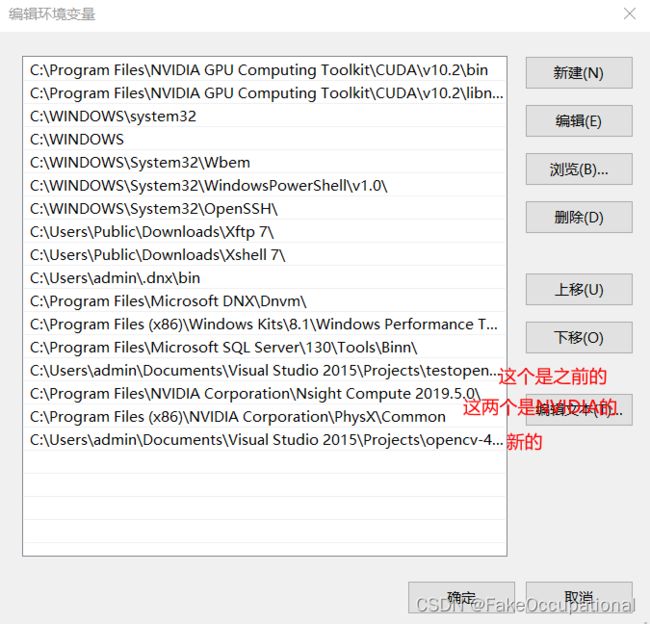
- 就可以将以下bin加到环境变量中了
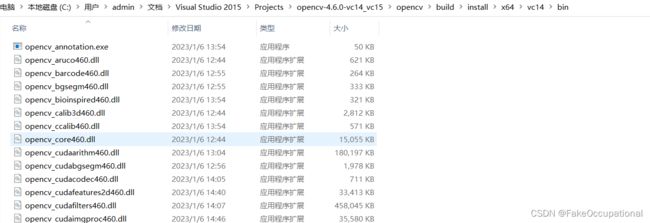


- 将C:\Users\admin\Documents\Visual Studio 2015\Projects\opencv-4.6.0-vc14_vc15\opencv\build\install\x64\vc14\bin加到path
添加链接描述
简单使用
- cuda的简单使用
- 设置完重启就不会有这个错误了

GpuMat cv::gpu::GpuMat(在Python是cv2.cuda_GpuMat)
- 主要看的这个,略微修改与注释
- 官方文档
upload+download()
#include # python 实现
img = cv2.imread("image.png", cv2.IMREAD_GRAYSCALE)
src = cv2.cuda_GpuMat()
src.upload(img)
clahe = cv2.cuda.createCLAHE(clipLimit=5.0, tileGridSize=(8, 8))# 使用对比度受限自适应直方图均衡化来均衡灰度图像的直方图。 https://docs.opencv.org/3.4/db/d79/classcv_1_1cuda_1_1CLAHE.html
dst = clahe.apply(src, cv2.cuda_Stream.Null())# 使用对比度受限自适应直方图均衡化来均衡灰度图像的直方图 https://docs.opencv.org/4.x/d6/db6/classcv_1_1CLAHE.html
result = dst.download()
cv2.imshow("result", result)
cv2.waitKey(0)
使用多GPU 略
打开视频流(这没有用到cuda)
// init video capture with video
VideoCapture capture(videoFileName);
if (!capture.isOpened())
{
    // error in opening the video file
    cout << "Unable to open file!" << endl;
    return;
}

// get default video FPS
double fps = capture.get(CAP_PROP_FPS);

// get total number of video frames
int num_frames = int(capture.get(CAP_PROP_FRAME_COUNT));
- python实现
# init video capture with video
cap = cv2.VideoCapture(video)

# get default video FPS
fps = cap.get(cv2.CAP_PROP_FPS)

# get total number of video frames
num_frames = cap.get(cv2.CAP_PROP_FRAME_COUNT)
读取视频(这里我跳过了源文章地大段基本c++方法地解释)
- 请注意,我们使用相同的 CPU 函数来读取和调整大小,但将结果上传到cv::cuda::GpuMat (cuda_GpuMat)实例:
// resize frame
cv::resize(frame, frame, Size(960, 540), 0, 0, INTER_LINEAR);

// convert to gray
cv::cvtColor(frame, previous_frame, COLOR_BGR2GRAY);

// upload pre-processed frame to GPU
cv::cuda::GpuMat gpu_previous;
gpu_previous.upload(previous_frame);

// declare cpu outputs for optical flow
cv::Mat hsv[3], angle, bgr;

// cv::cuda::GpuMat声明  declare gpu outputs for optical flow
cv::cuda::GpuMat gpu_magnitude, gpu_normalized_magnitude, gpu_angle;
cv::cuda::GpuMat gpu_hsv[3], gpu_merged_hsv, gpu_hsv_8u, gpu_bgr;

// set saturation to 1
hsv[1] = cv::Mat::ones(frame.size(), CV_32F);
gpu_hsv[1].upload(hsv[1]);
- python实现
# proceed if frame reading was successful
if ret:
    # resize frame
    frame = cv2.resize(previous_frame, (960, 540))

    # upload resized frame to GPU  --- 多了这一段
    gpu_frame = cv2.cuda_GpuMat()
    gpu_frame.upload(frame)

    # convert to gray  ---- 没变
    previous_frame = cv2.cvtColor(frame, cv2.COLOR_BGR2GRAY)

    # upload pre-processed frame to GPU
    gpu_previous = cv2.cuda_GpuMat()
    gpu_previous.upload(previous_frame)

    # create gpu_hsv output for optical flow  ----- hsv = np.zeros_like(frame, np.float32)
    gpu_hsv = cv2.cuda_GpuMat(gpu_frame.size(), cv2.CV_32FC3)
    gpu_hsv_8u = cv2.cuda_GpuMat(gpu_frame.size(), cv2.CV_8UC3)

    gpu_h = cv2.cuda_GpuMat(gpu_frame.size(), cv2.CV_32FC1)
    gpu_s = cv2.cuda_GpuMat(gpu_frame.size(), cv2.CV_32FC1)
    gpu_v = cv2.cuda_GpuMat(gpu_frame.size(), cv2.CV_32FC1)

    # set saturation to 1   ----  hsv[..., 1] = 1.0
    gpu_s.upload(np.ones_like(previous_frame, np.float32))
读取视频帧
while (true)//我删除了计时部分
{

    // capture frame-by-frame
    capture >> frame;if (frame.empty())break;

    // 增加了上传
    cv::cuda::GpuMat gpu_frame;  gpu_frame.upload(frame);

    // resize frame
    cv::cuda::resize(gpu_frame, gpu_frame, Size(960, 540), 0, 0, INTER_LINEAR);//类似 cv::resize(frame, frame, Size(960, 540), 0, 0, INTER_LINEAR);

    // 这里也类似cv::Mat换成 cv::cuda::GpuMat,cv::cvtColor换成cv::cuda::cvtColor
    cv::cuda::GpuMat gpu_current;
    cv::cuda::cvtColor(gpu_frame, gpu_current, COLOR_BGR2GRAY);
计算密集光流
// calculate optical flow
cv::Mat flow;
calcOpticalFlowFarneback(previous_frame, current_frame, flow, 0.5, 5, 15, 3, 5, 1.2, 0);

// create optical flow instance
Ptr<cuda::FarnebackOpticalFlow> ptr_calc = cuda::FarnebackOpticalFlow::create(5, 0.5, false, 15, 3, 5, 1.2, 0);
// calculate optical flow
cv::cuda::GpuMat gpu_flow;
ptr_calc->calc(gpu_previous, gpu_current, gpu_flow);
可视化前处理
// start post-process timer
auto start_post_time = high_resolution_clock::now();

// split the output flow into 2 vectors
cv::Mat flow_xy[2], flow_x, flow_y;
split(flow, flow_xy);

// get the result
flow_x = flow_xy[0];
flow_y = flow_xy[1];

// convert from cartesian to polar coordinates
cv::cartToPolar(flow_x, flow_y, magnitude, angle, true);
// normalize magnitude from 0 to 1
cv::normalize(magnitude, normalized_magnitude, 0.0, 1.0, NORM_MINMAX);
// get angle of optical flow
angle *= ((1 / 360.0) * (180 / 255.0));

// build hsv image
hsv[0] = angle;
hsv[2] = normalized_magnitude;
merge(hsv, 3, merged_hsv);

// multiply each pixel value to 255
merged_hsv.convertTo(hsv_8u, CV_8U, 255);

// convert hsv to bgr
cv::cvtColor(hsv_8u, bgr, COLOR_HSV2BGR);

// update previous_frame value
previous_frame = current_frame;
// start post-process timer
auto start_post_time = high_resolution_clock::now();

// split the output flow into 2 vectors
cv::cuda::GpuMat gpu_flow_xy[2];
cv::cuda::split(gpu_flow, gpu_flow_xy);

// convert from cartesian to polar coordinates
cv::cuda::cartToPolar(gpu_flow_xy[0], gpu_flow_xy[1], gpu_magnitude, gpu_angle, true);

// normalize magnitude from 0 to 1
cv::cuda::normalize(gpu_magnitude, gpu_normalized_magnitude, 0.0, 1.0, NORM_MINMAX, -1);

// get angle of optical flow
gpu_angle.download(angle);
angle *= ((1 / 360.0) * (180 / 255.0));

// build hsv image
gpu_hsv[0].upload(angle);
gpu_hsv[2] = gpu_normalized_magnitude;
cv::cuda::merge(gpu_hsv, 3, gpu_merged_hsv);

// multiply each pixel value to 255
gpu_merged_hsv.cv::cuda::GpuMat::convertTo(gpu_hsv_8u, CV_8U, 255.0);

// convert hsv to bgr
cv::cuda::cvtColor(gpu_hsv_8u, gpu_bgr, COLOR_HSV2BGR);

// send original frame from GPU back to CPU
gpu_frame.download(frame);

// send result from GPU back to CPU !!!!!!
gpu_bgr.download(bgr);

// update previous_frame value
gpu_previous = gpu_current;
可视化(不变)
// visualization
imshow("original", frame);
imshow("result", bgr);
int keyboard = waitKey(1);
if (keyboard == 27)
    break;
CG
- opencv中文war3school

learnopencv
添加链接描述
https://github.com/spmallick/learnopencv/blob/master/README.md
注:直接选中额外模块的源代码是无法编译的
- 这个教程挺详细的,
- 这个版本是在04:38 时有额外路径的选项,和这个文字教程一样,stackoverflow的英文教程
还有直接建议复制源码过去的Pasted the modules I want from opencv_contrib into opencv/modules.