Ubuntu16.04 安装 CUDA、CUDNN、OpenCV 并用 Anaconda 配置 Tensorflow 和 Caffe 详细过程(此种方案不好,好的方案是另一篇,基于pyhton2的)
Ubuntu16.04 安装 CUDA、CUDNN、OpenCV 和 Caffe 详细过程(基于Python2,没有anaconda2和3,因为基于anaconda2和3在安装caffe时会报错,很难解决)
详细安装教程:https://blog.csdn.net/zhuiqiuzhuoyue583/article/details/88756053
下面方法不好,会出现很多问题,不容易解决。
1.安装驱动
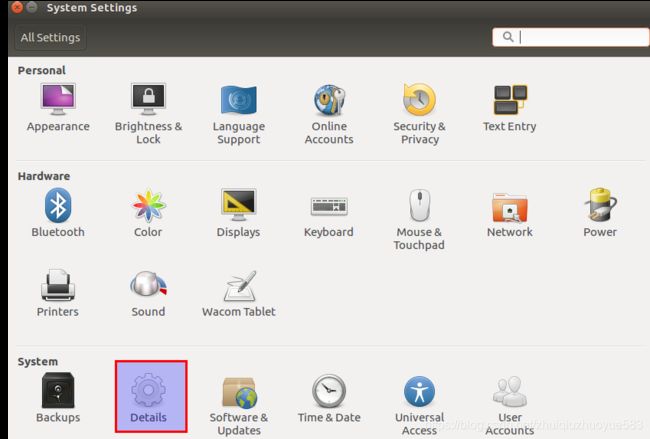
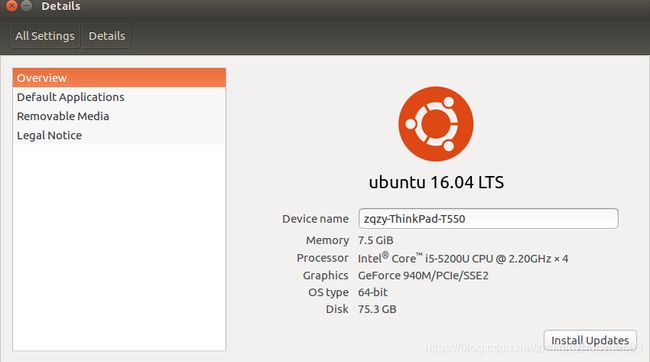
找到“System Settings”,在找到“Details”。
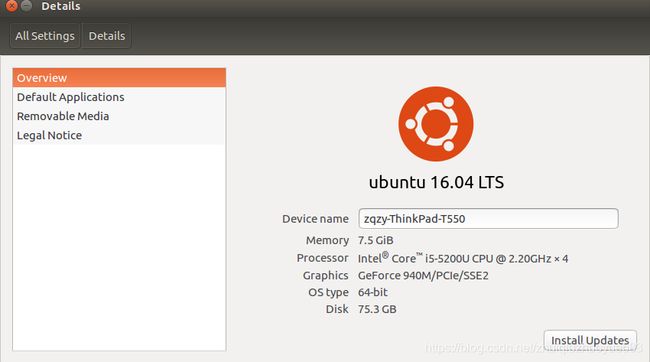
查看驱动,我这里安装后显示的。
安装NVIDIA驱动:
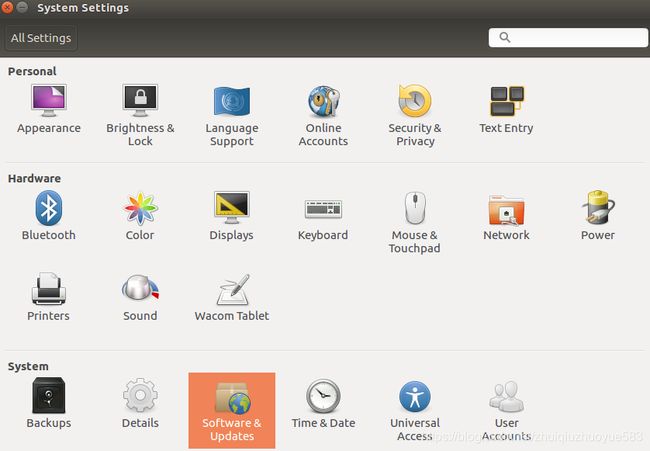
在“System Settings”找到“Software & Updates ”
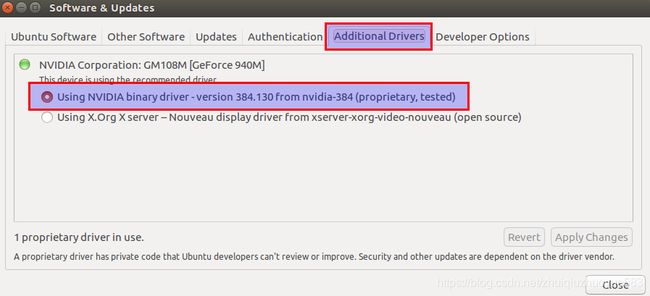
再找到“Additional Drivers”,系统会自动搜索可用的 NVIDIA驱动,选择 “NVIDIA”驱动即可。
再去“System Settings”,在找到“Details”,查看驱动:
2.安装相关依赖项
安装后续步骤或环境必需的依赖包,依次输入以下命令:
sudo apt-get install libprotobuf-dev libleveldb-dev libsnappy-dev libopencv-dev libhdf5-serial-dev protobuf-compiler

sudo apt-get install --no-install-recommends libboost-all-dev

sudo apt-get install libopenblas-dev liblapack-dev libatlas-base-dev

sudo apt-get install libgflags-dev libgoogle-glog-dev liblmdb-dev

sudo apt-get install git cmake build-essential
有一定几率安装失败而导致后续步骤出现问题,所以要确保以上依赖包都已安装成功,验证方法就是重新运行安装命令,如验证 git cmake build-essential是否安装成功共则再次运行以下命令:
sudo apt-get install git cmake build-essential 界面提示如下则说明已成功安装依赖包,否则继续安装直到安装成功。
yhao@yhao-X550VB:~$ sudo apt-get install git cmake build-essential
正在读取软件包列表... 完成
正在分析软件包的依赖关系树 正在读取状态信息... 完成
build-essential 已经是最新版 (12.1ubuntu2)。
cmake 已经是最新版 (3.5.1-1ubuntu3)。
git 已经是最新版 (1:2.7.4-0ubuntu1.1)。
下列软件包是自动安装的并且现在不需要了:
lib32gcc1 libc6-i386 使用'sudo apt autoremove'来卸载它(它们)。
升级了 0 个软件包,新安装了 0 个软件包,要卸载 0 个软件包,有 94 个软件包未被升级。
3.安装CUDA
CUDA是NVIDIA的编程语言平台,想使用GPU就必须要使用cuda。
(1)下载CUDA8.0
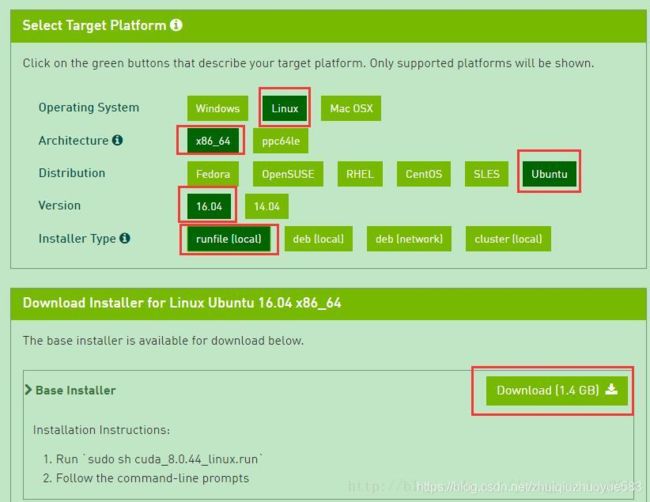
首先在官网上(https://developer.nvidia.com/cuda-downloads)下载CUDA,选择自己合适的版本。
该链接界面只显示最新版本。若需要下载以前的版本,可在页面下方点击Legacy Releases,选择自己需要的其他版本,这里安装的是cuda8.0。
这里写图片描述
在Windows中使用迅雷下载,然后再Ubuntu中使用,这样比较快。
下载完成后执行以下命令:
sudo chmod 777 cuda_8.0.44_linux.run

sudo ./cuda_8.0.44_linux.run
(注意:执行后会先出现一个声明,需要阅读到100%,同意声明后才会开始安装。)
安装时首先会有一系列提示让你确认,但是注意,有个让你选择是否安装nvidia361驱动时,一定要选择否:
Install NVIDIA Accelerated Graphics Driver for Linux-x86_64 361.62?因为前面我们已经安装了更加新的nvidia384,所以这里不要选择安装。其余的都直接默认或者选择是即可。
可能出现的错误:
安装cuda时可能有下面的信息:
Installing the CUDA Toolkit in /usr/local/cuda-8.0 …
Missing recommended library: libGLU.so
Missing recommended library: libX11.so
Missing recommended library: libXi.so
Missing recommended library: libXmu.so
原因是缺少相关的依赖库,安装相应库就解决了:
sudo apt-get install freeglut3-dev build-essential libx11-dev libxmu-dev libxi-dev libgl1-mesa-glx libglu1-mesa libglu1-mesa-dev再次安装,就不再提示了。
(3)环境变量配置
打开~/.bashrc文件: sudo gedit ~/.bashrc 将以下内容写入到~/.bashrc尾部:
export CUDA_HOME=/usr/local/cuda-8.0
export LD_LIBRARY_PATH=/usr/local/cuda-8.0/lib64:/usr/local/cuda-8.0/extras/CUPTI/lib64:$LD_LIBRARY_PATHs
export PATH=/usr/local/cuda-8.0/bin:$PATH
export LD_LIBRARY_PATH="/usr/local/cuda-8.0/lib64:/usr/local/cuda-8.0/extras/CUPTI/lib64:/usr/local/cuda-8.0/lib64:/usr/local/cuda-8.0/lib64"
刷新:
source ~/.bashrc(4)配置cuDNN
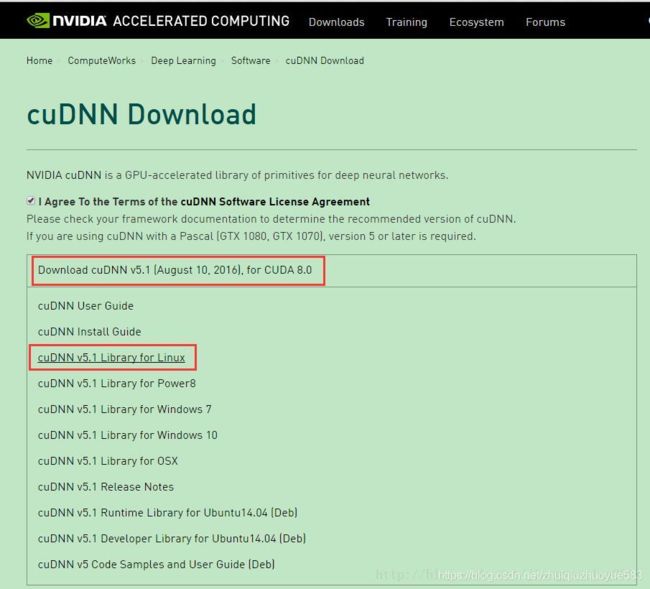
注意:首次配置cuDNN时我是下载的cuDNN6.0版本,但是后来在编译fast rcnn及SSD时发现有很多问题是由于cuDNN版本不匹配引起的,因此后来又手动删除掉了cuDNN6.0的include和lib文件,重新下载cuDNN5.1版本并重新编译caffe。
cuDNN是GPU加速计算深层神经网络的库。 首先去官网https://developer.nvidia.com/rdp/cudnn-download 下载cuDNN,需要注册一个账号才能下载。
注册后的下载网址:https://developer.nvidia.com/rdp/cudnn-archive
在Windows中使用迅雷下载,然后再Ubuntu中使用,这样比较快。
图3.cuDNN下载
下载cuDNN5.1 之后进行解压:
sudo tar -zxvf ./cudnn-8.0-linux-x64-v5.1.tgz进入cuDNN5.1 解压之后的include目录,在命令行进行如下操作:
cd cuda/include
sudo cp cudnn.h /usr/local/cuda/include  #复制头文件
再进入lib64目录下的动态文件进行复制和链接:
(这里的libcudnn.so.5.1.10是固有文件,而libcudnn.so.5是libcudnn.so.5.1.10链接得到的动态文件,libcudnn.so是libcudnn.so.5链接得到的动态文件。)
cd ..
cd lib64
sudo cp lib* /usr/local/cuda/lib64/   #复制动态链接库
cd /usr/local/cuda/lib64/
sudo rm -rf libcudnn.so libcudnn.so.5 #删除原有动态文件sudo ln -s libcudnn.so.5.1.10 libcudnn.so.5
#生成软衔接(注意这里要和自己下载的cudnn版本对应,可以在/usr/local/cuda/lib64下查看自己libcudnn的版本)
sudo ln -s libcudnn.so.5 libcudnn.so #生成软链接
这里需要注意上面这个命令,网上有人的第三行命令为:
sudo ln -s libcudnn.so.5.1.5 libcudnn.so.5 #生成软衔接起初我执行的也是上条链接 libcudnn.so.5.1.5 的命令,但是后面编译caffe时出错,报错内容为 /usr/bin/ld: 找不到 -lcudnn,所以这里需要先查看一下自己应该链接的是 libcudnn.so.5.1.10 还是 libcudnn.so.5.1.5 ,查看方法为下:
locate libcudnn.so我执行完后显示如下:
yhao@yhao-X550VB:~$ locate libcudnn.so
/home/yhao/.local/share/Trash/files/libcudnn.so
/home/yhao/.local/share/Trash/files/libcudnn.so.5
/home/yhao/.local/share/Trash/files/libcudnn.so.5.1.10
/home/yhao/.local/share/Trash/files/cuda/lib64/libcudnn.so
/home/yhao/.local/share/Trash/files/cuda/lib64/libcudnn.so.5
/home/yhao/.local/share/Trash/files/cuda/lib64/libcudnn.so.5.1.10
/home/yhao/.local/share/Trash/info/libcudnn.so.5.1.10.trashinfo
/home/yhao/.local/share/Trash/info/libcudnn.so.5.trashinfo
/home/yhao/.local/share/Trash/info/libcudnn.so.trashinfo
/home/yhao/cuda/lib64/libcudnn.so
/home/yhao/cuda/lib64/libcudnn.so.5
/home/yhao/cuda/lib64/libcudnn.so.5.1.10
/usr/local/lib/libcudnn.so
/usr/local/lib/libcudnn.so.5
可以看到我的文件是 libcudnn.so.5.1.10 ,并没有 libcudnn.so.5.1.5,所以第三行命令我链接的是 libcudnn.so.5.1.10 ,这里第三行链接命令视你的查看结果而定。
注意:下面这个步骤不能缺少!!否则可能链接失败!
执行
sudo ldconfig -v

#必须在/usr/local/cuda/lib64/目录下执行,否则可能会报
libcudnn.so.5: cannot open shared object file:
No such file or directory
或者
sudo ldconfig /usr/local/cuda/lib64至此,cudnn就配置完成了。
安装完成后可用 nvcc -V 命令验证是否安装成功,若出现以下信息则表示安装成功:
yhao@yhao-X550VB:~$ nvcc -V
nvcc: NVIDIA (R) Cuda compiler driver
Copyright (c) 2005-2016 NVIDIA
Corporation Built on Tue_Jan_10_13:22:03_CST_2017
Cuda compilation tools, release 8.0, V8.0.61
(5)测试CUDA的samples
cd /usr/local/cuda-8.0/samples/1_Utilities/deviceQuery
sudo make
sudo ./deviceQuery
如果显示一些关于GPU的信息,则说明安装成功。
![]()
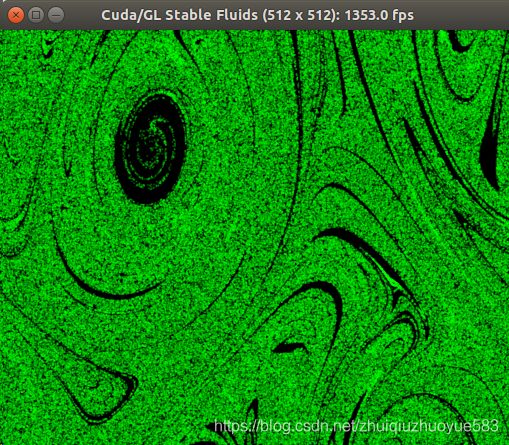
例二:
cd /usr/local/cuda/samples/5_Simulations/fluidsGL
sudo make clean && sudo make
./fluidsGL
自带例子测试通过,Cuna8.0安装配置完成!
参考:
https://blog.csdn.net/jiangyanting2011/article/details/78873113#commentBox
https://blog.csdn.net/CAU_Ayao/article/details/80578600#commentBox
https://blog.csdn.net/yhaolpz/article/details/71375762
4.安装OpenCV,这里是在安装anaconda3后,安装的opencv,主要在cmake时,将opencv配置到anaconda3中。
事实证明使用conda便捷安装的opencv是阉割版,不能实现视频和摄像头的读取功能,所以需要自己手动编译。
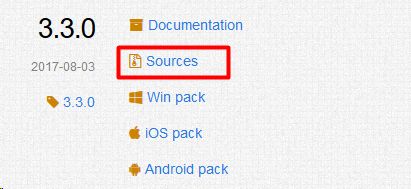
(1)下载opencv,我在window中用迅雷下载,下载后放到Ubuntu中,这样比较快。
https://opencv.org/releases.html
解压后,放在软件安装目录下,我是放在了“/home/zqzy”目录下了
(2)更新,否则可能会面会报错
sudo apt-get update
sudo apt-get upgrade
(3)安装依赖
sudo apt-get install build-essential
sudo apt-get install cmake git libgtk2.0-dev pkg-config libavcodec-dev libavformat-dev libswscale-dev
sudo apt-get install python-dev python-numpy libtbb2 libtbb-dev libjpeg-dev libpng-dev libtiff-dev libjasper-dev libdc1394-22-dev
sudo apt-get install libavcodec-dev libavformat-dev libswscale-dev libv4l-dev
sudo apt-get install libxvidcore-dev libx264-dev
sudo apt-get install libgtk-3-dev
sudo apt-get install libatlas-base-dev gfortran pylint
sudo apt-get install python2.7-dev python3.5-dev
sudo apt-getinstallbuild-essential
sudo apt-getinstall cmake git libgtk2.0-dev pkg-config libavcodec-dev libavformat-dev libswscale-dev
sudo apt-getinstall python-dev python-numpy libtbb2 libtbb-dev libjpeg-dev libpng-dev libtiff-dev libjasper-dev libdc1394-22-dev # 处理图像所需的包
sudo apt-getinstall libavcodec-dev libavformat-dev libswscale-dev libv4l-dev liblapacke-dev
sudo apt-getinstall libxvidcore-dev libx264-dev # 处理视频所需的包
sudo apt-getinstall libatlas-base-dev gfortran # 优化opencv功能
sudo apt-getinstall ffmpeg
(4)执行如下命令:
cd  /home/zqzy/opencv-3.3.0
mkdir build
cd build
(5)cmake,这里根据自己的安装目录进行修改
针对anaconda3,进行安装
/*执行时的命令*/

cmake -D WITH_IPP=OFF -D PYTHON_DEFAULT_EXECUTABLE=/home/zqzy/anaconda3/bin/python3 -D BUILD_opencv_python3=ON -D BUILD_opencv_python2=OFF -D PYTHON3_EXCUTABLE=/home/zqzy/anaconda3/bin/python3 -D PYTHON3_INCLUDE_DIR=/home/zqzy/anaconda3/include/python3.6m -D PYTHON3_LIBRARY=/home/zqzy/anaconda3/lib/libpython3.6m.so.1.0 -D PYTHON_NUMPY_PATH=/home/zqzy/anaconda3/lib/python3.6/site-packages ..
/* 上面的命令,如下,这样好阅读,但是还是用上面的命令执行
cmake
-D WITH_IPP=OFF
-D PYTHON_DEFAULT_EXECUTABLE=/home/zqzy/anaconda3/bin/python3
-D BUILD_opencv_python3=ON
-D BUILD_opencv_python2=OFF
-D PYTHON3_EXCUTABLE=/home/zqzy/anaconda3/bin/python3
-D PYTHON3_INCLUDE_DIR=/home/zqzy/anaconda3/include/python3.6m
-D PYTHON3_LIBRARY=/home/zqzy/anaconda3/lib/libpython3.6m.so.1.0
-D PYTHON_NUMPY_PATH=/home/zqzy/anaconda3/lib/python3.6/site-packages
..
*/
针对anaconda2,进行安装
cmake -D WITH_IPP=OFF -D PYTHON_DEFAULT_EXECUTABLE=/home/zqzy/anaconda2/bin/python2 -D BUILD_opencv_python3=OFF -D BUILD_opencv_python2=ON -D PYTHON2_EXCUTABLE=/home/zqzy/anaconda2/bin/python -D PYTHON2_INCLUDE_DIR=/home/zqzy/anaconda2/include/python2.7 -D PYTHON2_LIBRARY=/home/zqzy/anaconda2/lib/libpython2.7.so.1.0 -D PYTHON_NUMPY_PATH=/home/zqzy/anaconda2/lib/python2.7/site-packages ../*上面的命令,如下,这样好阅读,但是还是用上面的命令执行
cmake -D WITH_IPP=OFF
-D PYTHON_DEFAULT_EXECUTABLE=/home/zqzy/anaconda2/bin/python2
-D BUILD_opencv_python3=OFF
-D BUILD_opencv_python2=ON
-D PYTHON2_EXCUTABLE=/home/zqzy/anaconda2/bin/python
-D PYTHON2_INCLUDE_DIR=/home/zqzy/anaconda2/include/python2.7
-D PYTHON2_LIBRARY=/home/zqzy/anaconda2/lib/libpython2.7.so.1.0
-D PYTHON_NUMPY_PATH=/home/zqzy/anaconda2/lib/python2.7/site-packages
..
*/
(6)接下来一步该make了,我用的是,这步时间比较久,耐心等等,如果这步没有报错,那么就离成功不远了.
make -j8(7)接下来再用几句简单命令即可完成安装:
sudo make install
sudo gedit /etc/ld.so.conf.d/opencv.conf
在打开的写字板中输入:
/usr/local/lib在终端输入:
sudo ldconfig最后设置路径:
sudo gedit /etc/bash.bashrc文件末尾添加并保存:
PKG_CONFIG_PATH=$PKG_CONFIG_PATH:/usr/local/lib/pkgconfig

export PKG_CONFIG_PATH
测试
终端输入python,import cv2,报错 NO module in cv2,应该是找不到cv2.so文件。
针对anaconda3,进行安装:
解决方法:
去opencv-3.3.0/build/lib/python3这个路径下找到cv2.cpython-36m-x86_64-linux-gnu.so文件,
然后复制到/Software/anaconda3/lib/python3.6/site-packages文件夹下。
cp /home/zqzy/opencv-3.3.0/build/lib/python3/cv2.cpython-36m-x86_64-linux-gnu.so /home/zqzy/anaconda3/lib/python3.6/site-packages在终端输入python,import cv2,没有报错。
针对anaconda2,进行安装:
解决方法:
去opencv-3.3.0/build/lib这个路径下找到cv2.so文件,
然后复制到/Software/anaconda2/lib/python2.7/site-packages文件夹下。
cp /home/zqzy/opencv-3.3.0-py2/build/lib/cv2.so /home/zqzy/anaconda2/lib/python2.7/site-packages在终端输入python,import cv2,没有报错。
如果,复制完之后又报错:
ImportError: /home/wz/Software/anaconda3/bin/../lib/libstdc++.so.6: version `GLIBCXX_3.4.21’ not found (required by /home/wz/Software/anaconda3/lib/python3.6/site-packages/cv2.cpython-36m-x86_64-linux-gnu.so)
原因:gcc库版本太老
解决方案: conda install libgcc
应该装好了吧^-^~~
附上测试摄像头的代码
# 打开摄像头并灰度化显示
import cv2

capture = cv2.VideoCapture(0)

while(True):
    # 获取一帧
    ret, frame = capture.read()
    # 将这帧转换为灰度图
    gray = cv2.cvtColor(frame, cv2.COLOR_BGR2GRAY)

    cv2.imshow('frame', gray)
    if cv2.waitKey(1) == ord('q'):
        break
capture.release()
cv2.destroyAllWindows()
参考教程:https://blog.csdn.net/aaon22357/article/details/81913465
https://opencv.org/releases.html
5.安装caffe,这里是在安装anaconda3后,安装的caffe,主要在安装时,将caffe配置到anaconda3中。
(1)安装依赖
sudo apt-get install libprotobuf-dev libleveldb-dev libsnappy-dev libopencv-dev libhdf5-serial-dev protobuf-compiler
sudo apt-get install --no-install-recommends libboost-all-dev
sudo apt-get install libatlas-base-dev
sudo apt-get install libgflags-dev libgoogle-glog-dev liblmdb-dev
sudo apt-get install build-essential
sudo apt-get install python-dev
(2)下载caffe
git clone https://github.com/BVLC/caffe.git(3)配置Makefile.config文件之前,先复制几个文件,有的没有“libpython3.6m”这个文件
针对anaconda3,有的anaconda3没有libpython3.6m*,就不需要执行这句话。
sudo cp ~/anconda3/bin/libpython3.6m* /usr/lib/x86_64-linux-gnu针对 anaconda2,有的anaconda2也没有libpython2.7m*,就不需要执行这句话。
(4)将Makefile.config.example的内容复制到Makefile.config
sudo cp Makefile.config.example Makefile.config (5)修改Makefile.config文件
sudo gedit Makefile.config #打开Makefile.config文件(6)修改Makefile.config文件
针对anaconda3,修改Makefile.config文件
a.使用 cudnn
USE_CUDNN := 1

b.使用的 opencv 版本是 3
OPENCV_VERSION := 3

c.使用 python 来编写
WITH_PYTHON_LAYER := 1

d.重要的一项 :
将# Whatever else you find you need goes here.下面的
INCLUDE_DIRS := $(PYTHON_INCLUDE) /usr/local/include LIBRARY_DIRS := $(PYTHON_LIB) /usr/local/lib /usr/lib
修改为: INCLUDE_DIRS := $(PYTHON_INCLUDE) /usr/local/include /usr/include/hdf5/serial/ LIBRARY_DIRS := $(PYTHON_LIB) /usr/local/lib /usr/lib /usr/lib/x86_64-linux-gnu /usr/lib/x86_64-linux-gnu/hdf5/serial
这是因为ubuntu16.04的文件包含位置发生了变化,尤其是需要用到的hdf5的位置,所以需要更改这一路径

e.删除 CUDA_ARCH := 的前两行,避免 CUDA 报错


f. 修改 PYTHON_INCLUDE 路径,将其注释即可
# We need to be able to find Python.h and numpy/arrayobject.h.
# PYTHON_INCLUDE := /usr/include/python2.7 \
#                   /usr/lib/python2.7/dist-packages/numpy/core/include

g. 修改 Anaconda 路径
# Verify anaconda location, sometimes it's in root.
ANACONDA_HOME := /home/zqzy/anaconda3           #改成自己anaconda的路径

#注意这里的 \,书写方式是“空一个 空格,然后回车,下一行使用Tab建进行空格”
PYTHON_INCLUDE := $(ANACONDA_HOME)/include \
                $(ANACONDA_HOME)/include/python3.6m \
                $(ANACONDA_HOME)/lib/python3.6/site-packages/numpy/core/include
# 注意这里的空格是使用“Tab”键来写的

h. 使用 Python3
# Uncomment to use Python 3 (default is Python 2)
PYTHON_LIBRARIES := boost_python3 python3.6m

#注意这里的 \,书写方式是“空一个 空格,然后回车,下一行使用Tab建进行空格”
PYTHON_INCLUDE := /usr/include/python3.6m \
                /usr/lib/python3.6/dist-packages/numpy/core/include \
                /home/senius/anaconda3/include/python3.6m
# 注意这里的空格是使用“Tab”键来写的

i. 修改 PYTHON_LIB 路径
# We need to be able to find libpythonX.X.so or .dylib.
#PYTHON_LIB := /usr/lib

#注意这里的 \,书写方式是“空一个 空格,然后回车,下一行使用Tab建进行空格”
PYTHON_LIB := $(ANACONDA_HOME)/lib \
              $(ANACONDA_HOME)/pkgs/python-3.6.4-hc3d631a_1/lib
# 注意这里的空格是使用“Tab”键来写的

j. 紧接着上面这个PYTHON_LIB,在其下面添加
LINKFLAGS := -Wl,-rpath,/home/zqzy/anaconda3/lib #要添加这句话,否则报错

以上内容一定要仔细查看自己相应的目录一一对应,若没有相关目录一定是少安装了某些依赖,这一步配置好了后面就不会有什么错误
以上内容一定要仔细查看自己相应的目录一一对应,有的可能不太一样,需要自己去相应的目录查看,若没有相关目录一定是少安装了某些依赖,这一步配置好了后面就不会有什么错误
这里附上我修改后的针对anaconda3的Makefile.config:
## Refer to http://caffe.berkeleyvision.org/installation.html
# Contributions simplifying and improving our build system are welcome!

# cuDNN acceleration switch (uncomment to build with cuDNN).
USE_CUDNN := 1

# CPU-only switch (uncomment to build without GPU support).
# CPU_ONLY := 1

# uncomment to disable IO dependencies and corresponding data layers
# USE_OPENCV := 0
# USE_LEVELDB := 0
# USE_LMDB := 0

# uncomment to allow MDB_NOLOCK when reading LMDB files (only if necessary)
#	You should not set this flag if you will be reading LMDBs with any
#	possibility of simultaneous read and write
# ALLOW_LMDB_NOLOCK := 1

# Uncomment if you're using OpenCV 3
OPENCV_VERSION := 3

# To customize your choice of compiler, uncomment and set the following.
# N.B. the default for Linux is g++ and the default for OSX is clang++
# CUSTOM_CXX := g++

# CUDA directory contains bin/ and lib/ directories that we need.
CUDA_DIR := /usr/local/cuda
# On Ubuntu 14.04, if cuda tools are installed via
# "sudo apt-get install nvidia-cuda-toolkit" then use this instead:
# CUDA_DIR := /usr

# CUDA architecture setting: going with all of them.
# For CUDA < 6.0, comment the *_50 through *_61 lines for compatibility.
# For CUDA < 8.0, comment the *_60 and *_61 lines for compatibility.
CUDA_ARCH := -gencode arch=compute_30,code=sm_30 \
		-gencode arch=compute_35,code=sm_35 \
		-gencode arch=compute_50,code=sm_50 \
		-gencode arch=compute_52,code=sm_52 \
		-gencode arch=compute_60,code=sm_60 \
		-gencode arch=compute_61,code=sm_61 \
		-gencode arch=compute_61,code=compute_61

# BLAS choice:
# atlas for ATLAS (default)
# mkl for MKL
# open for OpenBlas
BLAS := atlas
# Custom (MKL/ATLAS/OpenBLAS) include and lib directories.
# Leave commented to accept the defaults for your choice of BLAS
# (which should work)!
# BLAS_INCLUDE := /path/to/your/blas
# BLAS_LIB := /path/to/your/blas

# Homebrew puts openblas in a directory that is not on the standard search path
# BLAS_INCLUDE := $(shell brew --prefix openblas)/include
# BLAS_LIB := $(shell brew --prefix openblas)/lib

# This is required only if you will compile the matlab interface.
# MATLAB directory should contain the mex binary in /bin.
# MATLAB_DIR := /usr/local
# MATLAB_DIR := /Applications/MATLAB_R2012b.app

# NOTE: this is required only if you will compile the python interface.
# We need to be able to find Python.h and numpy/arrayobject.h.
# PYTHON_INCLUDE := /usr/include/python2.7 \
#		/usr/lib/python2.7/dist-packages/numpy/core/include
# Anaconda Python distribution is quite popular. Include path:
# Verify anaconda location, sometimes it's in root.
ANACONDA_HOME := /home/zqzy/anaconda3
PYTHON_INCLUDE := $(ANACONDA_HOME)/include \
		  $(ANACONDA_HOME)/include/python3.6m \
		  $(ANACONDA_HOME)/lib/python3.6/site-packages/numpy/core/include

# Uncomment to use Python 3 (default is Python 2)
PYTHON_LIBRARIES := boost_python3 python3.6m
PYTHON_INCLUDE := /usr/include/python3.6m \
                 /usr/lib/python3.6/dist-packages/numpy/core/include \
                 /home/zqzy/anaconda3/include/python3.6m

# We need to be able to find libpythonX.X.so or .dylib.
#PYTHON_LIB := /usr/lib
PYTHON_LIB := $(ANACONDA_HOME)/lib \
              $(ANACONDA_HOME)/pkgs/python-3.6.4-hc3d631a_1/lib

LINKFLAGS := -Wl,-rpath,/home/zqzy/anaconda3/lib

# Homebrew installs numpy in a non standard path (keg only)
# PYTHON_INCLUDE += $(dir $(shell python -c 'import numpy.core; print(numpy.core.__file__)'))/include
# PYTHON_LIB += $(shell brew --prefix numpy)/lib

# Uncomment to support layers written in Python (will link against Python libs)
WITH_PYTHON_LAYER := 1

# Whatever else you find you need goes here.
INCLUDE_DIRS := $(PYTHON_INCLUDE) /usr/local/include /usr/include/hdf5/serial
LIBRARY_DIRS := $(PYTHON_LIB) /usr/local/lib /usr/lib /usr/lib/x86_64-linux-gnu /usr/lib/x86_64-linux-gnu/hdf5/serial

# If Homebrew is installed at a non standard location (for example your home directory) and you use it for general dependencies
# INCLUDE_DIRS += $(shell brew --prefix)/include
# LIBRARY_DIRS += $(shell brew --prefix)/lib

# NCCL acceleration switch (uncomment to build with NCCL)
# https://github.com/NVIDIA/nccl (last tested version: v1.2.3-1+cuda8.0)
# USE_NCCL := 1

# Uncomment to use `pkg-config` to specify OpenCV library paths.
# (Usually not necessary -- OpenCV libraries are normally installed in one of the above $LIBRARY_DIRS.)
# USE_PKG_CONFIG := 1

# N.B. both build and distribute dirs are cleared on `make clean`
BUILD_DIR := build
DISTRIBUTE_DIR := distribute

# Uncomment for debugging. Does not work on OSX due to https://github.com/BVLC/caffe/issues/171
# DEBUG := 1

# The ID of the GPU that 'make runtest' will use to run unit tests.
TEST_GPUID := 0

# enable pretty build (comment to see full commands)
Q ?= @
针对anaconda2,修改Makefile.config文件
a.使用 cudnn
USE_CUDNN := 1

b.使用的 opencv 版本是 3
OPENCV_VERSION := 3

c.使用 python 来编写
WITH_PYTHON_LAYER := 1

d.重要的一项 :
将# Whatever else you find you need goes here.下面的
INCLUDE_DIRS := $(PYTHON_INCLUDE) /usr/local/include LIBRARY_DIRS := $(PYTHON_LIB) /usr/local/lib /usr/lib
修改为: INCLUDE_DIRS := $(PYTHON_INCLUDE) /usr/local/include /usr/include/hdf5/serial/ LIBRARY_DIRS := $(PYTHON_LIB) /usr/local/lib /usr/lib /usr/lib/x86_64-linux-gnu /usr/lib/x86_64-linux-gnu/hdf5/serial
这是因为ubuntu16.04的文件包含位置发生了变化,尤其是需要用到的hdf5的位置,所以需要更改这一路径

e.删除 CUDA_ARCH := 的前两行,避免 CUDA 报错


f. 修改 PYTHON_INCLUDE 路径,将其注释即可
# We need to be able to find Python.h and numpy/arrayobject.h.
# PYTHON_INCLUDE := /usr/include/python2.7 \
#                   /usr/lib/python2.7/dist-packages/numpy/core/include

g. 修改 Anaconda 路径
# Anaconda Python distribution is quite popular. Include path:
# Verify anaconda location, sometimes it's in root.
ANACONDA_HOME := /home/zqzy/anaconda2    #取消注释,并且修改为自己anaconda的安装路径
PYTHON_INCLUDE := $(ANACONDA_HOME)/include \     #取消注释
         $(ANACONDA_HOME)/include/python2.7 \    #取消注释,注意这里空格是Tab键
         $(ANACONDA_HOME)/lib/python2.7/site-packages/numpy/core/include   ##取消注释

# 注意这里的空格是使用“Tab”键来写的


h. 修改 PYTHON_LIB 路径
# We need to be able to find libpythonX.X.so or .dylib.
#PYTHON_LIB := /usr/lib

#注意这里的 \,书写方式是“空一个 空格,然后回车,下一行使用Tab建进行空格”
PYTHON_LIB := $(ANACONDA_HOME)/lib \
              $(ANACONDA_HOME)/pkgs/python-2.7.14-h1571d57_29/lib
# 注意这里的空格是使用“Tab”键来写的

i. 紧接着上面这个PYTHON_LIB,在其下面添加
LINKFLAGS := -Wl,-rpath,/home/zqzy/anaconda2/lib #要添加这句话,否则报错

以上内容一定要仔细查看自己相应的目录一一对应,若没有相关目录一定是少安装了某些依赖,这一步配置好了后面就不会有什么错误
以上内容一定要仔细查看自己相应的目录一一对应,有的可能不太一样,需要自己去相应的目录查看,若没有相关目录一定是少安装了某些依赖,这一步配置好了后面就不会有什么错误
这里附上我修改后的针对anaconda2的Makefile.config:
## Refer to http://caffe.berkeleyvision.org/installation.html
# Contributions simplifying and improving our build system are welcome!

# cuDNN acceleration switch (uncomment to build with cuDNN).
USE_CUDNN := 1

# CPU-only switch (uncomment to build without GPU support).
# CPU_ONLY := 1

# uncomment to disable IO dependencies and corresponding data layers
# USE_OPENCV := 0
# USE_LEVELDB := 0
# USE_LMDB := 0

# uncomment to allow MDB_NOLOCK when reading LMDB files (only if necessary)
#	You should not set this flag if you will be reading LMDBs with any
#	possibility of simultaneous read and write
# ALLOW_LMDB_NOLOCK := 1

# Uncomment if you're using OpenCV 3
OPENCV_VERSION := 3

# To customize your choice of compiler, uncomment and set the following.
# N.B. the default for Linux is g++ and the default for OSX is clang++
# CUSTOM_CXX := g++

# CUDA directory contains bin/ and lib/ directories that we need.
CUDA_DIR := /usr/local/cuda
# On Ubuntu 14.04, if cuda tools are installed via
# "sudo apt-get install nvidia-cuda-toolkit" then use this instead:
# CUDA_DIR := /usr

# CUDA architecture setting: going with all of them.
# For CUDA < 6.0, comment the *_50 through *_61 lines for compatibility.
# For CUDA < 8.0, comment the *_60 and *_61 lines for compatibility.
CUDA_ARCH := -gencode arch=compute_30,code=sm_30 \
		-gencode arch=compute_35,code=sm_35 \
		-gencode arch=compute_50,code=sm_50 \
		-gencode arch=compute_52,code=sm_52 \
		-gencode arch=compute_60,code=sm_60 \
		-gencode arch=compute_61,code=sm_61 \
		-gencode arch=compute_61,code=compute_61

# BLAS choice:
# atlas for ATLAS (default)
# mkl for MKL
# open for OpenBlas
BLAS := atlas
# Custom (MKL/ATLAS/OpenBLAS) include and lib directories.
# Leave commented to accept the defaults for your choice of BLAS
# (which should work)!
# BLAS_INCLUDE := /path/to/your/blas
# BLAS_LIB := /path/to/your/blas

# Homebrew puts openblas in a directory that is not on the standard search path
# BLAS_INCLUDE := $(shell brew --prefix openblas)/include
# BLAS_LIB := $(shell brew --prefix openblas)/lib

# This is required only if you will compile the matlab interface.
# MATLAB directory should contain the mex binary in /bin.
# MATLAB_DIR := /usr/local
# MATLAB_DIR := /Applications/MATLAB_R2012b.app

# NOTE: this is required only if you will compile the python interface.
# We need to be able to find Python.h and numpy/arrayobject.h.
# PYTHON_INCLUDE := /usr/include/python2.7 \
#		/usr/lib/python2.7/dist-packages/numpy/core/include
# Anaconda Python distribution is quite popular. Include path:
# Verify anaconda location, sometimes it's in root.
ANACONDA_HOME := /home/zqzy/anaconda2
PYTHON_INCLUDE := $(ANACONDA_HOME)/include \
		$(ANACONDA_HOME)/include/python2.7 \
		$(ANACONDA_HOME)/lib/python2.7/site-packages/numpy/core/include

# Uncomment to use Python 3 (default is Python 2)
# PYTHON_LIBRARIES := boost_python3 python3.5m
# PYTHON_INCLUDE := /usr/include/python3.5m \
#                 /usr/lib/python3.5/dist-packages/numpy/core/include

# We need to be able to find libpythonX.X.so or .dylib.
# PYTHON_LIB := /usr/lib
PYTHON_LIB := $(ANACONDA_HOME)/lib \
	$(ANACONDA_HOME)/pkgs/python-2.7.14-h1571d57_29/lib

LINKFLAGS := -Wl,-rpath,/home/zqzy/anaconda2/lib

# Homebrew installs numpy in a non standard path (keg only)
# PYTHON_INCLUDE += $(dir $(shell python -c 'import numpy.core; print(numpy.core.__file__)'))/include
# PYTHON_LIB += $(shell brew --prefix numpy)/lib

# Uncomment to support layers written in Python (will link against Python libs)
WITH_PYTHON_LAYER := 1

# Whatever else you find you need goes here.
# INCLUDE_DIRS := $(PYTHON_INCLUDE) /usr/local/include
# LIBRARY_DIRS := $(PYTHON_LIB) /usr/local/lib /usr/lib

INCLUDE_DIRS := $(PYTHON_INCLUDE) /usr/local/include /usr/include/hdf5/serial/
LIBRARY_DIRS := $(PYTHON_LIB) /usr/local/lib /usr/lib /usr/lib/x86_64-linux-gnu /usr/lib/x86_64-linux-gnu/hdf5/serial


# If Homebrew is installed at a non standard location (for example your home directory) and you use it for general dependencies
# INCLUDE_DIRS += $(shell brew --prefix)/include
# LIBRARY_DIRS += $(shell brew --prefix)/lib

# NCCL acceleration switch (uncomment to build with NCCL)
# https://github.com/NVIDIA/nccl (last tested version: v1.2.3-1+cuda8.0)
# USE_NCCL := 1

# Uncomment to use `pkg-config` to specify OpenCV library paths.
# (Usually not necessary -- OpenCV libraries are normally installed in one of the above $LIBRARY_DIRS.)
# USE_PKG_CONFIG := 1

# N.B. both build and distribute dirs are cleared on `make clean`
BUILD_DIR := build
DISTRIBUTE_DIR := distribute

# Uncomment for debugging. Does not work on OSX due to https://github.com/BVLC/caffe/issues/171
# DEBUG := 1

# The ID of the GPU that 'make runtest' will use to run unit tests.
TEST_GPUID := 0

# enable pretty build (comment to see full commands)
Q ?= @
(6)修改 Makefile 文件把下面第一行代码改为第二行代码:
将:LIBRARIES += glog gflags protobuf boost_system boost_filesystem m hdf5_hl hdf5
替换为:LIBRARIES += glog gflags protobuf boost_system boost_filesystem m hdf5_serial_hl hdf5_serial opencv_core opencv_imgproc opencv_imgcodecs opencv_highgui
(7)修改 Makefile 文件把下面第一行代码改为第二行代码:
将: NVCCFLAGS +=-ccbin=$(CXX) -Xcompiler-fPIC $(COMMON_FLAGS)
替换为: NVCCFLAGS += -D_FORCE_INLINES -ccbin=$(CXX) -Xcompiler -fPIC $(COMMON_FLAGS)
(8)修改 Makefile 文件把下面第一段代码改为第二段代码:
将:
# Debugging
ifeq ($(DEBUG), 1)
        COMMON_FLAGS += -DDEBUG -g -O0
        NVCCFLAGS += -G
else
        COMMON_FLAGS += -DNDEBUG -O2
endif
修改为:
# Debugging
ifeq ($(DEBUG), 1)
        COMMON_FLAGS += -DDEBUG -g -O0
        NVCCFLAGS += -G
else
        COMMON_FLAGS += -DNDEBUG -O2
        NVCCFLAGS += -G
endif

# 注意这里的空格是使用“Tab”键来写的。
也就是加一句 NVCCFLAGS += -G
(9)针对anaconda3
使用“locate libpython3.6m.so.1.0” 查找 “libpython3.6m.so.1.0 ” 的位置,查找出来是在anaconda3/lib中
执行如下命令:
sudo gedit  /etc/ld.so.conf

/home/zqzy/anaconda3/lib/

sudo ldconfig
针对anaconda2
使用“locate libpython2.7.so.1.0” 查找 “libpython2.7.so.1.0 ” 的位置,查找出来是在/usr/lib/x86_64-linux-gnu/中
执行如下命令:
执行命令:
sudo gedit  /etc/ld.so.conf

添加内容:

/usr/lib/x86_64-linux-gnu/

执行命令:
sudo ldconfig
(10)编辑 /usr/local/cuda/include/host_config.h ,将其中的第115行注释掉
//#error -- unsupported GNU version! gcc versions later than 5 are not supported! (11)这里只针对anaconda3,对于anaconda2不需要
因为在配置文件的第 74 行中有 PYTHON_LIBRARIES := boost_python3 ,但是在系统中无法找到boost_python3.lib 这个库文件。
解决方案如下:
检查是否有如下文件:
ls /usr/lib/x86_64-linux-gnu/libboost_python-py35.so这里如果有,说明我们的系统中已经有了这种库文件,只是文件名不同。
添加软链接
cd /usr/lib/x86_64-linux-gnu/
sudo ln -s libboost_python-py35.so libboost_python3.so
sudo ln -s libboost_python-py35.a libboost_python3.a
sudo ln -s libboost_python-py35.so.1.58.0 libboost_python3.so.1.58.0

然后 sudo gedit /etc/ld.so.conf

添加 /usr/lib/x86_64-linux-gnu

sudo ldconfig
针对anaconda2,不需要第11这一步,因为没有在配置文件的第 74 行中添加 PYTHON_LIBRARIES := boost_python3
(12)将cuda信息,复制到“/usr/local/lib”的相应路径下
sudo cp /usr/local/cuda-8.0/lib64/libcudart.so.8.0 /usr/local/lib/libcudart.so.8.0 && sudo ldconfig
sudo cp /usr/local/cuda-8.0/lib64/libcublas.so.8.0 /usr/local/lib/libcublas.so.8.0 && sudo ldconfig
sudo cp /usr/local/cuda-8.0/lib64/libcurand.so.8.0 /usr/local/lib/libcurand.so.8.0 && sudo ldconfig
sudo cp /usr/local/cuda-8.0/lib64/libcudnn.so.5 /usr/local/lib/libcudnn.so.5 && sudo ldconfig
#这里根据自己编译运行时的提示错误,进行相应的拷贝,有的是libcudnn.so.5 ,有的是libcudnn.so.6
(13)编译
cd .. #到caffe-master目录
sudo make all -j8
sudo make pycaffe -j8
(14)添加环境变量
sudo gedit ~/.bashrc
最后一行添加export PYTHONPATH=/home/zqzy/caffe-master/python:$PYTHONPATH
source ~/.bashrc
(15)安装protobuf
先修改权限,否则安装不了:
sudo chown -R zqzy:zqzy /home/zqzy/anaconda3

#这里的zqzy是我的用户名
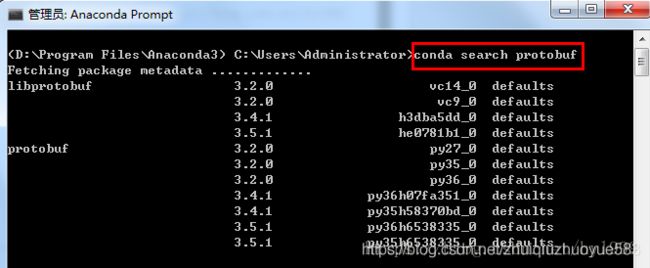
在Anaconda终端搜索protobuf库,如图:
然后安装protobuf(选择你对应的版本,我这里是python3.6,所以安装protobuf是3.2.0),如图:
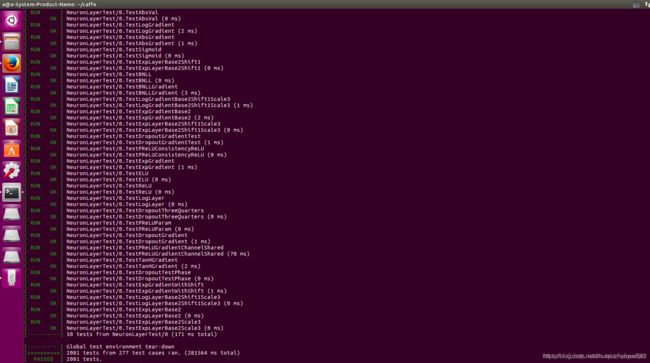
(16)测试
sudo make runtest -j8(16)在Python中导入,没有错误,即可
import caffe参考:
https://blog.csdn.net/yhaolpz/article/details/71375762#t8
https://blog.csdn.net/u012675539/article/details/51351553
https://blog.csdn.net/seniusen/article/details/78474929#commentBox
https://blog.csdn.net/ymshan92/article/details/80847564
https://blog.csdn.net/luteresa/article/details/79901991#commentBox
https://blog.csdn.net/weixin_40824648/article/details/80265943#t6
https://blog.csdn.net/qq_38451119/article/details/81126692
https://blog.csdn.net/hyl999/article/details/79712407
https://blog.csdn.net/ling_xiobai/article/details/78659981
