Transformer+BERT 推特文本分类(是否抱怨)
文章目录
- 1.基础设置
- 2.下载/导入数据集
-
- 2.1 下载数据集
- 2.2 Load Train Data
- 2.3 Load Test Data
- 3. 设置GPU/CPU来训练
- 4.Fine-tuning BERT
-
- 4.1 对原始文本进行轻微的数据处理
- 4.2 BERT Tokenizer 相关函数构建
- 4.3 确定输入句子的固定长度
- 4.4 tokenize data 正式对数据进行分词
- 4.5 创建PyTorch DataLoader
- 5.训练模型Train model
-
- 5.1 创建 BertClassifier
- 5.2 创建优化器和学习率规划器Optimizer & Learning Rate Scheduler
- 5.3 设置Training Loop 训练循环
- 5.4 训练
- 5.5 训练后验证模型精度
- 5.6 用所有的Traing data来训练模型
- 6. 对测试集进行预测
- 6.1 Test Data Preparation
- 6.2 预测
- 7. 总结
原本地址: Link
1.基础设置
import os
import re
from tqdm import tqdm
import numpy as np
import pandas as pd
import matplotlib.pyplot as plt

%matplotlib inline
2.下载/导入数据集
2.1 下载数据集
# Download data 下载数据
import requests
request = requests.get("https://drive.google.com/uc?export=download&id=1wHt8PsMLsfX5yNSqrt2fSTcb8LEiclcf")
with open("data.zip", "wb") as file:
    file.write(request.content)

# Unzip data 解压数据
import zipfile
with zipfile.ZipFile('data.zip') as zip:
    zip.extractall('data')
2.2 Load Train Data
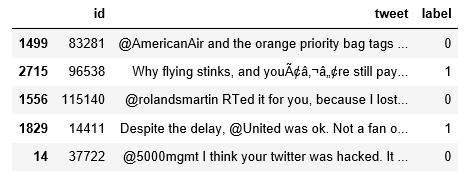
训练数据有2个文件,每个文件包含1700条抱怨/不抱怨的推文。 数据中的每条推文都至少包含一家航空公司的命名实体标签。
我们将加载训练数据并标记它。 因为我们仅使用文本数据进行分类,所以将删除不重要的列,仅保留id,tweet和label列。
 # 加载数据并设置标签
data_complaint = pd.read_csv('data/complaint1700.csv')
data_complaint['label'] = 0
data_non_complaint = pd.read_csv('data/noncomplaint1700.csv')
data_non_complaint['label'] = 1

# 将抱怨和不抱怨的两个数据合成一块
data = pd.concat([data_complaint, data_non_complaint], axis=0).reset_index(drop=True)

# 删除 'airline' 列
data.drop(['airline'], inplace=True, axis=1)

# 展示随机的5个样本
data.sample(5)
我们将整个训练数据随机分为两组:训练组(training set)包含90%的数据,验证组(validation set)包含10%的数据。 我们将使用训练集上的交叉验证执行超参数调整,并使用验证集来比较模型。
from sklearn.model_selection import train_test_split

X = data['tweet'].values
y = data['label'].values

X_train, X_val, y_train, y_val = train_test_split(X, y, test_size=0.1, random_state=2020)
2.3 Load Test Data
测试数据(test data)包含4555个没有标签的样本。 大约有300个样本是不抱怨的推文。 我们的任务是识别其ID,并手动检查我们的结果是否正确。(测试集没有label!!!)
# Load test data
test_data = pd.read_csv('data/test_data.csv')

# Keep important columns
test_data = test_data[['id', 'tweet']]

# Display 5 samples from the test data
test_data.sample(5)

3. 设置GPU/CPU来训练
Google Colab提供免费的GPU和TPU。 由于我们将训练大型神经网络,因此最好利用这些功能。
可以通过以下菜单添加GPU:
![]()
然后通过下面代码来自动判断使用GPU还是CPU。
import torch

if torch.cuda.is_available():
    device = torch.device("cuda")
    print(f'There are {torch.cuda.device_count()} GPU(s) available.')
    print('Device name:', torch.cuda.get_device_name(0))

else:
    print('No GPU available, using the CPU instead.')
    device = torch.device("cpu")
4.Fine-tuning BERT
4.1 对原始文本进行轻微的数据处理
此处只是定义了text_preprocessing函数,该函数会在之后对文本编码时一并调用
def text_preprocessing(text):
    """
    - 删除命名实体(例如 '@united'联合航空)
    - 纠正错误 (例如: '&' 改成 '&')
    @该函数input:传进文本字符串
    @该函数return:返回处理过的文本字符串
    """
    # Remove '@name'
    text = re.sub(r'(@.*?)[\s]', ' ', text)

    # Replace '&' with '&'
    text = re.sub(r'&', '&', text)

    # Remove trailing whitespace 删除空格
    text = re.sub(r'\s+', ' ', text).strip()

    return text
# Print sentence 0 打印示例样本
print('Original: ', X[0])
print('Processed: ', text_preprocessing(X[0]))
↓
Original: @united I’m having issues. Yesterday I rebooked for 24 hours after I was supposed to fly, now I can’t log on & check in. Can you help?
Processed: I’m having issues. Yesterday I rebooked for 24 hours after I was supposed to fly, now I can’t log on & check in. Can you help?
4.2 BERT Tokenizer 相关函数构建
为了应用经过预训练的BERT,我们必须使用库提供的tokenizer。 这是因为(1)模型具有特定的固定词汇表,并且(2)BERTtokenizer具有处理,词汇表外单词的特定方法。
另外,我们需要在每个句子的开头和结尾添加特殊标记,将所有句子填充并截断为单个恒定长度,并使用“attention mask”显式指明padding tokens。
BERT Tokenizer 的encode_plus方法:
(1)将文字分割成token,
(2)添加特殊的[CLS]和[SEP]token,并
(3)将这些token转换为tokenizer词汇表的索引,
(4)将句子填充或截断到最大长度,以及
(5)制作attention mask。
from transformers import BertTokenizer

# 加载 BERT tokenizer
tokenizer = BertTokenizer.from_pretrained('bert-base-uncased', do_lower_case=True)

# 创建一个函数来tokenize一串文本
def preprocessing_for_bert(data):
    """
    @传入参数(param)  一串存储在np.array格式下的文本数据: Array of texts to be processed.
    @该函数返回(return1):   input_ids (torch.Tensor格式): Tensor of token ids to be fed to a model.
    @该函数返回(return2):   attention_masks (torch.Tensor格式): 用于指示句子中的哪些token用于模型训练
    """
    # 创建空列表来存储output数据
    input_ids = []
    attention_masks = []

    # 对存储在data(np.array)中的每个句子....
    for sent in data:
        encoded_sent = tokenizer.encode_plus(  #进行编码
            text=text_preprocessing(sent),  # 调用上面创建的略微预处理文本的函数
            add_special_tokens=True,        # Add `[CLS]` and `[SEP]`
            max_length=MAX_LEN,             # 指定max_length(后面会指定)
            padding='max_length',         # 补长 padding
            #return_tensors='pt',           # Return PyTorch tensor 是否返回PyTorch张量
            return_attention_mask=True,      # Return attention mask
            truncation=True                  #截短
            )

        # 从上面编码得到的对象中用get获取input_ids和attention_mask存储到各自的列表中
        input_ids.append(encoded_sent.get('input_ids'))
        attention_masks.append(encoded_sent.get('attention_mask'))

    # 再将input_ids列表和attention_masks列表转换成torch的张量格式
    input_ids = torch.tensor(input_ids)
    attention_masks = torch.tensor(attention_masks)
	#返回所有句子的input_ids, attention_masks(tensor格式)
    return input_ids, attention_masks
上面函数中 tokenize.encode_plus 会:
# (1) 将句子进行切词,Tokenize the sentence
# (2) 添加特殊符号,Add the [CLS] and [SEP] token to the start and end
# (3) 截长补短, Truncate/Pad sentence to max length
# (4) 将每个token映射到指定的词汇表里面对应的索引, Map tokens to their IDs
# (5) 创建attention mask, Create attention mask
# (6) 返回一个输出字典,Return a dictionary of outputs,输出字典用get来获取对应的input_id, attention_mask
4.3 确定输入句子的固定长度
# 将训练数据集和测试数据集合并
all_tweets = np.concatenate([data.tweet.values, test_data.tweet.values])

# 对合并的数据进行编码
encoded_tweets = [tokenizer.encode(sent, add_special_tokens=True) for sent in all_tweets]

# 将编码后的句子长度,存储到一个列表中,找最大值
max_len = max([len(sent) for sent in encoded_tweets])
print('Max length: ', max_len)
还可以通过画图,找阈值
token_lens = []

for txt in all_tweets :
  tokens = tokenizer.encode(txt)
  token_lens.append(len(tokens))
sns.distplot(token_lens)
plt.xlim([0, 256]); # x轴长度
plt.xlabel('Token count')
def find_max_length(set_a_num,token_lens):
    '''set_a_num是要设置一个句子长度,看看有多少样本的长度小于这个阈值'''
    how_many_samples = len(token_lens) #有多少个样本
    how_many_samples_length_less_than_set_num = sum(i<set_a_num for i in token_lens) # 有多少样本,句子长度小于所设定的阈值
    percentage = how_many_samples_length_less_than_set_num/how_many_samples
    percentage = round(percentage,6)#保留六位小数
    percentage_str = format(percentage,'.4%') #将小数转换为百分比的字符串
    print("有{}的样本,分词后,句子的长度小于{}".format(percentage_str,set_a_num))
4.4 tokenize data 正式对数据进行分词
# 指定 `MAX_LEN`
MAX_LEN = 64

# 打印示例:第一个句子的token_id
token_ids = list(preprocessing_for_bert([X[0]])[0].squeeze().numpy())
print('Original: ', X[0])
print('Token IDs: ', token_ids)

# 运行函数 `preprocessing_for_bert`来处理训练集和验证集
print('Tokenizing data...')
train_inputs, train_masks = preprocessing_for_bert(X_train)
val_inputs, val_masks = preprocessing_for_bert(X_val)
4.5 创建PyTorch DataLoader
我们将使用Torch 的 DataLoader类为数据集创建一个迭代器。 这将有助于在训练期间节省内存并提高训练速度。
from torch.utils.data import TensorDataset, DataLoader, RandomSampler, SequentialSampler

# 将训练集和验证集的label转化成 torch.Tensor格式
train_labels = torch.tensor(y_train)
val_labels = torch.tensor(y_val)

# 针对微调fine-tuning BERT, 作者推荐 batch size 16或32
batch_size = 32

# 为训练集创建DataLoader
train_data = TensorDataset(train_inputs, train_masks, train_labels)# 将训练集的input_id,mask和label都封装进TensorDataset
train_sampler = RandomSampler(train_data) # 将封装好的数据洗牌
train_dataloader = DataLoader(train_data, sampler=train_sampler, batch_size=batch_size) #将洗牌好的数据传进DataLoader,并指定batch_size

# 为验证集创建DataLoader
val_data = TensorDataset(val_inputs, val_masks, val_labels)
val_sampler = SequentialSampler(val_data)
val_dataloader = DataLoader(val_data, sampler=val_sampler, batch_size=batch_size)
5.训练模型Train model
5.1 创建 BertClassifier
BERT基由12个Transformer层组成,每个Transformer层都接受token embeddings 的列表,并在输出上产生相同数量的且具有相同隐藏大小(或尺寸)的embedding。【CLS】token作为最后一个Transformer层的输出,被用于当作一个句子的features,来传入分类器中
Transformer库有BertForSequenceClassification 类,是设计用来做分类任务的,然而,这篇文章会创建一个新的类来定制自己的分类器
%%time
import torch
import torch.nn as nn
from transformers import BertModel

# 创建 BertClassfier 类
class BertClassifier(nn.Module):
    def __init__(self, freeze_bert=False):
        """
        实例化BertClassifier需要三个参数
        @param1    bert: a BertModel object (BertModel对象)
        @param2    classifier: a torch.nn.Module classifier (一个自定义的分类器,该分类器继承nn.Module)
        @param3    freeze_bert (bool): Set `False` to fine-tune the BERT model (设置是否冻结BERT里的权重参数)
        """
        super(BertClassifier, self).__init__()
        # 指定 hidden size of BERT(默认768维), hidden size of our classifier(自己设置为50), and number of labels(2分类问题)
        D_in, H, D_out = 768, 50, 2

        # 实例化BERT模型(Instantiate BERT model)
        self.bert = BertModel.from_pretrained('bert-base-uncased')

        # 实例化一层前向传播分类器(Instantiate an one-layer feed-forward classifier)
        self.classifier = nn.Sequential( # Sequential 就是一个有序容器,添加一层层神经网络
            nn.Linear(D_in, H),
            nn.ReLU(),
            #nn.Dropout(0.5),
            nn.Linear(H, D_out)
        )

        # 冻结 BERT model(是否让BERT的权重参数进行更新)
        if freeze_bert:
            for param in self.bert.parameters():
                param.requires_grad = False

    def forward(self, input_ids, attention_mask):
        """
        将输入传进BERT中,让classifier来计算logits,logits类似于未进行归一化的softmax的概率
        @输入(param1):input_ids (torch.Tensor): 传入一个id张量tensor,其形状为(batch_size, max_length)
        @输入(param2):attention_mask (torch.Tensor): 传入一个mask张量,形状为(batch_size, max_length)
        @返回(return): logits (torch.Tensor): 一个输出张量,类似于softmax(batch_size, num_labels)
        """
        # 将input_ids,和attention_mask传入 BERT
        outputs = self.bert(input_ids=input_ids,
                            attention_mask=attention_mask)

        #提取用于分类任务的特殊token[CLS]的最后一个隐层参数 (Extract the last hidden state of the token `[CLS]` for classification task)
        last_hidden_state_cls = outputs[0][:, 0, :]

        # 将上面获得CLS的最后一个隐层参数传入classifier计算logits值
        logits = self.classifier(last_hidden_state_cls) #可以将logits理解成未进入softmax时的概率

        return logits
5.2 创建优化器和学习率规划器Optimizer & Learning Rate Scheduler
为了微调Bert分类器,需要创建一个optimizer,作者推荐如下超参数设置:
Batch size: 16 or 32
Learning rate (Adam): 5e-5, 3e-5 or 2e-5
Number of epochs: 2, 3, 4
这里使用AdamW 优化器,创建一个模型初始化函数,函数中实例化了上面定义的BertClassifier分类器类
from transformers import AdamW, get_linear_schedule_with_warmup

def initialize_model(epochs=4):
    """
    初始化Bert Classifier, optimizer ,learning rate scheduler.
    """
    # 实例化 Bert Classifier
    bert_classifier = BertClassifier(freeze_bert=False)

    # 告诉这个实例化的分类器,使用gpu还是cpu
    bert_classifier.to(device)

    # 创建优化器optimizer
    optimizer = AdamW(bert_classifier.parameters(),
                      lr=5e-5,    # Default learning rate
                      eps=1e-8    # Default epsilon value
                      )

    # 总共训练步数是多少?Total number of training steps
    total_steps = len(train_dataloader) * epochs

    # 设置learning rate scheduler
    scheduler = get_linear_schedule_with_warmup(optimizer,
                                                num_warmup_steps=0, # 默认值是0,意思是预热期要几步达到预设的学习率
                                                num_training_steps=total_steps)
    return bert_classifier, optimizer, scheduler
使用Warmup预热学习率的方式,即先用最初的小学习率训练,然后每个step增大一点点,直到达到最初设置的比较大的学习率时(注:此时预热学习率完成),采用最初设置的学习率进行训练(注:预热学习率完成后的训练过程,学习率是衰减的),有助于使模型收敛速度变快,效果更佳。
5.3 设置Training Loop 训练循环
我们将会训练我们的Bert分类器进行4个epoch,并在验证集上评估每一轮的表现:
训练具体步骤:
- 从dataloader解压出我们的训练集数据,将这些数据传进GPU/CPU
- 将之前一步算出的梯度,清零
- 进行前向传播,计算logits概率和损失
- 执行后向传播,计算梯度 (loss.backward())
- 将梯度进行归一化,防止梯度爆炸 Clip the norm of the gradients to 1.0 to prevent “exploding gradients”
- 更新模型的权重参数(optimizer.step())
- 更新学习率 (scheduler.step())
评估具体步骤:
- 从dataloader解压验证集数据,传入GPU/CPU
- 前向传播
- 在验证数据集上,计算损失值和准确率
import random
import time

# 指定 loss function
loss_fn = nn.CrossEntropyLoss() #交叉熵损失函数

def set_seed(seed_value=42):
    """设置随机种子,为了之后复现。Set seed for reproducibility.
    """
    random.seed(seed_value)
    np.random.seed(seed_value)
    torch.manual_seed(seed_value)
    torch.cuda.manual_seed_all(seed_value)

def train(model, train_dataloader, val_dataloader=None, epochs=4, evaluation=False):
    """正式 BertClassifier model.
    """
    # 开始training loop
    print("Start training...\n")
    for epoch_i in range(epochs):
        # =================================================================================================
        #                                            Training
        # =================================================================================================
        # 打印结果表格的表头,epoch显示当前训练是第几个epoch,训练到第几个batch了,Elapsed是耗时多少秒
        print(f"{'Epoch':^7} | {'Batch':^7} | {'Train Loss':^12} | {'Val Loss':^10} | {'Val Acc':^9} | {'Elapsed':^9}")
        print("-"*70)

        # 开始计时,测算每轮epoch耗时多长时间
        t0_epoch, t0_batch = time.time(), time.time()

        # 每轮epoch开始前将各个计数器归零
        total_loss, batch_loss, batch_counts = 0, 0, 0

        # 这个train函数需要往里传入一个model参数,而这个model参数接收的就是之前initialize_model函数会返回的一个bert分类器模型
        model.train() #这个model = 一个实例化的bert_classifier

        # For each batch of training data... 从dataloader读取数据
        for step, batch in enumerate(train_dataloader):
            batch_counts +=1
            # 加载 batch到GPU/CPU
            b_input_ids, b_attn_mask, b_labels = tuple(t.to(device) for t in batch)

            # 将累计梯度清零
            model.zero_grad()

            # 往模型中传入从上面得到的input_id和mask,模型会进行前向传播得到logits值
            logits = model(b_input_ids, b_attn_mask)

            # 通过损失函数计算logits跟label之间的差距得到损失值,Compute loss and accumulate the loss values
            loss = loss_fn(logits, b_labels)
            batch_loss += loss.item()
            total_loss += loss.item()

            # 执行后向传播计算梯度
            loss.backward()

            # 修剪梯度进行归一化防止梯度爆炸
            torch.nn.utils.clip_grad_norm_(model.parameters(), 1.0)

            # 更新model参数,更新学习率
            optimizer.step()
            scheduler.step()

            # 每20个batch打印损失值和时间消耗
            if (step % 20 == 0 and step != 0) or (step == len(train_dataloader) - 1):
                # Calculate time elapsed for 20 batches
                time_elapsed = time.time() - t0_batch

                # Print training results
                print(f"{epoch_i + 1:^7} | {step:^7} | {batch_loss / batch_counts:^12.6f} | {'-':^10} | {'-':^9} | {time_elapsed:^9.2f}")

                # 将计数器清零
                batch_loss, batch_counts = 0, 0
                t0_batch = time.time()

        # 计算整个训练数据集的平均损失(Calculate the average loss over the entire training data)
        avg_train_loss = total_loss / len(train_dataloader)

        print("-"*70)
        # =========================================================================================
        #               Evaluation
        # =========================================================================================
        if evaluation == True:
            # 在每个epoch结束后会用验证集来测试模型的表现
            val_loss, val_accuracy = evaluate(model, val_dataloader) # 这个evaluate函数下面有定义

            # 打印这一轮epoch下,在训练集上训练完所有数据后所耗得总体时间
            time_elapsed = time.time() - t0_epoch

            print(f"{epoch_i + 1:^7} | {'-':^7} | {avg_train_loss:^12.6f} | {val_loss:^10.6f} | {val_accuracy:^9.2f} | {time_elapsed:^9.2f}")
            print("-"*70)
        print("\n")

    print("Training complete!")


def evaluate(model, val_dataloader):
    """在每个epoch结束后会用验证集来测试模型的表现
    """
    # Put the model into the evaluation mode. The dropout layers are disabled during
    # the test time.
    model.eval()

    # 创建空集,为了之后记录每一个batch的accuracy和loss
    val_accuracy = []
    val_loss = []

    # F在验证集中,每个batch....
    for batch in val_dataloader:
        # 加载 batch 数据到 GPU/CPU
        b_input_ids, b_attn_mask, b_labels = tuple(t.to(device) for t in batch)

        # 计算 logits
        with torch.no_grad():
            logits = model(b_input_ids, b_attn_mask)

        # 计算损失值
        loss = loss_fn(logits, b_labels)
        val_loss.append(loss.item())

        # 获取预测值
        preds = torch.argmax(logits, dim=1).flatten()

        # 计算准确率
        accuracy = (preds == b_labels).cpu().numpy().mean() * 100
        val_accuracy.append(accuracy)

    # 计算验证集的accuracy和loss
    val_loss = np.mean(val_loss)
    val_accuracy = np.mean(val_accuracy)

    return val_loss, val_accuracy
5.4 训练
set_seed(42)    # Set seed for reproducibility
bert_classifier, optimizer, scheduler = initialize_model(epochs=2)
train(bert_classifier, train_dataloader, val_dataloader, epochs=2, evaluation=True)
5.5 训练后验证模型精度
步骤跟train loop里的evaluation很像
import torch.nn.functional as F

def bert_predict(model, test_dataloader):
    """Perform a forward pass on the trained BERT model to predict probabilities
    on the test set.
    """
    # Put the model into the evaluation mode. The dropout layers are disabled during
    # the test time.
    model.eval()

    all_logits = []

    # For each batch in our test set...
    for batch in test_dataloader:
        # Load batch to GPU
        b_input_ids, b_attn_mask = tuple(t.to(device) for t in batch)[:2]

        # Compute logits
        with torch.no_grad():
            logits = model(b_input_ids, b_attn_mask)
        all_logits.append(logits)

    # Concatenate logits from each batch
    all_logits = torch.cat(all_logits, dim=0)

    # Apply softmax to calculate probabilities
    probs = F.softmax(all_logits, dim=1).cpu().numpy()

    return probs
画图:ROC曲线
from sklearn.metrics import accuracy_score, roc_curve, auc

def evaluate_roc(probs, y_true):
    """
    - Print AUC and accuracy on the test set
    - Plot ROC
    @params    probs (np.array): an array of predicted probabilities with shape (len(y_true), 2)
    @params    y_true (np.array): an array of the true values with shape (len(y_true),)
    """
    preds = probs[:, 1]
    fpr, tpr, threshold = roc_curve(y_true, preds)
    roc_auc = auc(fpr, tpr)
    print(f'AUC: {roc_auc:.4f}')

    # Get accuracy over the test set
    y_pred = np.where(preds >= 0.5, 1, 0)
    accuracy = accuracy_score(y_true, y_pred)
    print(f'Accuracy: {accuracy*100:.2f}%')

    # Plot ROC AUC
    plt.title('Receiver Operating Characteristic')
    plt.plot(fpr, tpr, 'b', label = 'AUC = %0.2f' % roc_auc)
    plt.legend(loc = 'lower right')
    plt.plot([0, 1], [0, 1],'r--')
    plt.xlim([0, 1])
    plt.ylim([0, 1])
    plt.ylabel('True Positive Rate')
    plt.xlabel('False Positive Rate')
    plt.show()
# Compute predicted probabilities on the test set
probs = bert_predict(bert_classifier, val_dataloader)

# Evaluate the Bert classifier
evaluate_roc(probs, y_val)
5.6 用所有的Traing data来训练模型
之前是吧train_data分出一部分validation data,现在要合并
#Concatenate the train set and the validation set
full_train_data = torch.utils.data.ConcatDataset([train_data, val_data])# 调用torch库中的合并数据集函数
full_train_sampler = RandomSampler(full_train_data) #将数据洗牌,打乱顺序
full_train_dataloader = DataLoader(full_train_data, sampler=full_train_sampler, batch_size=32) #将打乱的数据放进DataLoader中

# Train the Bert Classifier on the entire training data
set_seed(42)
bert_classifier, optimizer, scheduler = initialize_model(epochs=2)
train(bert_classifier, full_train_dataloader, epochs=2)
6. 对测试集进行预测
6.1 Test Data Preparation
#再浏览下测试集长什么样
test_data.sample(5)
对test data运行数据预处理程序
# Run `preprocessing_for_bert` on the test set
print('Tokenizing data...')
test_inputs, test_masks = preprocessing_for_bert(test_data.tweet)

# Create the DataLoader for our test set
test_dataset = TensorDataset(test_inputs, test_masks)
test_sampler = SequentialSampler(test_dataset)
test_dataloader = DataLoader(test_dataset, sampler=test_sampler, batch_size=32)
6.2 预测
此项目的测试集是没有label的,只能估算,其中大约有300条非负面的推文。因此,我们将继续调整决策阈值,直到我们拥有约300条非负面的推文为止。
我们将使用的阈值为0.992,这意味着预测概率大于99.2%的推文将被预测为阳性。与默认的0.5阈值相比,该值非常高。
手动检查测试集后,我发现这里的情感分类任务对人类来说都很困难。因此,较高的阈值将为我们提供安全的预测。
# Compute predicted probabilities on the test set
probs = bert_predict(bert_classifier, test_dataloader) #这里的bert_classifier是上面训练好的分类器

# Get predictions from the probabilities
threshold = 0.9
preds = np.where(probs[:, 1] > threshold, 1, 0) #满足判断预测值大于阈值就使出1,不满足输出0

# Number of tweets predicted non-negative
print("Number of tweets predicted non-negative: ", preds.sum())
解释np.where(condition, x, y)
满足条件(condition),输出x,不满足输出y。
——————————————————————————————————————————————————————
现在随机,选20个推特,来看预测的准确性
output = test_data[preds==1] # preds==1 可以看作是掩码,false,false,Ture,Flase....
list(output.sample(20).tweet)
[’@AmericanAir nope. Too late now. I hope it works for my next flight!’,
"I can’t get over how much different it is flying @VirginAmerica than any other airline! I Love it! I can’t wait to be home (for a week) ",
‘@BrysonJennings @SouthwestAir having the same issue as we speak with @SilverAirways!’,
“Was there an inflight movie? Watch Airbus’ mad stunt with $1.5 billion worth of #airplanes http://t.co/s6DIuB0vs6 #travel @americanair”,
‘@carlyaquilino @JetBlue Ahhhh Florida deepest part of the Deep South. I want to leave too. although South Florida is not as bad’,
‘Cant wait for @SouthwestAir to bring me to florida in a couple weeks maybe I will even get a new plane ’,
“@ajblankenship @Expedia @AmericanAir @emirates I am looking into @emirates flying to Dubai and Nairobi … Can’t wait! #ExpediaChat”,
‘@Zak_Bagans @SouthwestAir it will go by quickly sorry you didnt get what you desired i hate when people say thats life but sadly it is’,
‘Not a bad rate for #Paris @AmericanAir $701 LA->Paris RT/incl taxes/ Valid for #travel starting March 31st/Sun-Thurs departures’,
‘When did @AlaskaAir become the most expensive way to fly from Seattle to Hawaii? Weird. Sad. Want to support the hometown team, but…’,
“@thekenyeung PS always always fly @VirginAmerica their operations are the best and the planes are new. I’ve almost never had delays.”,
‘@DeltaAssist DM me. Have had an issue and like to discuss.’,
'@airfarewatchdog: NYC #JFK to Los Angeles #LAX $261 round-trip, on @united travel in Feb/March http://t.co/FRUzSysaXO_ need late April _’,
‘Thanks @AlaskaAir for covering my damaged back from an incident in Bozeman, MT. I appreciate it and look forward to flying with you again’,
‘@AmericanAir I never thought I would have to use social media to complain, but I had purchased two tickets to Cabo last year for this week.’,
“Hope the new @AmericanAir weeds out the worst of @USAirways in the merger. And there’s a lot that can be weeded out.”,
'@AmericanAir can you help @camerondallas get to Shreveport cos he missed his flight? ',
‘@united I miss @JetBlue you could learn a few things from them’,
“34 dais waiting for info about my luggag@Castellanosgena @AmericanAir @British_Airways what to spect? When you’re going to do somenthing?”,
“@easyJet I hope U don’t kick out crying toddlers from Ur flights @united @SarahBlackwood1”]
7. 总结
通过在BERT之上添加简单的单层神经网络分类器并对BERT进行微调,我们可以获得很好的性能,尽管我们只有3400个数据,但它比基线方法要好10%(基线方法用的是TF-DF将句子词向量化,然后用贝叶斯进行分类)
另外,尽管BERT很大,很复杂并且具有数百万个参数,但我们只需要在2-4个时间段内对其进行微调即可。 由于BERT接受了大量培训,并且已经编码了许多有关我们语言的信息,因此可以实现该结果。 在短时间内通过少量数据获得的非凡性能表明了为什么BERT是目前可用的最强大的NLP模型之一。