CentOS7 ElasticSearch与ElasticSearch-head的安装部署
一,相关网站
| ELK官网 | https://www.elastic.co/ |
| 官网文档 | https://www.elastic.co/guide/index.html |
| 中文手册 | https://www.elastic.co/guide/cn/elasticsearch/guide/current/index.html |
| 中文社区 | https://elasticsearch.cn/ |
| ELK-API | https://www.elastic.co/guide/en/elasticsearch/client/java-api/current/transport-client.html |
二,ElasticSearch安装
1,确认Java环境
echo $JAVA_HOME2,ElasticSearch下载
这里使用wget命令,2021/06/15 官网最新的版本更新到了 7.13.2,有需要可以换下版本。
官网下载链接: https://www.elastic.co/cn/downloads/elasticsearch
#进入 /usr/local
cd /usr/local

#下载elasticsearch
wget  https://artifacts.elastic.co/downloads/elasticsearch/elasticsearch-6.6.0.tar.gz
下载完成后解压tar文件,然后更改一下解压出来的文件夹名称,去掉版本号改为elasticsearch
#解压
tar -zxvf elasticsearch-6.6.0.tar.gz

# 修改文件夹名称
mv elasticsearch-6.6.0 elasticsearch
3,修改配置文件
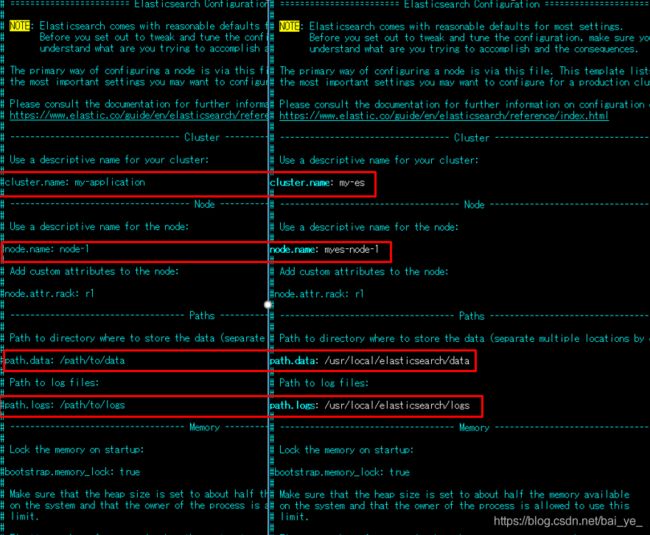
之后进入 elasticsearch 文件夹下 config ,vim 修改 elasticsearch.yml 配置文件。
vim elasticsearch.yml#配置es的集群名称,默认是elasticsearch,es会自动发现在同一网段下的es,
#如果在同一网段下有多个集群,就可以用这个属性来区分不同的集群。
cluster.name: my-es
#节点名称
node.name: myes-node-1
#设置索引数据的存储路径
path.data: /usr/local/elasticsearch/data
#设置日志的存储路径
path.logs: /usr/local/elasticsearch/logs
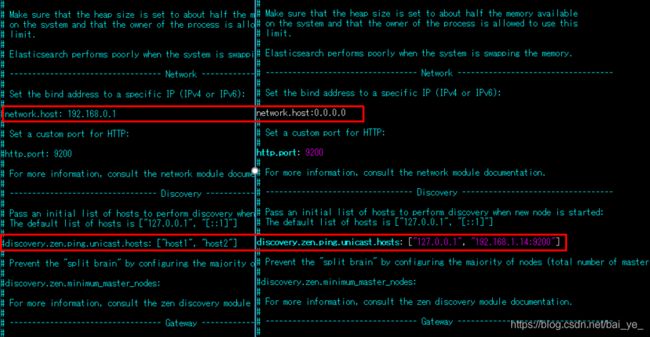
#设置当前的ip地址,通过指定相同网段的其他节点会加入该集群中
network.host: 0.0.0.0
#设置对外服务的http端口
http.port: 9200
#设置集群中master节点的初始列表,可以通过这些节点来自动发现新加入集群的节点
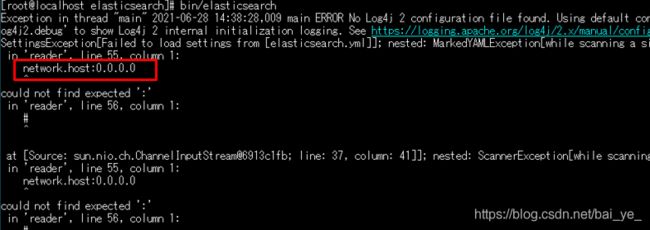
discovery.zen.ping.unicast.hosts: ["127.0.0.1","192.168.1.14:9200"]这里第一次配置network.host: 冒号后面未加空格,导致后面启动报错了,正确应该如下
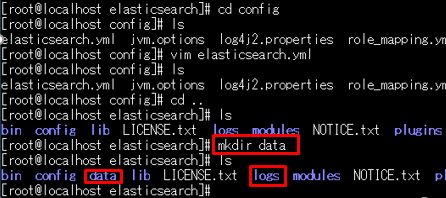
检查一下 elasticsearch 有没有data和logs文件夹,没有就 mkdir 文件夹名 自己创建一个。
4,启动异常处理
总结一下主要遇到以下几类
- 配置文件出错
- can not run elasticsearch as root
- AccessDeniedException
- Native controller process has stopped - no new native processes can be started
ps:不想一步一步踩坑的话,先看下面的对应方法,全部修改之后再启动。
上述准备工作完成后就可以启动了,在 elasticsearch 文件夹下执行启动命令
bin/elasticsearch配置文件出错:这里报配置文件出错,就是上面配置的 network.host: 冒号后面未加空格,修改一下就好了。
再次启动,报错can not run elasticsearch as root 。
因为安全问题elasticsearch 不让用root用户直接运行,所以要创建新用户。
useradd esuser
passwd wsuser
#之后输入密码 与 密码确认
su esuser 再次启动报错 AccessDeniedException,权限问题。
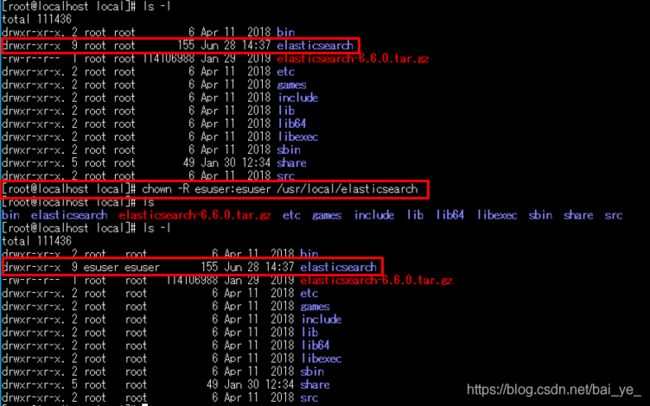
所以给esuser用户赋予 elasticsearch 文件夹的访问权限,如下(这里切到了root用户执行):
chown -R esuser:esuser /usr/local/elasticsearch之后切回 esuser,再次启动报错: Native controller process has stopped - no new native processes can be started。
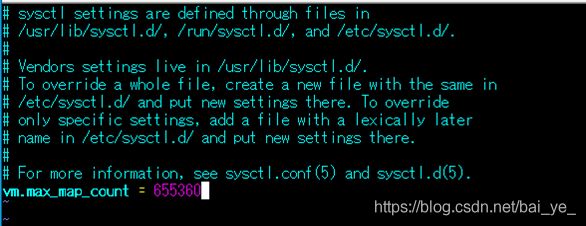
可能原因1:最大虚拟内存太小,解决办法切换到 root 用户修改配置sysctl.conf:
vi /etc/sysctl.conf vm.max_map_count=655360之后保存,并执行
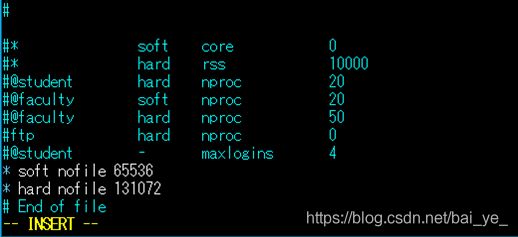
sysctl -p可能原因2:无法创建本地文件问题,用户最大可创建文件数太小,解决方案:切换到root用户,编辑limits.conf配置文件。
vi /etc/security/limits.conf并在文件最后追加
* soft nofile 65536
* hard nofile 131072
保存退出未生效的情况下,可能需要重新登录之后再试一下。
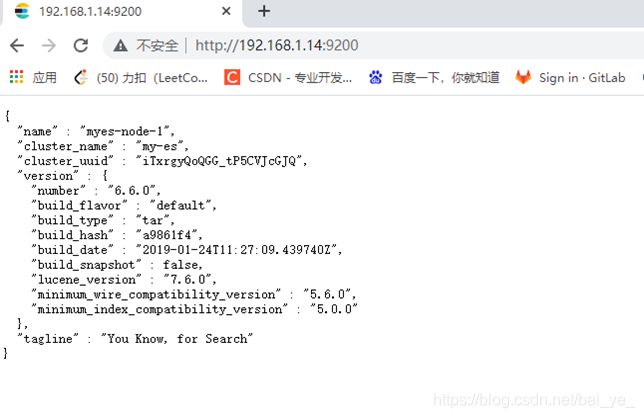
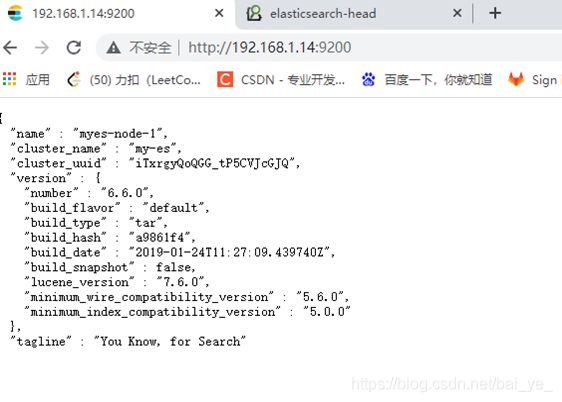
最后启动成功,ip地址:9200 访问如下:
三,ElasticSearch-head安装
1,nodejs install
在/usr/local/ 下执行
# 下载  在/usr/local/ 下执行
wget https://nodejs.org/dist/v10.16.3/node-v10.16.3-linux-x64.tar.xz
解压后,vi /etc/profile 追加nodejs环境变量
# 解压
tar -xJf node-v10.16.3-linux-x64.tar.xz

vi /etc/profile
# nodejs环境变量
export NODE_HOME=/usr/local/node-v10.16.3-linux-x64
export PATH=$NODE_HOME/bin:$PATH检查是否安装成功
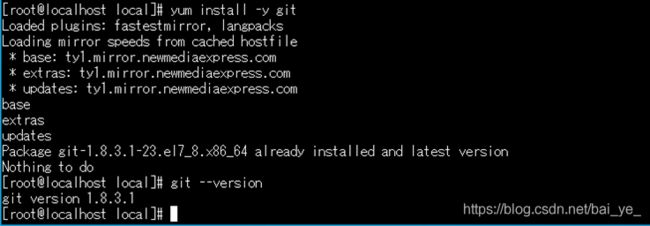
2,git install
# 安装git插件
yum install -y git

# 验证git插件是否安装成功
git --version
3,elasticsearch-head npm install
# 在 /usr/loacl/下执行
git clone git://github.com/mobz/elasticsearch-head.git

# 在 /usr/loacl/elasticsearch-head/下执行
npm install
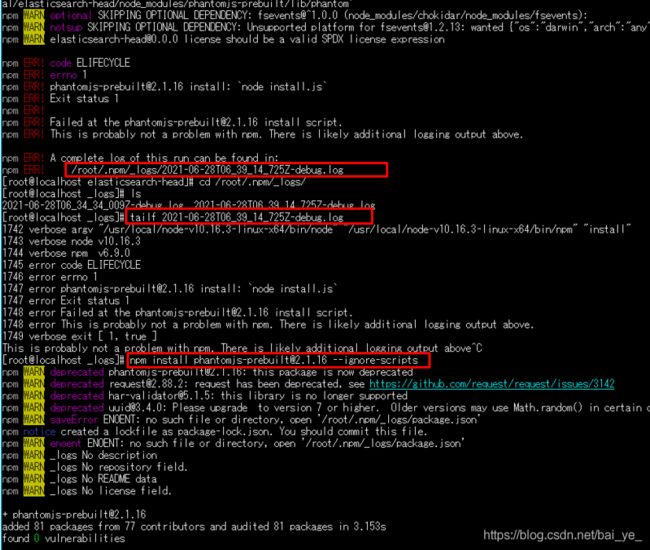
这里npm install 报错,查看了log,npm install执行之前需要执行:
npm install [email protected] --ignore-scripts npm install 成功。
4,跨域访问
vi 修改 /usr/local/elasticsearch/config/elasticsearch.yml 配置文件,文件最后追加:
http.cors.enabled: true
http.cors.allow-origin: "*"
5,Elasticsearch-head启动
elasticsearch-head 文件夹下启动,
npm run start四,ElasticSearch-head 连接 ElasticSearch
1,nohup 后台运行
# elasticsearch nohup启动
nohup /usr/local/elasticsearch/bin/elasticsearch 2>&1 &

# elasticsearch-head nohup启动 /usr/lcoal/elasticsearch-head/ 下执行
nohup npm run start &
lsof -i:port 查看运行情况, kill -9 PID 杀死进程。
2,查看启动与连接情况
ElasticSearch-head 成功连接 ElasticSearch。
五,参考博客
ElasticSearch在linux上安装部署
Elasticsearch-head插件的安装与配置
windows下安装ElasticSearch的Head插件报错解决方法


