【图像去雾】基于双边滤波+opencv【含具体代码】
he博士提出的暗通道先验去雾算法相信大家多有了解,该算法处理后的图像雾气可以得到很有效的去除,可以说是目前最知名的模型了。之前在知网上看到几篇将双边滤波与暗通道结合起来的去雾算法,编程复现后发现去雾效果很是不错,并且原理也并不复杂。下文附上原理和代码。
大气散射模型:
求解暗通道:
求解大气光幕:
求解透射率
图像复原
附代码:
#include
#include
#include
#include
#include
#include
#include
#include
using namespace cv;
using namespace std;
void fogremove(Mat& image, Mat& dstimage)
{
	//求解暗通道图
	Mat iimage;
	image.convertTo(iimage, CV_32FC3,1.0 /255,0);
	int w = 15;
	Mat iborder;
	copyMakeBorder(iimage,iborder,w/2, w / 2, w / 2, w / 2, BORDER_REPLICATE);
	vector ibordervector(3);
	split(iborder,ibordervector);
	Mat darkchannel(image.size(), CV_32FC1);
	double minTemp, minPixel;
	for (int r = 0; r < darkchannel.rows; r++)
	{
		for (int c = 0; c < darkchannel.cols; c++)
		{
			minPixel = 1;
			for (vector::iterator itib = ibordervector.begin(); itib != ibordervector.end(); itib++)
			{
				Mat roi(*itib, Rect(c, r, w, w));
				minMaxLoc(roi, &minTemp);
				minPixel = min(minTemp, minPixel);
			}
			darkchannel.at(r, c) = float(minPixel);
		}
	}
	imshow("dark", darkchannel);
	//求解大气光强
	float ratioa = 0.001;
	int num = ratioa * darkchannel.rows * darkchannel.cols;
	Mat dv;
	dv = darkchannel.reshape(1, 1);
	Mat_ dvidx;
	sortIdx(dv, dvidx, SORT_EVERY_ROW + SORT_DESCENDING);
	int count = 0, temp = 0;
	int x, y;
	Mat mask(darkchannel.size(), CV_8UC1);
	int r = 0;
	for (int c = 0; c < dvidx.cols; c++)
	{
		temp = dvidx.at(r, c);
		x = temp / darkchannel.cols;
		y = temp % darkchannel.cols;
		if (count < num)
		{
			mask.at(x, y) = 1;
			count += 1;
		}
		else
		{
			mask.at(x, y) = 0;
		}
	}
	vector A(3);
	vector iv(3);
	split(iimage, iv);
	vector::iterator itA = A.begin();
	vector::iterator itiv = iv.begin();
	for (; itA != A.end() && itiv != iv.end(); itA++, itiv++)
	{
		minMaxLoc(*itiv,0,&(*itA),0,0,mask);

	}

	//求解最小颜色分量图
	Mat minRgb = Mat::zeros(image.rows, image.cols, CV_8UC1);
	for (int i = 0; i < image.rows; i++)
		for (int j = 0; j < image.cols; j++)
		{
			uchar g_minvalue = 255;
			for (int c = 0; c < 3; c++)
			{
				if (g_minvalue > image.at(i, j)[c])
					g_minvalue = image.at(i, j)[c];
			}
			minRgb.at(i, j) = g_minvalue;
		}
	//求解大气光幕
	Mat vbx(minRgb.size(), CV_8UC1);
	Mat wbx(minRgb.size(), CV_8UC1);
	Mat gx(minRgb.size(), CV_8UC1);
	bilateralFilter(minRgb, vbx, 15, 10, 10);
	for (int i = 0; i < image.rows; i++)
		for (int j = 0; j < image.cols; j++)
		{
			wbx.at(i, j) = abs(minRgb.at(i, j) - vbx.at(i, j));
		}
	bilateralFilter(wbx, gx, 15, 10, 10);
	Mat bx(minRgb.size(), CV_8UC1);
	int A0 = (A[0] + A[1] + A[2]) / 3 * 255;
	for (int i = 0; i < image.rows; i++)
		for (int j = 0; j < image.cols; j++)
		{
			bx.at(i, j) = vbx.at(i, j) - 3 * vbx.at(i, j) * gx.at(i, j) / A0;
		}
	Mat vx(minRgb.size(), CV_8UC1);
	for (int i = 0; i < image.rows; i++)
		for (int j = 0; j < image.cols; j++)
		{
			vx.at(i, j) = MAX(MIN(0.9 * bx.at(i, j), minRgb.at(i, j)), 0);
		}
	//求解透射率
	Mat tx(minRgb.size(), CV_32FC1);
	for (int i = 0; i < image.rows; i++)
		for (int j = 0; j < image.cols; j++)
		{
			tx.at(i, j) = 1 - 0.95 * vx.at(i, j) / A0;
		}
	imshow("tx", tx);
	//图像复原
	float t0 = 0.1;
	for (size_t r = 0; r < dstimage.rows; r++)
	{
		for (size_t c = 0; c < dstimage.cols; c++)
		{
			dstimage.at(r, c) = Vec3f((iimage.at(r, c)[0] - A[0]) / max(tx.at(r, c), t0) + A[0], (iimage.at(r, c)[1] - A[1]) / max(tx.at(r, c), t0) + A[1], (iimage.at(r, c)[2] - A[2]) / max(tx.at(r, c), t0) + A[2]);
		}
	}
	imshow("result",dstimage);
}
int main()
{
	cv::utils::logging::setLogLevel(utils::logging::LOG_LEVEL_SILENT);
	Mat src = imread("wutu.png");
	Mat dst(src.size(), CV_32FC3);
	imshow("original",src);
	fogremove(src,dst);
	waitKey();
	return 0;
}
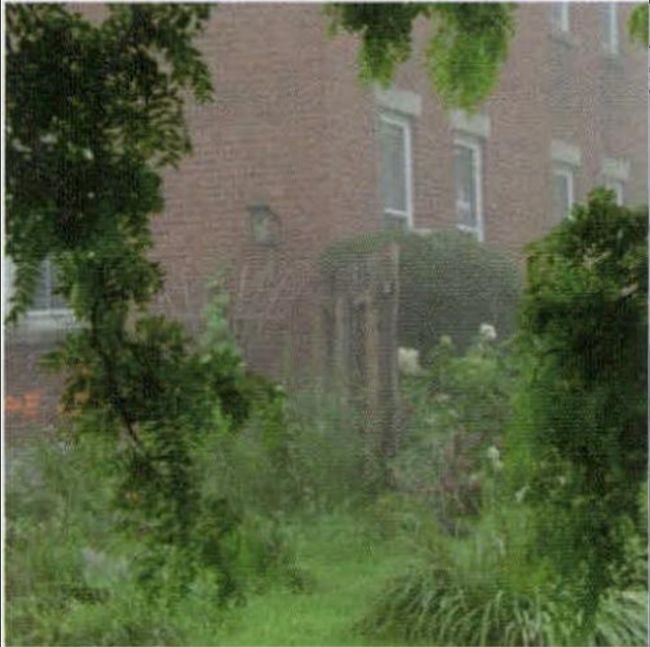
以上代码在配置了opencv库的基础上可以直接运行,效果如下:
原图:
去雾后图像
最后列出本文参考的相关文献,帮助大家可以更好地理解和作出进一步的改进。
王一帆,尹传历,黄义明,王洪玉.基于双边滤波的图像去雾[J].中国图象图形学报,2014,19(03):386-392;
余永龙. 结合双边滤波与暗通道的图像去雾算法及应用研究[D].南昌航空大学,2015;
陈龙,郭宝龙,毕娟,朱娟娟.基于联合双边滤波的单幅图像去雾算法[J].北京邮电大学学报,2012,35(04):19-23.


