09 Softmax 回归 + 损失函数 + 图片分类数据集【动手学深度学习v2】
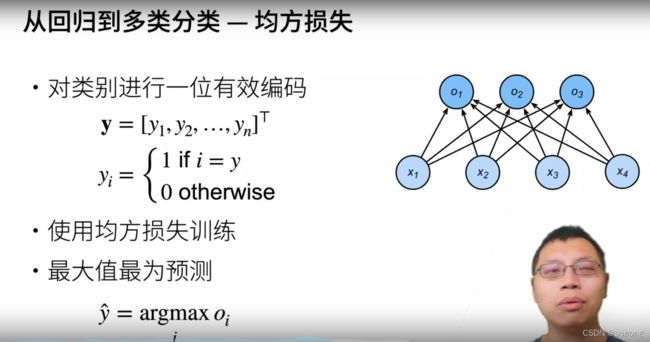
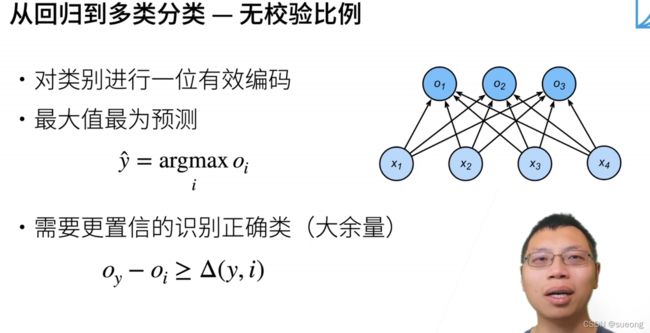
分类问题
梯度下降理解
https://zhuanlan.zhihu.com/p/335191534(强推)
图像分类数据集
 import matplotlib.pyplot as plt
import torch
import torchvision
from torch.utils import data
from torchvision import transforms
from d2l import torch as d2l

d2l.use_svg_display()

# 使用框架内的内置函数将fashion-minist数据集下载并读取到内存
# 通过totensor实例将图像数据从PIL类型变成32位浮点 的tensor类型
# 并除255使得所得的像素数值在0-1之间

trans = transforms.ToTensor()
train = torchvision.datasets.FashionMNIST(root='./data', train=True, transform=trans, download=True)
test = torchvision.datasets.FashionMNIST(root='./data', train=False, transform=trans, download=True)


print(len(train))
print(len(test))

# 通过下标访问任意一个样本,返回值为两个torch,一个特征tensor和 一个标签tensor
print(train[100])
print(train[0][0], train[0][1],train[0][0].shape)


# labels是一个列表
# 数值标签转文本标签
def get_fashion_mnist_labels(labels):
    text_labels = ['t-shirt', 'trouser', 'pullover', 'dress', 'coat',
                   'sandal', 'shirt', 'sneaker', 'bag', 'ankle boot']
    return [text_labels[int(i)] for i in labels]


def show_fashion_mnist(images, labels):
    d2l.use_svg_display()
    # 绘制矢量图
    _, figs = plt.subplots(2, len(images), figsize=(12, 12))
    # 创建子图,一行len(images)列,图片大小12*12
    for f, img, lbl in zip(figs, images, labels):
        # zip函数将他们压缩成由多个元组组成的列表
        f.imshow(img.view((28, 28)).numpy())
        # 将img转形为28*28大小的张量,然后转换成numpy数组
        f.set_title(lbl)
        # 设置每个子图的标题为标签
        # 不显示坐标刻度
        f.axes.get_xaxis().set_visible(False)
        f.axes.get_yaxis().set_visible(False)
        # 关闭x轴y轴
    plt.show()


# next拿到第一个小批量
X, y = next(iter(data.DataLoader(train, batch_size=18)))
show_fashion_mnist(X, get_fashion_mnist_labels(y))

在模型中读取小批量
有了线性回归中读取小批量的经验,我们知道读取小批量可以使用torch中内置的dataloader函数来实现。
dataloader还支持多线程读取数据,通过设置它的num_workers参数。
import matplotlib.pyplot as plt
import torch
import torchvision
from torch.utils import data
from torchvision import transforms
from d2l import torch as d2l

d2l.use_svg_display()

# 使用框架内的内置函数将fashion-minist数据集下载并读取到内存
# 通过totensor实例将图像数据从PIL类型变成32位浮点 的tensor类型
# 并除255使得所得的像素数值在0-1之间

trans = transforms.ToTensor()
train = torchvision.datasets.FashionMNIST(root='./data', train=True, transform=trans, download=True)
test = torchvision.datasets.FashionMNIST(root='./data', train=False, transform=trans, download=True)


print(len(train))
print(len(test))

# 通过下标访问任意一个样本,返回值为两个torch,一个特征tensor和 一个标签tensor
print(train[100])
print(train[0][0], train[0][1],train[0][0].shape)


# labels是一个列表
# 数值标签转文本标签
def get_fashion_mnist_labels(labels):
    text_labels = ['t-shirt', 'trouser', 'pullover', 'dress', 'coat',
                   'sandal', 'shirt', 'sneaker', 'bag', 'ankle boot']
    return [text_labels[int(i)] for i in labels]


def show_fashion_mnist(images, labels):
    d2l.use_svg_display()
    # 绘制矢量图
    _, figs = plt.subplots(1, len(images), figsize=(12, 12))
    # 创建子图,一行len(images)列,图片大小12*12
    for f, img, lbl in zip(figs, images, labels):
        # zip函数将他们压缩成由多个元组组成的列表
        f.imshow(img.view((28, 28)).numpy())
        # 将img转形为28*28大小的张量,然后转换成numpy数组
        f.set_title(lbl)
        # 设置每个子图的标题为标签
        f.axes.get_xaxis().set_visible(False)
        f.axes.get_yaxis().set_visible(False)
        # 关闭x轴y轴
    plt.show()


# next拿到第一个小批量
X, y = next(iter(data.DataLoader(train, batch_size=18)))
show_fashion_mnist(X, get_fashion_mnist_labels(y))


batch_size = 256
# 小批量数目
# num_workers=4,不开启多线程读取。

train_iter = data.DataLoader(train, batch_size=batch_size, shuffle=True, num_workers=8)

# test_iter = data.DataLoader(test, batch_size=batch_size, shuffle=False, num_workers=4)
timer = d2l.Timer()
for X,y in train_iter:
    continue
print(f'{timer.stop():.2f} sec')
# 数据的读取需要比训练快
'''
num_workers=4
2.97 sec

num_workers=8
2.02 sec
'''
softmax回归的从0实现
import matplotlib.pyplot as plt
import torch
import torchvision
from torch.utils import data
from torchvision import transforms
from d2l import torch as d2l
from IPython import display

batch_size = 256
# 训练集和测试集的迭代器
train_iter, test_iter = d2l.load_data_fashion_mnist(batch_size)
num_inputs = 784
num_outputs = 10

# 对于softmax 输入是个向量 所以把3d的图像压缩成一行784列的向量
# 将展平每个图像,将它们视为长度为784的向量。因为我们的数据集有10个类别.所以网络输出维度为10
W = torch.normal(0, 0.01, size=(num_inputs, num_outputs), requires_grad=True)
b = torch.zeros(num_outputs, requires_grad=True)


# 实现sotfmax 对矩阵的每行做softmax
def softmax(X):
    X_exp = torch.exp(X)
    partition = X_exp.sum(1, keepdim=True)
    # 沿着列变化求和 就是每一行求和
    # soft(X)ij =exp(Xij)/sumk(exp(Xik))
    return X_exp / partition
    # 广播机制


X = torch.normal(0, 1, (2, 5))
# 均值0 方差1 2*5
X_prob = softmax(X)
# 沿列变化相加
print(X_prob, X_prob.sum(1))
'''

tensor([[0.3529, 0.1850, 0.1426, 0.0871, 0.2324],
        [0.1502, 0.0493, 0.0970, 0.4357, 0.2677]]) tensor([1., 1.])

'''


# 实现softmax回归模型
def net(X):
    # X变列向量 -1表示自动算 其实是batchsize*784的矩阵
    return softmax(torch.matmul(X.reshape((-1, W.shape[0])), W) + b)


#  创建一个数据y_hat,其中包含2个样本在3个类别的预测概率,使用y作为y_hat中概率的索引

y = torch.tensor([0, 2])
y_hat = torch.tensor([[0.1, 0.3, 0.6], [0.3, 0.2, 0.5]])
# 等价y_hat[[0, 1], [0, 2]] 看[0,0][1,2]的值 就是 预测第0个样本是第0类的概率 预测第1个样本是第2类的概率
# 看真实标号 类的预测值是多少
print(y_hat[[0, 1], y])


# 实现交叉熵损失函数
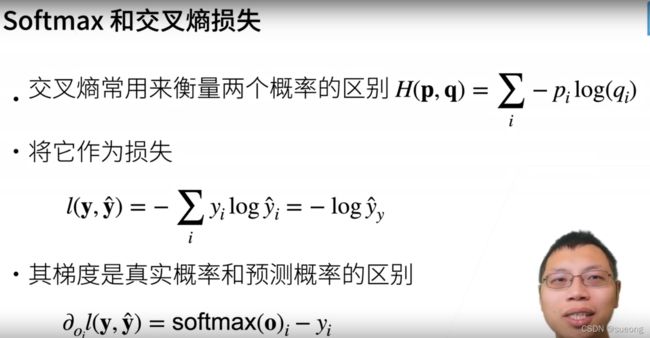
def cross_entropy(y_hat, y):
    return -torch.log(y_hat[range(len(y_hat)), y])


