HuggingFace (transformers) 自定义图像数据集、使用 DeiT 模型、Trainer 进行训练回归任务
资料
Hugging Face 官方文档:https://huggingface.co/
Hugging Face 代码链接:https://github.com/huggingface/transformers
1. 环境准备
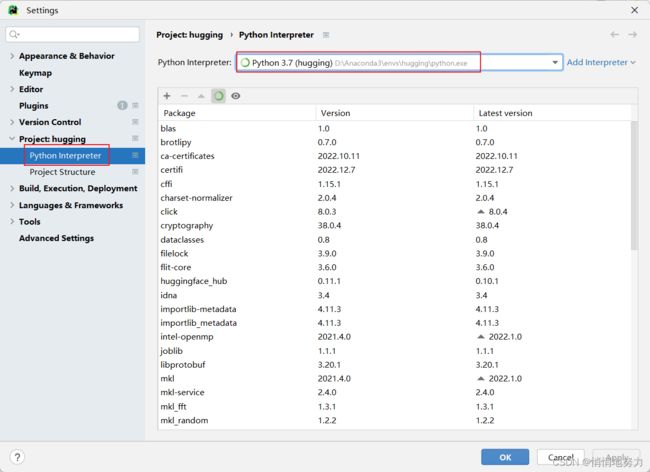
- 创建 conda 环境
- 激活 conda 环境
- 下载 transformers 依赖
- 下载 transformers 中需要处理数据集的依赖
- 下载 pytorch 依赖,因为这里使用的 transformers 是基于 PyTorch 实现的,所以需要导入 pytorch 依赖
- 下载 tensorboard 依赖。训练过程中,使用 TensorBoard 可视化
conda create -n hugging python=3.7
conda activate hugging
conda install -c huggingface transformers
conda install datasets
conda install pytorch torchvision torchaudio pytorch-cuda=11.7 -c pytorch -c nvidia
conda install tensorboard
2 任务及数据集描述
需求说明:有一个视线估计任务,输入为人脸图像,输出为该人脸图像在手机屏幕上的注视点坐标 (x, y)。
数据集的目录结构如下:
\GazeCapture_new
	-- Image
		-- 00002
			-- face
				-- 00000.jpg
				-- 00001.jpg
				-- .....
			-- grid
				-- .....
			-- left
				-- ....
			-- right
				-- .....
		-- 00003
			-- face
				-- .....
			-- grid
				-- .....
			-- left
				-- ....
			-- right
				-- .....
		-- ......
	-- Label
		-- train
			-- 00002.label
			-- .....
		-- test
			-- 03024.label
			-- .....
		-- val
			-- ......
每一个标签文件中的内容,如 00002.label 存储的内容
Face Left Right Grid Xcam, Ycam Xdot, Ydot Device
00002\face\00000.jpg 00002\left\00000.jpg 00002\right\00000.jpg 00002\grid\00000.jpg 1.064,-6.0055 160,284 iPhone6
00002\face\00001.jpg 00002\left\00001.jpg 00002\right\00001.jpg 00002\grid\00001.jpg 1.064,-6.0055 160,284 iPhone6
00002\face\00002.jpg 00002\left\00002.jpg 00002\right\00002.jpg 00002\grid\00002.jpg 1.064,-6.0055 160,284 iPhone6
00002\face\00003.jpg 00002\left\00003.jpg 00002\right\00003.jpg 00002\grid\00003.jpg 1.064,-6.0055 160,284 iPhone6
.......
- Face 表示脸部图片的存储路径。
- Left 表示左眼图片的存储路径。
- Right 表示右眼图片的存储路径。
- Grid 表示网格图片的存储路径。
- Xcam, Ycam 是标签,表示人脸图片对应的视线位置的 (x, y) 坐标,单位为厘米。 后续的训练过程使用这两个值作为标签。
- Xdot, Ydot 表示人脸图片对应的视线位置的 (x, y) 坐标,单位为像素。
- Device 表示采集设备型号。
如果想要使用我的数据集,先把代码跑通,这里提供我使用的部分数据集作为参考,但由于不是完整的数据集,所以训练效果不是很好,仅供跑通代码作为参考。
https://drive.google.com/file/d/1gM-wzkaEcnw0GEKQ2eedpYlvjuqhp3gA/view?usp=sharing
3. DataSet
!!!注意:Dataset 一定不要完全粘贴我的代码,一定要按照自己的数据集编写对应代码。只有以下几点需要和我一模一样:
- 自定义类继承
Dataset,自定义的类名可以自行命名。 - 重写
__init__、__len__、__getitem__这三个方法,方法内的具体逻辑根据自己的数据集修改。 __getitem__方法的返回值形式一定要是{"labels": xxx, "pixel_values": xxx}。
import os.path

from torch.utils.data import Dataset
from transform import transform
import numpy as np

# 读取数据,如果是训练数据,随即打乱数据顺序
def get_label_list(label_path):
    # 存储所有标签文件中的所有内容
    full_lines = []
    # 获取所有标签文件的名称,如 00002.label, 00003.label, ......
    label_names = os.listdir(label_path)
    # 遍历每一个标签文件,并读取其中内容
    for label_name in label_names:
        # 标签文件全路径,如 D:\datasets\GazeCapture_new\Label\train\00002.label
        label_abs_path = os.path.join(label_path, label_name)
        # 读取每一个标签文件中的内容
        with open(label_abs_path) as flist:
            # 存储该标签文件中的所有内容
            full_line = []
            for line in flist:
                full_line.append(line.strip())
            # 移除首行表头 'Face Left Right Grid Xcam, Ycam Xdot, Ydot Device'
            full_line.pop(0)
            full_lines.extend(full_line)
    return full_lines


class GazeCaptureDataset(Dataset):
    def __init__(self, root_path, data_type):
        self.data_dir = root_path
        # 标签文件的根路径,如 D:\datasets\GazeCapture_new\Label\train
        label_root_path = os.path.join(root_path + '/Label', data_type)
        # 获取所有标签文件中的所有内容
        self.full_lines = get_label_list(label_root_path)
        # 每一行内容的分隔符
        self.delimiter = ' '
        # 数据集长度,也就是一共有多少个图片
        self.num_samples = len(self.full_lines)

    def __len__(self):
        return self.num_samples

    def __getitem__(self, idx):
        # 标签文件的一行,对应一个训练实例
        line = self.full_lines[idx]
        # 将标签文件中的一行内容按照分隔符进行分割
        Face, Left, Right, Grid, XYcam, XYdot, Device = line.split(self.delimiter)
        # 获取网络的输入:人脸图片
        face_path = os.path.join(self.data_dir + '/Image/', Face)
        # 读取人脸图像
        with open(face_path, 'rb') as f:
            img = f.read()
        # 将人脸图像进行格式转化:缩放、裁剪、标准化
        pixel_values = transform(img)
        # 获取标签值
        labels = np.array(XYcam.split(","), np.float32)
        # 注意返回值的形式一定要是 {"labels": xxx, "pixel_values": xxx}
        result = {"labels": labels}
        result["pixel_values"] = pixel_values
        return result
transform.py 工具类的代码如下:
# Copyright (c) 2020 PaddlePaddle Authors. All Rights Reserved.
#
# Licensed under the Apache License, Version 2.0 (the "License");
# you may not use this file except in compliance with the License.
# You may obtain a copy of the License at
#
#     http://www.apache.org/licenses/LICENSE-2.0
#
# Unless required by applicable law or agreed to in writing, software
# distributed under the License is distributed on an "AS IS" BASIS,
# WITHOUT WARRANTIES OR CONDITIONS OF ANY KIND, either express or implied.
# See the License for the specific language governing permissions and
# limitations under the License.

import numpy as np
import cv2
from PIL import Image


# 定义decode_image函数,将图片转为Numpy格式r
def decode_image(img, to_rgb=True):
    data = np.frombuffer(img, dtype='uint8')
    img = cv2.imdecode(data, 1)
    if to_rgb:
        assert img.shape[2] == 3, 'invalid shape of image[%s]' % (
            img.shape)
        img = img[:, :, ::-1]

    return img


# 定义resize_image函数,对图片大小进行调整
def resize_image(img, size=None, resize_short=None, interpolation=-1):
    interpolation = interpolation if interpolation >= 0 else None
    if resize_short is not None and resize_short > 0:
        resize_short = resize_short
        w = None
        h = None
    elif size is not None:
        resize_short = None
        w = size if type(size) is int else size[0]
        h = size if type(size) is int else size[1]
    else:
        raise ValueError("invalid params for ReisizeImage for '\
            'both 'size' and 'resize_short' are None")

    img_h, img_w = img.shape[:2]
    if resize_short is not None:
        percent = float(resize_short) / min(img_w, img_h)
        w = int(round(img_w * percent))
        h = int(round(img_h * percent))
    else:
        w = w
        h = h
    if interpolation is None:
        return cv2.resize(img, (w, h))
    else:
        return cv2.resize(img, (w, h), interpolation=interpolation)


# 定义crop_image函数,对图片进行裁剪
def crop_image(img, size):
    if type(size) is int:
        size = (size, size)
    else:
        size = size  # (h, w)

    w, h = size
    img_h, img_w = img.shape[:2]
    w_start = (img_w - w) // 2
    h_start = (img_h - h) // 2

    w_end = w_start + w
    h_end = h_start + h
    return img[h_start:h_end, w_start:w_end, :]


# 定义normalize_image函数,对图片进行归一化
def normalize_image(img, scale=None, mean=None, std=None, order= ''):
    if isinstance(scale, str):
        scale = eval(scale)
    scale = np.float32(scale if scale is not None else 1.0 / 255.0)
    mean = mean if mean is not None else [0.485, 0.456, 0.406]
    std = std if std is not None else [0.229, 0.224, 0.225]

    shape = (3, 1, 1) if order == 'chw' else (1, 1, 3)
    mean = np.array(mean).reshape(shape).astype('float32')
    std = np.array(std).reshape(shape).astype('float32')

    if isinstance(img, Image.Image):
        img = np.array(img)
    assert isinstance(img, np.ndarray), "invalid input 'img' in NormalizeImage"
    # 对图片进行归一化
    return (img.astype('float32') * scale - mean) / std


# 定义to_CHW_image函数,对图片进行通道变换,将原通道为‘hwc’的图像转为‘chw‘
def to_CHW_image(img):
    if isinstance(img, Image.Image):
        img = np.array(img)
    # 对图片进行通道变换
    return img.transpose((2, 0, 1))


# 图像预处理方法汇总
def transform(data, mode='train'):

    # 图像解码
    data = decode_image(data)
    # 图像缩放
    data = resize_image(data, resize_short=224)
    # 图像裁剪
    data = crop_image(data, size=224)
    # 标准化
    data = normalize_image(data, scale=1./255., mean=[0.5, 0.5, 0.5], std=[0.5, 0.5, 0.5])
    # 通道变换
    data = to_CHW_image(data)
    return data
4. 训练
from transformers import TrainingArguments
from transformers import DeiTForImageClassification
from torch import nn
from transformers import Trainer
from transformers import DeiTConfig
from dataset import GazeCaptureDataset

# 数据集根路径
root_path = r"D:\datasets\GazeCapture_new"
# 1.定义 Dataset
train_dataset = GazeCaptureDataset(root_path, data_type='train')
val_dataset = GazeCaptureDataset(root_path, data_type='val')

# 2.定义 DeiT 图像模型
'''
num_labels 表示图像的输出值为 2,即 (x, y) 两个坐标值
problem_type="regression" 表示任务是回归任务
'''
configuration = DeiTConfig(num_labels=2, problem_type="regression")
model = DeiTForImageClassification(configuration)


# 3.训练
## 3.1 训练参数
'''
output_dir:模型预测和 checkpoint 的输出目录。
evaluation_strategy 训练过程中采用的验证策略。可能的取值有:
    "no": 训练过程中不验证
    "steps": 在每个 eval_steps 中执行(并记录)验证。
    "epoch": 在每个 epoch 结束时进行验证。
eval_steps=100:每 100 次训练执行一次验证。
per_device_train_batch_size/per_device_eval_batch_size:用于训练/验证的 batch size。
logging_dir:TensorBoard 日志目录。默认为 *output_dir/runs/CURRENT_DATETIME_HOSTNAME*。
logging_steps=50:每隔 50 步写入 TensorBoard
save_strategy 训练期间采用的 checkpoint 保存策略。可能取值为:
    "no": 训练期间不保存 checkpoint
    "epoch": 每个 epoch 结束后保存 checkpoint
    "steps": 每个 save_steps 结束后保存 checkpoint
save_steps=100:每 100 次训练保存一次 checkpoint
'''
training_args = TrainingArguments(output_dir="gaze_trainer",
                                  evaluation_strategy="steps",
                                  eval_steps=100,
                                  per_device_train_batch_size=2,
                                  per_device_eval_batch_size=2,
                                  logging_dir='./logs',
                                  logging_steps=50,
                                  save_strategy="steps",
                                  save_steps=100)
## 3.2 自定义 Trainer
class RegressionTrainer(Trainer):
    # 重写计算 loss 的函数
    def compute_loss(self, model, inputs, return_outputs=False):
        # 获取标签值
        labels = inputs.get("labels")
        # 获取输入值
        x = inputs.get("pixel_values")
        # 模型输出值
        outputs = model(x)
        logits = outputs.get('logits')
        # 定义损失函数为平滑 L1 损失
        loss_fct = nn.SmoothL1Loss()
        # 计算输出值和标签的损失
        loss = loss_fct(logits, labels)
        return (loss, outputs) if return_outputs else loss

## 3.3 定义Trainer对象:
trainer = RegressionTrainer(
    model=model,
    args=training_args,
    train_dataset=train_dataset,
    eval_dataset=val_dataset
)

## 3.4 开始训练:
trainer.train()
更多 Trainer 参数参考:https://huggingface.co/docs/transformers/main_classes/trainer#transformers.TrainingArguments
5. 查看 Tensorboard
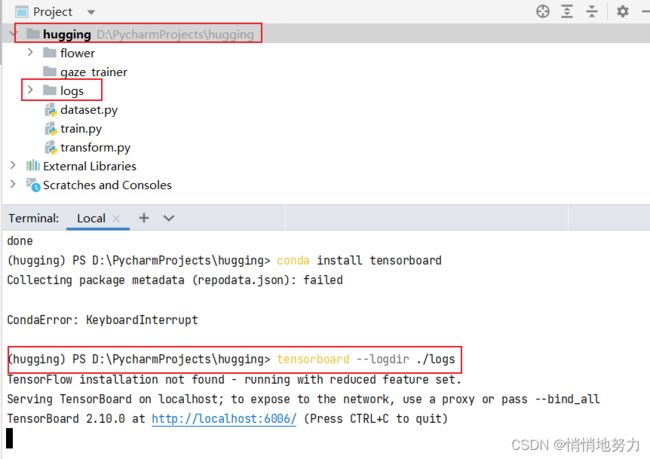
在当前工程目录下,打开命令行,执行
(hugging) PS D:\PycharmProjects\hugging> tensorboard --logdir ./logs
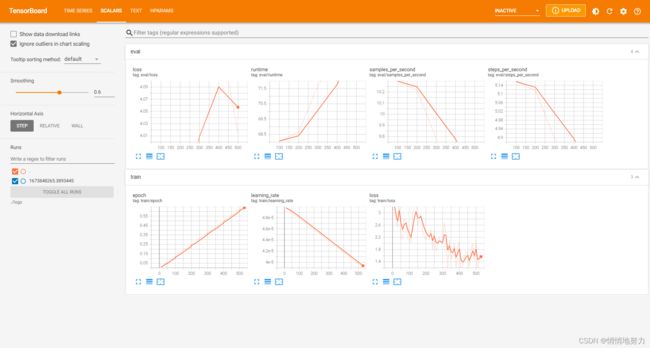
然后打开浏览器,访问 http://localhost:6006/ ,即可看到训练过程的 TensorBoard 可视化结果:


