OpenVINO示例介绍
接着前面系列博客来讲,我们知道学东西应该先从官网的示例来着手,循序渐进,这是一个很好的学习方法。有两处例子:
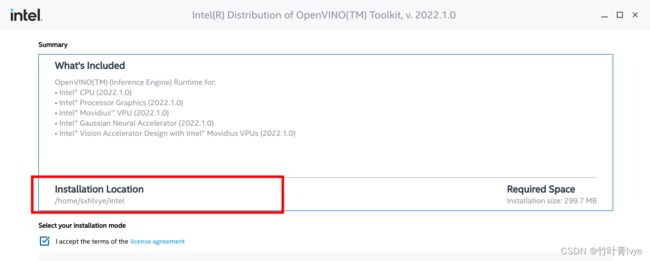
第一处,OpenVINO安装路径下的例子,在用Using Installer安装OpenVINO Runtime的时候,其会提示你一个安装路径,如下图:
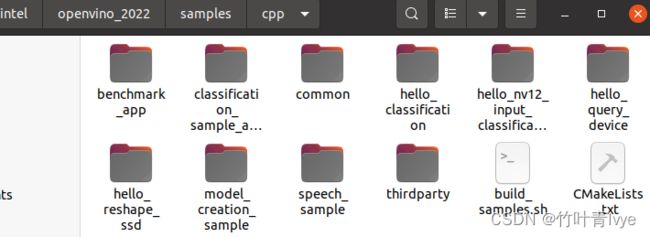
安装完毕后,可以在此目录下(结合自己的路径)看到有关的cpp以及python例子,然后就可以先练练手,玩起来了。
第二处,OpenVINO在github上 有个open_model_zoo ,这年头大家都喜欢自家整个模型库,比如隔壁tensorflow家的model garden(博主也有一篇博客对它里面的object detection库进行了介绍,感兴趣的看客可移步过去)。对于Open_model_zoo里面例子的使用介绍见博主的另一篇博客
https://blog.csdn.net/jiugeshao/article/details/124763586?csdn_share_tail=%7B%22type%22%3A%22blog%22%2C%22rType%22%3A%22article%22%2C%22rId%22%3A%22124763586%22%2C%22source%22%3A%22jiugeshao%22%7D&ctrtid=WFqK3![]() https://blog.csdn.net/jiugeshao/article/details/124763586?csdn_share_tail=%7B%22type%22%3A%22blog%22%2C%22rType%22%3A%22article%22%2C%22rId%22%3A%22124763586%22%2C%22source%22%3A%22jiugeshao%22%7D&ctrtid=WFqK3
https://blog.csdn.net/jiugeshao/article/details/124763586?csdn_share_tail=%7B%22type%22%3A%22blog%22%2C%22rType%22%3A%22article%22%2C%22rId%22%3A%22124763586%22%2C%22source%22%3A%22jiugeshao%22%7D&ctrtid=WFqK3
如果是新手,且还是第一次接触OpenVINO,那么很是建议先看完博主所写的前两篇博客,本篇电脑的软件环境也同前两篇博客,python还是用的testOpenVINO虚拟环境。
OpenVINO使用介绍_竹叶青lvye的博客-CSDN博客_openvino使用
Intel Movidius Neural Computer Stick 2使用(PC-Based Ubuntu)_竹叶青lvye的博客-CSDN博客
再交待下博主的环境配置:
Ubuntu 20.04
python3.6.13 (Anaconda)
cuda version: 11.2
cudnn version: cudnn-11.2-linux-x64-v8.1.1.33
一. OpenVINO安装路径下的自带例子
1. 如果要跑c++版的例子,则需要按照如下官网页面去编译下自带示例。
Get Started with Sample and Demo Applications — OpenVINO™ documentation
cd到/home/sxhlvye/intel/openvino_2022/samples/cpp目录下,结合自己的路径
终端执行如下语句进行编译
./build_samples.sh编译生成的文件见如下路径(终端中的log日志底部会有提示,编译出来的东西生成到哪里去了,注意去看下)
移步到/home/sxhlvye/inference_engine_cpp_samples_build/intel64目录下,便可以看到一个个示例对应的可执行文件。
2. 先在python环境下跑通一个sample例子
(1) 安装对应框架的开发包。
由于博主前两篇博客中,只安装了tensorflow和onnx的openVINO包。所以博主这边再安装全,如下命令即可。
python -m pip install openvino-dev[caffe,onnx,tensorflow2,pytorch,mxnet](2) 下载模型
博主想要测试下classification_sample_async例子
官网对这个例子使用介绍见如下链接
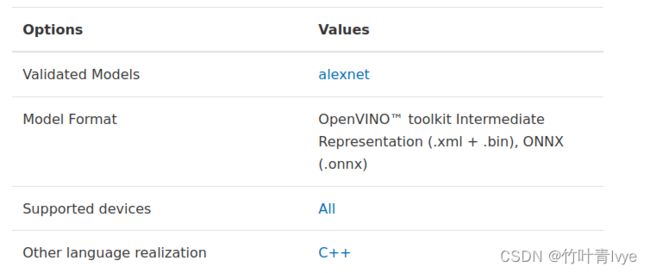
Image Classification Async Python* Sample — OpenVINO™ documentation
其测试的是alexnet模型
博主这边想来测试下resnet-50-pytorch模型,如下两处都对这个模型进行了介绍
resnet-50-pytorch — OpenVINO™ documentation
open_model_zoo/models/public/resnet-50-pytorch at master · openvinotoolkit/open_model_zoo · GitHub
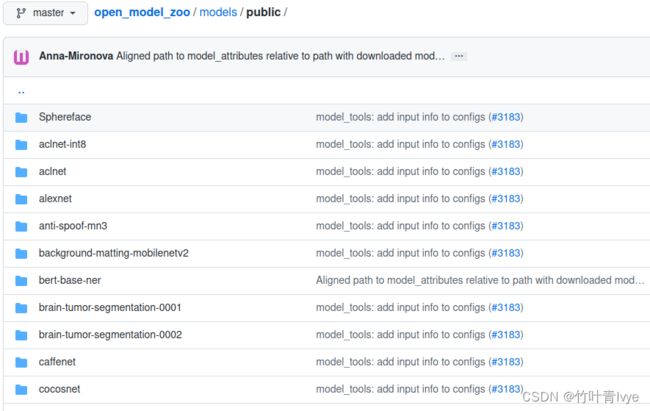
这边所使用的模型都是openVINO官网提供出来的模型,想了解更多模型可以直接去github上model zoo去看下
https://github.com/openvinotoolkit/open_model_zoo/tree/master/models/public
或者到此页面也能看到列举出来的模型,其和github上的也是保持一致的
resnet-50-pytorch — OpenVINO™ documentation
下载之前需要在终端中设置如下的环境变量,不然下载会失败
export OMZ_ROOT=https://github.com/openvinotoolkit/open_model_zoo
官网如下页面链接上也说明了此步骤
Model Downloader and other automation tools — OpenVINO™ documentation
如下命令语句即可以下载模型
omz_downloader --name resnet-50-pytorch(3) 模型转换
从终端中可以看到此在电脑上的保存路径,但这边是pytorch的pth模型结构,所以需要转换,一种方法是类似博主博客 第二步里的方法,使用mo命令转换; 一种在此同等目录下,使用omz_converter转换
omz_converter --name resnet-50-pytorch
![]()
其会自动将刚下载的模型转换成OpenVINO IR模型,提供了两种量化模型,一种是FP16的,一种是FP32的
转换log日志太长,这边只贴上在转换FP32时的部分log日志
========== Converting resnet-50-pytorch to IR (FP32)
Conversion command: /home/sxhlvye/anaconda3/envs/testOpenVINO/bin/python -- /home/sxhlvye/anaconda3/envs/testOpenVINO/bin/mo --framework=onnx --data_type=FP32 --output_dir=/home/sxhlvye/intel/openvino_2022.1.0.643/samples/python/classification_sample_async/public/resnet-50-pytorch/FP32 --model_name=resnet-50-pytorch --input=data '--mean_values=data[123.675,116.28,103.53]' '--scale_values=data[58.395,57.12,57.375]' --reverse_input_channels --output=prob --input_model=/home/sxhlvye/intel/openvino_2022.1.0.643/samples/python/classification_sample_async/public/resnet-50-pytorch/resnet-v1-50.onnx '--layout=data(NCHW)' '--input_shape=[1, 3, 224, 224]' '--layout=data(NCHW)' '--input_shape=[1, 3, 224, 224]'
如下是将pytorch模型转换为onnx模型
如下是将onnx以FP32精度量化为OpenVINO IR模型
从如上截图中可以看到omz_converter也是通过调用mo命令来转换的,其跟随参数很多。咱们也可以拿这个完全体的命令语句来做模板,所以这个转换语句是相当有价值的,值得参考。如下官网上有对mo命令可选参数的介绍:
Compression of a Model to FP16 — OpenVINO™ documentation
Setting Input Shapes — OpenVINO™ documentation
Changing input shapes — OpenVINO™ documentation
Convert model with Model Optimizer — OpenVINO™ documentation
Embedding Preprocessing Computation — OpenVINO™ documentation
Convert model with Model Optimizer — OpenVINO™ documentation
(4) 运行sample程序,用上面转换得到的OpenVINO模型来预测图片
终端cd到classification_sample_async.py文件所在目录下,同时将上面FP32量化的模型文件拷贝到此目录下,运行命令行参考官网,对一张香蕉图片进行预测
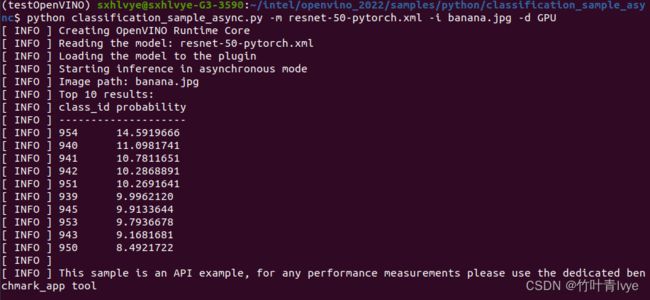
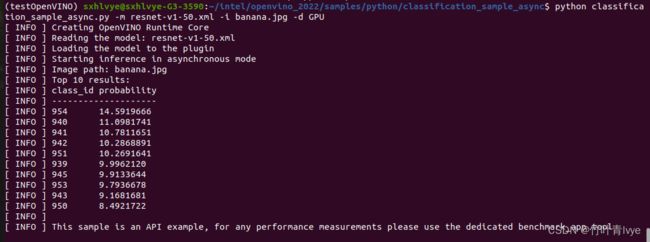
python classification_sample_async.py -m resnet-50-pytorch.xml -i banana.jpg -d GPU
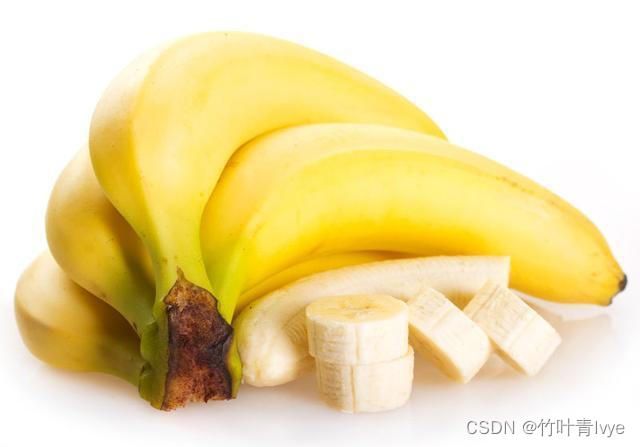
所用香蕉图片长这个样子
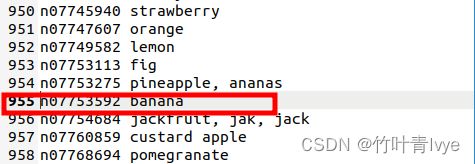
结果是正确的,对应于imagenet_2012.txt ,上面结果得分最大的类别位于954,因为下标是0开始,所以对应txt中的955行。
小验证1:
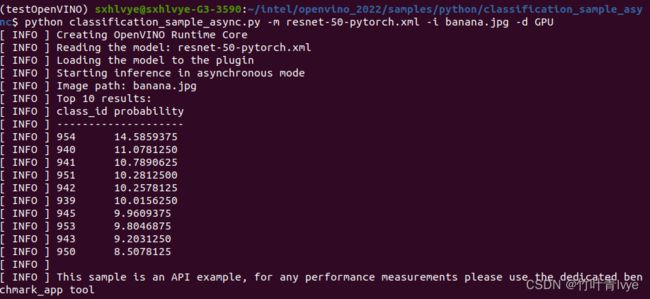
博主又跑了下上面生成的FP16量化模型,结果如下:
对比FP32的结果,差距微乎其微。
小验证2:
上面第(3)步是使用的omz_converter命令来对第(2)步的模型进行转换的,这里自己手动直接使用mo命令语句来尝试下转化。可以参考官网Converting an ONNX Model — OpenVINO™ documentation
mo --input_model resnet-v1-50.onnx --input=data --mean_values=data[123.675,116.28,103.53] --scale_values=data[58.395,57.12,57.375] --reverse_input_channels --output=prob --layout "nchw->nchw" '--input_shape=[1,3,224,224]'
转换日志如下,可知默认就是FP32精度模式
Model Optimizer arguments:
Common parameters:
	- Path to the Input Model: 	/home/sxhlvye/intel/openvino_2022.1.0.643/samples/python/classification_sample_async/resnet-v1-50.onnx
	- Path for generated IR: 	/home/sxhlvye/intel/openvino_2022.1.0.643/samples/python/classification_sample_async/.
	- IR output name: 	resnet-v1-50
	- Log level: 	ERROR
	- Batch: 	Not specified, inherited from the model
	- Input layers: 	data
	- Output layers: 	prob
	- Input shapes: 	[1,3,224,224]
	- Source layout: 	Not specified
	- Target layout: 	Not specified
	- Layout: 	nchw->nchw
	- Mean values: 	data[123.675,116.28,103.53]
	- Scale values: 	data[58.395,57.12,57.375]
	- Scale factor: 	Not specified
	- Precision of IR: 	FP32
	- Enable fusing: 	True
	- User transformations: 	Not specified
	- Reverse input channels: 	True
	- Enable IR generation for fixed input shape: 	False
	- Use the transformations config file: 	None
Advanced parameters:
	- Force the usage of legacy Frontend of Model Optimizer for model conversion into IR: 	False
	- Force the usage of new Frontend of Model Optimizer for model conversion into IR: 	False
OpenVINO runtime found in: 	/home/sxhlvye/intel/openvino_2022/python/python3.6/openvino
OpenVINO runtime version: 	2022.1.0-7019-cdb9bec7210-releases/2022/1
Model Optimizer version: 	2022.1.0-7019-cdb9bec7210-releases/2022/1
[ SUCCESS ] Generated IR version 11 model.
[ SUCCESS ] XML file: /home/sxhlvye/intel/openvino_2022.1.0.643/samples/python/classification_sample_async/resnet-v1-50.xml
[ SUCCESS ] BIN file: /home/sxhlvye/intel/openvino_2022.1.0.643/samples/python/classification_sample_async/resnet-v1-50.bin
[ SUCCESS ] Total execution time: 0.97 seconds.
[ SUCCESS ] Memory consumed: 296 MB.
It's been a while, check for a new version of Intel(R) Distribution of OpenVINO(TM) toolkit here https://software.intel.com/content/www/us/en/develop/tools/openvino-toolkit/download.html?cid=other&source=prod&campid=ww_2022_bu_IOTG_OpenVINO-2022-1&content=upg_all&medium=organic or on the GitHub*
[ INFO ] The model was converted to IR v11, the latest model format that corresponds to the source DL framework input/output format. While IR v11 is backwards compatible with OpenVINO Inference Engine API v1.0, please use API v2.0 (as of 2022.1) to take advantage of the latest improvements in IR v11.
Find more information about API v2.0 and IR v11 at https://docs.openvino.ai
再用其转换后的OpenVINO IR模型预测下图片,结果如下,和omz_converter命令一致。
3. 再在c++环境下跑通上面sample例子
有了上面的基础,这边就很轻松了,上面第一点就介绍了openVINO自带的例子,这里移步到编译所生成的可执行文件目录下,同时将前面第二点生成的模型也拷贝过来,图片也一并拷贝过来
执行如下命令:
./classification_sample_async -m resnet-v1-50.xml -i banana.jpg -d GPU
![]()
结果如下:
[ INFO ] OpenVINO Runtime version ......... 2022.1.0
[ INFO ] Build ........... 2022.1.0-7019-cdb9bec7210-releases/2022/1
[ INFO ]
[ INFO ] Parsing input parameters
[ INFO ] Files were added: 1
[ INFO ]     banana.jpg
[ INFO ] Loading model files:
[ INFO ] resnet-v1-50.xml
[ INFO ] model name: torch-jit-export
[ INFO ]     inputs
[ INFO ]         input name: data
[ INFO ]         input type: f32
[ INFO ]         input shape: {1, 3, 224, 224}
[ INFO ]     outputs
[ INFO ]         output name: prob
[ INFO ]         output type: f32
[ INFO ]         output shape: {1, 1000}
[ INFO ] Read input images
[ WARNING ] Image is resized from (640, 447) to (224, 224)
[ INFO ] Set batch size 1
[ INFO ] model name: torch-jit-export
[ INFO ]     inputs
[ INFO ]         input name: data
[ INFO ]         input type: u8
[ INFO ]         input shape: {1, 224, 224, 3}
[ INFO ]     outputs
[ INFO ]         output name: prob
[ INFO ]         output type: f32
[ INFO ]         output shape: {1, 1000}
[ INFO ] Loading model to the device GPU
[ INFO ] Create infer request
[ INFO ] Start inference (asynchronous executions)
[ INFO ] Completed 1 async request execution
[ INFO ] Completed 2 async request execution
[ INFO ] Completed 3 async request execution
[ INFO ] Completed 4 async request execution
[ INFO ] Completed 5 async request execution
[ INFO ] Completed 6 async request execution
[ INFO ] Completed 7 async request execution
[ INFO ] Completed 8 async request execution
[ INFO ] Completed 9 async request execution
[ INFO ] Completed 10 async request execution
[ INFO ] Completed async requests execution

Top 10 results:

Image banana.jpg

classid probability
------- -----------
954     14.5919666
940     11.0981741
941     10.7811651
942     10.2868891
951     10.2691641
939     9.9962120
945     9.9133644
953     9.7936678
943     9.1681681
950     8.4921722
可以看到分类结果和python下是保持一致的。
4. 继续再跑跑别的安装目录下的OpenVINO Sample例子
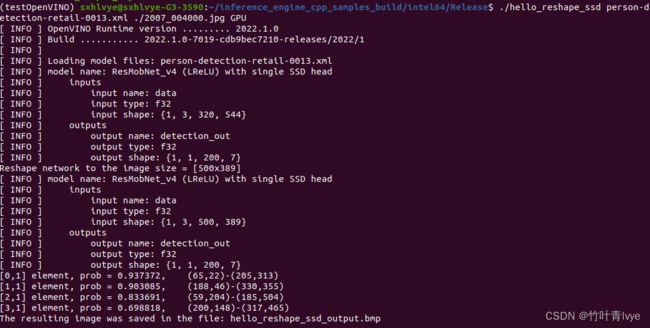
这里选择hello_reshape_ssd。这里只跑下c++版的,看个效果,参考官网运行此例子
Hello Reshape SSD C++ Sample — OpenVINO™ documentation
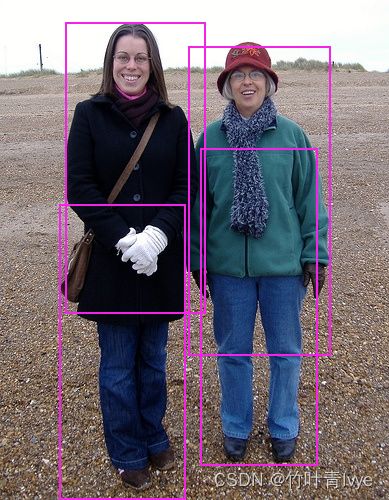
博主测试图片如下
测试结果如下:
其它例子参考上面的方法运行就可以了,这里不再详述了。
二. open_model_zoo例子
上面第一步里已经涉及了很多,比如模型下载,转换等介绍,所以第二部分不会再详解,快速的来看下怎么跑出效果来。
1.从github上下载例子
GitHub - openvinotoolkit/open_model_zoo: Pre-trained Deep Learning models and demos (high quality and extremely fast)
博主这里放在此路径下(结合自己的路径)
2.python下运行例子
(1)准备图片、模型、标签文件
这里演示运行classification_demo例子,例子路径如下(结合自己的路径)
博主把图片、imagenet_2012.txt(标签文件也就是label文件)、测试模型也放过来了
注:imagenet_2012.txt不知道的童鞋可以在如下open_model_zoo目录下找(结合自己的路径)
这里会分别测试resnet-50-pytorch模型(第一步里已经生成了)和resnet-50-tf模型。resnet-50-tf模型参考上面的下载和转换就行。
omz_downloader --name resnet-50-tf
omz_converter --name resnet-50-tf
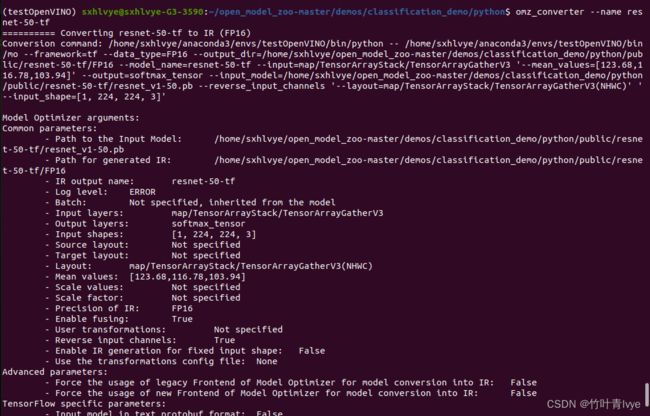
部分下载日志和转换日志如下(因为觉得里面信息有些参考价值,所以贴下)
可以看出来和上面的pytorch模型通道结构是不一样的,这里是NHWC格式。
(2)安装依赖包
参考gitbub这一页
open_model_zoo/demos at master · openvinotoolkit/open_model_zoo · GitHub
cd到目录/home/sxhlvye/open_model_zoo-master/demos下(结合自己的open_model_zoo放置路径)
终端执行如下命令:
python -m pip install --user -r requirements.txt此外还需要参考此页
open_model_zoo/README.md at master · openvinotoolkit/open_model_zoo · GitHub
配置下openmodelzoo_modelapi库
cd到/home/sxhlvye/open_model_zoo-master/demos/common/python目录下,执行如下语句
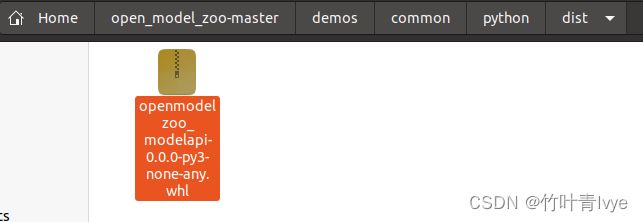
完毕后再此目录下能够看到whl文件
cd到此目录下执行下命令语句,进行安装
pip install openmodelzoo_modelapi-0.0.0-py3-none-any.whl --force-reinstall此时执行如下语句不会出现报错
不然会报如下错误:
from openvino.model_zoo.model_api.models import Classification, outputTransform
ModuleNotFoundError: No module named 'openvino.model_zoo.model_api
(3)pycharm中运行此例子(classification python* Demo)
参看github讲解及官网
https://github.com/openvinotoolkit/open_model_zoo/tree/master/demos/classification_demo/python
Classification Python* Demo — OpenVINO™ documentation
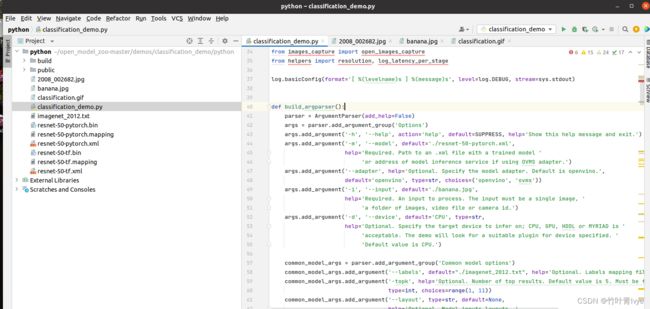
博主这里并没有安装介绍的那样使用命令行语句,而是直接在py文件中给入参数
classification_demo中的代码修改了如下几处即可。
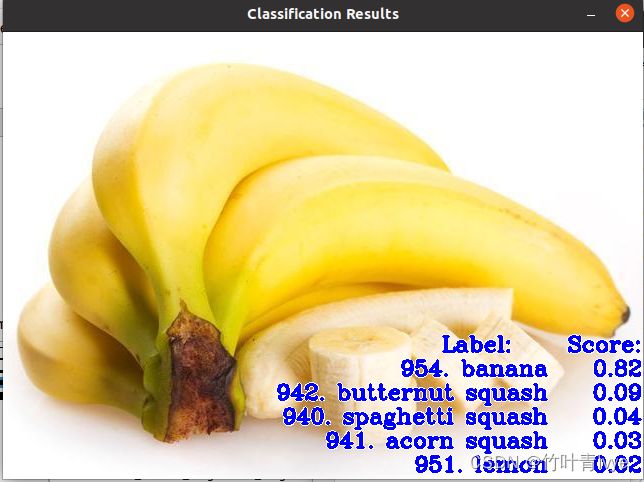
运行结果如下:
ok,完毕。
3.c++下运行例子
(1)先编译例子
参照页面
open_model_zoo/demos at master · openvinotoolkit/open_model_zoo · GitHub
先做下这两步
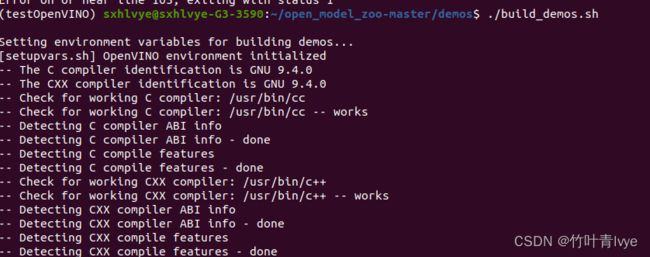
这边没有什么好说的,如下是博主的记录(结合自己的路径)
![]()
下面一步是官网上没有提到的,是个坑,下载open_mode_zoom时,gflas文件夹不会下载下来,需要手动去这个页面上下载下来
https://github.com/gflags/gflags/tree/e171aa2d15ed9eb17054558e0b3a6a413bb01067
下载完毕后,把文件夹里的文件拷贝到如下目录下(结合自己的open_model_zoo在电脑上的位置)
不然后面编译的时候会出现报错:
-- Looking for pthread.h
-- Looking for pthread.h - found
-- Performing Test CMAKE_HAVE_LIBC_PTHREAD
-- Performing Test CMAKE_HAVE_LIBC_PTHREAD - Failed
-- Looking for pthread_create in pthreads
-- Looking for pthread_create in pthreads - not found
-- Looking for pthread_create in pthread
-- Looking for pthread_create in pthread - found
-- Found Threads: TRUE
CMake Error at CMakeLists.txt:143 (add_subdirectory):
The source directory
/home/sxhlvye/open_model_zoo-master/demos/thirdparty/gflags
does not contain a CMakeLists.txt file.
-- Configuring incomplete, errors occurred!
See also "/home/sxhlvye/omz_demos_build/CMakeFiles/CMakeOutput.log".
See also "/home/sxhlvye/omz_demos_build/CMakeFiles/CMakeError.log".
Error on or near line 105; exiting with status 1
只需要cd到/home/sxhlvye/open_model_zoo-master/demos(结合自己的路径),执行如下命令即可:
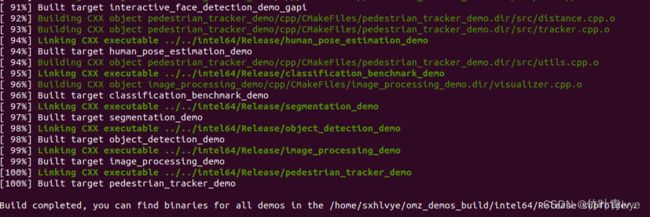
./build_demos.sh
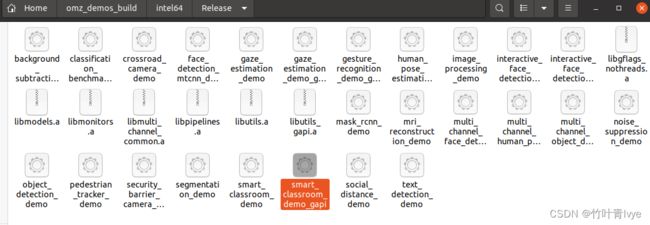
完毕后在如下目录下就能看到编译获得的例子可执行文件
这里将python环境下测试所用的图片、模型、标签文件也都拷贝过来,并在终端运行如下命令,便可以运行起c++版本的分类例子,参考页面
open_model_zoo/demos/classification_benchmark_demo/cpp at master · openvinotoolkit/open_model_zoo · GitHub
./classification_benchmark_demo -m resnet-50-tf.xml -i banana.jpg -labels imagenet_2012.txt
结果如下:
到此c++下例子也运行结束。
4.再跑跑别的例子
这里跑下c++版的object_detection_demmo, 使用yolo-v3-tf模型,标签文件使用coco_80cl.txt(上面第2点提到了标签文件去哪里找)。
准备完毕后,执行如下命令行语句
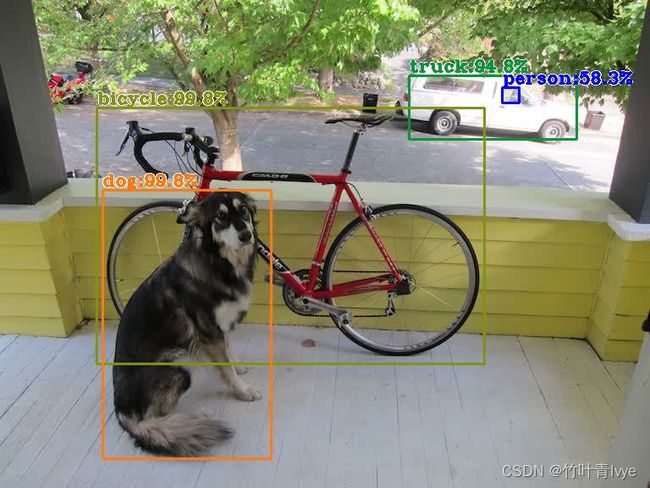
./object_detection_demo -d GPU -i dog.jpg -m yolo-v3-tf.xml -labels coco_80cl.txt -at yolo -o output.jpg
检测效果如下:真是杠杠的!
别的不再演示了,自行发挥吧。
