DifFace——一种扩散模型来提高人脸图片分辨率与清晰度
前期我们介绍过不同的模型来提高图片的分辨率与清晰度的文章,本期我们介绍另外一种可以提高人脸与整体图片分辨率与清晰度的模型--DifFace,从模型的名字可以看出,此模型主要用于人脸部分的清晰度与分辨率的提高,当然,代码中也同样提供了整体图片分辨率与清晰度的模型
使用opencv实现深度学习的图片与视频的超分辨率
USRNet端到端深度学习网络实现图片视频的超分辨率与清晰度
DifFace——扩散模型提高人脸图片质量
通过扩散模型学习一对高质量与低质量的人脸图片,并从低质量的人脸图片来预测高质量的人脸图片,模型如下图
DifFace模型
https://huggingface.co/spaces/OAOA/DifFace
https://github.com/zsyOAOA/DifFace
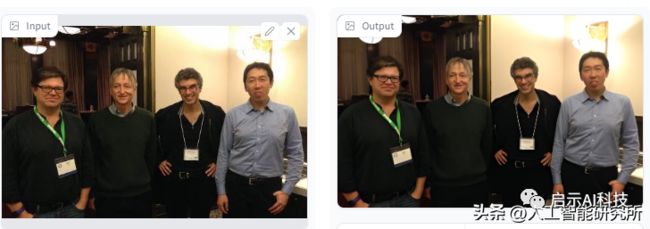
模型已经开源,当然也可以直接在huggingface体验。虽然模型只是用来检测图片并提高图片的分辨率与清晰度,当然我们也可以从视频中,提取每帧图片,并利用此模型改善每帧图片 的质量,最后再把图片合并起来形成视频,以来提高视频的分辨率与清晰度。
从结果来看,模型不仅提高了图片的清晰度,且大大提高了图片的分辨率
DifFace——代码实战
代码已经开源,我们可以直接在GitHub上面来运行代码,当然在Google colab中我们可以利用Google免费的GPU,本期代码实现在Google colab中。
@title **Install Miniconda3**
# https://github.com/conda-incubator/condacolab
!pip install -q condacolab
import condacolab
condacolab.install_miniconda()
! git clone https://github.com/zsyOAOA/DifFace.git
%cd DifFace
!conda info --envs
!conda env update -n base -f /content/DifFace/environment.yaml
首先需要配置Google colab上面的运行环境,这里需要安装condacolab,并安装install_miniconda,然后我们可以clone GitHub上面的代码并更新DifFace的配置环境,以便可以运行DifFace的完整代码
import cv2
import matplotlib.pyplot as plt
from IPython.display import clear_output
import os
import shutil
from pathlib import Path

def display(img1, img2):
  fig = plt.figure(figsize=(25, 10))
  ax1 = fig.add_subplot(1, 2, 1)
  plt.title('Input', fontsize=16)
  ax1.axis('off')
  ax2 = fig.add_subplot(1, 2, 2)
  plt.title('DifFace', fontsize=16)
  ax2.axis('off')
  ax1.imshow(img1)
  ax2.imshow(img2)

def imread(img_path):
  img = cv2.imread(img_path)
  if img.ndim > 3:
    img = img[:, :, :3]
  img = cv2.cvtColor(img, cv2.COLOR_BGR2RGB)
  return img

def reset_folder(path):
    if os.path.isdir(path):
      shutil.rmtree(path)
   os.makedirs(path,exist_ok=True)
环境配置好后,我们就可以来进行DifFace的图片质量提高模型了,在模型预测前,我们初始化display与imread 函数来显示图片与加载本地的图片,方便我们从本地加载低质量的图片,模型预测完成后,可以同步显示低质量图片与高质量图片,以便方便对比。
"""
!python inference_difface.py
  --aligned
  --in_path [image folder/image path]
  --out_path [result folder]
  --gpu_id [gpu index]
"""
!python /content/DifFace/inference_difface.py \
  --aligned \
  --in_path /content/DifFace/testdata/cropped_faces \
  --out_path /content/result_aligned \
  --gpu_id 0

im_path_list = sorted([x for x in Path("/content/DifFace/testdata/cropped_faces").glob("*.png")])
out_dir = Path("/content/result_aligned/restored_faces")
for im_path_in in im_path_list:
  im1 = imread(str(im_path_in))
  im_path_out = out_dir / im_path_in.name
  im2 = imread(str(im_path_out))
  display(im1, im2)
最后我们便可以运行inference_difface.py代码来进行DifFace模型的高质量图片预测了,这里我们添加aligned参数,以便增加人脸面部图片的质量效果,输入低质量的图片保持在cropped_faces文件夹中,最终提高质量的图片保持在restored_faces文件夹中。
当然,模型除了可以提高局部的面部图片外,模型同样提供了可以提高整体图片质量的模型,我们可以修改一下运行参数,以便提高整体的图片质量。
"""
!python inference_difface.py
  -t 200   # The whole length of the pretrained diffusion model, default 250
  -s 80    # started timestpes for DifFace, default 100
  --in_path [image folder/image path]
  --out_path [result folder]
  --gpu_id [gpu index]
"""

!python /content/DifFace/inference_difface.py \
  -t 200 -s 80 \
  --in_path /content/DifFace/testdata/whole_imgs/ \
  --out_path /content/result_unaligned \
  --gpu_id 0

in_dir = "/content/DifFace/testdata/whole_imgs"
im_path_list = sorted([x for x in Path(in_dir).glob("*.png")])
im_path_list.extend([x for x in Path(in_dir).glob("*.jpg")])
out_dir = Path("/content/result_unaligned/restored_image")
for im_path_in in im_path_list:
  im1 = imread(str(im_path_in))
  im_path_out = out_dir / im_path_in.name
  im2 = imread(str(im_path_out))
  display(im1, im2)
这里添加-t,-s参数,以便让模型可以提高整体图片的质量,同样来运行inference_difface.py脚本,我们的低质量图片保存在whole_imgs文件夹中,模型运行后的图片保存在restored_image文件夹中。
从运行的结果来看,模型可以有效的提高人脸的图片质量,不仅提高了图片的分辨率,且大大提高了图片的清晰度。利用此模型我们可以来修复老电影,把低分辨率的视频提高到高分辨率,并提高视频的清晰度,然后以利用我们介绍的图片转彩色模型,再把视频转换到高清的彩色视频。
X搜索小程序:AI人工智能工具,体验不一样的AI工具
![]()


