Tensorflow2.0图像预处理
实验步骤
1、载入库
import matplotlib.pyplot as plt
import tensorflow as tf
import numpy as np
2、读取照片
image_data = tf.keras.preprocessing.image.load_img('d:/data/1.jpg','rb')

plt.imshow(image_data)
plt.show()

img_data = tf.keras.preprocessing.image.img_to_array(image_data)
3、图像缩放
-
利用双线性插值法 ResizeMethod.BILINEAR,对应method=0
resized = tf.image.resize(img_data,[256,256])
print("Digital type: ",resized.dtype)
resized1 = np.asarray(resized,dtype='uint8')
plt.imshow(resized1)
plt.show()
print("Digital type: ",resized1.dtype)
-
最近邻插值法NEAREST_NEIGHBOR,对应method=1
resized2 = tf.image.resize(img_data,[256,512],method='nearest')
resized2 = np.asarray(resized2, dtype='uint8')
plt.imshow(resized2)
plt.show()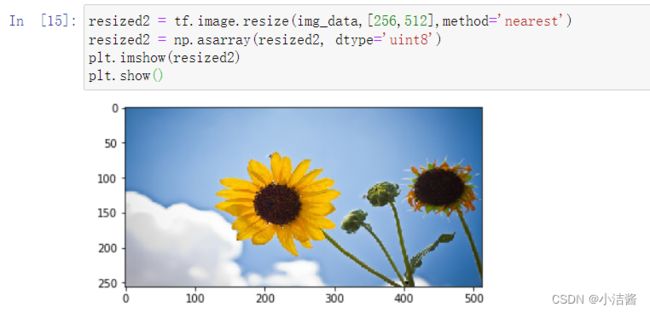
-
双立方插值法BICUBIC,对应method=2
resized3 = tf.image.resize(img_data,[256,256], method='bicubic')
resized3 = np.asarray(resized3, dtype='uint8')
plt.imshow(resized3)
plt.show()
-
像素区域插值法AREA,对应method=3
resized3 = tf.image.resize(img_data,[256,256], method='area')
resized3 = np.asarray(resized3, dtype='uint8')
plt.imshow(resized3)
plt.show()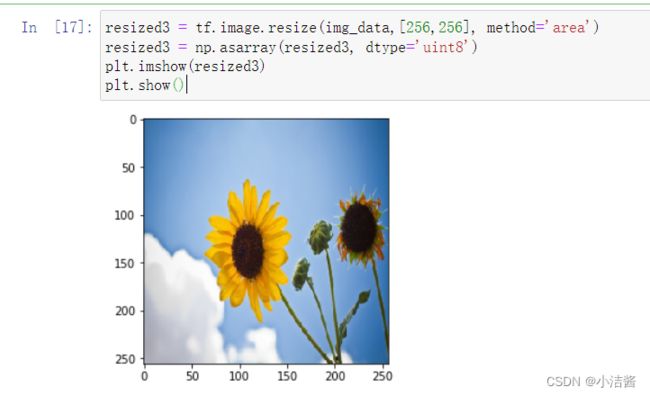
-
裁剪或填充后缩放
croped = tf.image.resize_with_crop_or_pad(img_data,100,100)
croped=np.asarray(croped,dtype='uint8')
plt.imshow(croped)
plt.show()

padded = tf.image.resize_with_crop_or_pad(img_data,600,600)
padded = np.asarray(padded,dtype='uint8')
plt.imshow(padded)
plt.show()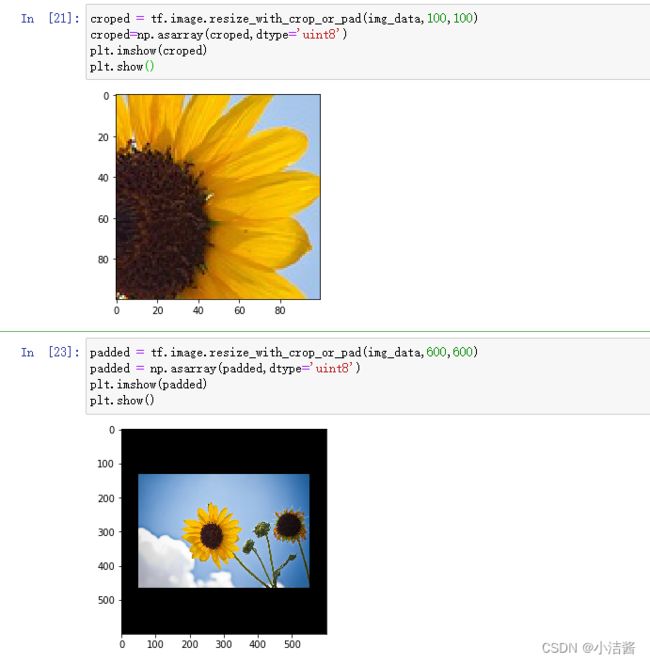
4、随机裁剪
random_croped1 = tf.image.random_crop(img_data,[200,200,3])
random_croped1 = np.asarray(random_croped1,dtype='uint8')
plt.imshow(random_croped1)
plt.show() 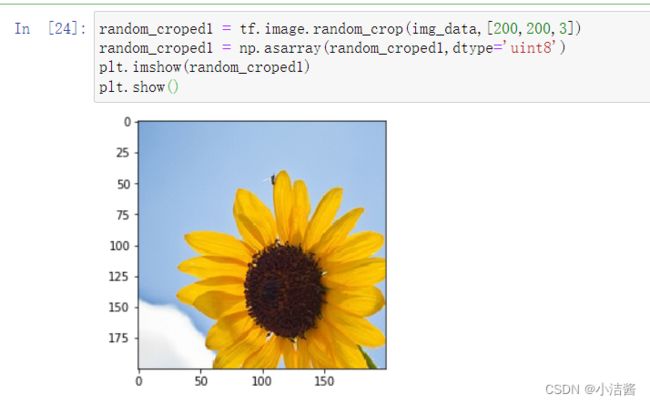
5、水平翻转
img_data = np.asarray(img_data,dtype='uint8')
plt.imshow(img_data)
plt.show()
flip_left_right = tf.image.flip_left_right(img_data)
flip_left_right = np.asarray(flip_left_right,dtype='uint8')
plt.imshow(flip_left_right)
plt.show()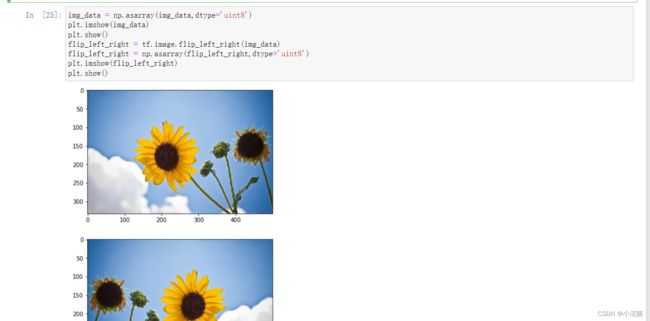
6、上下翻转
img_data = np.asarray(img_data, dtype='uint8')
plt.imshow(img_data)
plt.show()
flip_up_down = tf.image.flip_up_down(img_data)
img_data = np.asarray(img_data,dtype='uint8')
plt.imshow(flip_up_down)
plt.show()

7、改变对比度
img_data = np.asarray(img_data,dtype='uint8')
plt.imshow(img_data)
plt.show()
contrast=tf.image.random_contrast(img_data,lower=0.2,upper=3)
contrast = np.asarray(contrast,dtype='uint8')
plt.imshow(contrast)
plt.show() 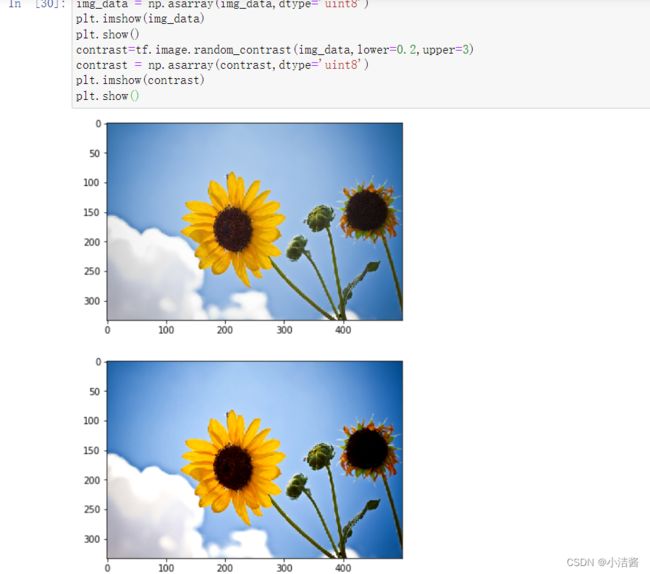
8、白化处理
img_data = np.asarray(img_data,dtype='uint8')
plt.imshow(img_data)
plt.show()
standardization= tf.image.per_image_standardization(img_data)
standardization = np.asarray(standardization,dtype='uint8')
plt.imshow(np.asarray(standardization,dtype='uint8'))
plt.show()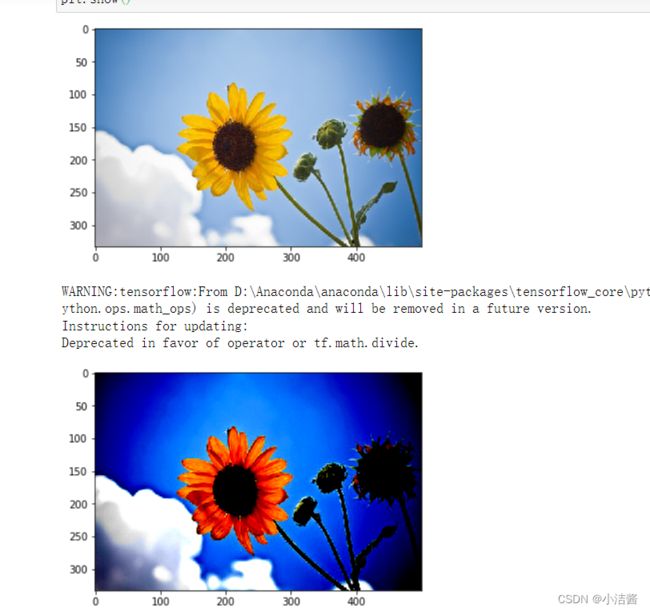
9、定义卷积操作函数
import numpy as np
from PIL import Image
def ImgConvolve(image_array,kernel):
#参数说明:
   #image_array:原灰度图像矩阵
  # kernel :卷积核
   #返回值:原图像与算子进行卷积后的结果

   image_arr = image_array.copy()
   img_dim1,img_dim2 = image_arr.shape
   k_dim1,k_dim2 = kernel.shape
   AddW = int((k_dim1-1)/2)
   AddH = int((k_dim2-1)/2)
   # padding填充
   temp = np.zeros([img_dim1 + AddW*2,img_dim2 + AddH*2])#将原图拷贝到临时图片的中央
   temp[AddW:AddW+img_dim1,AddH:AddH+img_dim2]= image_arr[:,:]
        #初始化一张同样大小的图片作为输出图片
   output = np.zeros_like(a=temp)
   #将扩充后的图和卷积核进行卷积
   for i in range(AddW,AddW+img_dim1):
       for j in range(AddH,AddH+img_dim2):
        output[i][j]= int(np.sum(temp[i-AddW:i+AddW+1,j-AddW:j+AddW+1]*kernel))
return output[AddW:AddW+img_dim1,AddH:AddH+img_dim2] 
10、定义卷积核
#提取竖直方向特征
# sobel_x
kernel_1 = np.array(
              [[-1,0,1],
              [ -2,9,2],
              [ -1,0,1]])
#提取水平方向特征
# sobel_y
kernel_2 = np.array(
              [[-1,-2,-1],
               [ 0,0,0],
               [ 1,2,1]])

# Laplace扩展算子
#二阶微分算子
kernel_3 = np.array(
              [[1,1,1],
               [1,-8,1],
[1,1,1]]) 
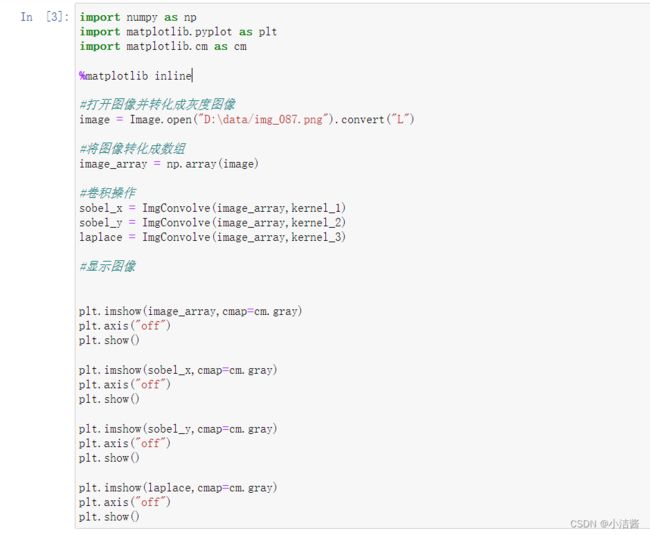
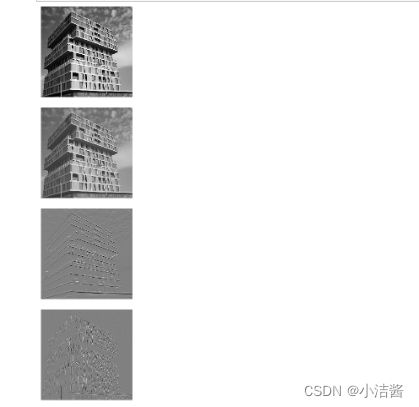
11、卷积操作并显示
import numpy as np
import matplotlib.pyplot as plt
import matplotlib.cm as cm

%matplotlib inline

#打开图像并转化成灰度图像
image = Image.open("D:\data/img_087.png").convert("L")

#将图像转化成数组
image_array = np.array(image)

#卷积操作
sobel_x = ImgConvolve(image_array,kernel_1)
sobel_y = ImgConvolve(image_array,kernel_2)
laplace = ImgConvolve(image_array,kernel_3)

#显示图像


plt.imshow(image_array,cmap=cm.gray)
plt.axis("off")
plt.show()

plt.imshow(sobel_x,cmap=cm.gray)
plt.axis("off")
plt.show()

plt.imshow(sobel_y,cmap=cm.gray)
plt.axis("off")
plt.show()

plt.imshow(laplace,cmap=cm.gray)
plt.axis("off")
plt.show()