基于 FastAPI 的房源租赁系统设计与实现
项目背景
传统的线下租房不便、途径少、信息更新慢,导致房屋租赁效率低。为了有效的提升租赁效率和房源信息管理、提供更优质的租赁服务。让房东出租宣传展示与房源管理、租客更好的检索房源信息、发布租房需求以及入住预定、后台房源管理、审核等一站式租赁服务平台。
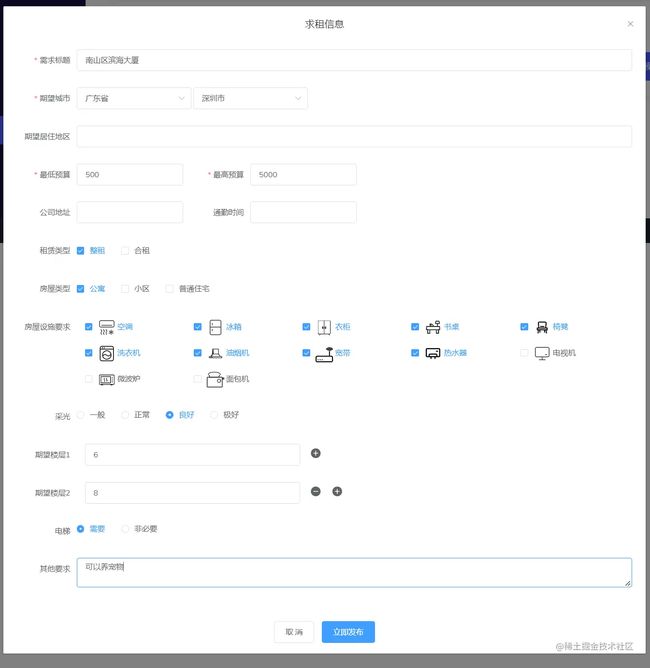
- 租客:浏览房源、收藏房源、预定房源、发布租房需求、查看电子合同。
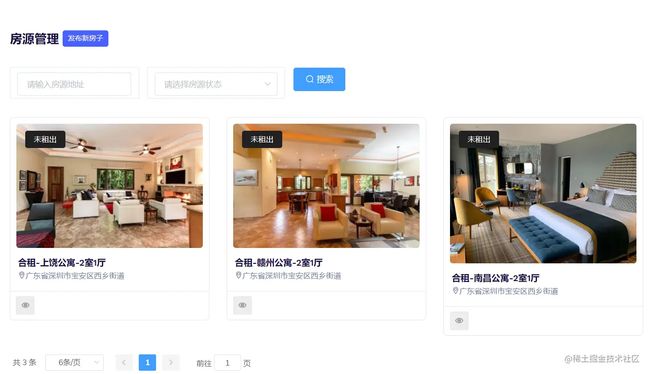
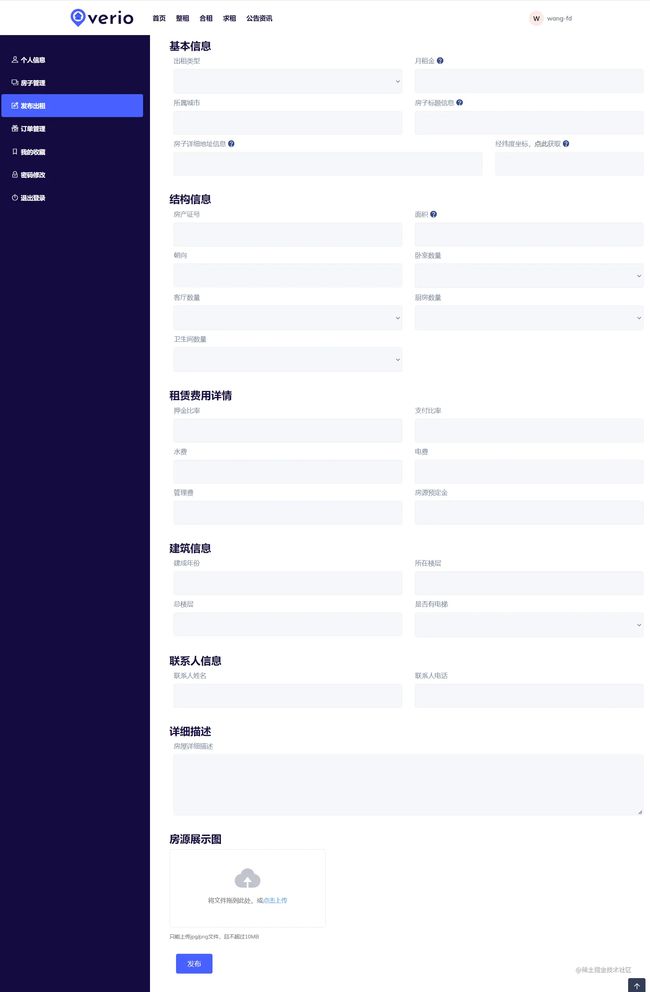
- 房东:发布房源、订单管理、查看电子合同。
- 管家:查看房源信息、回复咨询、线下带看房源。
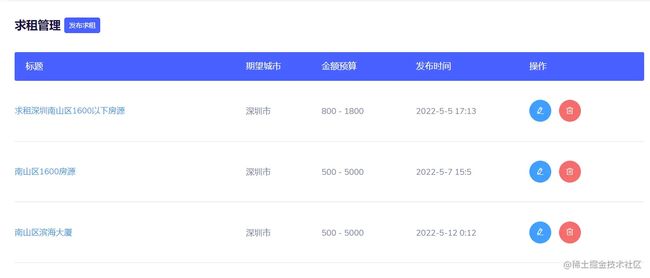
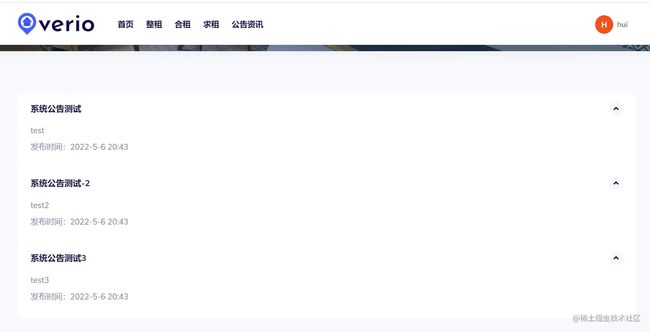
- 管理员:用户管理、房源管理、订单管理、租房需求、实名认证、系统公告管理。
TODO
- 房源全文检索
- 租房需求支持评论
- 日租、合租模式
- 房源推荐系统(Go开发)
项目特色
- 采用了七牛云OSS、CDN服务加速一些图片资源。
- 采用 FastAPI 的后台任务实现异步发送短信验证码。
- 采用 tortoise-orm 完成数据库操作的封装。
- 通过模板字符串动态渲染富文本实现电子合同功能。
- 对接阿里支付实现了订单、支付模块,对接百度地图实现当前城市定位、房源附近信息查询等功能。
- 前端界面采用 Vue.js + Element ui 实现数据渲染,Bootstrap 实现自适应布局。
项目体验
项目体验地址 http://43.138.220.206:9999/huihome 由于注册需要发送短信验证码,而手机验证码服务现在只能给我的测试手机号发送验证码,因此不能使用注册服务。大家可以使用已有账号去登录体验。
| 账号类别 | 用户名 | 密码 | 备注 |
|---|---|---|---|
| 用户账号 | hui | 123456 | 租客账号 |
| 用户账号 | wang | 123456 | 房东账号 |
项目源码:HuiDBK/HuiHome: 基于FastAPI的房屋租赁系统 (github.com)
项目还没有太完善,服务器也只是学习级别的,可能会出现很多异常,望大家多担待。
项目启动
- 准备好MySQL 与 Redis数据库服务,修改相关数据库配置信息
- 申请第三方服务:七牛云的OSS服务、容联云的短信服务、阿里的支付服务、百度地图服务
- 依赖于 Python 3.7.9 编程环境
- 安装 requirements.txt 项目依赖
pip install -r requirements.txt - 启动项目 python run.py
- 如果成功在本地启动项目,访问 http://127.0.0.1:8080/docs 地址查看接口文档
项目部署
- 确保Mysql、Redis服务正常
- 在存在Dockerfile文件的项目目录下构建镜像 docker build -t house_rental_image . (最后.不要忘记)
- 运行镜像产生容器 docker run -d --name house_rental_container -p 80:80 house_rental_image
- docker ps 查看容器是否启动
系统整体功能图
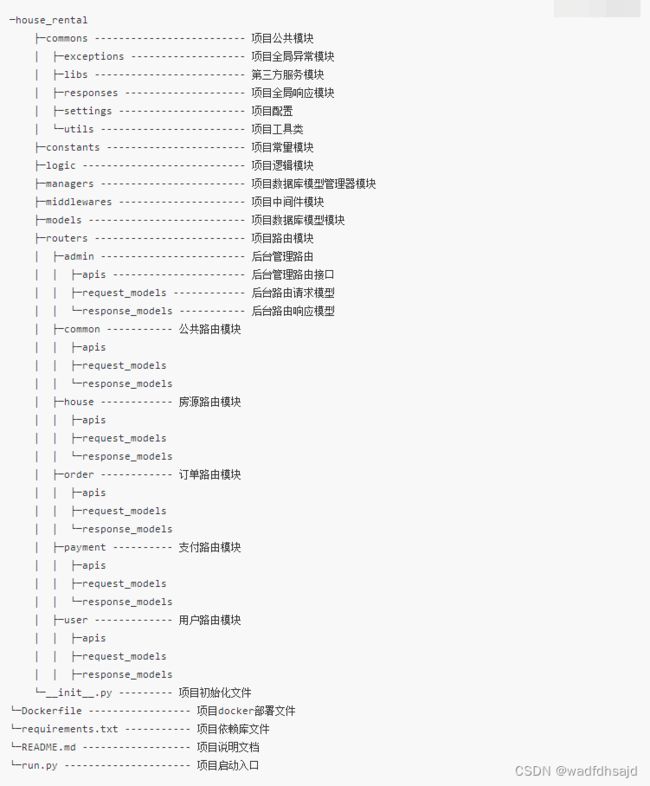
项目结构
项目开发整体采用的是Python的FastAPI框架来搭建系统的接口服务,接口设计遵循 Restful API接口规范。接口前后端交互都采用json格式进行数据交互,项目整体的结构如下:
项目Redis缓存设计
Redis key 规范:
project : module : business : unique key
 项目名 :  模块名 :  业务    : 唯一区别key

例如:用户手机短信验证码缓存
house_rental:user:sms_code:13022331752
复制代码
用户模块缓存
房源模块缓存
其他缓存
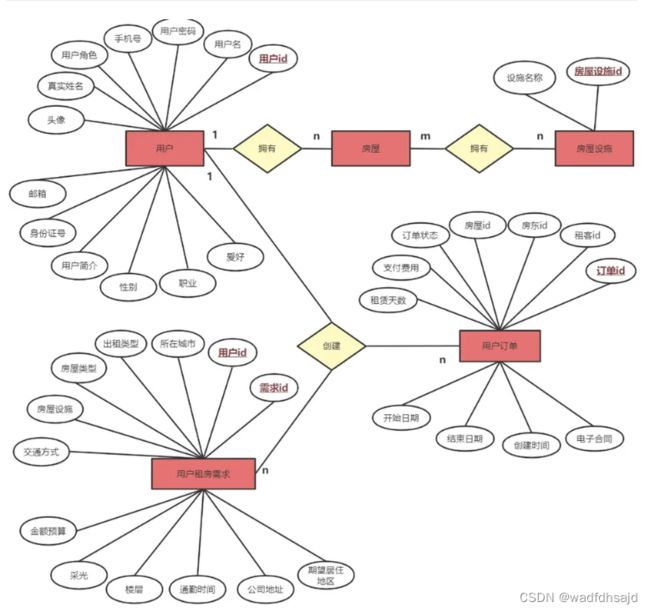
系统整体ER图
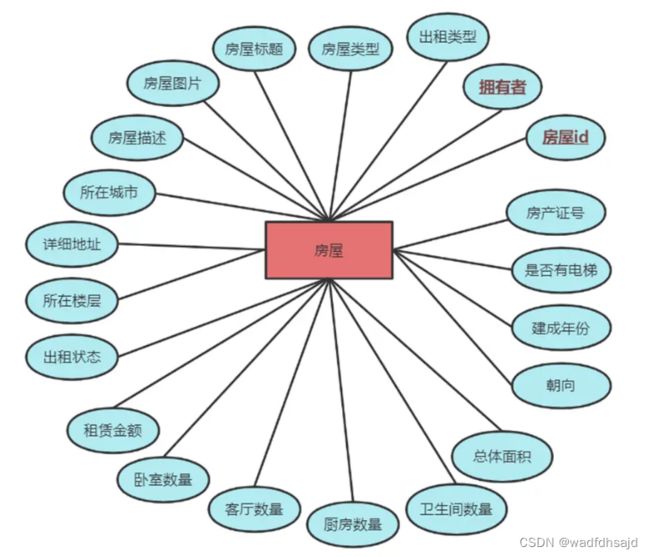
房屋属性太多故在整体ER图省略
实际表属性更多进行了垂直分表。
代码细节
实名认证装饰器
def real_auth_required(func):
    """ 实名认证装饰器 """

    @wraps(func)
    async def warp(*args, **kwargs):
        """
        通过请求上下文的user对象来判断用户有没有实名认证
        """
        cur_request = context_util.REQUEST_CONTEXT.get()
        user = cur_request.user or None

        if not user:
            raise AuthorizationException()

        if user.role == UserRole.admin.value:
            # 管理员不需要实名认证
            return await func(*args, **kwargs)

        # 此时不同直接通过 user.auth_status 来验证
        # 应该通过 user_id 去数据库中查询最新的状态
        user_profile = await UserProfileManager.get_by_id(user.id)
        if user_profile.auth_status != UserAuthStatus.authorized.value:
            raise BusinessException().exc_data(ErrorCodeEnum.REALNAME_AUTH_ERR)

        return await func(*args, **kwargs)

    return warp
分页数据封装装饰器
from pydantic import BaseModel, Field


class ResponseBaseModel(BaseModel):
    """ 统一响应模型 """
    code: int
    message: str
    data: dict


class ListResponseDataModel(BaseModel):
    """ 分页列表响应data模型 """
    total: int = Field(default=0, description="数据总数量")
    data_list: list = Field(default=[], description='数据列表')
    has_more: bool = Field(default=False, description="是否有下一页")
    next_offset: int = Field(default=0, description="offset下次起步")


def list_page(func):
    """ 分页数据封装装饰器 """

    @wraps(func)
    async def warp(*args, **kwargs):
        """
        寻找函数参数 ListPageRequestModel 的实例 有获取 limit、offset
        所有分页请求入参都继承 ListPageRequestModel
        """

        limit, offset = None, None
        # 位置参数中寻找
        for arg in args:
            if limit is not None and offset is not None:
                break

            if isinstance(arg, ListPageRequestModel):
                limit, offset = arg.limit, arg.offset

        # 关键字参数中寻找
        for key, value in kwargs.items():
            if limit is not None and offset is not None:
                break

            if isinstance(value, ListPageRequestModel):
                # 关键字参数值是否是 ListPageRequestModel
                limit, offset = value.limit, value.offset
            elif key == 'limit':
                # 也支持关键参数 key 为 limit 和 offset的情况
                limit = value
            elif key == 'offset':
                offset = value

        if limit is None or offset is None:
            # 没有成功赋值, 则不支持
            logger.debug('不支持分页数据封装')

        # 执行函数获取分页响应的数据, 有两种情况
        # 1 返回使用了pydantic model ListResponseDataModel (尽量使用这种来返回业务数据)
        # 2 返回 total data_list (元组)
        data_obj = await func(*args, **kwargs)

        # 分页数据返回的参数都必须遵守 ListResponseDataModel
        if isinstance(data_obj, ListResponseDataModel):
            # ListResponseDataModel 处理
            data_obj.next_offset = offset + limit
            data_obj.has_more = False if data_obj.next_offset > data_obj.total else True

        elif isinstance(data_obj, tuple):
            # 元组 处理
            total = data_obj[0] if isinstance(data_obj[0], int) else data_obj[1]
            data_list = data_obj[1] if isinstance(data_obj[1], list) else data_obj[0]
            data_obj = ListResponseDataModel(
                total=total,
                data_list=data_list,
                next_offset=offset + limit,
                has_more=False if offset + limit > total else True
            )

        list_page_resp = data_obj

        return list_page_resp

    return warp
json数据缓存装饰器
def cache_json(cache_info=None, key=None, timeout=60):
    """
    缓存装饰器 (适合缓存字符串json数据)
    :param key: 缓存的key
    :param timeout: 缓存的时间 默认60秒
    :param cache_info: 封装好的缓存信息对象 RedisCacheInfo
    :return:
    """
    if cache_info:
        # 有封装的缓存对象
        key = cache_info.key
        timeout = cache_info.timeout

    def cache_decorator(api_func):
        @wraps(api_func)
        async def warp(*args, **kwargs):
            # 1、没有设置key则根据接口函数的信息和系统密钥自动生成(尽量设置key)
            nonlocal key
            if not key:
                # 应用名:函数所在模块:函数名:函数位置参数:函数关键字参数:系统密钥 进行hash
                param_args_str = ','.join([str(arg) for arg in args])
                param_kwargs_str = ','.join(sorted([f'{k}:{v}' for k, v in kwargs.items()]))
                hash_str = f'{constants.APP_NAME}:{api_func.__module__}:{api_func.__name__}:' \
                           f'{param_args_str}:{param_kwargs_str}:{settings.SECRET}'
                has_result = hashlib.md5(hash_str.encode()).hexdigest()

                # 根据哈希结果生成key
                key = f'{constants.APP_NAME}:{api_func.__module__}:{api_func.__name__}:{has_result}'

            # 2、先查看是否有缓存
            from house_rental.commons.utils.redis_util import RedisUtil
            redis_client = await RedisUtil().get_redis_conn()
            cache_data = await redis_client.get(key)
            if cache_data:
                return json.loads(cache_data)

            # 3、执行接口函数获取结果
            api_result = await api_func(*args, **kwargs)

            # 4、设置缓存
            if isinstance(api_result, BaseModel):
                # 结果是pydantic的模型对象处理
                api_result_json = api_result.json()
            elif isinstance(api_result, dict):
                # 字典
                api_result_json = json.dumps(api_result)
            else:
                # 其他可以json序列化的
                api_result_json = json.dumps(api_result)

            await redis_client.setex(key, timeout, api_result_json)
            return api_result

        return warp

    return cache_decorator
项目接口依赖(Depends)
async def jwt_authentication(request: Request):
    """ jwt 鉴权"""
    # for api_url in settings.API_URL_WHITE_LIST:
    #     # 在白名单的接口无需token验证
    #     if str(request.url.path).startswith(api_url):
    #         return
    token = request.headers.get('Authorization') or None
    if not token:
        raise AuthorizationException()

    # Bearer 占了7位
    if not str(token).startswith('Bearer '):
        raise AuthorizationException()

    token = str(token)[7:]
    user_info = jwt_util.verify_jwt(token)
    if not user_info:
        # 无效token
        raise AuthorizationException()

    # 校验通过保存到request.user中
    user_id = user_info.get('user_id')
    user = await UserBasicManager.get_by_id(user_id)

    if user.role != UserRole.admin.value and str(request.url.path).startswith('/api/v1/admin'):
        # 不是管理员无法访问了后台模块接口
        raise AuthorizationException()

    request.scope['user'] = user


async def request_context(request: Request):
    """ 保存当前request对象到上下文中 """
    context_util.REQUEST_CONTEXT.set(request)


async def login_required(request: Request):
    """ 登录权限校验 """
    try:
        user = request.user
    except:
        raise AuthorizationException().exc_data(ErrorCodeEnum.AUTHORIZATION_ERR)

    if not user:
        raise AuthorizationException().exc_data(ErrorCodeEnum.AUTHORIZATION_ERR)
响应序列化递归工具函数
def obj2DataModel(
        data_obj: Union[
            Dict,
            Type[BaseOrmModel],
            List[Dict],
            List[BaseOrmModel]
        ],
        data_model: Type[BaseModel]
) -> Union[BaseModel, List[BaseModel], None]:
    """
    将数据对象转换成 pydantic的响应模型对象, 如果是数据库模型对象则调用to_dict()后递归
    :param data_obj: 支持 字典对象, 数据库模型对象, 列表对象
    :param data_model: 转换后数据模型
    :return:
    """

    if isinstance(data_obj, dict):
        # 字典处理
        return data_model(**data_obj)

    elif isinstance(data_obj, BaseOrmModel):
        # 数据模型对象处理, to_dict()后递归调用
        return obj2DataModel(data_obj.to_dict(), data_model=data_model)

    elif isinstance(data_obj, list):
        # 列表处理
        return [obj2DataModel(item, data_model=data_model) for item in data_obj]

    else:
        logger.debug(f'不支持此{data_obj}类型的转换')
    return
入参、出参代码样式
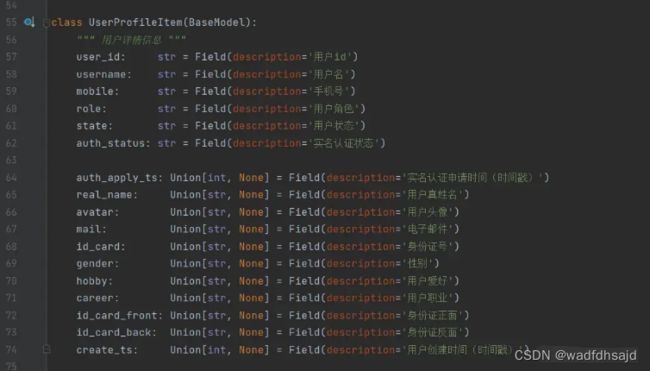
未调整前:
调整后:
不要为了单独一个而全部调整,只要达到了美观就行无需全部对齐,重要是关注每个入参和出参有没有关联等,一些必传啊,枚举参数等,相关联的放到一起,这样的代码才更赏心悦目。
房源设施双色图标展示
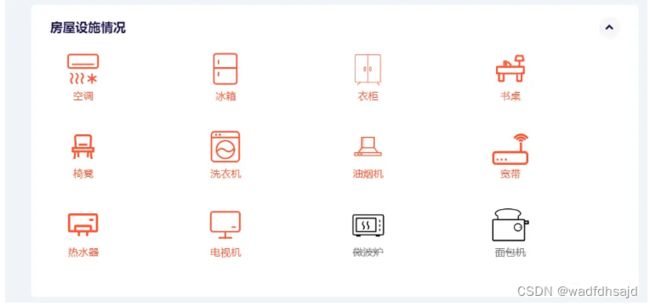
首先我可以获取所有房源设施的信息,接口返回当前房源有的房源信息,只要判断不在总房源设施列表里的就显示 灰色图标、文字下划线 在则显示不同的颜色(数据库只存了灰色图标)
1、通过 filter 函数滤镜函数实现图标不同颜色的阴影,然后原图标偏移图标宽度然后隐藏,就只剩下带颜色的图标阴影(本项目所采用的方案)
.facility_no {
filter: grayscale(100%);
-webkit-filter: grayscale(100%);
-moz-filter: grayscale(100%);
-o-filter: grayscale(100%);
text-decoration: line-through;
}
.facility_yes {
filter: drop-shadow(46px 0px 0px #fd5332);
backdrop-filter: blur(0px);
}
.facility_text {
width: 46px;
text-align: center;
}
.facility_hidden {
width: 46px;
height: 46px;
text-indent: -46px;
overflow: hidden;
}
![]()
{{ item.name }}
![]()
{{ item.name }}
2、数据库存存储两张不同颜色的图标
3、数据库还是存储一张图标但一张图标包含两种图标,前端通过切图来分割图标 background-image 属性搭配
background-positon:x轴起点 y轴起点;
background-size:背景图片的大小;
width:终点x轴位置;
height:终点y轴位置;
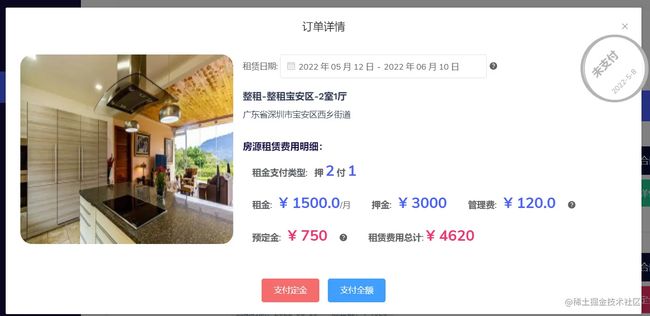
支付状态章印显示
通过 position 属性实现子绝父相定位章印元素,border-radius 控制边框圆角
.seal{
   width: 115px;
   height: 115px;
   border: solid 5px #B4B4B4;
   border-radius: 100%;
   background-color: rgba(255, 255, 255, 0.8);
   position: relative;
   display: flex;
   justify-content: center;
   align-items: center;
}
.seal-son{
   width: 110px;
   height: 110px;
   border: solid 2px #B4B4B4;
   border-radius: 100%;
   background-color: rgba(255, 255, 255, 0.8);
   position: relative;
}

.seal-lg-text{
    position: absolute;
    top: 32px;
    text-align: center;
    font-size: 18px;
    transform: rotate(-45deg);
    right: 40px;
    color: #B4B4B4;font-weight: 900;
}
.seal-sm-text{
    position: absolute;
    top: 66px;
    text-align: center;
    font-size: 10px;
    transform: rotate(-45deg);
    left: 40px;color: #B4B4B4;
}
实际使用如果位置不够好,通过style重写覆盖css属性调整,有点像类继承一样
                    已支付


                    已预订


                    未支付


                    已完成


                    已取消


                {{ order_detail_item.update_ts }}
元素大小缩放提高交互
.el_scale:hover {
    transform: scale(1.03)
}
项目界面展示
首页
登录注册
房源列表
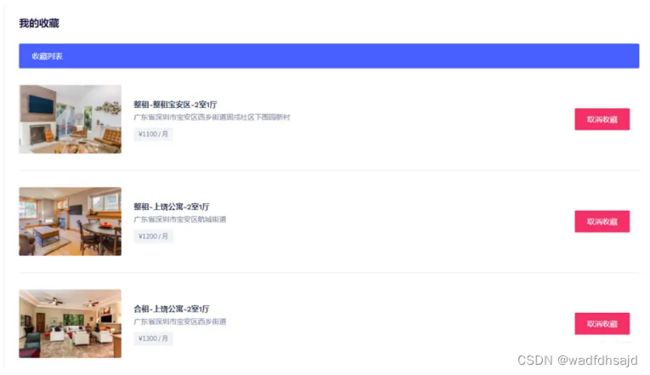
房源收藏
房源详情


