osgEarth示例分析——osgearth_features
前言
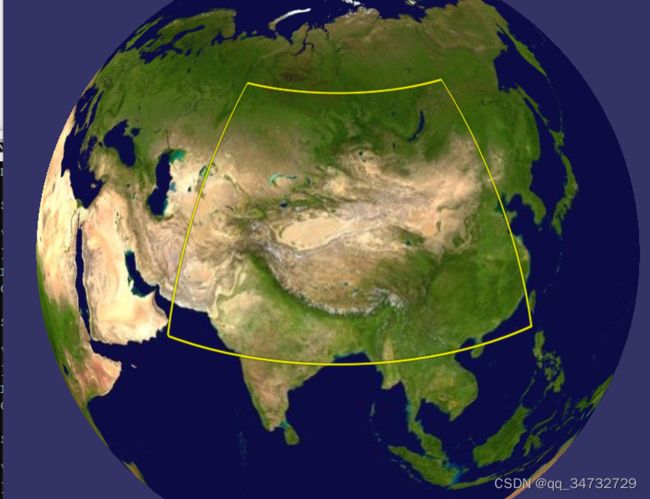
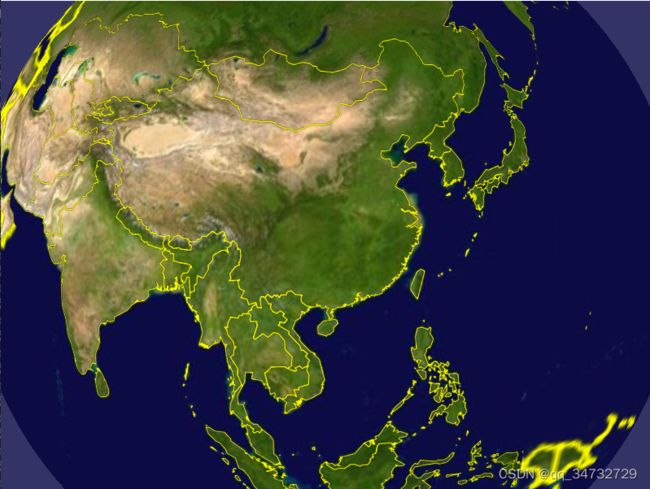
osgearth_features示例,主要演示如何通过代码方式加载shp文件,并设置其样式。在执行时,通过不同 的命令,得到不一样的效果。
cmd执行命令:
// rasterize 光栅化,不输入时,会显示名称
// mem参数输入,加载矩形,否则加载world.shp文件。shp文件路径一定要写全路径,否则无法加载。
// labels 可以不用填写。
// clamp 和 drape 任选其一。

// 采用clamp方式绘制
osgearth_featuresd.exe --rasterize --mem --labels --clamp

// 采用drape方式绘制
osgearth_featuresd.exe --rasterize --mem --labels --drape

// 还有多种组合方式
osgearth_featuresd.exe --labels --drape
效果
代码分析
简单流程:
// osgEarth表达矢量的基本思路是:
//    先将shp文件读取到矢量源图层FeatureSourceLayer中,
//    这个图层加载到osgEarth的图层列表中是不显示的,
//    必须得再加载一个专门的符号化图层,将其符号化,才能正常显示。


// 1. 先声明基础地图
osgEarth::Drivers::GDALOptions basemap;
basemap.url() = "world.tif";
// 添加影像图到map节点
map->addLayer( new ImageLayer(ImageLayerOptions("basemap", basemap)));


// 2. 加载特征数据
osgEarth::Drivers::OGRFeatureOptions featureData;
featureData.url() = "world.shp";
// 特征源图层选项设置
osgEarth::Features::FeatureSourceLayerOptions ogrLayer;
ogrLayer.name() = "vector-data";
ogrLayer.featureSource() = featureData;
map->addLayer(new osgEarth::Features::FeatureSourceLayer(ogrLayer));

/*******↑featureData添加到FeatureSourceLayer,*****↓符号化*******/

// 3.初始化线样式
// 对ls alt render 进行设置
Style style;
osgEarth::Symbology::LineSymbol* ls = style.getOrCreateSymbol();
osgEarth::Symbology::AltitudeSymbol* alt = style.getOrCreate();
osgEarth::Symbology::RenderSymbol* render = style.getOrCreate();


// 4.光栅化或矢量化,二选一
// 4.1光栅化
osgEarth::Drivers::AGGLiteOptions rasterOptions;
rasterOptions.featureOptions() = featureData;
rasterOptions.styles()->addStyle( style );
map->addLayer(new ImageLayer("My Features", rasterOptions) );

// 4.2矢量化
osgEarth::Features::FeatureModelLayerOptions fml;
fml.styles()->addStyle(style);
map->addLayer(new FeatureModelLayer(fml));

// 5.如果需要加入label样式,以矢量化为前提
osgEarth::Symbology::Style labelStyle;
osgEarth::Symbology::TextSymbol* text = labelStyle.getOrCreateSymbol();
FeatureModelLayerOptions fml;
fml.styles()->addStyle( labelStyle );
map->addLayer(new FeatureModelLayer(fml));
完整源码:
#include
#include
#include
#include

#include
#include
#include
#include
#include

#include
#include

#include
#include
#include

using namespace osgEarth;
using namespace osgEarth::Features;
using namespace osgEarth::Drivers;
using namespace osgEarth::Symbology;
using namespace osgEarth::Util;

int usage( const std::string& app )
{
    OE_NOTICE "\n" << app << "\n"	// 绘制特征的方法
        << "  --rasterize           : draw features as rasterized image tiles \n" // 光栅化平铺瓦片图
        << "  --drape               : draw features as projected texture \n"	// 投影纹理
        << "  --clamp               : draw features using shader clamping \n"	// 使用贴地着色器
        << "  --mem                 : load features from memory \n"				// 加载默认线
        << "  --labels              : add feature labels \n"					// 添加文本标签
        << "\n"
        << MapNodeHelper().usage()
        << std::endl;

    return 0;
}

//
// NOTE: run this sample from the repo/tests directory.
//
int main(int argc, char** argv)
{
    osg::ArgumentParser arguments(&argc,argv);

    if ( arguments.read("--help") )
        return usage( argv[0] );

	// cmd执行命令时,输入: osgearth_featuresd.exe --rasterize --mem --labels --drape --clamp (一些参数)
	// 当输入了某个参数,则获取到的值为1,否则为0
    bool useRaster  = arguments.read("--rasterize");
    bool useMem     = arguments.read("--mem");
    bool useLabels  = arguments.read("--labels");
    bool useDraping = arguments.read("--drape");
    bool useClamping = arguments.read("--clamp");
	std::cout << useRaster << useMem << useLabels << useDraping << useClamping << std::endl;

    osgViewer::Viewer viewer(arguments);

    // Start by creating the map:
    Map* map = new Map();

    // Start with a basemap imagery layer; we'll be using the GDAL driver
    // to load a local GeoTIFF file:
	// 添加默认地图
    GDALOptions basemap;// GDAL选项类,继承自TileSourceOptions
    basemap.url() = "../data/world.tif";
    map->addLayer( new ImageLayer(ImageLayerOptions("basemap", basemap)));

    // Next we add a feature layer.
	// 添加shp文件
    OGRFeatureOptions featureData;
    if ( !useMem )
    {
        // Configures the feature driver to load the vectors from a shapefile:
		// 如果给出相对路径,则国界线总是加载不上
		// 此处必须给全路径!!!
        featureData.url() = "D:\\osgearth\\data\\world.shp";
		std::cout << "add world.shp" << std::endl;
    }
    else
    {
        // the --mem options tells us to just make an in-memory geometry:
		// 当没有 --mem参数时,采用默认的line绘制
        Ring* line = new Ring();
        line->push_back( osg::Vec3d(60, 20, 0) );
        line->push_back( osg::Vec3d(120, 20, 0) );
        line->push_back( osg::Vec3d(120, 60, 0) );
        line->push_back( osg::Vec3d(60, 60, 0) );
        featureData.geometry() = line;
		std::cout << "don't add world.shp" << std::endl;
    }

    // Make a feature source layer and add it to the Map:
	// 制作特征源图层并添加到map
    FeatureSourceLayerOptions ogrLayer;
    ogrLayer.name() = "vector-data";// 矢量数据
    ogrLayer.featureSource() = featureData;// shp 文件或者默认line
    map->addLayer(new FeatureSourceLayer(ogrLayer));

    // Define a style for the feature data. Since we are going to render the
    // vectors as lines, configure the line symbolizer:
    // 设置矢量面样式(包括边界线)
    Style style;

    LineSymbol* ls = style.getOrCreateSymbol();
    ls->stroke()->color() = Color::Yellow;
    ls->stroke()->width() = 2.0f;// 可以将线宽设置宽一些,更容易看出不同参数useDraping和useClamping产生的区别
    ls->tessellationSize()->set(100, Units::KILOMETERS);// 细分程度

    if (useDraping)//是否设置drape属性
    {
        AltitudeSymbol* alt = style.getOrCreate();
        alt->clamping() = alt->CLAMP_TO_TERRAIN;
        alt->technique() = alt->TECHNIQUE_DRAPE;
		std::cout << "drape" << std::endl;
    }

    else if (useClamping)// 贴地属性
    {
        AltitudeSymbol* alt = style.getOrCreate();
        alt->clamping() = alt->CLAMP_TO_TERRAIN;
        alt->technique() = alt->TECHNIQUE_GPU;
		// 线的细分程度
        ls->tessellationSize()->set(100, Units::KILOMETERS);

        RenderSymbol* render = style.getOrCreate();
        render->depthOffset()->enabled() = true;
		render->depthTest() = false;
		std::cout << "no drape,but clamp" << std::endl;
    }

    if (useRaster)// 光栅化
    {
        AGGLiteOptions rasterOptions;
        rasterOptions.featureOptions() = featureData;
        rasterOptions.styles() = new StyleSheet();
        rasterOptions.styles()->addStyle( style );
        map->addLayer(new ImageLayer("My Features", rasterOptions) );
		std::cout << "raster" << std::endl;
    }

    else //if (useGeom)
    {
        FeatureModelLayerOptions fml;
        fml.name() = "My Features";
        fml.featureSourceLayer() = "vector-data";
        fml.styles() = new StyleSheet();
        fml.styles()->addStyle(style);
       // fml.enableLighting() = false;

        map->addLayer(new FeatureModelLayer(fml));
		std::cout << "no raster" << std::endl;
    }

    if ( useLabels && !useRaster )// 有标签且非光栅化
    {
        // set up symbology for drawing labels. We're pulling the label
        // text from the name attribute, and its draw priority from the
        // population attribute.
        // 设置文本样式
        Style labelStyle;

        TextSymbol* text = labelStyle.getOrCreateSymbol();
        text->content() = StringExpression( "[cntry_name]" );//如果需要显示汉字,则需要转换成UTF-8编码
        text->priority() = NumericExpression( "[pop_cntry]" );
        text->size() = 26.0f;// 字号有些大
        text->alignment() = TextSymbol::ALIGN_CENTER_CENTER;
        text->fill()->color() = Color::White;
        text->halo()->color() = Color::DarkGray;// 文字光环颜色

        // and configure a model layer:
        FeatureModelLayerOptions fml;
        fml.name() = "Labels";
        fml.featureSourceLayer() = "vector-data";
        fml.styles() = new StyleSheet();
        fml.styles()->addStyle( labelStyle );

        map->addLayer(new FeatureModelLayer(fml));
		std::cout << "no raster, but labels" << std::endl;
    }

    // That's it, the map is ready; now create a MapNode to render the Map:
    MapNode* mapNode = new MapNode(map);

    viewer.setSceneData( mapNode );
    viewer.setCameraManipulator( new EarthManipulator() );

    // add some stock OSG handlers:
    MapNodeHelper().configureView(&viewer);

    return viewer.run();
}
参考链接:osgEarth使用笔记4——加载矢量数据


