python读取pcd点云/转numpy(python2+python3,非ROS环境)
0.引言
\qquad ROS的PCL库支持python读取点云,ROS1关联的是python2(2.7),ROS2关联的是python3(>=3.5),但这对于windows的用户和没装ROS的ubuntu用户似乎不够友好。下面就介绍两种不需要ros的方法。
\qquad 点云的fileds有好几种,XYZ,XYZI,XYZRGB,XYZRGBA,本文以XYZI为例讲解,如果是RGB类型的参考以下链接:
https://blog.csdn.net/qq_35565669/article/details/106687208
1.python2读取点云
在python2的环境下:
pip2 install pypcd
注意,python3不能安装这个包
参考代码:
#!/usr/bin/python2
import pypcd
import numpy as np
import os
from tqdm import tqdm
pcd_dir = '/data3/data/SemiAuto_Calib/PC2_CV3/PC2_CV/pcd'
out_pcd_dir = "data/pcd"
pcd_files = [file for file in os.listdir(pcd_dir) if os.path.splitext(file)[1]=='.pcd']
pcd_files.sort()
os.makedirs(out_pcd_dir)
for file in tqdm(pcd_files,desc="pcd"):
    cloud = pypcd.PointCloud.from_path(os.path.join(pcd_dir,file))
    pcd_array = cloud.pc_data.view(np.float32).reshape(cloud.pc_data.shape+(-1,))  # numpy.ndarray (N,4)
    np.save(os.path.join(out_pcd_dir,os.path.splitext(file)[0]+".npy"),pcd_array)  # 读取时np.load(file)
Windows用户可删除第一行注释,并切换到python2环境运行此脚本。
2.python3读取点云
2.1. pclpy
需要python3.6的环境,安装pclpy
pip3 install pclpy
python3.6环境用户直接跳过以下内容
原github网址:
https://github.com/davidcaron/pclpy
注:原github网址提示兼容的版本:

若不是python3.6则不能直接通过pip安装(无pypi的二进制文件),需要通过conda安装:
conda install -c conda-forge -c davidcaron pclpy不建议使用,安装了10分钟仍然在等待,而且是强制安装。
参考代码:
import pclpy
from pclpy import pcl
import numpy as np
obj = pclpy.pcl.PointCloud.PointXYZI()
pcl.io.loadPCDFile('PC2_CV\pcd\PointXYZI_001.pcd',obj)
np_xyz = obj.xyz
insty = obj.intensity[:,None]
print(np_xyz.shape,insty.shape)
输出:
(28800, 3) (28800, 1)
一个是XYZ坐标,一个是intensity强度。
另外,这个库还可以像pcl一样展示点云
参考:https://www.codeleading.com/article/19791179164/
import pclpy
from pclpy import pcl
obj=pclpy.pcl.PointCloud.PointXYZI()
pcl.io.loadPCDFile('PC2_CV\pcd\PointXYZI_001.pcd',obj)
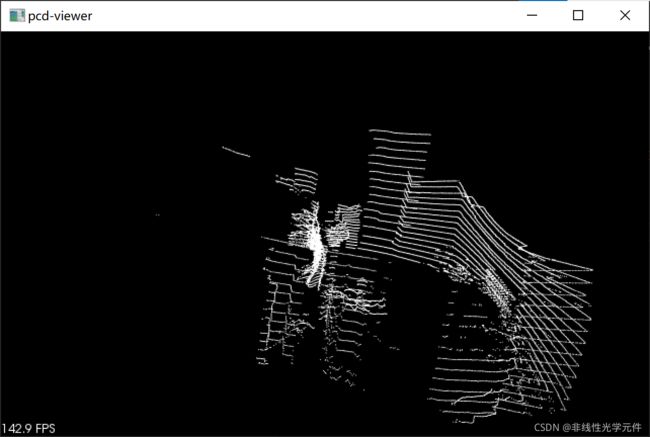
viewer=pcl.visualization.PCLVisualizer('pcd-viewer')
viewer.addPointCloud(obj)
while(not viewer.wasStopped()):
viewer.spinOnce(100)
不怎么好看,但是可以随便旋转。
2.2. open3d读取
open3d库相较于pclpy要大很多,但是对不同版本的python均兼容,也是直接通过pip安装。
【pcl官网教程链接】
numpy转open3d格式
import open3d as o3d
import numpy as np
xyz = numpy.random.rand(10,3)
pcd = o3d.geometry.PointCloud()
pcd.points = o3d.utility.Vector3dVector(xyz)
o3d.io.write_point_cloud("test.ply", pcd)
open3d转numpy格式
import open3d as o3d
import numpy as np
pcd_load = o3d.io.read_point_cloud("test.ply")
xyz_load = np.asarray(pcd_load.points)
本文教程展示的是ply格式的点云,实际上,pcd、ply、obj格式的诸多格式点云open3d均可以随意读写,所以只需要学会将numpy转为open3dd的pointcloud格式,即可保存为任何一种形式的点云。以下是一个官网教程的案例
# examples/Python/Basic/file_io.py

import open3d as o3d

if __name__ == "__main__":

    print("Testing IO for point cloud ...")
    pcd = o3d.io.read_point_cloud("../../TestData/fragment.pcd")
    print(pcd)
    o3d.io.write_point_cloud("copy_of_fragment.pcd", pcd)

    print("Testing IO for meshes ...")
    mesh = o3d.io.read_triangle_mesh("../../TestData/knot.ply")
    print(mesh)
    o3d.io.write_triangle_mesh("copy_of_knot.ply", mesh)

    print("Testing IO for textured meshes ...")
    textured_mesh = o3d.io.read_triangle_mesh("../../TestData/crate/crate.obj")
    print(textured_mesh)
    o3d.io.write_triangle_mesh("copy_of_crate.obj",
                               textured_mesh,
                               write_triangle_uvs=True)
    copy_textured_mesh = o3d.io.read_triangle_mesh('copy_of_crate.obj')
    print(copy_textured_mesh)

    print("Testing IO for images ...")
    img = o3d.io.read_image("../../TestData/lena_color.jpg")
    print(img)
    o3d.io.write_image("copy_of_lena_color.jpg", img)
附:本人在安装open3d时还遇到了一个奇怪的问题
Cannot uninstall ‘terminado’. It is a distutils installed project and thus we cannot accurately determine which files belong to it which would lead to only a partial uninstall.
若有遇到同样问题的伙伴,可以参考以下解决方案:
pip install terminado==0.9.1 --ignore-installed