机器学习-Tensorflow基于MNIST数据集,导入minist数据集,创建,保存模型,用模型测试识别自己的手写数字
从下载Anaconda到实现MNIST手写数字识别成功的整个过程
一、下载最新版本的Anaconda,根据Anaconda安装tensorflow
【参考另一篇博客】使用Anaconda3安装tensorflow(windows10环境)_Jango826的博客-CSDN博客_使用anaconda安装tensorflow
二、用Anaconda中自带的Spyder编写代码(在tensorflow环境下执行)
【参考】Tensorflow中文社区:http://www.tensorfly.cn/tfdoc/tutorials/mnist_pros.html
1、(1)导入MNIST数据集;
(2)创建模型-保存模型到指定路径
# -*- coding: utf-8 -*-
"""
Created on Fri Sep 20 14:25:03 2019

@author: LiJiangtao
下载mnist数据集到指定路径,并创建训练模型,并将训练好的模型保存到指定路径
"""
'''
参考博客:机器学习Tensorflow基于MNIST数据集识别自己的手写数字
https://blog.csdn.net/qq_38269418/article/details/78991649
'''

from tensorflow.examples.tutorials.mnist import input_data

import tensorflow as tf

#MNIST数据集所在路径
mnist = input_data.read_data_sets('D:/soft/Anaconda3/envs/tensorflow/Lib/site-packages/tensorflow/examples/tutorials/mnist/MNIST_data', one_hot=True) #MNIST数据集所在路径

x = tf.placeholder(tf.float32, [None, 784])

y_ = tf.placeholder(tf.float32, [None, 10])


def weight_variable(shape):
    initial = tf.truncated_normal(shape,stddev = 0.1)
    return tf.Variable(initial)

def bias_variable(shape):
    initial = tf.constant(0.1,shape = shape)
    return tf.Variable(initial)

def conv2d(x,W):
    return tf.nn.conv2d(x, W, strides = [1,1,1,1], padding = 'SAME')

def max_pool_2x2(x):
    return tf.nn.max_pool(x, ksize=[1,2,2,1], strides=[1,2,2,1], padding='SAME')

W_conv1 = weight_variable([5, 5, 1, 32])
b_conv1 = bias_variable([32])

x_image = tf.reshape(x,[-1,28,28,1])

h_conv1 = tf.nn.relu(conv2d(x_image,W_conv1) + b_conv1)
h_pool1 = max_pool_2x2(h_conv1)

W_conv2 = weight_variable([5, 5, 32, 64])
b_conv2 = bias_variable([64])

h_conv2 = tf.nn.relu(conv2d(h_pool1, W_conv2) + b_conv2)
h_pool2 = max_pool_2x2(h_conv2)

W_fc1 = weight_variable([7 * 7 * 64, 1024])
b_fc1 = bias_variable([1024])

h_pool2_flat = tf.reshape(h_pool2, [-1, 7*7*64])
h_fc1 = tf.nn.relu(tf.matmul(h_pool2_flat, W_fc1) + b_fc1)

keep_prob = tf.placeholder("float")
h_fc1_drop = tf.nn.dropout(h_fc1, keep_prob)

W_fc2 = weight_variable([1024, 10])
b_fc2 = bias_variable([10])

y_conv=tf.nn.softmax(tf.matmul(h_fc1_drop, W_fc2) + b_fc2)

cross_entropy = -tf.reduce_sum(y_*tf.log(y_conv))
train_step = tf.train.AdamOptimizer(1e-4).minimize(cross_entropy)
correct_prediction = tf.equal(tf.argmax(y_conv,1), tf.argmax(y_,1))
accuracy = tf.reduce_mean(tf.cast(correct_prediction, "float"))

saver = tf.train.Saver() #定义saver

with tf.Session() as sess:
    sess.run(tf.global_variables_initializer())
    for i in range(20000):#设置训练样本数量(共60000)
        batch = mnist.train.next_batch(50)
        if i % 100 == 0:
            train_accuracy = accuracy.eval(feed_dict={
                x: batch[0], y_: batch[1], keep_prob: 1.0})
            print('step %d, training accuracy %g' % (i, train_accuracy))
        train_step.run(feed_dict={x: batch[0], y_: batch[1], keep_prob: 0.5})
    saver.save(sess, 'D:/BworkSpace/Spyder/20190920Test/test/model.ckpt') #模型储存位置

    print('test accuracy %g' % accuracy.eval(feed_dict={
        x: mnist.test.images, y_: mnist.test.labels, keep_prob: 1.0}))
如上代码时下载mnist数据集到指定路径(D:/soft/Anaconda3/envs/tensorflow/Lib/site-packages/tensorflow/examples/tutorials/mnist/MNIST_data),

并将数据集创建模型,将建好的模型保存到制定路径上(我放到的是 D:/BworkSpace/Spyder/20190920Test/test/model.ckpt)
代码运行完成后,会生成如下的四个文件(百度搜索这四个文件的作用)

代码运行结果

2、制作28*28像素的手写数字,用上面截图训练出的模型识别数字(28*28的像素可以用美图秀秀制作)
整体来看,和刚才的代码相似度很高,也是将需要测试的图片进行卷积,池化,softmax回归
# -*- coding: utf-8 -*-
"""
Created on Fri Sep 20 14:25:03 2019

@author: LiJiangtao
用创建好的模型测试自己手写的数字
"""
'''
参考博客:机器学习Tensorflow基于MNIST数据集识别自己的手写数字
https://blog.csdn.net/qq_38269418/article/details/78991649
'''

from PIL import Image, ImageFilter
import tensorflow as tf
import matplotlib.pyplot as plt

def imageprepare():
    im = Image.open('D:/BworkSpace/Spyder/20190920Test/test/picuture/5_meitu_1.png') #读取的图片所在路径,注意是28*28像素
    plt.imshow(im)  #显示需要识别的图片
    plt.show()
    im = im.convert('L')
    tv = list(im.getdata())
    tva = [(255-x)*1.0/255.0 for x in tv]
    return tva

result=imageprepare()
x = tf.placeholder(tf.float32, [None, 784])

y_ = tf.placeholder(tf.float32, [None, 10])

def weight_variable(shape):
    initial = tf.truncated_normal(shape,stddev = 0.1)
    return tf.Variable(initial)

def bias_variable(shape):
    initial = tf.constant(0.1,shape = shape)
    return tf.Variable(initial)

def conv2d(x,W):
    return tf.nn.conv2d(x, W, strides = [1,1,1,1], padding = 'SAME')

def max_pool_2x2(x):
    return tf.nn.max_pool(x, ksize=[1,2,2,1], strides=[1,2,2,1], padding='SAME')

W_conv1 = weight_variable([5, 5, 1, 32])
b_conv1 = bias_variable([32])

x_image = tf.reshape(x,[-1,28,28,1])

h_conv1 = tf.nn.relu(conv2d(x_image,W_conv1) + b_conv1)
h_pool1 = max_pool_2x2(h_conv1)

W_conv2 = weight_variable([5, 5, 32, 64])
b_conv2 = bias_variable([64])

h_conv2 = tf.nn.relu(conv2d(h_pool1, W_conv2) + b_conv2)
h_pool2 = max_pool_2x2(h_conv2)

W_fc1 = weight_variable([7 * 7 * 64, 1024])
b_fc1 = bias_variable([1024])

h_pool2_flat = tf.reshape(h_pool2, [-1, 7*7*64])
h_fc1 = tf.nn.relu(tf.matmul(h_pool2_flat, W_fc1) + b_fc1)

keep_prob = tf.placeholder("float")
h_fc1_drop = tf.nn.dropout(h_fc1, keep_prob)

W_fc2 = weight_variable([1024, 10])
b_fc2 = bias_variable([10])

y_conv=tf.nn.softmax(tf.matmul(h_fc1_drop, W_fc2) + b_fc2)

cross_entropy = -tf.reduce_sum(y_*tf.log(y_conv))
train_step = tf.train.AdamOptimizer(1e-4).minimize(cross_entropy)
correct_prediction = tf.equal(tf.argmax(y_conv,1), tf.argmax(y_,1))
accuracy = tf.reduce_mean(tf.cast(correct_prediction, "float"))

saver = tf.train.Saver()

with tf.Session() as sess:
    sess.run(tf.global_variables_initializer())
    saver.restore(sess, "D:/BworkSpace/Spyder/20190920Test/test/model.ckpt") #使用模型,参数和之前的代码保持一致

    prediction=tf.argmax(y_conv,1)
    predint=prediction.eval(feed_dict={x: [result],keep_prob: 1.0}, session=sess)

    print('识别结果:')
    print(predint[0])
代码运行结果
‘5’的28*28像素图片

‘5’制作成28*28像素图片前的原图


整个过程遇到的问题
1.使用Spyder运行程序时出现No module named ‘tensorflow’解决办法
【参考】spyder中无法import tensorflow问题 spyder中无法import tensorflow问题_ru8dgj0001的博客-CSDN博客_spyder无法import
有时在Anaconda自带的ipython 和Spyder中import tensorflow的时候一直失败,并且一直提示 No module named ‘tensorflow’。
这个原因是因为我们没有在tensorflow的环境下打开它们。为了能在ipython和Spyder中使用tensorflow,我们需要在tensorflow的环境中安装这两个的插件
解决方案:打开Anaconda Navigator-------->Not installed,找到 ipython和Spyder点击进行安装,安装好后就可以使用了

在IPython console下输入import tensorflow,如果没有报错则表明安装成功了

2.Anaconda中ImportError: No module named 'matplotlib' 问题的解决
【参考】Anaconda中ImportError: No module named 'matplotlib' 问题的解决_扬子江的博客-CSDN博客_anaconda中import
安装Anaconda来运行tensorflow,在Spyder软件中运行import matplotlib.pyplot as pt语句时会出现ImportError: No module named 'matplotlib'的错误,而在网页版的Jupyter软件中运行没有出这样的错误。出现这样的原因是在Anaconda的tensorflow环境中的没有installed matplotlib
解决方案:在Anaconda Navigator软件中选择Environments,再选择tensorflow,在installed中查找是否安装了matplotlib,如果没有找到,就切换到Not installed,将其安装上,就可以解决该问题。

3.python+tensorflow练习中遇到问题/Check failed: PyBfloat16_Type.tp_base != nullptr
【参考】python+tensorflow练习中遇到问题/Check failed: PyBfloat16_Type.tp_base != nullptr - 九天的个人空间 - OSCHINA - 中文开源技术交流社区
运行tensorflow时出现问题的解决方法: Check failed: PyBfloat16_Type.tp_base != nullptr_sinat_41898083的博客-CSDN博客
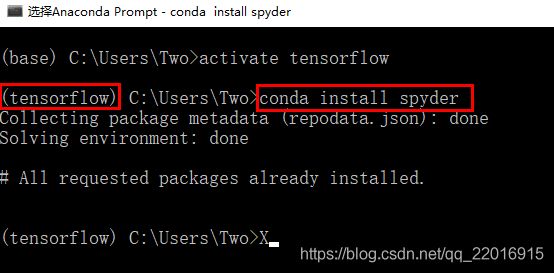
(1)、进入Anaconda Prompt,启动tensorflow: activate tensorflow
(2)、卸载安装的numpy:pip uninstall numpy
(3)、更新现在唯一存在的numpy版本:python -m pip install --upgrade numpy
4.Spyder:NotFoundError: Restoring from checkpoint failed.
【参考】Spyder:NotFoundError: Restoring from checkpoint failed._xjp_xujiping的博客-CSDN博客
Tensorflow加载模型错误:( 只是在这个项目中出现了这个错误,在其他的项目中未出现)
NotFoundError: Restoring from checkpoint failed.
This is most likely due to a Variable name or other graph key
 that is missing from the checkpoint. Please ensure that you
have not altered the graph expected based on the checkpoint. Original error:

Key beta1_power not found in checkpoint解决方法:Restart kernel(按下图所示操作,然后加载模型成功)

参考博客
1、Spyder官网:Spyder IDE Documentation
2、Tensorflow中文社区(含mnist数据集下载地址):http://www.tensorfly.cn/tfdoc/tutorials/mnist_download.html
3、代码参考博客:机器学习Tensorflow基于MNIST数据集识别自己的手写数字(读取和测试自己的模型)_BigMouthDog的博客-CSDN博客