【网安基础之Linux系统Ⅸ】服务器搭建总结
LAMP架构
第一步:安装httpd
指令一:[root@TYS ~]# yum install httpd -y //安装
指令二:[root@TYS ~]# systemctl start httpd //启动
第二步:安装PHP
(1)安装
指令一:[root@TYS ~]# yum install php -y //安装
指令二:[root@TYS ~]# yum install php-* -y //安装插件
(2)编写php测试页面和更改配置文件
指令一:[root@TYS ~]# cd /var/www/html //进入目录
指令二:[root@TYS html]# vi index.php //创建并编辑index.php文件
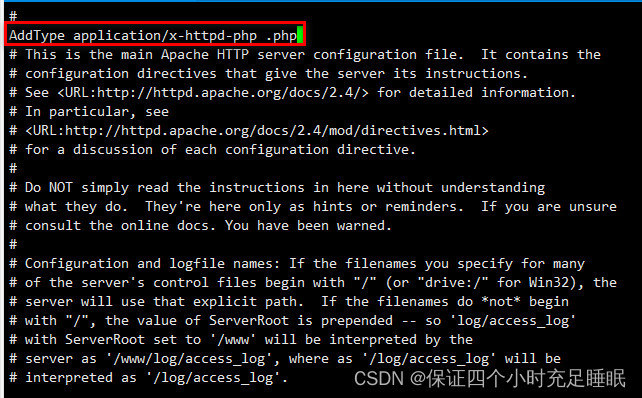
指令三:[root@TYS html]# vi /etc/httpd/conf/httpd.conf //编辑配置文件
添加一行:AddType application/x-httpd-php .php
指令四:[root@TYS html]# systemctl restart httpd //重启服务
第三步:安装MYSQL
指令一:[root@TYS html]# yum install mariadb -y //安装mariadb ,其是mysql的开源分支,可以完全兼容
指令二:[root@TYS html]# yum install mariadb-* -y //安装mariadb的所有插件
指令三:[root@TYS html]# systemctl start mariadb //启动mariadb
LNMP架构搭建
1.安装Nginx
第一步:yum install nginx -y //安装nginx服务(若无可用软件包,则搭建yum源文件)
创建Nginx的yum源:vi /etc/yum.repos.d/nginx.repo
[nginx]
name=nginx_repo
baseurl=http://nginx.org/packages/centos/7/$basearch/
gpgcheck=0
enabled=1
第二步:systemctl start nginx //启动nginx服务
第三步:lsof -i:80 //检查80端口是否启动
netstat -antp
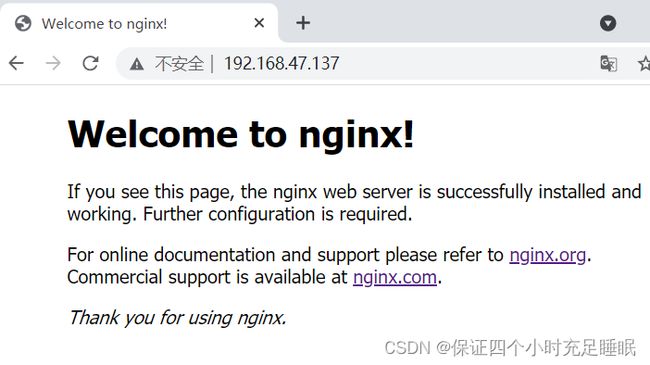
第四步:浏览器访问
2.安装PHP
第一步:yum install php -y //安装php服务
第二步:vim /usr/share/nginx/html/index.php
编辑内容:
网页调用;
第三步:yum install php-fpm -y //安装php-fpm服务
第四步:systemctl start php-fpm //启动php-fpm服务
第五步:lsof -i:9000 //验证
第六步:
修改nginx默认配置文件,将index.php文件类型加入 vi /etc/nginx/conf.d/default.conf
在index行添加index.php
location / {
root /usr/share/nginx/html;
index index.html index.htm index.php;
}
将以下内容
#location ~ \.php$ {
# root html;
# fastcgi_pass 127.0.0.1:9000;
# fastcgi_index index.php;
# fastcgi_param SCRIPT_FILENAME /scripts$fastcgi_script_name;
# include fastcgi_params;
#}
改为:
location ~ \.php$ {
root /usr/share/nginx/html;
fastcgi_pass 127.0.0.1:9000;
fastcgi_index index.php;
fastcgi_param SCRIPT_FILENAME $document_root$fastcgi_script_name; include fastcgi_params;
第七步:重启服务systemctl reload nginx
3.安装Mysql
指令一:[root@TYS html]# yum install mariadb -y //安装mariadb ,其是mysql的开源分支,可以完全兼容
指令二:[root@TYS html]# yum install mariadb-* -y //安装mariadb的所有插件
指令三:[root@TYS html]# systemctl start mariadb //启动mariadb
指令四:mysqladmin -uroot -p password 123456 //修改密码
问题:缺两个包
解决:
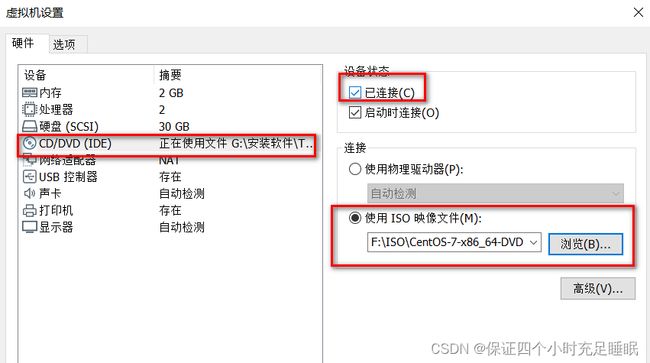
第一步:挂载yum源
mount /dev/sr0 /media/ //将本地yum安装包挂载在/media/
第二步:cd /media/Packages //进入目录
ls | grep php-pdo-5.4.16-46.el7.x86_64.rpm
ls | grep php-mysql-5.4.16-46.el7.x86_64.rpm
安装:
rpm -ivh php-pdo-5.4.16-46.el7.x86_64.rpm --nodeps
rpm -ivh php-mysql-5.4.16-46.el7.x86_64.rpm --nodeps
重启服务:
[root@TYS Packages]# systemctl restart php-fpm
[root@TYS Packages]# systemctl restart nginx
搭建docker
第一步:创建docker的yum源
(1)wget -O /etc/yum.repos.d/CentOS-Base.repo http://mirrors.aliyun.com/repo/Centos-7.repo
(2)yum clean all
(3)yum makecache
第二步:安装docker
yum install docker
第三步:启动服务
systemctl start docker
第四步:搜索镜像
docker search kali/ubuntu/suse
第五步:安装镜像
docker pull docker.io/ubuntu //安装docker.io/ubuntu镜像
查看安装了哪些镜像:[root@TYS ~]# docker images
第六步:创建容器
[root@TYS ~]# docker run -it --name ubuntu -p 2000:80 -p 2222:22 docker.io/ubuntu /bin/bash
退出:exit
查看创建的虚拟机:docker ps -a
启动/停止:docker start/stop 虚拟机的名字
进入:
docker attach ubuntu1/d49d70cc329c
docker exec -it ubuntu1/d49d70cc329c /bin/bash //常用它出容器 终端,不会导致容器的停止。
在docker容器中安装web服务
第一步:apt-get update //更新工具
apt-get install vim //安装vim
第二步:安装apche服务:root@dbf3acd4885f:/# apt-get install apache2 -y
第三步:启动apche服务(在docker容器中的ubuntu镜像中需要到目标目录下才能操控)
root@dbf3acd4885f:/etc/init.d# /etc/init.d/apache2 start //启动
root@dbf3acd4885f:/etc/init.d# apt-get install net-tools //安装netstat指令
root@dbf3acd4885f:/etc/init.d# netstat -antp |grep 80 //查看端口是否安装成功
docker安装Centos7镜像
第一步:寻找镜像:[root@TYS ~]# docker search centos:7
第二步:安装镜像:[root@TYS ~]# docker pull centos:7
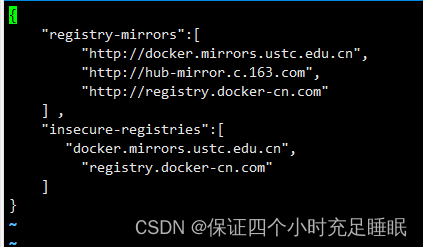
【注意,docker换源
第一步:/etc/docker/daemon.json
第二步:
{
"registry-mirrors":[
"http://docker.mirrors.ustc.edu.cn",
"http://hub-mirror.c.163.com",
"http://registry.docker-cn.com"
] ,
"insecure-registries":[
"docker.mirrors.ustc.edu.cn",
"registry.docker-cn.com"
]
}
第三步:service docker restart
】
第三步:查看镜像是否下载好了:docker images
第四步:创建容器
[root@TYS docker]# docker run -it --name centos7 -p 8888:80 -p 8886:3306 -p 8882:22 --privileged=true 8652b9f0cb4c /usr/sbin/init
【 -p 8888:80 //80网络服务端口 -p 8886:3306 //3306是mysql数据库端口 -p 8882:22//22是SSH远程连接端口;
privileged=true //赋予权限
8652b9f0cb4c //是该镜像的IMAGE ID
/usr/sbin/init //配置环境
】
第五步:运行容器
[root@TYS ~]# docker start centos7
[root@TYS ~]# docker exec -it centos7 /bin/bash
第六步:安装apache服务:[root@9386e1bf93b9 /]# yum install httpd -y
启动服务:[root@9386e1bf93b9 /]# systemctl start httpd
第七步:安装php:[root@9386e1bf93b9 /]# yum install php -y
安装php插件:[root@9386e1bf93b9 /]# yum install php-* -y
!!将另外两个包安装
1.挂载源:[root@9386e1bf93b9 /]# mount /dev/sr0 /media/
2.cd /media/Packages //进入目录
ls | grep php-pdo-5.4.16-46.el7.x86_64.rpm
ls | grep php-mysql-5.4.16-46.el7.x86_64.rpm
安装:
rpm -ivh php-pdo-5.4.16-46.el7.x86_64.rpm --nodeps
rpm -ivh php-mysql-5.4.16-46.el7.x86_64.rpm --nodeps
重启服务:
第八步:编写测试文件:[root@9386e1bf93b9 Packages]# cd /var/www/html
[root@9386e1bf93b9 html]# vi index.php
[root@9386e1bf93b9 html]# vi /etc/httpd/conf/httpd.conf //修改配置信息
添加一行:AddType application/x-httpd-php .php
[root@9386e1bf93b9 html]# systemctl restart httpd
第九步:安装mysql:[root@9386e1bf93b9 html]# yum install mariadb
指令二:[root@TYS html]# yum install mariadb-* -y //安装mariadb的所有插件
指令三:[root@TYS html]# systemctl start mariadb //启动mariadb
安装ssh功能:yum install -y initscripts openssh-server openssl openssl-devel
启动ssh服务:service sshd restart
查看端口:ss -tan
$TTL 1D
@ IN SOA www root ( 0 ; serial 1D ; refresh
1H ; retry
1W ; expire
3H ) ; minimum
NS www.tys.com.
news A 192.168.44.200
club A 192.168.44.201
AAAA ::1


