文字区域检测数据增强(一)随机裁剪
过程
由于文字标注区域可以为任意四边形,为了不把文字标注区域切分成两个区域,因此首先需要得到所有标注框的最外界坐标,如下图红色框的获取过程。
然后根据红色框与图像边界的距离进一步随机生成裁剪坐标,如生成蓝色虚线框的左上角与右下角坐标。
随后进行区域剪裁与Bbox调整。
BBox的坐标更新,只需要将原来的BBox的值减去裁剪区域的起始坐标,如减去蓝色框的起始坐标。如下:
[bbox[0][0] - crop_x_min, bbox[0][1] - crop_y_min],
[bbox[1][0] - crop_x_min, bbox[1][1] - crop_y_min],
[bbox[2][0] - crop_x_min, bbox[2][1] - crop_y_min],
[bbox[3][0] - crop_x_min, bbox[3][1] - crop_y_min]
代码
import random
import math
import cv2
import numpy as np

point_size = 1
point_color = (0, 0, 255) # BGR
thickness = 4 # 可以为 0 、4、8
def crop_img(img, bboxes):
    h = img.shape[0]
    w = img.shape[1]
    x_min = w
    y_min = h
    x_max = 0
    y_max = 0
    # 拿到所有框的综合的最外界结果,保证不会把框切成两块
    for bbox in bboxes:
        x0 = min(x_min, bbox[0][0])  # 左上角x
        y0 = min(y_min, bbox[0][1])  # 左上角y
        x1 = min(x_min, bbox[1][0])  # 左下角x
        y1 = max(y_max, bbox[1][1])  # 左下角y
        x2 = max(x_max, bbox[2][0])  # 右下角x
        y2 = max(y_max, bbox[2][1])  # 右下角y
        x3 = max(x_max, bbox[3][0])  # 右上角x
        y3 = min(y_min, bbox[3][1])  # 右上角y

    d_to_left = min(x0, x1, x2, x3)
    d_to_top = min(y0, y1, y2, y3)
    d_to_right = w - max(x0, x1, x2, x3)
    d_to_down = h - max(y0, y1, y2, y3)

    # 随机生成裁剪坐标
    crop_x_min = int(min(x0, x1, x2, x3) - random.uniform(d_to_left // 2, d_to_left))
    crop_y_min = int(min(y0, y1, y2, y3) - random.uniform(d_to_top // 2, d_to_top))
    crop_x_max = int(max(x0, x1, x2, x3) + random.uniform(d_to_right // 2, d_to_right))
    crop_y_max = int(max(y0, y1, y2, y3) + random.uniform(d_to_down // 2, d_to_down))

    # #固定坐标裁剪
    # crop_x_min = 100
    # crop_y_min = 0
    # crop_x_max = 1230
    # crop_y_max = 900

    # # 确保在边界之内
    # crop_x_min = max(0, crop_x_min)
    # crop_y_min = max(0, crop_y_min)
    # crop_x_max = min(w, crop_x_max)
    # crop_y_max = min(h, crop_y_max)

    # 裁剪图像
    crop_img = img[crop_y_min:crop_y_max, crop_x_min:crop_x_max]
    # print(bboxes)
    # 调整坐标
    crop_bbox = []
    for bbox in bboxes:
        crop_bbox.append([[bbox[0][0] - crop_x_min, bbox[0][1] - crop_y_min],
                          [bbox[1][0] - crop_x_min, bbox[1][1] - crop_y_min],
                          [bbox[2][0] - crop_x_min, bbox[2][1] - crop_y_min],
                          [bbox[3][0] - crop_x_min, bbox[3][1] - crop_y_min]
                          ])
    # print(crop_bbox)
    return crop_img, crop_bbox
测试
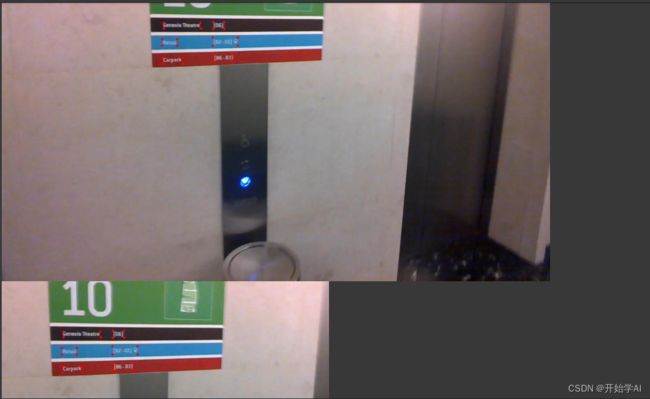
测试选取了ICDAR2015数据集的一张图片,bboxes是标注的坐标,为一个列表。
img = cv2.imread("/content/drive/Shareddrives/OCR/data/Crop_data/img_1.jpg")
img1 = img.copy()
bboxes = [[(377,117),(463,117),(465,130),(378,130)],
      [(493,115),(519,115),(519,131),(493,131)],
      [(374,155),(409,155),(409,170),(374,170)],
      [(492,151),(551,151),(551,170),(492,170)],
      [(376,198),(422,198),(422,212),(376,212)],
      [(494,190),(539,189),(539,205),(494,206)]]
for box in bboxes:
  for p in box:
    cv2.circle(img1, p, point_size, point_color, thickness)
# cv2_imshow(img)
cv2_imshow(img1)
crop_img, crop_bbox = crop_img(img,bboxes)
# cv2_imshow(crop_img)
for box in crop_bbox:
  for p in box:
    for i in range(2):
      if p[i] < 0:
        p[i] = 0
    p = tuple(p)
    cv2.circle(crop_img, p, point_size, point_color, thickness)
cv2_imshow(crop_img)
