基于pytorch的花卉识别小程序
通过迁移学习,以VGG16为基础,对有5种类型的花卉数据进行训练,训练完后,保存模型参数,然后用Pyqt5简单实现了一个小程序。
代码:
predict.py(加载模型参数,对输入的图片进行预测,给出类别和概率)
import torch
import numpy as np
import matplotlib.pyplot as plt
import torchvision.models as models
import torch.nn.functional as F


def imshow(image):
    img = image
    img = img.numpy()  # FloatTensor转为ndarray
    img = np.transpose(img, (1, 2, 0))  # 把channel那一维放到最后
    # 显示图片
    plt.imshow(img)
    plt.show()

model = models.vgg16(pretrained=False)
model.classifier = torch.nn.Sequential(torch.nn.Linear(25088, 4096),
                                       torch.nn.ReLU(),
                                       torch.nn.Dropout(p=0.5),
                                       torch.nn.Linear(4096, 4096),
                                       torch.nn.ReLU(),
                                       torch.nn.Dropout(p=0.5),
                                       torch.nn.Linear(4096, 5))
model.load_state_dict(torch.load("model.pkl"))

def predict_pic(model,filepath):
    from PIL import Image
    img = Image.open(filepath)
    img = img.resize((224, 224), Image.BILINEAR)   #想调整的大小
    img=np.array(img)
    img = np.transpose(img, (2,0,1))  # 把channel那一维放到最后
    img = img/255
    img=torch.from_numpy(img)
    #imshow(img)
    img=img.to(torch.float32)
    model=model.eval()
    y_pred=model(img.view(1,3,224,224))
    _,pred=torch.max(y_pred,1)
    return pred,F.softmax(y_pred,dim=1)
GUI代码
# -*- coding: utf-8 -*-

# Form implementation generated from reading ui file 'test.ui'
#
# Created by: PyQt5 UI code generator 5.15.2
#
# WARNING: Any manual changes made to this file will be lost when pyuic5 is
# run again.  Do not edit this file unless you know what you are doing.


from PyQt5 import QtCore, QtGui, QtWidgets


class Ui_Form(object):
    def setupUi(self, Form):
        Form.setObjectName("Form")
        Form.resize(495, 449)
        self.gridLayout = QtWidgets.QGridLayout(Form)
        self.gridLayout.setObjectName("gridLayout")
        self.prob_lineEdit = QtWidgets.QLineEdit(Form)
        self.prob_lineEdit.setObjectName("prob_lineEdit")
        self.gridLayout.addWidget(self.prob_lineEdit, 3, 4, 1, 2)
        self.label_3 = QtWidgets.QLabel(Form)
        self.label_3.setObjectName("label_3")
        self.gridLayout.addWidget(self.label_3, 3, 1, 1, 1)
        self.label_4 = QtWidgets.QLabel(Form)
        self.label_4.setObjectName("label_4")
        self.gridLayout.addWidget(self.label_4, 3, 3, 1, 1)
        self.label = QtWidgets.QLabel(Form)
        self.label.setObjectName("label")
        self.gridLayout.addWidget(self.label, 1, 0, 1, 1)
        self.result_lineEdit = QtWidgets.QLineEdit(Form)
        self.result_lineEdit.setObjectName("result_lineEdit")
        self.gridLayout.addWidget(self.result_lineEdit, 3, 2, 1, 1)
        self.path_lineEdit = QtWidgets.QLineEdit(Form)
        self.path_lineEdit.setObjectName("path_lineEdit")
        self.gridLayout.addWidget(self.path_lineEdit, 1, 1, 1, 2)
        self.pushButton_2 = QtWidgets.QPushButton(Form)
        self.pushButton_2.setObjectName("pushButton_2")
        self.gridLayout.addWidget(self.pushButton_2, 3, 0, 1, 1)
        self.label_2 = QtWidgets.QLabel(Form)
        self.label_2.setText("")
        self.label_2.setObjectName("label_2")
        self.gridLayout.addWidget(self.label_2, 2, 0, 1, 6)
        self.pushButton = QtWidgets.QPushButton(Form)
        self.pushButton.setObjectName("pushButton")
        self.gridLayout.addWidget(self.pushButton, 1, 3, 1, 3)

        self.retranslateUi(Form)
        QtCore.QMetaObject.connectSlotsByName(Form)

    def retranslateUi(self, Form):
        _translate = QtCore.QCoreApplication.translate
        Form.setWindowTitle(_translate("Form", "Form"))
        self.label_3.setText(_translate("Form", "识别结果"))
        self.label_4.setText(_translate("Form", "概率"))
        self.label.setText(_translate("Form", "图片路径"))
        self.pushButton_2.setText(_translate("Form", "识别"))
        self.pushButton.setText(_translate("Form", "..."))
main文件
import test
from PyQt5.QtCore import Qt as Qt
import sys
from PyQt5 import QtCore, QtGui, QtWidgets, Qt
from PyQt5.QtWidgets import *
from PyQt5.QtCore import *
from predict import *
import warnings
warnings.filterwarnings("ignore")

class mainwindow(QtWidgets.QWidget,test.Ui_Form):
    def __init__(self):
        super().__init__()
        self.setupUi(self)
        flags = Qt.Window | Qt.WindowSystemMenuHint | Qt.WindowMinimizeButtonHint | Qt.WindowMaximizeButtonHint | Qt.WindowCloseButtonHint
        self.setWindowFlags(flags)
        self.pushButton.clicked.connect(self.openpic)
        self.pushButton_2.clicked.connect(self.run)

    def openpic(self):
        try:
            openfile_name = QFileDialog.getOpenFileName(self, '选择文件', '', '图片文件(*)')
            self.path_lineEdit.setText(openfile_name[0])
            picture = QtGui.QPixmap(openfile_name[0]).scaled(self.label_2.width(), self.label_2.height())
            self.label_2.setPixmap(picture)
        except Exception as e:
            print(e)
    def run(self):
        flower_class = ['daisy', 'dandelion', 'roses', 'sunflowers', 'tulips']
        file_path=self.path_lineEdit.text()
        result,probs=predict_pic(model,file_path)
        self.result_lineEdit.setText(flower_class[result.item()])
        prob=torch.max(probs).item()
        self.prob_lineEdit.setText(str(round(prob,2)))


if __name__=='__main__':
    app = QtWidgets.QApplication(sys.argv)
    w = mainwindow()
    w.show()
    sys.exit(app.exec_())
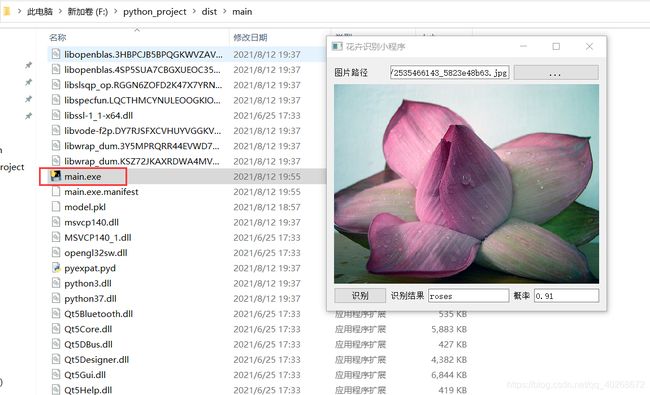
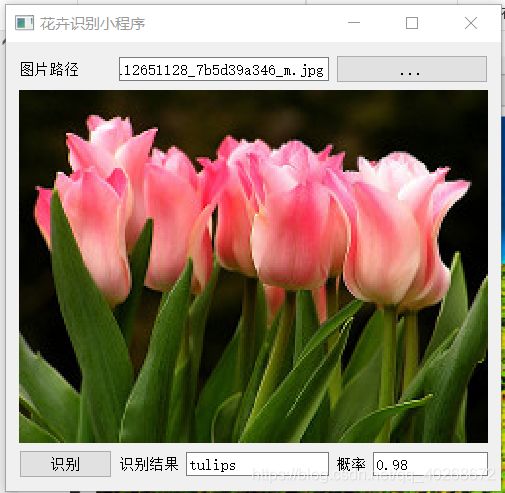
程序展示


最后,可以通过pyinstaller对代码进行打包,打包完成后,将模型参数文件放入打包后的文件夹即可运行: