springboot
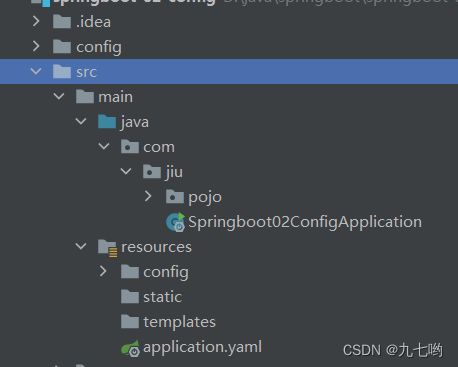
一.创建项目
Spring Initializr建立项目也可以在idea上直接创建,我们在创建时springboot的版本不能选择 3.0.0,因为springboot3.0.0只支持idea17的版本
二.更改端口号
我们更改端口号一般在资源目录下的application.properties
server.port=端口号
三.自动装配
pom.xml
- spring-boot-dependencies:核心依赖在父工程中
- 我们在写springboot依赖可以不用指定版本,因为有版本仓库
启动器:说白了就是springboot的启动场景,下面导入的就是自动帮我们导入web环境所有的依赖
            org.springframework.boot
            spring-boot-starter-web
springboot会将所有的场景变成一个个启动器 ,我们要是用什么功能只需要找到对应的启动器,spring.factories里有所有的主动配置类,但不会生效只有导入对应的start启动器才有用
四.彩蛋
我们可以直接去浏览器搜索:springboot banner 在线生成 可以打印我们自己喜欢的图案,直接放在resources下
五.看主程序源码,理解springboot原理
  @SpringbootApplication 复合注解,识别这是一个springboot
=>@ComponentScan 扫描package下的所有加@Component@Repository@Service@Controller的类到Ioc容器、
  @EnableAutoConfiguration 自动导入配置
=>导入AutoConfigurationImportSelector获取所有的实体getAutoConfigurationEntry
=>loadFactoryNames加载配置,获取资源("METAINF/spring.factories")),遍历URL,将读取的资源封装到
  properties
=>每个xxxAutoConfiguration都有
  @Configuration(proxyBeanMethods = false)标注这是一个Ioc配置类,可以进行been的配置、
  @ConditionalOnwebApplication(type = ConditionalOnWebApplication.Type.SERVLET)是Spring的底
  层注解,根据不同的条件来判断当前的配置或者类是否生效、
  @ConditionalOnClass(characterEncodingFilter.class)字符编码过滤器、
  @ConditionalOnPoperty(prefix = "配置文件",value = "enabled",matchIfMissing = true)
  是否存在以下配置、不存在走默认
  @EnableConfigurationProperties(xxxxProperties.class)自动配置属性
=>每个xxxProperties封装配置文件中相关属性,@ConfigurationProperties(prefix = "配置文件")要与
  之对应,我们写的类和配置文件和这个一样
在配置文件上输入debug: true查看哪些类生效那些没有生效
六.yaml
官方简易使用的配置文件application.yaml,比application.properties更加简洁
- application.propertiesv: key=value
- application.yaml:key:空格value
1.普通语法
#普通的key
name: jiuqi

#对象
student:
  name: jiuqi
  age: 3
#行内写法
students: {name: jiuqi,age: 3}

#数组
pet:
  -pig
  -dig
  -cat
#行内写法
pets:[pig,dog,cat]
2.特殊语法
name: ${random.uuid}
age: ${random.int}
3.给属性赋值的几种方法
1.直接赋值
- 实体类
package com.jiu.pojo;

import org.springframework.beans.factory.annotation.Value;
import org.springframework.stereotype.Component;

@Component
public class Dog {
    @Value("旺财")
    private String name;
    @Value("3")
    private Integer age;

    public Dog() {
    }

    public Dog(String name, Integer age) {
        this.name = name;
        this.age = age;
    }

    public String getName() {
        return name;
    }

    public void setName(String name) {
        this.name = name;
    }

    public Integer getAge() {
        return age;
    }

    public void setAge(Integer age) {
        this.age = age;
    }

    @Override
    public String toString() {
        return "Dog{" +
                "name='" + name + '\'' +
                ", age=" + age +
                '}';
    }
}
- 测试
package com.jiu;

import com.jiu.pojo.Dog;
import com.jiu.pojo.Person;
import org.junit.jupiter.api.Test;
import org.springframework.beans.factory.annotation.Autowired;
import org.springframework.boot.test.context.SpringBootTest;

@SpringBootTest
class Springboot02ConfigApplicationTests {


    @Autowired
    private Dog dog;

    @Autowired
    private Person person;

    @Test
    void contextLoads() {
        System.out.println(dog);
    }

}
2.通过applicat.yaml配置文件赋值
- 实体类person
package com.jiu.pojo;
import org.springframework.boot.context.properties.ConfigurationProperties;
import org.springframework.stereotype.Component;
import java.util.Date;
import java.util.List;
import java.util.Map;
@Component
@ConfigurationProperties(prefix = "person") //让实体类和注释类绑定起来
public class Person {
private String name;
private Integer age;
private Boolean happy;
private Date birth;
private Map maps;
private List - 配置文件 application.yaml
person:
  name: 夜游
  age: 1000
  happy: true
  birth: 2022/11/02
  maps: {k1: v1,k2: v2}
  lists:
    -code
    -music
    -girl
  dog:
    name: 大黄
    age: 100
他们通过在实体类使用注解@ConfigurationProperties(prefix = "person")进行绑定
我们还需要导入下面的让注解不报错
            org.springframework.boot
            spring-boot-starter-test
            test
当然我们不仅可以使用配置文件给实体类赋值,要学会举一反三
3.使用自定义配置文件赋值
- 自定义配置文件qi.properties
name=吴霜降- 实体类Dog
package com.jiu.pojo;

import org.springframework.beans.factory.annotation.Value;
import org.springframework.context.annotation.PropertySource;
import org.springframework.stereotype.Component;

@Component
@PropertySource(value = "classpath:qi.properties")
public class Dog {
    @Value("${name}")
    private String name;
    @Value("3")
    private Integer age;

    public Dog() {
    }

    public Dog(String name, Integer age) {
        this.name = name;
        this.age = age;
    }

    public String getName() {
        return name;
    }

    public void setName(String name) {
        this.name = name;
    }

    public Integer getAge() {
        return age;
    }

    public void setAge(Integer age) {
        this.age = age;
    }

    @Override
    public String toString() {
        return "Dog{" +
                "name='" + name + '\'' +
                ", age=" + age +
                '}';
    }
}
我们通过@PropertySource(value = "classpath:qi.properties")进行绑定,但是还需要用
@Value("${name}")进行赋值,比较麻烦不建议使用
4.松散绑定
我们可以在类使用驼峰命名,而yaml配置文件使用中划线的形式
private String bigName;application.yaml
dog:
  big-name: 小白
5.JSR303校验
使用注解@Validated然后开启对应的start才可以使用
            org.springframework.boot
            spring-boot-starter-validation
校验时在校验的地方加格式注解,格式类型有:
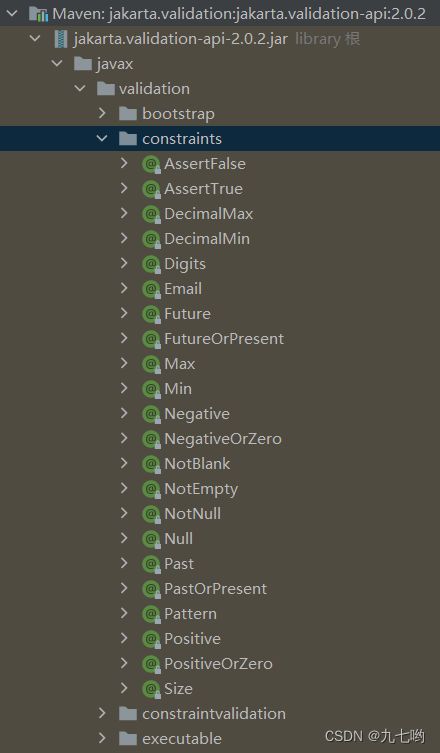
例如 @Email 校正邮箱 ,@Email(message = "邮箱格式错误") 自己定义错误信息
package com.jiu.pojo;
import org.springframework.boot.context.properties.ConfigurationProperties;
import org.springframework.stereotype.Component;
import org.springframework.validation.annotation.Validated;
import javax.validation.constraints.Email;
import java.util.Date;
import java.util.List;
import java.util.Map;
@Component
@ConfigurationProperties(prefix = "person") //让实体类和注释类绑定起来
@Validated //数据校验
public class Person {
@Email
private String name;
private Integer age;
private Boolean happy;
private Date birth;
private Map maps;
private List 6.配置环境存在的位置
1.file: ./config/
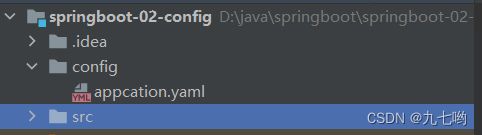
2.file:./
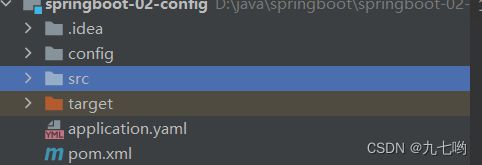
3.classpath:/config/
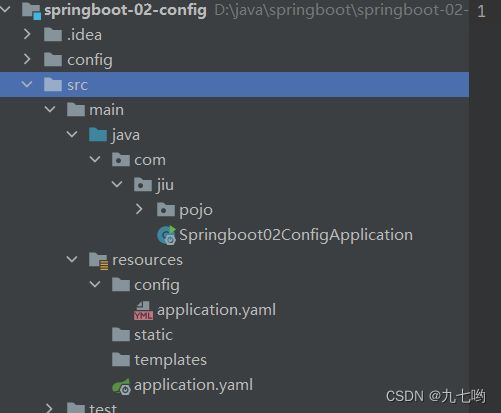
4.classpath:/
优先级顺序也是从上到下
7.多环境配置
active:为使用哪个环境
server:
  port: 8081

---
server:
  port: 8082
spring:
  profiles:
    active: dev

---
server:
  port: 8083
spring:
  profiles: test
七.静态资源导入
我们分析上面源码得知:
1.可以在在public、static、/**、resource
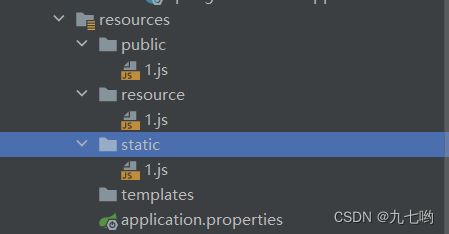
优先级: resource > static > public
2.首先在WebJars上下载我们需要的maven包导入我们的环境,然后我们去库里找到所在位置URL 栏从resources下一级输入
例如:我们从WebJars下载jQuery的maven包
            org.webjars.npm
            jquery
            3.6.1
在库里找到资源位置
最后URL输入localhost:8080/webjars/jquery/3.6.1/dist/jquery.js
八.thymeleaf
- 首先需要导入依赖
            org.thymeleaf
            thymeleaf-spring5


            org.thymeleaf.extras
            thymeleaf-extras-java8time
- 每个thymeleaf的html文件包含xmlns:th="http://www.thymeleaf.org
//templates下的所有页面只能通过controller来跳转
@Controller
public class IndexController {
@RequestMapping("/test")
public String index(Model model) {
model.addAttribute("msg","hello,thymeleaf");
model.addAttribute("jq","1111
");
model.addAttribute("users", Arrays.asList("九七","jiuqi"));
return "test";
}
}
前后端传递值 th:text="${}"
可以识别符号的 th:utext="${}"
数据转换 th:each="user:${}" 输出 th:text="${}" 另一输出方式 [[${}]]
    Title


[[${user}]]
九.MVC配置原理
- 扩展springmvc主要加注解@Configuration但不能加@EnableWebMvc,这个类导入DelegatingWebMvcConfiguiration:从容器中获取所有的webmvcconfig
- 在springboot有非常多的xxxConfiguration帮助我们进行拓展配置
1.自定义视图解析器
package com.jiu.config;

import org.springframework.context.annotation.Bean;
import org.springframework.context.annotation.Configuration;
import org.springframework.web.servlet.View;
import org.springframework.web.servlet.ViewResolver;

import java.util.Locale;


//全面扩展springmvc
@Configuration
public class MyMvConfig {


    @Bean
    public ViewResolver myViewResolver(){
        return new MyViewResolver();
    }

    public static class MyViewResolver implements ViewResolver{
        //自定义一个视图解析器MyViewResolver
        @Override
        public View resolveViewName(String viewName, Locale locale) throws Exception {
            return null;
        }
    }
}
2.自定义日期格式化在application.yaml
spring.mvc.date-format= 3.自定义视图跳转
@Configuration
public class MyMvConfig implements WebMvcConfigurer {

    //试图添砖
    @Override
    public void addViewControllers(ViewControllerRegistry registry) {
        registry.addViewController("/jiu").setViewName("test");
    }
}