前言
此文主要基于C#制作一个飞机大战游戏,重温经典的同时亦可学习。
实现流程
1、创建项目
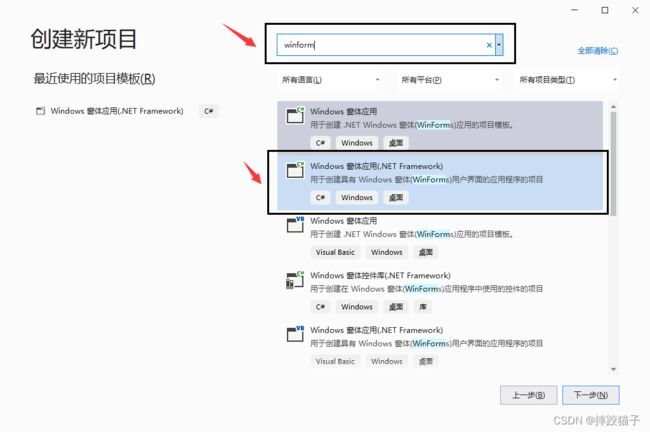
打开Visual Studio,右侧选择创建新项目。
搜索框输入winform,选择windows窗体应用,填写对应的保存路径点击下一步,创建成功后如下图,会有一个默认打开的Form窗体。
2、界面绘制
准备对应的素材(飞机、子弹、音效等),通过Icon以及窗体Text属性修改窗体图标以及标题显示;同时配置StartPosition属性值为CenterScreen,让窗体默认居中显示。
双击窗体生成窗体加载事件并定义函数对背景进行初始化。
使用Random产生随机数,从资源中获取图片设置为窗体背景。
        private const int PLANE_OFFSET = 2;       //设置每次定时器触发时图片发生偏移的速度

        private int pix_x = 0;
        private int pix_y = 0;         //背景图片移动起始的坐标
        int shot_y = 10;
        int blood_y = 50;
        private Image[] bgrounds;        //设置多张背景图片,每次运行程序随机产生背景图片
        int index = 0;                           //背景图片索引
        Image avatar = Resource.imgHeadSheep;     //角色头像图片
        Image boomImg = Resource.bomb4;          //爆炸效果图片
        Image shotImg = Resource.shotgun;
        Image bloodImg = Resource.bloodbox;

        bool isDropGun = false;      //是否产生shotgun的标志
        bool isDropBox = false;       //是否产生bloodbox的标志

        private void Form1_Load(object sender, EventArgs e)//窗体加载事件
        {
            InitBackground();              //初始化背景
        }

        public GameForm()
        {
            InitializeComponent();
            this.Size = new Size(420, 630);//让窗体与图片一样大
            //this.DoubleBuffered = true; //双缓冲区
        }
         ///
        /// 初始化背景,随机生成背景图片
        ///
        public void InitBackground()
        {
            bgrounds = new Image[4];
            Random rd = new Random();
            index = rd.Next(0, 4);//产生0-3的随机数,表示不同背景
            bgrounds[0] = Resource.background1;//从资源获取图片
            bgrounds[1] = Resource.background2;
            bgrounds[2] = Resource.background3;
            bgrounds[3] = Resource.background4;
        }
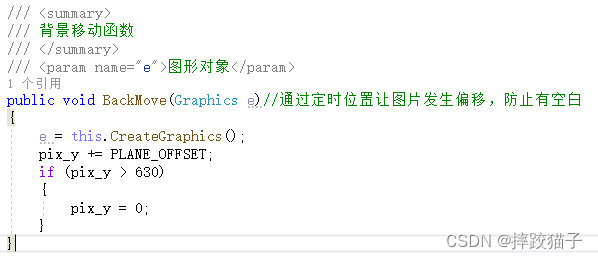
新建一个背景移动函数,通过定时位置让图片发生偏移,防止有空白。
////// 背景移动函数 /// /// 图形对象 public void BackMove(Graphics e)//通过定时位置让图片发生偏移,防止有空白 { e = this.CreateGraphics(); pix_y += PLANE_OFFSET; if (pix_y > 630) { pix_y = 0; } }
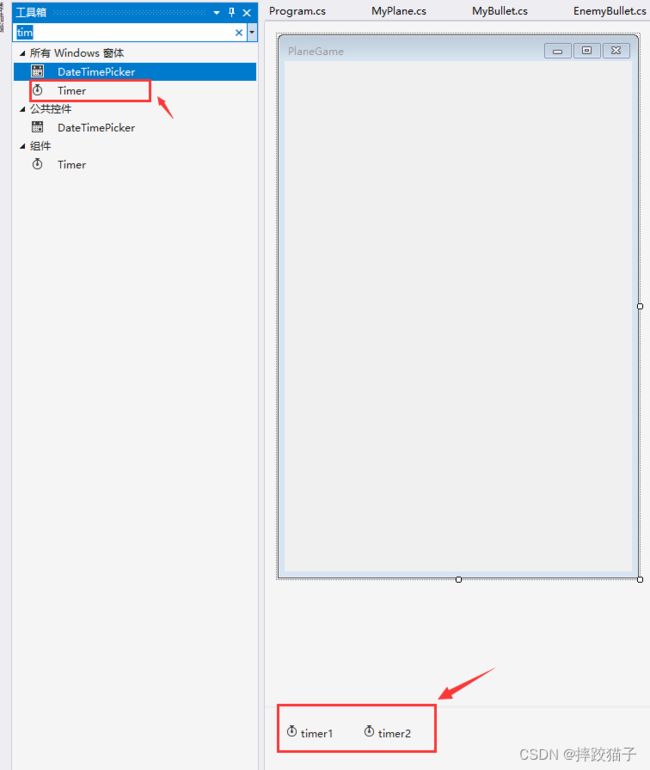
通过工具箱拖拽两个定时器到窗体上并设置定时器事件,用于定时生成血包以及强化弹药。
////// 设置定时器1事件 /// private void timer1_Tick(object sender, EventArgs e) { this.Invalidate(); //使当前窗口无效,系统自动调用OnPaint()函数重绘 } ////// 设置定时器2事件 /// private void timer2_Tick(object sender, EventArgs e) { Graphics g = this.CreateGraphics(); for (int j = 0; j < Fighter.fighters.Count; j++) { if (Fighter.fighters[j].flag) { g.DrawImage(boomImg, Fighter.fighters[j].GetLoc()); SoundPlayer music = new SoundPlayer(Resource.BOMB21); music.Play(); Fighter.fighters.Remove(Fighter.fighters[j]); } } }
通过Graphics类绘制游戏界面,Graphics类作用为封装一个GDI+绘图图画,效果如下。
| 函数 | 作用 |
|---|---|
| DrawImage | 在指定位置并且按指定大小绘制指定的Image |
| DrawRectangle | 绘制由Rectangle结构指定的矩形 |
| FillRectangle | 填充由一对坐标、一个宽度和一个高度指定的矩形的内部 |
| DrawString | 在指定位置并目用指定的 Brush 和 Font 对象绘制指定的文本字符串 |
| DrawImage | 在指定位置并且按指定大小绘制指定的Image |
////// 绘制游戏界面 /// /// private void DrawGame(Graphics g) { this.BackMove(g); g.DrawImage(bgrounds[index], pix_x, pix_y, 420, 630); g.DrawImage(bgrounds[index], pix_x, pix_y - 630, 420, 630); //绘制背景 g.DrawImage(avatar, 10, 10); //绘制角色头像 g.DrawRectangle(new Pen(Color.Black), new Rectangle(10, 100, 100, 10)); //绘制血条矩形 g.FillRectangle(Brushes.Red, 10, 101, MyPlane.health, 9); //填充血条矩形 g.DrawRectangle(new Pen(Color.Blue), new Rectangle(10, 120, 100, 10)); g.FillRectangle(Brushes.Green, 11, 121, MyPlane.score, 9); g.DrawString("Player:摔跤猫子", new Font("宋体", 9, FontStyle.Bold), Brushes.Yellow, new Point(10, 140)); //显示玩家 g.DrawString("Score:" + MyPlane.score, new Font("宋体", 9, FontStyle.Bold), Brushes.Yellow, new Point(10, 160)); //显示分数 }
3、我方飞机
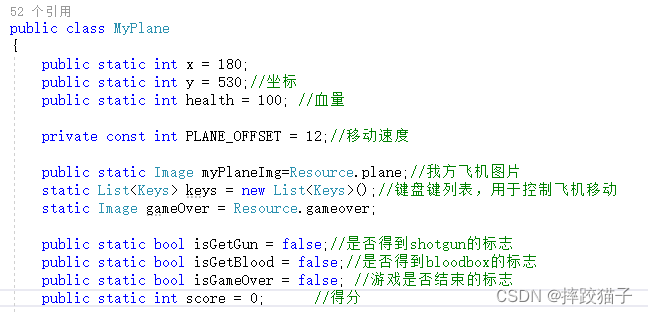
创建一个MyPlane实体类,定义字段如下。
		public static int x = 180;
        public static int y = 530;//坐标
        public static int health = 100; //血量

        private const int PLANE_OFFSET = 12;//移动速度

        public static Image myPlaneImg=Resource.plane;//我方飞机图片
        static List keys = new List();//键盘键列表,用于控制飞机移动
        static Image gameOver = Resource.gameover;

        public static bool isGetGun = false;//是否得到shotgun的标志
        public static bool isGetBlood = false;//是否得到bloodbox的标志
        public static bool isGameOver = false; //游戏是否结束的标志
        public static int score = 0;      //得分
调用Graphics类的DrawImage函数显示我方飞机。
////// 显示我方飞机 /// /// public static void MyPlaneShow(Graphics g) { if (health > 0) { g.DrawImage(myPlaneImg, x, y); } else if (health <= 0 || score <= 0) { isGameOver = true; g.DrawImage(myPlaneImg, 0, -300); g.DrawImage(gameOver, 10, 260); } else if (isGetBlood && health <= 90) { health += 10; } }
通过Keys类定义键盘事件函数。
| 成员名称 | 说明 |
|---|---|
| KeyCode | 从键值提取键代码的位屏蔽 |
| Modifiers | 从键值提取修饰符的位屏蔽 |
| None | 没有按任何键 |
| LButton | 鼠标左按钮 |
| RButton | 鼠标石按钮 |
| Cancel | Cancel 键 |
| MButton | 鼠标中按钮(三个按钮的鼠标) |
| XButton1 | 第一个X鼠标按钮(五个按钮的鼠标) |
| XButton2 | 第二个 X 鼠标按钮(五个按钮的鼠标) |
| Back | Backspace 键 |
这里先用熟悉的WASD键来控制我方飞机移动。
////// 显示我方飞机 /// /// public static void MyPlaneShow(Graphics g) { if (health > 0) { g.DrawImage(myPlaneImg, x, y); } else if (health <= 0 || score <= 0) { isGameOver = true; g.DrawImage(myPlaneImg, 0, -300); g.DrawImage(gameOver, 10, 260); } else if (isGetBlood && health <= 90) { health += 10; } } ////// 松开键盘键 /// /// public static void Keyup(Keys key) { keys.Remove(key); } ////// 按下键盘键 /// /// public static void Keydown(Keys key) { if (!keys.Contains(key)) { keys.Add(key); } } ////// 判断按键是否被按下 /// /// ///是则返回true 不是则返回false public static bool IsKeyDown(Keys key) { return keys.Contains(key); } ////// 用键盘控制我方飞机移动 /// public static void MyPlaneMove() { if(isGameOver) { return; } if (IsKeyDown(Keys.A)) { myPlaneImg = Resource.planeLeft; if (x < 5) x = 5; x -= PLANE_OFFSET; } if (IsKeyDown(Keys.D)) { myPlaneImg = Resource.planeRight; if (x > 370) x = 370; x += PLANE_OFFSET; } if (IsKeyDown(Keys.W)) { if (y < 5) y = 5; y -= PLANE_OFFSET; } if (IsKeyDown(Keys.S)) { if (y > 530) y = 530; y += PLANE_OFFSET; } }
4、敌方飞机
创建一个Fighter实体类,定义字段如下。
Image redImg; Image greenImg; Image yellowImg; public Image fighterImg;//敌机图片 private const int FIGHTER_OFFSET = 4;//敌机图片移动速度 public int _x = 0; public int _y = 0;//敌机图片移动起始的坐标 public static Listfighters = new List ();//敌机对象列表 private int fi;//敌机图片索引 List imgList = new List ();//敌机图片列表 public bool flag = false;//碰撞的标志
通过Random产生随机数,用于定义随机出现的敌机x以及y点坐标。
////// 随机产生敌机 /// public static void ProduceFighter() { Random rad = new Random(); if (rad.Next(18) == 0) { Fighter f = new Fighter(rad.Next(0, 350), rad.Next(0, 3)); fighters.Add(f); } } public Fighter(int x,int i) { _x = x;//横坐标 fi = i; redImg = Resource.fighterRed; greenImg = Resource.fighterGreen; yellowImg = Resource.fighterYellow; switch (fi) { case 0: fighterImg = redImg;break; case 1: fighterImg = greenImg;break; case 2: fighterImg = yellowImg;break; default: break; } imgList.Add(redImg); imgList.Add(greenImg); imgList.Add(yellowImg); }
通过Graphics绘制敌机图片。
////// 出现敌机 /// public void FighterShow(Graphics g) { g.DrawImage(fighterImg,_x,_y); } public void fMove() { _y += FIGHTER_OFFSET; } ////// 敌机移动函数 /// public static void FighterMove(Graphics g)//通过定时位置让图片发生偏移 { for (int i = 0; i < fighters.Count; i++) { fighters[i].FighterShow(g); fighters[i].fMove(); if (fighters[i]._y > 650) { fighters.Remove(fighters[i]); } } }
5、子弹及碰撞检测
创建一个MyBullet实体类,定义字段如下。
private int x;//子弹横坐标 private int y;//子弹纵坐标 private const int BULLET_OFFSET = 18;//移动速度 public int Angle;//子弹角度 private Image bulImg;//定义子弹图片 private const double PI = Math.PI; public static ListmybulList = new List ();//子弹对象集合 static Bitmap bm = new Bitmap(Resource.bomb4);//爆炸图片 public bool isHit = false;//碰撞的标志
通过按键盘J键来产生我方子弹
////// 通过按键盘J键来产生我方子弹 /// public static void ProduceMybul() { if (!MyPlane.isGameOver && MyPlane.IsKeyDown(Keys.J)) { mybulList.Add(new MyBullet(MyPlane.x + 13, MyPlane.y - 10, 0)); if (MyPlane.isGetGun) { mybulList.Add(new MyBullet(MyPlane.x + 13, MyPlane.y - 8, 60)); mybulList.Add(new MyBullet(MyPlane.x + 7, MyPlane.y - 8, 30)); mybulList.Add(new MyBullet(MyPlane.x + 30, MyPlane.y - 12, 120)); mybulList.Add(new MyBullet(MyPlane.x, MyPlane.y - 7, 150)); } } }
定义敌机碰撞检测方法
////// 敌机碰撞检测方法 /// public static void IsHitEnemy(Graphics g) { Rectangle myPlaneRect = new Rectangle(MyPlane.x, MyPlane.y, MyPlane.myPlaneImg.Width, MyPlane.myPlaneImg.Height); //包住myplane的Rectangle //g.DrawRectangle(new Pen(Color.Red), myPlaneRect); for(int i = 0; i < mybulList.Count; i++) for (int j = 0; j < Fighter.fighters.Count; j++) { Rectangle mybulRect = new Rectangle(mybulList[i].x, mybulList[i].y, 8, 10); Rectangle fighterRect = new Rectangle(Fighter.fighters[j]._x, Fighter.fighters[j]._y, 65, 45); //g.DrawRectangle(new Pen(Color.Black), fighterRect); if (mybulRect.IntersectsWith(fighterRect)) //我方子弹击中敌机,敌机爆炸 { mybulList.Remove(mybulList[i]); Fighter.fighters[j].flag = true; if (MyPlane.score < 100) { MyPlane.score += 1; } } else if (myPlaneRect.IntersectsWith(fighterRect)) //我方飞机撞上敌机,敌机爆炸 { Fighter.fighters[j].flag = true; if (MyPlane.score < 100) { MyPlane.score += 1; } } } }
总结
到此这篇关于基于C#制作一个飞机大战小游戏的文章就介绍到这了,更多相关C#制作飞机大战小游戏内容请搜索脚本之家以前的文章或继续浏览下面的相关文章希望大家以后多多支持脚本之家!


