rabbitmq延迟队列问题及其插件解决
1.背景
使用springboot整合rabbitmq,实现延迟队列,
目的很简单,在delay-queue延迟队列中设置自定义过期时间,然后当过期时间过去了以后,将消息发送到dead-letter-queue死信队列中,接下来,我们试一试看看会发生什么?
2.项目搭建
2.1 application.yml
server:
  port: 8888

#rabbitmq
spring:
  rabbitmq:
    host: localhost
    username: guest
    password: guest
    port: 5672
2.2 pom.xml
            org.springframework.boot
            spring-boot-starter-web


            org.springframework.boot
            spring-boot-starter-amqp


            org.springframework.boot
            spring-boot-starter-test
            test


            org.projectlombok
            lombok
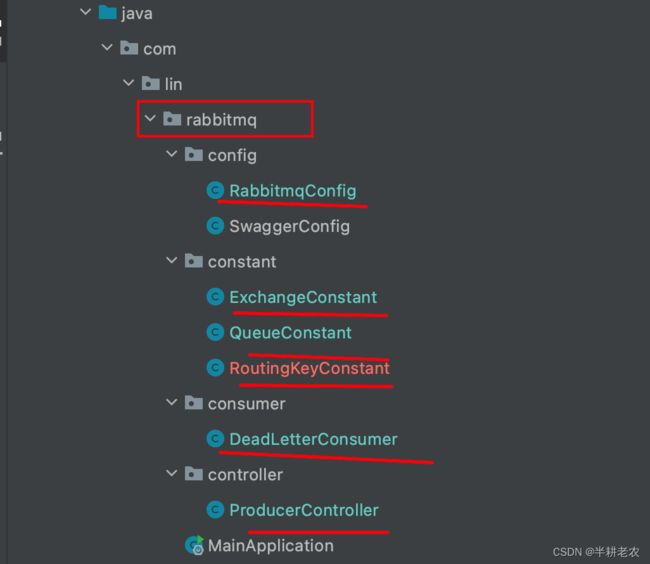
2.3 包目录结构如下
2.4 把静态常量都声明在constant里面,方便调用,命名规则为类型xxxConstant,如ExchangeConstant,RoutingKeyConstant等;
constant.ExchangeConstant
public class ExchangeConstant {
    /**
     * 直连交换机 direct-exchange
     */
    public static final String DirectExchange = "direct-exchange";

    /**
     * 死信交换机: dead-exchange
     */
    public static final String DeadExchange = "dead-exchange";

}
constant.QueueConstant
public class QueueConstant {


    /**
     * 死信队列 :QD
     */
    public static final String DeadQueue = "QD";

    /**
     * 普通队列 不设置其过期时间
     */
    public static final String CommonQueue = "common-queue";

}
constant.RoutingKeyConstant
public class RoutingKeyConstant {

    /**
     * 连接死信交换机的routingKey
     */
    public static final String DeadLetterRoutingKey = "YD";

    /**
     * 连接普通交换机的routingKey
     */
    public static final String CommonQueueRoutingKey = "common-queue-routing-key";


}
RabbitmqConfig.java
@Configuration
public class RabbitmqConfig {

    /**
     * 声明direct交换机 DirectExchange
     * @return
     */
    @Bean
    public DirectExchange declareNormalDirectExchange(){
        return new DirectExchange(ExchangeConstant.DirectExchange,
                true,false,null);
    }

    /**
     * 声明direct 死信交换机 DeadExchange
     * @return
     */
    @Bean
    public DirectExchange declareDeadExchange(){
        return new DirectExchange(ExchangeConstant.DeadExchange,
                true,false,null);
    }


    /**
     * 声明死信队列QD
     * @return
     */
    @Bean
    public Queue declareQueueQD(){
        return QueueBuilder.durable(QueueConstant.DeadQueue)
                .deadLetterExchange(ExchangeConstant.DeadExchange)
                .deadLetterRoutingKey("YD")
                .build();
    }


    /**
     * 绑定死信交换机和其死信队列
     * @return
     */
    @Bean
    public Binding bindingDeadExchangeAndQueueD(){
        return BindingBuilder.bind(declareQueueQD())
                .to(declareDeadExchange())
                .with("YD");
    }

    /**
     * 声明普通队列
     * @return
     */
    @Bean
    public Queue declareCommonQueue(){
        return QueueBuilder.durable(QueueConstant.CommonQueue)
                .deadLetterExchange(ExchangeConstant.DeadExchange)
                .deadLetterRoutingKey(RoutingKeyConstant.DeadLetterRoutingKey)
                .build();
    }

    /**
     * 绑定交换机和普通队列
     * @return
     */
    @Bean
    public Binding commonQueueWithExchange(){
        return BindingBuilder.bind(declareCommonQueue())
                .to(declareNormalDirectExchange()).with(RoutingKeyConstant.CommonQueueRoutingKey);
    }


}
controller.ProducerController
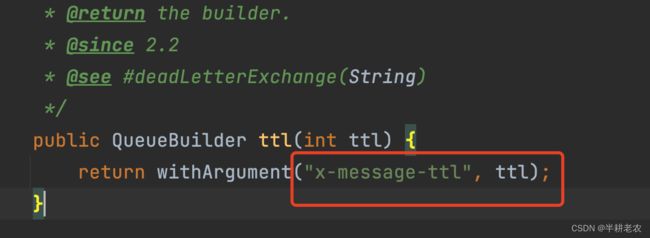
注意: 以前我们如果声明一个队列消息过期时间为10秒,40秒,我们通常这么做,反正底层也是封装成参数”x-message-ttl";
还有一种,我们可能会声明一个map,放进这个队列声明里面,但是这两种,都是提前声明好的消息过期时间
反而,我们下面这种写法,将我们让消息的生产者声明过期时间,也就是自定义声明过期时间
@RestController
@Slf4j
@RequestMapping("/delay")
public class ProducerController {

    @Autowired
    private RabbitTemplate rabbitTemplate;


    @PostMapping("/ttl/{time}/{message}")
    public void sendExpireTimeWithMessage(@PathVariable Integer time,@PathVariable String message){

        rabbitTemplate.convertAndSend(ExchangeConstant.DirectExchange, RoutingKeyConstant.CommonQueueRoutingKey,
                message, msg -> {
                     int expiration = time * 1000;
                    msg.getMessageProperties().setExpiration(String.valueOf(expiration));
                    return msg;
                }
        );

        log.info("发送的时间为:{},延时时间为:{},消息内容为:{}", LocalDateTime.now(),time,message);

    }


}
然后,我们消费者端 consumer.DeadLetterConsumer.java中,我们查看以下它的接收时间
@Component
@Slf4j
public class DeadLetterConsumer {


    @RabbitListener(queues = QueueConstant.DeadQueue)
    public void receiveMessageWithTime(Message message) throws IOException {
        String msg = new String(message.getBody());

        log.info("接收到死信队列中的时间为:{},消息为:{}",
                LocalDateTime.now(),msg);

    }
}
3. 问题显现
发送两条,先发送延迟为2s,在发送延迟为30s的,
结果如下,完全没有问题
我们希望,即便我2秒延迟后发于30s延迟,但是我只是延迟2s发送,后发归后发,正常依旧应该在我发送完2s的这条请求之后,2s之后就能收到这条消息,但是并没有,它在30s之后跟这个刚才延时为30s的请求一起过来了!! 这大坑子
4.问题解决
4.1 安装一个插件
说明:我的rabbitmq版本为3.10.2,且为brew方式安装,虽然位置不太一样,但是方式是一样的
网址:延迟队列插件github网址
注意:我们不是下载他的GitHub代码,而是下载它release下面的版本的后缀是 .ez的文件,没有错,就是这个!!!
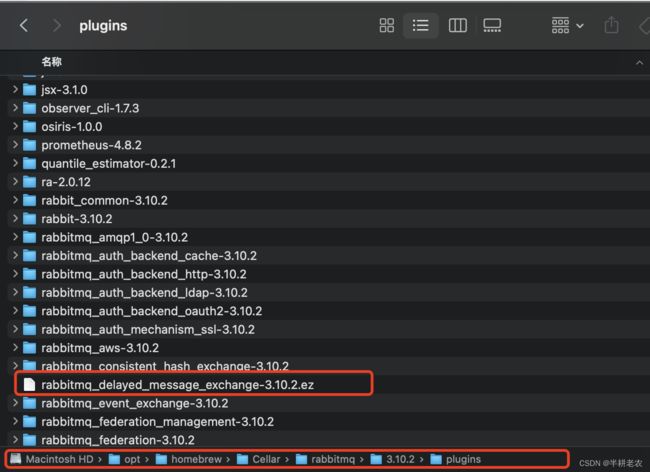
放到安装到rabbitmq的plugins 目录下
brew安装的rabbitmq的plugin目录为
在plugins的目录下,打开cmd,键入
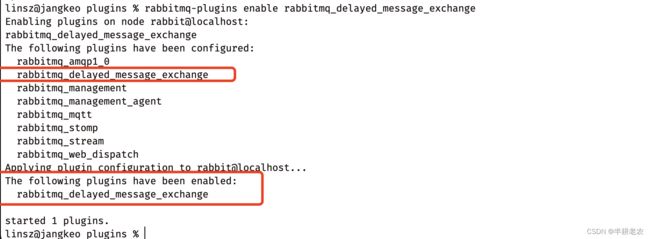
rabbitmq-plugins enable rabbitmq_delayed_message_exchange注意,无关版本号,就是这句命令,如果提示文件找不到,多半是因为导入的插件有问题 ,执行如下为
我们要的就是那个delayed_message_exchange ,然后重启rabbitmq,
如果你也是用brew安装的,则为,
brew services restart rabbitmq

##或者分步执行
brew services stop rabbitmq
brew services start rabbitmq
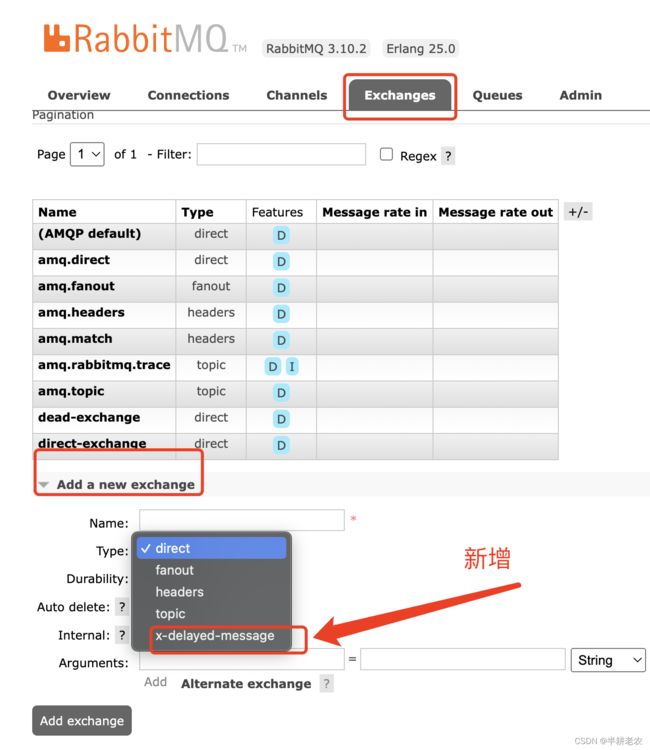
然后,在rabbitmq的页面,可以看到,
4.2 代码解决
前戏过多,现在我们用代码解决以下,
主要的实现在于,声明并且使用我们自定义的这个交换机类型,这个交换机会让我们的延迟信息在延迟之后再放入延迟队列,并且让消费者消费,注意,以前我们是让过期的队列中的信息放到死信队列,现在呢,我们不要声明两个队列了,只声明一个延迟队列,并且让消费者消费它
简单说,我们以前是作用在队列上的延迟队列,现在让他它作用在交换机上
执行流程图如下
代码如下:
静态常量
 DelayRabbitmqConfig.java: 我们新建一个配置类
package com.lin.rabbitmq.config;

import com.lin.rabbitmq.constant.ExchangeConstant;
import com.lin.rabbitmq.constant.QueueConstant;
import com.lin.rabbitmq.constant.RoutingKeyConstant;
import org.springframework.amqp.core.*;
import org.springframework.context.annotation.Bean;
import org.springframework.context.annotation.Configuration;

import java.awt.image.DirectColorModel;
import java.util.HashMap;

/**
 * @program: rabbitmq-springboot
 * @description: 基于插件的延迟队列
 * @author: linsz
 * @create: 2022-07-18 23:58
 **/
@Configuration
public class DelayRabbitmqConfig {

    /**
     * 声明延迟队列
     * @return
     */
    @Bean
    public Queue delayQueue(){
        return new Queue(QueueConstant.DelayQueue,
                true,false,false);
    }

    /**
     * 声明延迟自定义交换机类型
     * @return
     */
    @Bean
    public CustomExchange delayCustomExchange(){
        HashMap args = new HashMap<>();
//        设置 x-delayed-type 为 direct,当然也可以是 topic 等 发送消息时设置消息头 headers 的 x-delay 属性,即延迟时间,如果不设置消息将会立即投递
        args.put("x-delayed-type","direct");
        return new CustomExchange(ExchangeConstant.DelayCustomerExchange,
                "x-delayed-message",true,false,args);
    }

    /**
     * 绑定延迟交换机和队列
     * @return
     */
    @Bean
    public Binding delayQueueAndCustomExchange(){
        return BindingBuilder.bind(delayQueue())
                .to(delayCustomExchange()).with(RoutingKeyConstant.DelayCustomerRoutingKey).noargs();
    }
}
新建DelayQueueBasedPluginsController.java
package com.lin.rabbitmq.controller;

import com.lin.rabbitmq.constant.ExchangeConstant;
import com.lin.rabbitmq.constant.RoutingKeyConstant;
import lombok.extern.slf4j.Slf4j;
import org.springframework.amqp.AmqpException;
import org.springframework.amqp.core.Message;
import org.springframework.amqp.core.MessagePostProcessor;
import org.springframework.amqp.rabbit.core.RabbitTemplate;
import org.springframework.beans.factory.annotation.Autowired;
import org.springframework.context.annotation.Bean;
import org.springframework.web.bind.annotation.PathVariable;
import org.springframework.web.bind.annotation.PostMapping;
import org.springframework.web.bind.annotation.RequestMapping;
import org.springframework.web.bind.annotation.RestController;

import java.time.LocalDateTime;

/**
 * @program: rabbitmq-springboot
 * @description: 基于插件的延迟队列
 * @author: linsz
 * @create: 2022-07-19 00:22
 **/
@RestController
@Slf4j
@RequestMapping("/send")
public class DelayQueueBasedPluginsController {

    @Autowired
    private RabbitTemplate rabbitTemplate;


    @PostMapping("/delay/{time}/{message}")
    public void delayQueueProducer(@PathVariable String message, @PathVariable String time){
        rabbitTemplate.convertAndSend(ExchangeConstant.DelayCustomerExchange,
                RoutingKeyConstant.DelayCustomerRoutingKey,
                message, msg -> {
                    int delay = Integer.parseInt(time) * 1000;
                    msg.getMessageProperties().setDelay(delay);
                    return msg;
                });
        log.info("在时间:{},发送延迟时间为:{},延迟队列发送消息:{}", LocalDateTime.now(),time,message);

    }
}
新建DelayConsumer.java
package com.lin.rabbitmq.consumer;

import com.lin.rabbitmq.constant.QueueConstant;
import lombok.extern.slf4j.Slf4j;
import org.springframework.amqp.core.Message;
import org.springframework.amqp.rabbit.annotation.RabbitListener;
import org.springframework.stereotype.Component;

import java.time.LocalDateTime;

/**
 * @program: rabbitmq-springboot
 * @description: 基于插件的延迟队列消费端
 * @author: linsz
 * @create: 2022-07-19 00:30
 **/

@Component
@Slf4j
public class DelayConsumer {

    @RabbitListener(queues = QueueConstant.DelayQueue)
    public void delayConsumer(Message message){
        log.info("在时间为:{},消费端接收到一条消息为:{}", LocalDateTime.now(),new String(message.getBody()));
    }
}
分别发送:
结果如下:
使用这种自定义交换机类型,原来的会不会受影响呢
我们先跑延迟为5s,在跑延迟为20s的请求
显然不会,所以说,该插件实现是增强了原来的延迟队列的功能,而不是抛弃,其实从其原理也能推断出它不会让以前的延迟短的先发或者是延迟长的先发有异常;
对于这些消息都先放到一个交换机,等到你延迟时间结束时,放到消息延迟队列,至于你是否先发还是后发间隔几毫秒,无所谓!!!

