ZED2代相机+nvidia jetson AGX xavier踩坑记录
ZED2代相机+nvidia jetson AGX xavier踩坑记录
项目描述
nvidia jetson AGX xavier就不详细介绍了,jetson系列嵌入式开发板比一般的arrch64开发板多了CUDA,跑深度学习项目会快一些,同时开发板上装有jetpack开发套件,ubuntu、CUDA、cudnn都装好了,开发更加便捷。具体查看https://developer.nvidia.com/zh-cn/embedded-computing。
ZED是双目相机品牌,提供目标检测方面的接口和例程,2代的功能更加丰富一些,ZED2代的3.2.2版本的SDK支持jetpack4.4,所以准备尝试一下它提供的这个PyTorch+Mask-RCNN项目。
项目地址:https://github.com/stereolabs/zed-pytorch
项目文档:https://www.stereolabs.com/docs/pytorch/
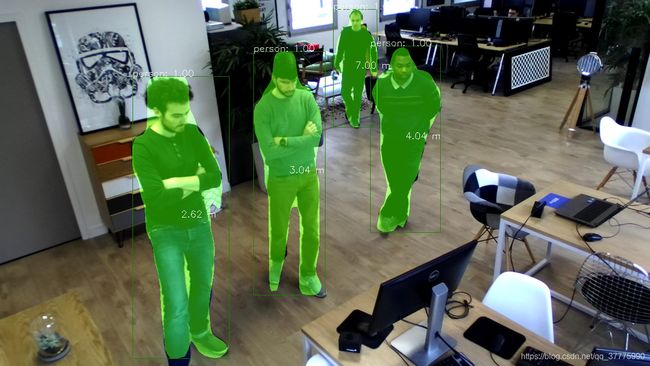
简而言之,在nvidia jetson AGX xavier硬件平台上,在pytorch框架里,使用Mask R-CNN和ZED提供的SDK,完成对目标的检测、分割、测距。这个项目的吸引力在于“custom neural network”,目标识别的种类、网络使用的权重都是可以修改的,而ZED SDK提供的例程是不可以修改的。如果能深入学习代码,那么之后采用pytorch框架+ZED双目的其他项目也可以参考这个项目。
一些小弯路
(此步骤最终失败,仅作为记录)
根据项目文档中的安装步骤来,安装完 ZED SDK 和 Python API后,由于之前在Windows环境下一般都使用Anaconda搭建pytorch环境,换新平台后也准备这样,根据参考链接[1],jetson平台没有Anaconda,安装替代品mini-forge,miniforge的.sh release下载地址:
https://github.com/conda-forge/miniforge/releases
安装:
sh Miniforge-pypy3-xxx-Linux-aarch64.sh
安装完成后基本使用pip3安装,conda命令几乎不使用,装了conda等于没装…一次开机后,在conda环境Terminal中输入pip3 list,发现和系统环境下的list不同,conda环境下的torch、torchvison、numpy之类的都不见踪影,可能是因为系统升级的原因…
最终决定抛弃conda,直接在系统环境下使用pip3安装pytorch。
问题1 安装pytorch版本错误
这个问题出现在安装文档的Installation–PYTORCH INSTALLATION步骤中。
问题出现描述:
在jetson上安装完pytorch后,输入测试代码:
$ python3 -c "import torch ; print(torch.**__version__**)"
出现Segmentation fault (core dumped)错误,而正常情况应当输出pytorch的版本号。
问题解决过程:
(1)安装pytorch前先查询开发板的jetpack软件版本,查询方法为Terminal输入命令:
$ head -n 1 /etc/nv_tegra_release
或者安装jetson-stats状态查看工具:
$ sudo -H pip install jetson-stats
安装完成后,输入:
$ sudo jtop
即可查看jetpack软件版本和内存使用率、温度等其他信息。
经过查询,本文使用的开发板jetpack版本为JetPack 4.4 (L4T R32.4.3)
(2)适用于jetson的pytorch的软件版本查询和下载地址为:
https://elinux.org/Jetson_Zoo#Machine_Learning
在网址中查询,对应的pytorch版本是: PyTorch v1.6.0 pip wheel (Python 3.6)
注意下载pytorch安装文件需要魔法上网。
(3)按照正常流程安装pytorch
$ sudo apt-get install python3-pip libopenblas-base libopenmpi-dev
$ pip3 install Cython
$ pip3 install numpy torch-1.6.0-cp36-cp36m-linux_aarch64.whl
(4)下载安装torchvison
pytorch1.6.0对应的torchvison版本为0.7.0,如果安装pytorch版本不对,这一步会出现import torch失败的错误。
$ sudo apt-get install libjpeg-dev zlib1g-dev
$ git clone --branch v0.7.0 https://github.com/pytorch/vision torchvision
$ cd torchvision
$ sudo python3 setup.py install
对于v0.5.0版本之前的torchvison:
$ cd ../
$ pip3 install 'pillow<7' # not needed for torchvision v0.5.0+
问题总结:
(1)最开始查询jetpack版本时,只注意到了4.4,根据一部分网络教程,安装使用的pytorch版本为1.5.0,最后import pytorch出现错误。
查询问题解决过程第2步中的网址,jetpack4.4也分具体的版本:JetPack 4.4 Developer Preview (L4T R32.4.2)可安装的版本为1.2.0至1.5.0;本文开发板JetPack 4.4 (L4T R32.4.3),仅可安装1.6.0。
(2)查询软件版本期间出现了记忆混乱,仅记得L4T R32.4.3,以为jetpack版本为4.3,安装过程又走了一些弯路。
(3)最后使用枚举法,将各个版本的pytorch版本安装了一遍,确定1.6.0版本可行。总结就是,严格按照官方网站给出的版本要求,有时候不一定可以向下版本兼容。
问题2 maskrcnn-benchmark module引入失败
这个问题出现在安装文档的Running Mask R-CNN 3D步骤中。
问题出现描述:
Terminal输入命令:
$ cd zed-pytorch # zed_object_detection folder
$ python zed_object_detection.py --config-file ../configs/caffe2/e2e_mask_rcnn_R_50_C4_1x_caffe2.yaml --min-image-size 256
出现问题:No module named ‘maskrcnn_benchmark.modeling’
问题解决过程:
查看pip3 list是有mask-benchmark0.1.0的,不知道为什么调用模块没有成功。总之根据github里的issue ,需要手动重新编译安装maskrcnn-bench的源码。具体流程可参考参考链接[2],因为jetpack包含python2.7和python3.6,注意替换命令中的pip为pip3。
在安装依赖项时,遇到如下问题:
(1)pip3安装python-opencv失败
根据参考链接[3],使用$ sudo pip3 show opencv-python命令,发现无法返回版本信息,说明pypi上没有合适的arrch64架构的opencv-python。使用$ sudo apt-get install python3-opencv命令,安装成功。
(2)pip3安装matplotlib失败
同(1),使用sudo apt-get install安装
在安装maskrcnn_benchmark本体时,遇到如下问题:
(3)出现错误:deform_conv_cuda.cu(954): error: identifier "AT_CHECK" is undefined
参考链接[4]:打开/maskrcnn_benchmark/maskrcnn_benchmark/csrc文件夹下的deform_conv_cuda.cu and deform_conv.h,搜索“AT_CHECK”,替换为"TORCH_CHECK"。
(4)安装maskrcnn-benchmark后,再次运行zed-pytorch代码,出现:
ValueError: numpy.ufunc has the wrong size, try recompiling
原因是numpy的版本太低了,推测是使用apt-get install方式安装python3-opencv,顺带把numpy安装了,而apt-get install版本一般都比较低,使用pip3重新安装numpy:
$ sudo pip3 uninstall numpy
$ sudo pip3 install numpy -i https://pypi.tuna.tsinghua.edu.cn/simple
(5)出现警告:maskrcnn-benchmark/maskrcnn_benchmark/structures/boxlist_ops.py:46: UserWarning: This overload of nonzero is deprecated:nonzero()
这个问题根据警告提示来改就行,设定nonzero(as_tuple=False)
问题总结:
(1)arrch64架构,或者说arm架构,和x86_64架构确实不太一样,很多依赖库都没有,一般的ubuntu下的软件安装命令可能会失败。要总结一下的话,安装依赖库时,pip3 install对应的是pypi源,apt-get install对应的ubuntu源,pip3 install没有对应软件的话就看看apt-get install里有没有,两个都没有的话,只能git clone软件的源码,然后自己编译安装了。
(2)软件的版本问题,注意了也没用吧,只能靠试错法…
问题3 cuDNN error与 CUDA error
这个问题出现在安装文档的Running Mask R-CNN 3D步骤中。
问题出现描述:
解决完问题1和问题2之后,运行项目出现错误:
File "/home/yuan/.local/lib/python3.6/site-packages/torch/nn/modules/conv.py", line 416, in _conv_forward
    self.padding, self.dilation, self.groups)
RuntimeError: cuDNN error: CUDNN_STATUS_MAPPING_ERROR
尝试搜索后未能解决,在zed_object_detection.py代码中设置禁用cuDNN:
torch.backends.cudnn.enabled = False
接着继续出现错误:
File "/home/yuan/.local/lib/python3.6/site-packages/torch/nn/modules/conv.py", line 416, in _conv_forward
    self.padding, self.dilation, self.groups)
RuntimeError: CUDA error: CUBLAS_STATUS_INTERNAL_ERROR when calling `cublasSgemm(handle, opa, opb, m, n, k, &alpha, a, lda, b, ldb, &beta, c, ldc)`
问题解决尝试:
失败的一些尝试:
https://zhuanlan.zhihu.com/p/140954200:torch.cuda.set_device(1)
https://ask.csdn.net/questions/1093728:重装显卡驱动(对于jetson开发板等于重装系统)
(1)ZED的代码实际上调用了maskrcnn-benchmark用于图像分割,本文首先单独测试maskrcnn-bench/demo/中的程序:
cd demo
python3 webcam.py --config-file ../configs/caffe2/e2e_keypoint_rcnn_R_50_FPN_1x_caffe2.yaml.yaml --min-image-size 300
如图所示,程序可以正常运行,每张图片处理时间约为1.6秒,jtop查看显示程序使用的是GPU:
(2)使用CPU运行zed-pytorch程序:
python3 zed_object_detection.py --config-file ../configs/caffe2/e2e_keypoint_rcnn_R_50_FPN_1x_caffe2.yaml --min-image-size 100 MODEL.DEVICE cpu
程序可以正常运行,--min-image-size 100的情况下处理单帧时间约为35秒,--min-image-size设置低于100时没有出现分割结果。

(3)综合(1)(2),说明maskrcnn-benchmark在CUDA 10.2环境下没有问题…问题可能出在:ZED的代码与CUDA 10.2存在冲突。
在maskrcnn/demo/中复制webcam.py,作为新的webcam2.py,修改后与原代码的区别在于:使用ZED SDK获取左目图像,并使用cvtColor将图像格式从RGBA转换为RGB。运行webcam2.py后复现了上文的cuDNN错误和CUDA错误,可以定位产生错误的点在于ZED获取的图像。
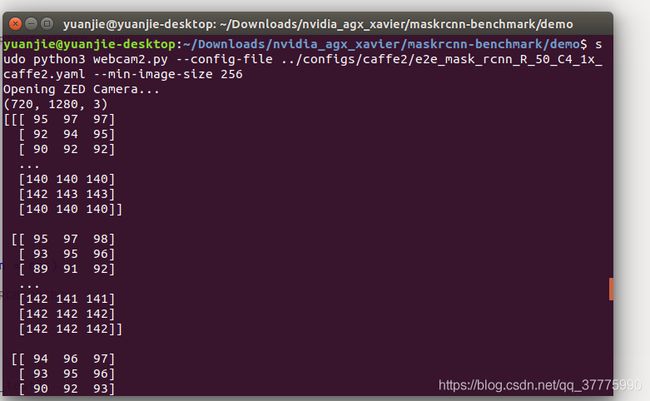
(4)使用print(left_C3.shape)属性查看cvt_Color返回的ndarray图像的形状,返回(720, 1280, 3);继续使用print(left)_C3查看图像像素具体内容,如图所示:
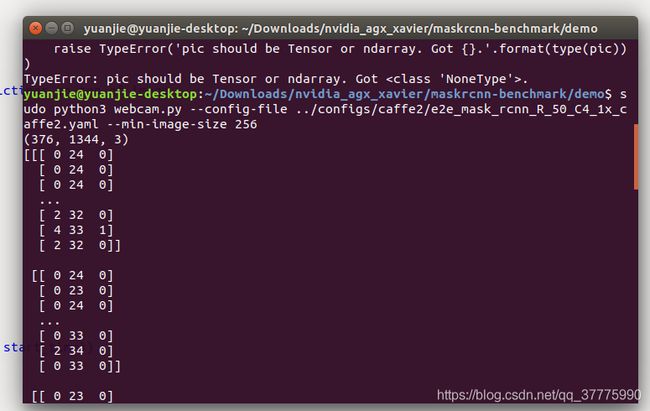
相同方法查看原版webcam.py中的img变量,形状为(376, 1344, 3);像素内容如图所示:
问题很奇怪…两个图像只有分辨率不同,之后也尝试过更小的分辨率、相同分辨率的ZED图像,ZED项目依然出现相同的错误。图像维度都是3维,像素值类型都是int无符号整型(uint8),不存在16位浮点数和32位浮点数的差异,为什么使用ZED获取的图像的就会产生CUDA错误呢…
(5)在webcam2.py中尝试直接传递图像参数给目标检测函数:
test = np.random.randint(0, 255, size = [376, 672, 3], dtype = 'u1')
coco_demo.run_on_opencv_image(test)
也是一样的错误。看来失败才是常态,opencv的VideoCapture(0)能成功反而是异类了。
顺路了解了opencv使用的相机分辨率376*1344是VGA模式,详情见https://www.stereolabs.com/docs/api/python/classpyzed_1_1sl_1_1RESOLUTION.html
(6)根据error log在/usr/local/lib/python3.6/dist-packages/maskrcnn_benchmark-0.1-py3.6-linux-aarch64.egg/maskrcnn_benchmark/modeling/backbone/resnet.py"文件的328行添加print('resnet.py'),统计发现原代码输出19次,而webcam2.py输出9次,中道崩殂。
(7)Nvidia的CUBLAS库文档参考链接[5]显示:
An internal cuBLAS operation failed. This error is usually caused by a cudaMemcpyAsync() failure.
To correct: check that the hardware, an appropriate version of the driver, and the cuBLAS library are correctly installed. Also, check that the memory passed as a parameter to the routine is not being deallocated(解除配置) prior to the routine’s completion.
泛泛而谈了一下解决的方法…在程序完成前不要释放memory?但第(5)个尝试也出现了相同的问题啊,(6)说明问题出在了函数调用的中间,卷积操作是成功执行几次的,但第10次执行失败。
(8)参考链接[6]
Don’t use 10.2.2.89-1 - it is not compatible! So fix could be:
apt-get purge libcublas10 libcublas-dev
apt-get install libcublas10=10.2.1.243-1 libcublas-dev=10.2.1.243-1 cuda-libraries-10-1 cuda-libraries-dev-10-1
等于重装cuda10.1版本,等于安装jetpack4.3,暂时无法实行。
问题发现过程:
困扰多日,最后请教师父解决了问题,问题所在简而言之:jetson AGX xavier的CUDA核心计算能力无法同时支撑ZED SDK计算深度图和mask-rcnn进行图像分割。
问题的发现过程大概如下:
(1)不使用VideoCapture(0),也不使用ZED SDK获取图像,自定义图像test = np.random.randint(0, 255, size = [376, 672, 3], dtype = 'u1'),传递给coco_demo.run_on_opencv_image(test)函数,程序可以正常运行。
(2)在(1)的基础上,在while循环之前增加ZED SDK打开摄像头的代码:
    init_cap_params = sl.InitParameters()
    cam = sl.Camera()
    runtime = sl.RuntimeParameters()
    init_cap_params.camera_resolution = sl.RESOLUTION.VGA
    init_cap_params.depth_mode = sl.DEPTH_MODE.ULTRA
    init_cap_params.coordinate_units = sl.UNIT.METER
    init_cap_params.depth_stabilization = True
    init_cap_params.camera_image_flip = False
    init_cap_params.coordinate_system = sl.COORDINATE_SYSTEM.RIGHT_HANDED_Y_UP

    if not cam.is_opened():
        print("Opening ZED Camera...")
    status = cam.open(init_cap_params)
    if status != sl.ERROR_CODE.SUCCESS:
        print(repr(status))
        exit()
    test = np.random.randint(0, 255, size = [376, 672, 3], dtype = 'u1')
    ############################# while ###############################
    while True:
        start_time = time.time()

        #print(left_img[0,1,1])
        composite = coco_demo.run_on_opencv_image(test)

        print("Time: {:.2f} s / img".format(time.time() - start_time))
        cv2.imshow("COCO detections", composite)
        if cv2.waitKey(1) == 27:
            break  # esc to quit
    cv2.destroyAllWindows()
程序运行失败,复现了错误。此时,在while循环中,并没有获取ZED相机图像,coco_demo.run_on_opencv_image()函数处理的依然是图像test。
(3)在mask-rcnn的具体实现代码zed-project/predictor.py中,146行左右,修改self.device=torch.device(cfg.MODEL.DEVICE)为self.device=torch.device('cpu'),程序正常运行。单帧图像处理时间在35秒左右。
在第(2)步时,可以确定输入coco_demo.run_on_opencv_image()的图像没有问题,进一步定位错误的产生与ZED打开摄像头的操作相关。之前的一些尝试,是根据ZED获取图像时程序失败,opencv获取图像时程序成功的情况,判断问题出在获取的图像,使用自定义图像,在输入图像的大小、维度、像素数据类型都相同的情况下程序依然失败,陷入了迷惑之中…
在第(3)步,可以确定问题是CUDA核心运算能力不足的原因了,GPU计算深度图可以单独运行,mask-rcnn可以单独运行,两个一起上就不行了,进入模型后,进行卷积运算计算能力不足,最终失败。
问题总结:
(1)最大的教训还是没有学好控制变量法。自定义图像test只在webcam2.py中尝试了,没有在运行成功的使用opencv的webcam.py代码中尝试,这实际上是在引入一个“ZED获取图像”的变量后,又引入了一个“自定义图像”的变量,给错误定位造成了困难。
(2)opencv的VideoCapture(0)先入为主,其实ZED在cam.open(init_cap_params)打开摄像头时就已经进行计算深度和构建点云的工作了,不然也获取不了深度图。retrieve_image是获取图像,不是处理图像。
(3)目前没有Ubuntu系统的PC机在手边,有机会看看ZED和mask-rcnn同时跑GPU上会不会出问题…希望不要…
参考链接
[1]https://blog.csdn.net/weixin_43877080/article/details/106994966
[2]https://github.com/facebookresearch/maskrcnn-benchmark/blob/master/INSTALL.md
[3]https://blog.csdn.net/weixin_42644062/article/details/99405524
[4]https://github.com/conansherry/detectron2/issues/12
[5]https://docs.nvidia.com/cuda/cublas/index.html#error-status
[6]https://github.com/tensorflow/tensorflow/issues/37233
附录
(1)webcam2.py代码
# Copyright (c) Facebook, Inc. and its affiliates. All Rights Reserved.
import argparse
import cv2

from maskrcnn_benchmark.config import cfg
from predictor import COCODemo
import torch
import pyzed.sl as sl
import numpy as np

#torch.backends.cudnn.enabled = False

def main():
    parser = argparse.ArgumentParser(description="PyTorch Object Detection Webcam Demo")
    parser.add_argument(
        "--config-file",
        default="../configs/caffe2/e2e_mask_rcnn_R_50_FPN_1x_caffe2.yaml",
        metavar="FILE",
        help="path to config file",
    )
    parser.add_argument(
        "--confidence-threshold",
        type=float,
        default=0.7,
        help="Minimum score for the prediction to be shown",
    )
    parser.add_argument(
        "--min-image-size",
        type=int,
        default=224,
        help="Smallest size of the image to feed to the model. "
            "Model was trained with 800, which gives best results",
    )
    parser.add_argument(
        "--show-mask-heatmaps",
        dest="show_mask_heatmaps",
        help="Show a heatmap probability for the top masks-per-dim masks",
        action="store_true",
    )
    parser.add_argument(
        "--masks-per-dim",
        type=int,
        default=2,
        help="Number of heatmaps per dimension to show",
    )
    parser.add_argument(
        "opts",
        help="Modify model config options using the command-line",
        default=None,
        nargs=argparse.REMAINDER,
    )

    args = parser.parse_args()

    # load config from file and command-line arguments
    cfg.merge_from_file(args.config_file)
    cfg.merge_from_list(args.opts)
    cfg.freeze()

    # prepare object that handles inference plus adds predictions on top of image
    coco_demo = COCODemo(
        cfg,
        confidence_threshold=args.confidence_threshold,
        show_mask_heatmaps=args.show_mask_heatmaps,
        masks_per_dim=args.masks_per_dim,
        min_image_size=args.min_image_size,
    )
################################ change ####################################
    init_cap_params = sl.InitParameters()
    cam = sl.Camera()
    runtime = sl.RuntimeParameters()
    init_cap_params.camera_resolution = sl.RESOLUTION.HD720
    init_cap_params.depth_mode = sl.DEPTH_MODE.ULTRA
    init_cap_params.coordinate_units = sl.UNIT.METER
    init_cap_params.depth_stabilization = True
    init_cap_params.camera_image_flip = False
    init_cap_params.coordinate_system = sl.COORDINATE_SYSTEM.RIGHT_HANDED_Y_UP

    if not cam.is_opened():
        print("Opening ZED Camera...")
    status = cam.open(init_cap_params)
    if status != sl.ERROR_CODE.SUCCESS:
        print(repr(status))
        exit()
    res = sl.Resolution(672, 376)
    #left = sl.Mat(1280,720,sl.MAT_TYPE.U8_C4)
    left = sl.Mat()
    key = ''

    #test = np.random.randint(0, 255, size = [376, 672, 3], dtype = 'u1')

    while key != 113:  # for 'q' key
        err = cam.grab(runtime)
        if err == sl.ERROR_CODE.SUCCESS:
            cam.retrieve_image(left, sl.VIEW.LEFT, resolution = res)
            #cam.retrieve_image(left, sl.VIEW.LEFT)
            left_C4 = left.get_data().copy()
            #left_C3 = cv2.cvtColor(left_C4, cv2.COLOR_RGBA2RGB)
            left_C3 = left_C4[:,:,:3].copy()
            #np.savetxt("left_C3_result.txt", left_C3[:,:,0], fmt='%d')
            print(left_C3.shape)
            #tmp_test = coco_demo.compute_prediction(left_C3)
            tmp_test = coco_demo.run_on_opencv_image(left_C3)
            cv2.imshow("COCO detections", tmp_test)
            #tmp_test = coco_demo.run_on_opencv_image(test)
            #cv2.imshow("COCO detections", test)
            key = cv2.waitKey(1)


if __name__ == "__main__":
    main()
(2)webcam2.py产生的error log
Traceback (most recent call last):
  File "webcam3.py", line 109, in
    main()
  File "webcam3.py", line 102, in main
    tmp_test = coco_demo.run_on_opencv_image(left_C3)
  File "/home/yuan/Downloads/nvidia_agx_xavier/maskrcnn-benchmark/demo/predictor.py", line 211, in run_on_opencv_image
    predictions = self.compute_prediction(image)
  File "/home/yuan/Downloads/nvidia_agx_xavier/maskrcnn-benchmark/demo/predictor.py", line 244, in compute_prediction
    predictions = self.model(image_list)
  File "/home/yuan/.local/lib/python3.6/site-packages/torch/nn/modules/module.py", line 722, in _call_impl
    result = self.forward(*input, **kwargs)
  File "/usr/local/lib/python3.6/dist-packages/maskrcnn_benchmark-0.1-py3.6-linux-aarch64.egg/maskrcnn_benchmark/modeling/detector/generalized_rcnn.py", line 52, in forward
    x, result, detector_losses = self.roi_heads(features, proposals, targets)
  File "/home/yuan/.local/lib/python3.6/site-packages/torch/nn/modules/module.py", line 722, in _call_impl
    result = self.forward(*input, **kwargs)
  File "/usr/local/lib/python3.6/dist-packages/maskrcnn_benchmark-0.1-py3.6-linux-aarch64.egg/maskrcnn_benchmark/modeling/roi_heads/roi_heads.py", line 26, in forward
    x, detections, loss_box = self.box(features, proposals, targets)
  File "/home/yuan/.local/lib/python3.6/site-packages/torch/nn/modules/module.py", line 722, in _call_impl
    result = self.forward(*input, **kwargs)
  File "/usr/local/lib/python3.6/dist-packages/maskrcnn_benchmark-0.1-py3.6-linux-aarch64.egg/maskrcnn_benchmark/modeling/roi_heads/box_head/box_head.py", line 47, in forward
    x = self.feature_extractor(features, proposals)
  File "/home/yuan/.local/lib/python3.6/site-packages/torch/nn/modules/module.py", line 722, in _call_impl
    result = self.forward(*input, **kwargs)
  File "/usr/local/lib/python3.6/dist-packages/maskrcnn_benchmark-0.1-py3.6-linux-aarch64.egg/maskrcnn_benchmark/modeling/roi_heads/box_head/roi_box_feature_extractors.py", line 45, in forward
    x = self.head(x)
  File "/home/yuan/.local/lib/python3.6/site-packages/torch/nn/modules/module.py", line 722, in _call_impl
    result = self.forward(*input, **kwargs)
  File "/usr/local/lib/python3.6/dist-packages/maskrcnn_benchmark-0.1-py3.6-linux-aarch64.egg/maskrcnn_benchmark/modeling/backbone/resnet.py", line 203, in forward
    x = getattr(self, stage)(x)
  File "/home/yuan/.local/lib/python3.6/site-packages/torch/nn/modules/module.py", line 722, in _call_impl
    result = self.forward(*input, **kwargs)
  File "/home/yuan/.local/lib/python3.6/site-packages/torch/nn/modules/container.py", line 117, in forward
    input = module(input)
  File "/home/yuan/.local/lib/python3.6/site-packages/torch/nn/modules/module.py", line 722, in _call_impl
    result = self.forward(*input, **kwargs)
  File "/usr/local/lib/python3.6/dist-packages/maskrcnn_benchmark-0.1-py3.6-linux-aarch64.egg/maskrcnn_benchmark/modeling/backbone/resnet.py", line 332, in forward
    out = self.conv2(out)
  File "/home/yuan/.local/lib/python3.6/site-packages/torch/nn/modules/module.py", line 722, in _call_impl
    result = self.forward(*input, **kwargs)
  File "/usr/local/lib/python3.6/dist-packages/maskrcnn_benchmark-0.1-py3.6-linux-aarch64.egg/maskrcnn_benchmark/layers/misc.py", line 33, in forward
    return super(Conv2d, self).forward(x)
  File "/home/yuan/.local/lib/python3.6/site-packages/torch/nn/modules/conv.py", line 420, in forward
    return self._conv_forward(input, self.weight)
  File "/home/yuan/.local/lib/python3.6/site-packages/torch/nn/modules/conv.py", line 417, in _conv_forward
    self.padding, self.dilation, self.groups)
RuntimeError: CUDA error: CUBLAS_STATUS_INTERNAL_ERROR when calling `cublasSgemm( handle, opa, opb, m, n, k, &alpha, a, lda, b, ldb, &beta, c, ldc)`


