Chapter 1: SpringBoot入门
尚硅谷SpringBoot顶尖教程
1. SpringBoot简介
SpringBoot用来简化Spring应用开发, 约定大于配置, 去繁从简, just run就能创建一个独立的、产品级的应用。
背景:
J2EE笨重的开发,繁多的配置,低下的开发效率,复杂的部署流程, 第三方技术集成难度大。
解决:
spring全家桶时代。
SpringBoot ➡ J2EE一站式解决方案。
SpringCloud ➡ 分布式整体解决方案。
优点:
- 快速创建独立运行的Spring项目以及与主流框架集成;
- 使用嵌入式的Servlet容器,应用无需打成WAR包;
- starters起步依赖与版本控制;
- 大量的自动配置, 简化开发; 也可以修改默认值;
- 无需配置XML, 无代码生成, 开箱即用。
- 准生产环境的运行时应用监控;
总结:
- 简化Spring应用开发的一个脚手架;
- 整个Spring技术栈的大整合;
- JavaEE开发的一站式解决方案;
2. 微服务
2014年 , Martin Fowler 提出了微服务化的思想.
一个应用是一组小型服务, 通过HTTP进行通信;每一个功能元素最终都是一个可独立替换和独立升级的软件单元。
3. 环境准备
jdk1.8:spring boot 1.7及以上
maven3.x: maven3.3及以上
IntelliJ IDEA 2019.3.4 x64或Eclipse集成STS插件
springBoot 1.5.9.REALEASE
3.1 Maven设置
给maven的settings.xml配置文件的profiles标签指定jdk版本。
<profile>
    <id>jdk1.8id>
    <activation>
        <activeByDefault>trueactiveByDefault>
        <jdk>1.8jdk>
    activation>
    <properties>
        <maven.compiler.source>1.8maven.compiler.source>
        <maven.compiler.target>1.8maven.compiler.target>
        <maven.compiler.compilerVersion>1.8maven.compiler.compilerVersion>
    properties>
profile>
设置Maven仓库的远程仓库地址, 用来从远程下载依赖, 可配置多个, 第一个下载不到可以往下面继续寻找.
<mirrors>
	<mirror>
		<id>alimavenid>
		<mirrorOf>centralmirrorOf>
		<name>aliyun mavenname>
		<url>http://maven.aliyun.com/nexus/content/repositories/central/url>
	mirror>

	<mirror>
	        <id>nexus-aliyunid>
	        <mirrorOf>centralmirrorOf>
	        <name>Nexus aliyunname>
	        <url>http://maven.aliyun.com/nexus/content/groups/publicurl>
	mirror>

	<mirror>
		<id>centralid>
		<name>Maven Repository Switchboardname>
		<url>http://repo1.maven.org/maven2/url>
		<mirrorOf>centralmirrorOf>
	mirror>

	<mirror>
		<id>repo2id>
		<mirrorOf>centralmirrorOf>
		<name>Human Readable Name for this Mirror.name>
		<url>http://repo2.maven.org/maven2/url>
	mirror>

	<mirror>
		<id>ibiblioid>
		<mirrorOf>centralmirrorOf>
		<name>Human Readable Name for this Mirror.name>
		<url>http://mirrors.ibiblio.org/pub/mirrors/maven2/url>
	mirror>

	<mirror>
		<id>jboss-public-repository-groupid>
		<mirrorOf>centralmirrorOf>
		<name>JBoss Public Repository Groupname>
		<url>http://repository.jboss.org/nexus/content/groups/publicurl>
	mirror>
mirrors>
3.2 Idea设置
在idea中配置maven, 指定maven的安装目录、settings.xml文件位置; 以及maven本地仓库的目录;

4. HelloWorld案例
需求:浏览器发送hello请求,服务器接受请求并处理,响应Hello World字符串。
创建maven工程, 导入SpringBoot依赖。
<project xmlns="http://maven.apache.org/POM/4.0.0" xmlns:xsi="http://www.w3.org/2001/XMLSchema-instance"
         xsi:schemaLocation="http://maven.apache.org/POM/4.0.0 https://maven.apache.org/xsd/maven-4.0.0.xsd">
    <modelVersion>4.0.0modelVersion>
	<parent>
        <groupId>org.springframework.bootgroupId>
        <artifactId>spring-boot-starter-parentartifactId>
        <version>1.5.10.RELEASEversion>
        <relativePath/>
    parent>
    <groupId>com.atguguigroupId>
    <artifactId>spring-boot-01-hello-quickartifactId>
    <version>0.0.1-SNAPSHOTversion>
    <packaging>warpackaging>
    <name>spring-boot-01-hello-quickname>
    <description>Demo project for Spring Bootdescription>
    <properties>
        <java.version>1.8java.version>
    properties>
	<dependencies>
        <dependency>
            <groupId>org.springframework.bootgroupId>
            <artifactId>spring-boot-starter-webartifactId>
        dependency>
    dependencies>


    <build>
        <plugins>
            <plugin>
                <groupId>org.springframework.bootgroupId>
                <artifactId>spring-boot-maven-pluginartifactId>
            plugin>
        plugins>
    build>
project>
编写主启动类.
package com.atgugui;

import org.springframework.boot.SpringApplication;
import org.springframework.boot.autoconfigure.SpringBootApplication;

@SpringBootApplication // 用来标注一个主程序类,说明这是一个springboot应用
public class HelloWorldMainApplication {
    public static void main(String[] args) {
        SpringApplication.run(HelloWorldMainApplication.class, args);
    }
}
编写Controller
@RestController
//@Controller
public class HelloController {
    //    @ResponseBody
    @RequestMapping("/hello")
    public String hello() {
        return "Hello World";
    }
}
运行主程序, 测试.
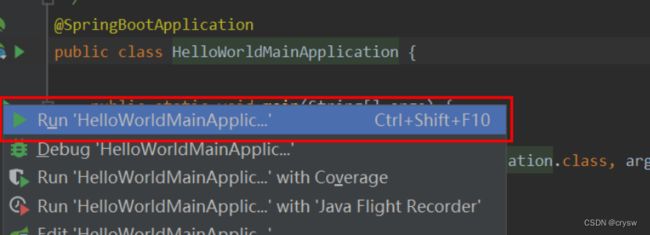
windows环境使用命令mvn spring-boot:run启动程序,也可以使用开发工具启动。

或者

启动标识:


启动了内嵌的tomcat的8080端口,http端口。

也可以将这个应用打成jar包,直接使用java -jar命令启动应用包。

java -jar spring-boot-01-helloworld-1.0-SNAPSHOT.jar
5. pom.xml
5.1 SpringBoot应用父项目
SpringBoot项目的pom.xml中导入了父项目spring-boot-starter-parent
<parent>
	<groupId>org.springframework.bootgroupId>
	<artifactId>spring-boot-starter-parentartifactId>

	<version>1.5.10.RELEASEversion>
	<relativePath/>
parent>
它的父项目是:
<parent>
	<groupId>org.springframework.bootgroupId>
	<artifactId>spring-boot-dependenciesartifactId>
	<version>1.5.10.RELEASEversion>
	<relativePath>../../spring-boot-dependenciesrelativePath>
parent>
spring-boot-dependencies中来真正管理spring boot应用里面的所有依赖版本。
Spring Boot的版本管理中心,我们以后导入依赖默认是不需要写版本;如果没有在dependencies里面管理的依赖是需要我们自己写版本号的。

5.2 起步依赖
<dependency>
	<groupId>org.springframework.bootgroupId>
	<artifactId>spring-boot-starter-webartifactId>
dependency>
spring-boot-starter-web:
spring-boot-starter:springboot的场景启动器,帮助我们导入了web模块正常运行所依赖的组件。
SpringBoot将所有的功能场景都抽取出来,做成一个个的starter启动器,只需要在项目里面引入这些starter,相关场景的所有依赖都会导入进来。要用什么功能就导入什么场景的启动器 , 实现按需引入。
6. 主启动类
6.1 @SpringBootApplication
主启动类是SpringBoot应用的程序入口。
@SpringBootApplication:springboot应用标注在某个类上说明这个类是SpringBoot的主配置类,通过运行这个类的main方法来启动SpringBoot应用。
@Target(ElementType.TYPE)
@Retention(RetentionPolicy.RUNTIME)
@Documented
@Inherited
@SpringBootConfiguration
@EnableAutoConfiguration
@ComponentScan(excludeFilters = {
		@Filter(type = FilterType.CUSTOM, classes = TypeExcludeFilter.class),
		@Filter(type = FilterType.CUSTOM, classes = AutoConfigurationExcludeFilter.class) })
public @interface SpringBootApplication {
    //....
}
@SpringBootConfiguration:标注在某个类上,表示这是一个SpringBoot的配置类。
@Configuration:配置类上来标注这个注解。配置类替换原来的配置文件。
配置类也是容器中的一个组件. @Component
6.2 @EnableAutoConfiguration
@EnableAutoConfiguration: 开启自动配置功能,以前我们需要配置的内容,SpringBoot帮助我们自动配置。
@Target(ElementType.TYPE)
@Retention(RetentionPolicy.RUNTIME)
@Documented
@Inherited
@AutoConfigurationPackage
@Import(EnableAutoConfigurationImportSelector.class)
public @interface EnableAutoConfiguration {
    //...
}
@AutoConfigurationPackage:自动配置包
@Target(ElementType.TYPE)
@Retention(RetentionPolicy.RUNTIME)
@Documented
@Inherited
@Import(AutoConfigurationPackages.Registrar.class)
public @interface AutoConfigurationPackage {
}
@Import({AutoConfigurationPackages.Registrar.class}) : Spring的底层注解@Import,给容器中导入一个组件,导入的组件是AutoConfigurationPackages.Registrar.class, 实现了将主配置类(@SpringBootApplication标注的类)所在包及下面所有子包里面的所有组件扫描到Spring容器中。
@Order(Ordered.HIGHEST_PRECEDENCE)
static class Registrar implements ImportBeanDefinitionRegistrar, DeterminableImports {

	@Override
	public void registerBeanDefinitions(AnnotationMetadata metadata,
			BeanDefinitionRegistry registry) {
        // 在这行打断点,启动应用调试; 下面执行结果是当前应用主启动类所以的包名
		register(registry, new PackageImport(metadata).getPackageName());
	}

	@Override
	public Set<Object> determineImports(AnnotationMetadata metadata) {
		return Collections.<Object>singleton(new PackageImport(metadata));
	}
}
6.3 @Import
@Import({EnableAutoConfigurationImportSelector.class}) :给容器中导入组件。
EnableAutoConfigurationImportSelector:导入所需要组件的选择器。
将所有需要导入的组件以全类名的方式返回,这些组件就会被添加到容器中。
会给容器中导入自动配置类(xxxAutoConfiguration),就是给容器中导入这个场景需要的所有组件,并配置好这些组件。
AutoConfigurationImportSelector#selectImports
public class AutoConfigurationImportSelector
		implements DeferredImportSelector, BeanClassLoaderAware, ResourceLoaderAware,
		BeanFactoryAware, EnvironmentAware, Ordered {
 	// ....
	@Override
	public String[] selectImports(AnnotationMetadata annotationMetadata) {
		if (!isEnabled(annotationMetadata)) {
			return NO_IMPORTS;
		}
		try {
			AutoConfigurationMetadata autoConfigurationMetadata = AutoConfigurationMetadataLoader
					.loadMetadata(this.beanClassLoader);
			AnnotationAttributes attributes = getAttributes(annotationMetadata);
            // 返回所有自动配置类的全路径名
			List<String> configurations = getCandidateConfigurations(annotationMetadata,
					attributes);
			configurations = removeDuplicates(configurations);
			configurations = sort(configurations, autoConfigurationMetadata);
			Set<String> exclusions = getExclusions(annotationMetadata, attributes);
			checkExcludedClasses(configurations, exclusions);
			configurations.removeAll(exclusions);
			configurations = filter(configurations, autoConfigurationMetadata);
			fireAutoConfigurationImportEvents(configurations, exclusions);
			return configurations.toArray(new String[configurations.size()]);
		}
		catch (IOException ex) {
			throw new IllegalStateException(ex);
		}
	}
}
AutoConfigurationImportSelector#getCandidateConfigurations
// SpringFactoriesLoader.loadFactoryNames(...)
protected List<String> getCandidateConfigurations(AnnotationMetadata metadata,
		AnnotationAttributes attributes) {
	List<String> configurations = SpringFactoriesLoader.loadFactoryNames(
			getSpringFactoriesLoaderFactoryClass(), getBeanClassLoader());
	Assert.notEmpty(configurations,
			"No auto configuration classes found in META-INF/spring.factories. If you "
					+ "are using a custom packaging, make sure that file is correct.");
	return configurations;
}
SpringFactoriesLoader#loadFactoryNames
SpringBoot在启动的时候从类路径下的META-INF/spring.factories中获取EnableAutoConfiguration指定的值,将这些值作为自动配置类导入到容器中,自动配置类就生效,帮我们进行自动配置工作。
public static final String FACTORIES_RESOURCE_LOCATION = "META-INF/spring.factories";

public static List<String> loadFactoryNames(Class<?> factoryClass, ClassLoader classLoader) {
	String factoryClassName = factoryClass.getName();
	try {
        // 根据类加载器判断,先从项目资源中查找, 再从系统资源中查找
		Enumeration<URL> urls = (classLoader != null ? classLoader.getResources(FACTORIES_RESOURCE_LOCATION) :
				ClassLoader.getSystemResources(FACTORIES_RESOURCE_LOCATION));
		List<String> result = new ArrayList<String>();
		while (urls.hasMoreElements()) {
			URL url = urls.nextElement();
			Properties properties = PropertiesLoaderUtils.loadProperties(new UrlResource(url));
			String factoryClassNames = properties.getProperty(factoryClassName);
			result.addAll(Arrays.asList(StringUtils.commaDelimitedListToStringArray(factoryClassNames)));
		}
		return result;
	}
	catch (IOException ex) {
		throw new IllegalArgumentException("Unable to load [" + factoryClass.getName() +
				"] factories from location [" + FACTORIES_RESOURCE_LOCATION + "]", ex);
	}
}
J2EE的整体解决方案都和自动配置都在org.springframework.boot.autoconfigure包下面。

7. Spring Initializer
IDE都支持使用Spring Initializer创建向导快速创建一个SpringBoot项目。
选择我们需要的模块,向导会联网创建SpringBoot项目。

默认生成的SpringBoot项目:
- 主程序已经生成好了,我们只需要写我们自己的逻辑。
- resources文件夹中目录结构
- static:保存所有的静态资源,js/css/html/images;
- templates:保存所有的模块页面;(SpringBoot默认jar包使用嵌入式的Tomcat,默认不支持jsp页面, 可以使用模板引擎);
- application.properties: SpringBoot应用的配置文件。
Eclipse使用spring tool suite插件后也一样的支持快速创建SpringBoot项目。
Spring Tools 4 for Eclipse


