nomachine连接桌面_NoMachine –下载,安装和用于NX,SSH连接

nomachine连接桌面
NoMachine is a remote desktop tool that provides high performance and speed. NoMachine is mainly designed for Linux distributions but in order to make a remote desktop connection and remote management easier, it is also provided by macOS and Windows operating systems. NoMachine provides the freedom to work the employees from anywhere.
NoMachine是提供高性能和速度的远程桌面工具。 NoMachine主要是为Linux发行版设计的,但是为了使远程桌面连接和远程管理更容易,macOS和Windows操作系统也提供了它。 NoMachine提供了在任何地方工作的员工的自由。
NoMachine功能 (NoMachine Features)
There are a lot of features which makes NoMachine very popular and preferred remote desktop tool. Here we will provide these features.
有很多功能使NoMachine成为非常流行和首选的远程桌面工具。 在这里,我们将提供这些功能。
NoMachine is
cross-platformwhere operating systems and devices like Windows, Linux, macOS, iOS, RaspberryPi, Android is supportedNoMachine是
cross-platform,支持Windows和Linux,macOS,iOS,RaspberryPi,Android等操作系统和设备Provides
faster and quality remote desktop experienceaccording to the open-source protocol VNC根据开源协议VNC提供
faster and quality remote desktop experienceProvides
centralized remote access managementwhich makes it useful for enterprise environments.提供
centralized remote access management,使其对企业环境有用。Installation, configuration, and management are
very easyaccording to other alternatives.根据其他选择,安装,配置和管理
very easy。Provides
policy-based accesswhich can be set user level, location, network.提供
policy-based access,可以设置用户级别,位置,网络。It is fully
securedwith the OpenSSL, TLS, AES 128, and SSH tunneling.它具有OpenSSL,TLS,AES 128和SSH隧道的完全
secured。Screen sharingwith others makes it easier to collaborate.与他人
Screen sharing可简化协作。Web-based clientand access is very useful where we can access to NoMachine servers just with a browser.Web-based client和访问非常有用,我们可以仅通过浏览器访问NoMachine服务器。Remote printingis another good feature.Remote printing是另一个好功能。File transferfeatures will make collaboration straightforward and eliminate to file servers and trivial tasks.File transfer功能将使协作变得简单明了,并消除了文件服务器和琐碎的任务。A remote desktop
session recordingcan be done easily and can be turned into a video conference.远程桌面
session recording可以轻松完成,并且可以变成视频会议。
下载并安装Windows (Download and Install For Windows)
NoMachine can be downloaded for 32 and 64 bit Windows XP, Vista, 7, 8, 10, and Windows Server 2008, 2012, 2016, 2019. Following link redirect to download page. The installation will require about 130 MB disk space.
可以为32位和64位Windows XP,Vista,7、8、10和Windows Server 2008、2012、2016、2019下载NoMachine。将链接重定向到下载页面。 安装将需要大约130 MB磁盘空间。
https://www.nomachine.com/download/download&id=8
https://www.nomachine.com/download/download&id=8
 Download and Install For Windows 下载并安装Windows
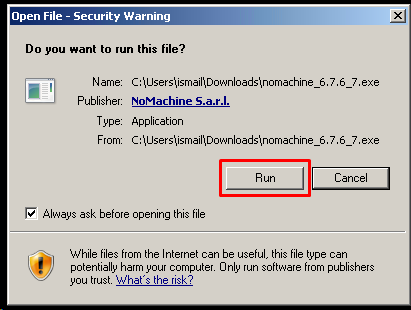
Open and start the installation file named nomachine_6.7.6_7.exe
打开并启动名为nomachine_6.7.6_7.exe的安装文件
 Start NoMachine Installation 开始安装NoMachine
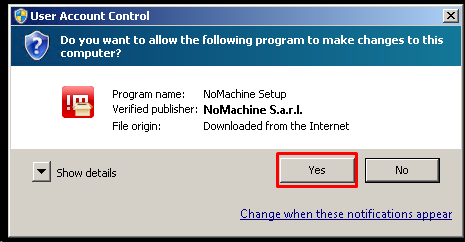
We need to provide Administrative rights with the following User Account Control and click Yes.
我们需要提供具有以下User Account Control管理权限,然后单击“ Yes 。
 User Account Control 用户帐号控制
We will see the following Welcome Screen and click to Next.
我们将看到以下Welcome Screen ,然后单击Next 。
 NoMachine Installation Welcome Screen NoMachine安装欢迎屏幕
In the following screen, we will the License Agreement by accepting we will continue.
在以下屏幕中,我们将接受License Agreement以继续我们的License Agreement 。
 NoMachine License Agreement NoMachine许可协议
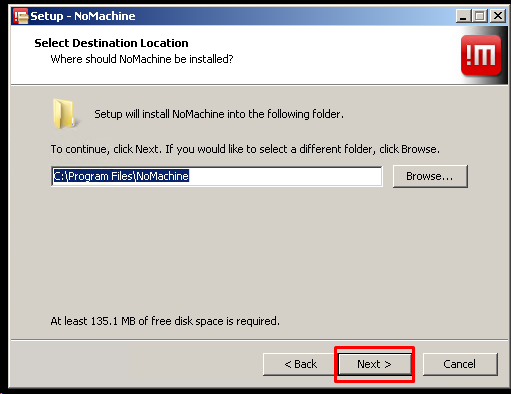
We will select the installation path which is C:\Program Files\ NoMachine
我们将选择安装路径为C:\Program Files\ NoMachine
 Select NoMachine Installation Destination 选择NoMachine安装目标
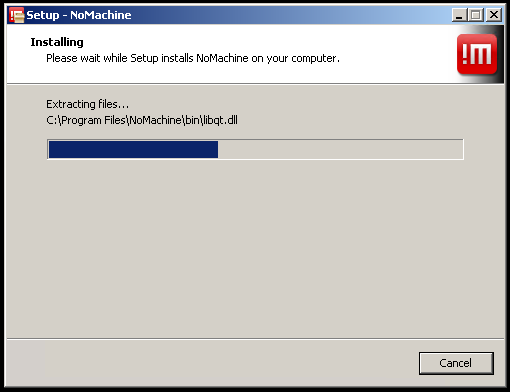
We can see the following screen during installation
安装过程中我们可以看到以下屏幕
 NoMachine Installation NoMachine安装
After the installation is complete we can see the following screen which will update some operating system component and take some time.
安装完成后,我们将看到以下屏幕,该屏幕将更新某些操作系统组件并花费一些时间。

When the NoMachine installation is complete successfully we will see the following screen.
当NoMachine安装成功完成时,我们将看到以下屏幕。
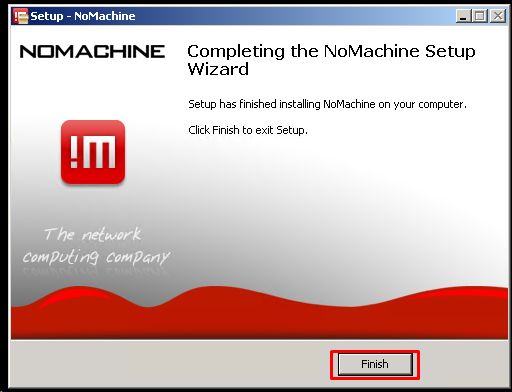
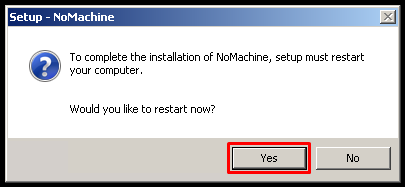
We have to restart the system in order to use NoMachine properly.
为了正确使用NoMachine,我们必须重新启动系统。
下载并安装Ubuntu,Debian,Mint,Kali (Download and Install For Ubuntu, Debian, Mint, Kali)
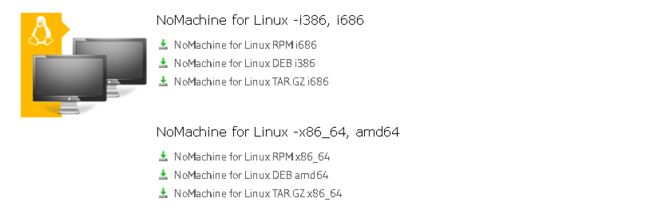
We can download the Linux setup files from the following link. For Linux, NoMachine is provided as RPM,DEB,TAR.GZ. We will use deb for Ubuntu, Debian, Mint, and Kali installation. 32 and 64 bit is provided with different setup files so we will select 64 bit for this tutorial.
我们可以从以下链接下载Linux安装文件。 对于Linux,NoMachine作为RPM,DEB,TAR.GZ提供。 我们将使用deb进行Ubuntu,Debian,Mint和Kali安装。 不同的安装文件提供了32位和64位,因此本教程将选择64位。
https://www.nomachine.com/download/linux&id=1
https://www.nomachine.com/download/linux&id=1
 Download and Install For Ubuntu, Debian, Mint, Kali 下载并安装Ubuntu,Debian,Mint,Kali
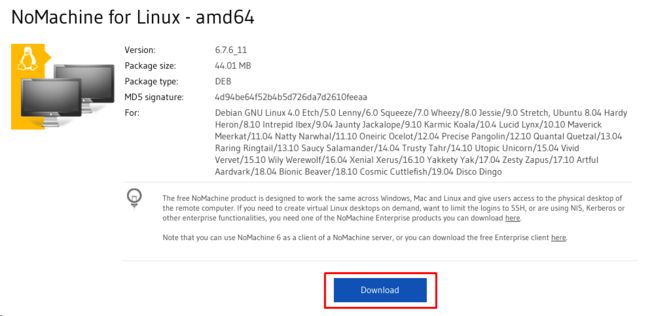
We will be redirected to the following URL and web page.
我们将被重定向到以下URL和网页。
https://www.nomachine.com/download/download&id=6
https://www.nomachine.com/download/download&id=6
Then we will navigate to the directory where we downloaded the NoMachine deb installer. In this case it is downloaded into Downloads
然后,我们将导航到下载NoMachine deb安装程序的目录。 在这种情况下,它将下载到“ Downloads
$ cd Downloads

$ sudo dpkg -i nomachine_6.7.6_11_amd64.deb
nomachine.deb nomachine.deb
We can see from the output that the TCP 4000 port listening for coming NX remote desktop connection.
从输出中我们可以看到TCP 4000端口正在监听即将到来的NX远程桌面连接。
NoMachine主屏幕 (NoMachine Main Screen)
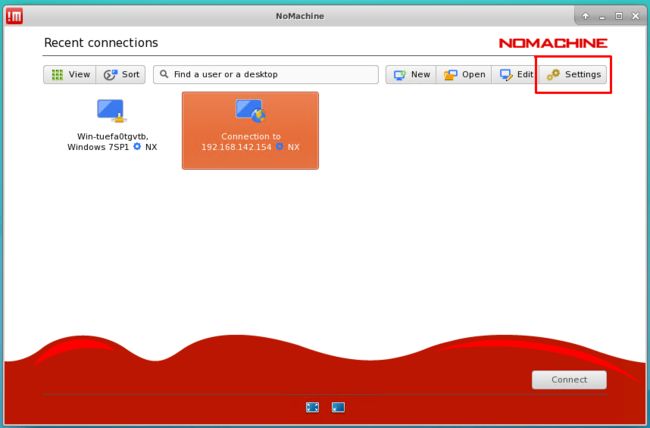
The main screen is like below for the NoMachine. It is very clear where recent connections, create a new connection and settings buttons are shown.
NoMachine的主屏幕如下所示。 很清楚显示了最近的连接,创建新的连接和设置按钮的位置。
 Main Screen 主屏幕
编辑首选项(Edit Preferences)
We can edit preferences and then click to the Settings on the right upper corner. This will open connection preferences screen which provides configuration for Input , Appearance , Transfers , Folders , Privacy .
我们可以编辑首选项,然后单击右上角的Settings 。 这将打开连接首选项屏幕,该屏幕提供Input , Appearance , Transfers , Folders , Privacy 。
 Edit Preferences 编辑首选项
输入首选项(Input Preferences)
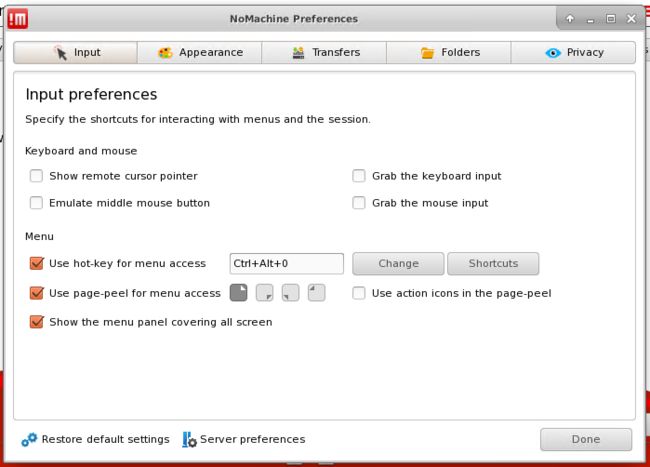
We can change the preferences of the Input. We can specify the following configuration.
我们可以更改Input的首选项。 我们可以指定以下配置。
Show remote cursor pointerShow remote cursor pointerEmulate middle mouse buttonEmulate middle mouse buttonGrab the keyboard inputGrab the keyboard inputGrab the mouse inputGrab the mouse inputUse hot-key for menu accessUse hot-key for menu accessShow the menu panel covering all-screenShow the menu panel covering all-screen
 Input Preferences 输入首选项
外观偏好(Appearance Preferences)
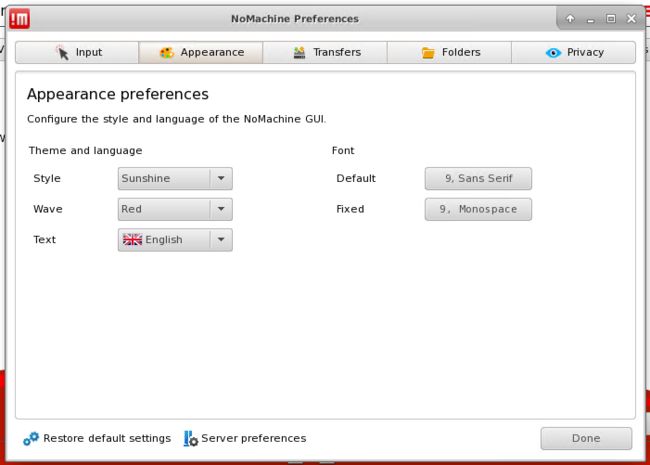
We can configure the appearance of the NoMachine with the Appearance preferences.
我们可以使用Appearance首选项配置NoMachine的Appearance 。
StyleStyleWaveWaveTextTextDefaultDefaultFixedFixed
 Appearance Preferences 外观偏好
转移偏好(Transfer Preferences)
We can set the following transfer preferences from this screen.
我们可以在此屏幕上设置以下传输首选项。
Allow others to send you a fileAllow others to send you a fileAutomatically save the received filesAutomatically save the received filesDisallow files bigger thanDisallow files bigger than
 Transfer Preferences 转移偏好
文件夹首选项(Folders Preferences)
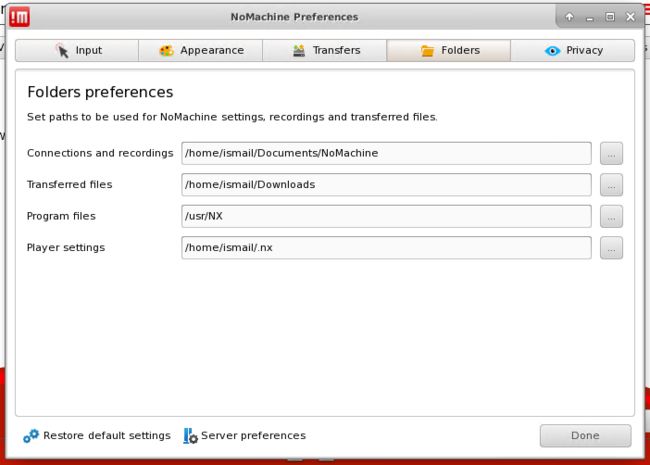
In this screen, we can set the following Folder Preferences.
在此屏幕中,我们可以设置以下Folder Preferences 。
Connections and recordingsConnections and recordingsTransferred filesTransferred filesProgram filesProgram filesPlayer settingsPlayer settings
 Folders Preferences 文件夹首选项
隐私首选项(Privacy Preferences)
In this screen, we can set the following Privacy Preferences.
在此屏幕中,我们可以设置以下“ Privacy Preferences 。
Don't delete log files on exitDon't delete log files on exitDon't save connection screenshotsDon't save connection screenshots- `Don’t show other computers on the network` `不显示网络上的其他计算机`
 Privacy Preferences 隐私首选项
建立连接(Create Connection)
After the installation is complete an icon will be shown on the menu like below. We will click right on this icon which will show a menu like below. From here we will click New Connection. New Connection is used to store connection configuration and profile. The new connection creation will work both on Linux and Windows.
安装完成后,将在菜单上显示一个图标,如下所示。 我们将在该图标上单击鼠标右键,该菜单将显示如下所示的菜单。 在这里,我们将单击“ New Connection 。 New Connection用于存储连接配置和配置文件。 新的连接创建将在Linux和Windows上均可使用。
 New Connection 新连接
指定协议(Specify Protocol)
We will see a screen like below which is the first step of new connection creation. In this step, we will specify the connection protocol which will be NX. We can also select SSH to ssh into the remote system.
我们将看到如下屏幕,这是创建新连接的第一步。 在此步骤中,我们将指定连接协议NX 。 我们还可以选择SSH到远程系统。
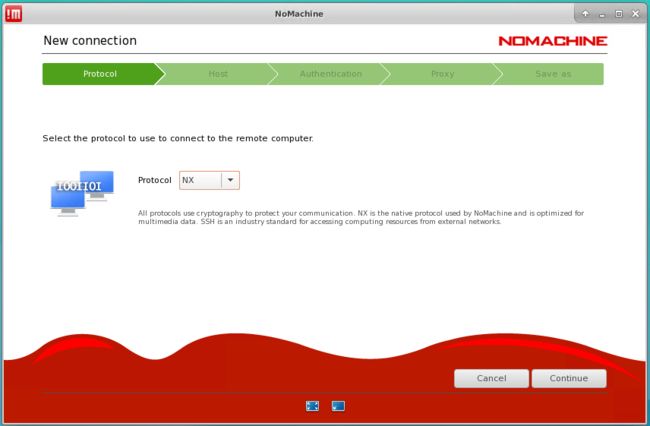 Specify Protocol 指定协议
设置主机名IP地址,端口(Set Hostname IP Address, Port)
In this step, we will set the IP address or hostname with the port. We can also enable the Use UDP communication for multimedia data which will make communication faster.
在此步骤中,我们将使用端口设置IP地址或主机名。 我们还可以启用Use UDP communication for multimedia data这将使通信速度更快。
 Set Hostname IP Address, Port 设置主机名IP地址,端口
指定身份验证方法(Specify Authentication Method)
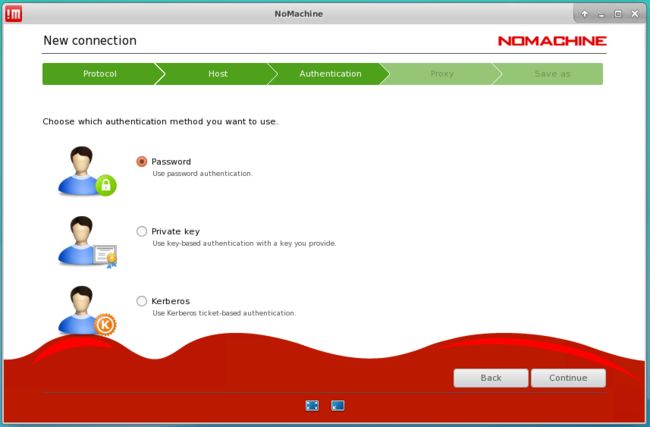
In the following screen can specify the authentication method which can be Password, Private Key , Kerberos.
在以下屏幕中,可以指定身份验证方法,可以是Password , Private Key , Kerberos 。
代理配置 (Proxy Configuration)
If we need some proxy in order to access the internet or other networks we can specify the proxy here.
如果我们需要一些代理才能访问Internet或其他网络,则可以在此处指定代理。
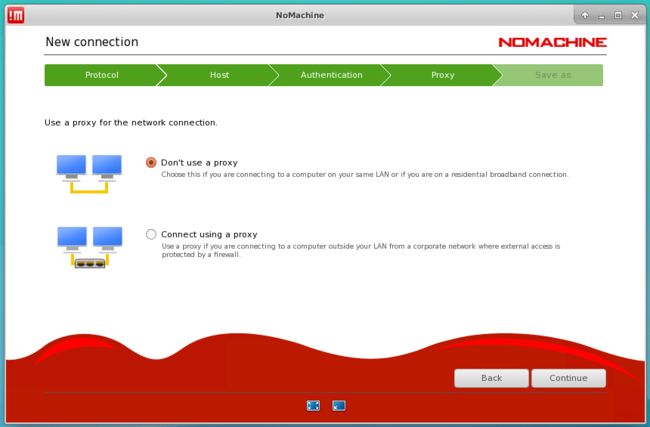 Proxy Configuration 代理配置
设置连接名称并保存(Set Connection Name and Save)
In this part, we will set the connection name and then click to the Done in order to save the configured connection with the specified name.
在这一部分中,我们将设置连接名称,然后单击“ Done以保存具有指定名称的已配置连接。
 Set Connection Name and Save 设置连接名称并保存
连接远程系统(Connect Remote System)
We can start the connection by just clicking the connection we want to start like below.
我们可以通过单击想要启动的连接来启动连接,如下所示。
 Connect Remote System 连接远程系统
If we are connecting for the first time to the remote system we will be asked for verification. We have to very and accept the remote system fingerprint just by clicking Yes.
如果我们是第一次连接到远程系统,将要求我们进行验证。 我们必须非常非常,只需单击“ Yes就可以接受远程系统指纹。
 Verify Host Authenticity 验证主机真实性
We will see the following authentication screen where we will provide a username and password for authenticating the remote system. We can also save the password for the future connection by ticking Save this password in the connection file.
我们将看到以下身份验证屏幕,其中将提供用于验证远程系统的用户名和密码。 我们还可以通过选中Save this password in the connection file将来连接的Save this password in the connection file 。
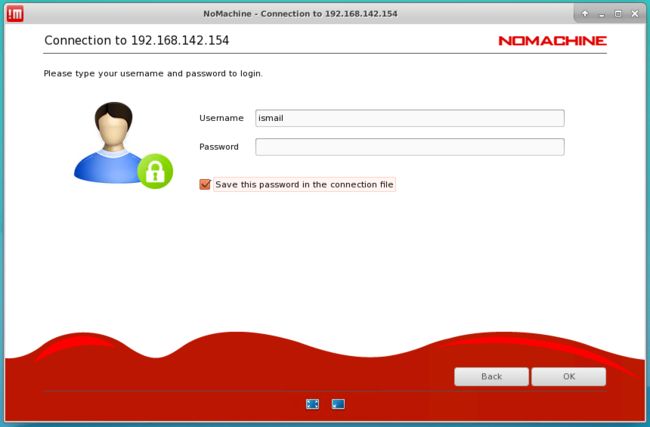 Authentication 认证方式
If this is the first connection we will be provided some information about NoMachine usage like below. We can forward by clicking OK. We can also disable this introduction by ticking Don't show this message again.
如果这是第一个连接,我们将为您提供有关NoMachine使用情况的一些信息,如下所示。 我们可以通过单击OK进行转发。 我们也可以通过选中Don't show this message again来禁用此介绍。
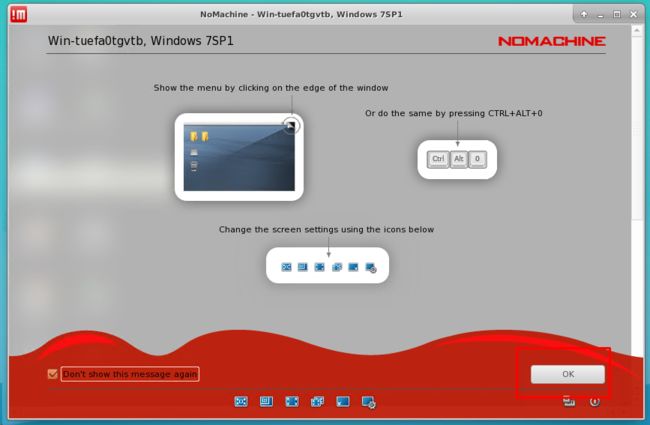 NoMachine Info NoMachine信息
Then we will see the following screen which is the remote system desktop which is a Windows 7 in this example.
然后,我们将看到以下屏幕,该屏幕是远程系统桌面,在此示例中为Windows 7。
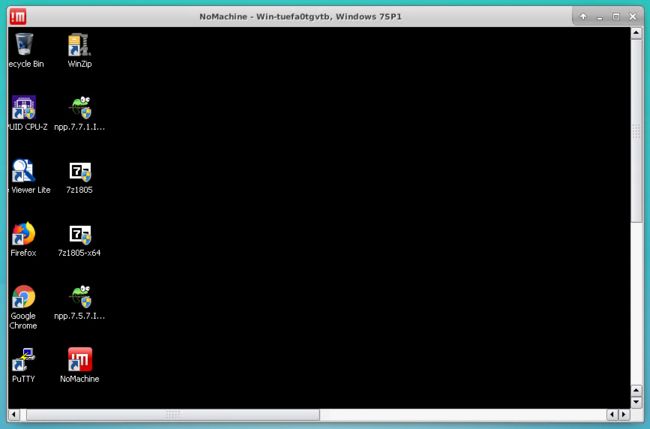 NoMachine Remote Desktop NoMachine远程桌面
翻译自: https://www.poftut.com/nomachine-download-install-and-use-for-nx-ssh-connections/
nomachine连接桌面