Mac:安装终端利器iTerm,并配置oh_my_zsh
一、安装iTerm
1、安装iTerm
下载Iterm
或者使用Homebrew安装
brew cask install iterm22、配置iTerm的主题
1)主题下载地址
2)文件解压后,打开iterm 2,按 “command+,”, 打开perferences设置界面
3)选择【 Profiles -> Colors -> Color Presets -> Import 】
4)选择刚才解压的【solarized->iterm2-colors-solarized->Solarized Dark.itermcolors】文件,导入成功
5)最后选择 “Solarized Dark” 主题,就可以了。
3、配置Meslo字体
1)下载字体:Meslo LG M Regular for Powerline.ttf
2)下载完成后,双击直接安装即可
3)打开iTerm,按“command + ,”,打开偏好设置
4)选择Profiles -> Text -> Font -> Chanage Font,选择 Meslo LG M Regular for Powerline 字体。
4、配置 快速隐藏和显示 的快捷键
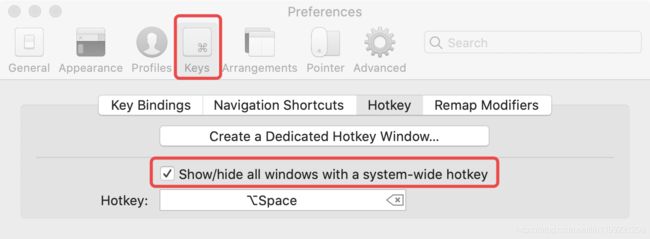
1)打开 iTerm,按【Command + ,】键,打开 Preferences 配置界面
2)然后Profiles → Keys → Hotkey →勾选 show/hide all windows with a system-wide hotkey即可
二、更改系统默认shell为zsh
1、查看系统是 bash 还是 zsh
chsh2、切换命名
//zsh 切换为 bash
chsh -s /bin/bash

//bash 切换为 zsh
chsh -s /bin/zsh
三、配置oh_my_zsh
1、安装oh_my_zsh
1)方式一(二选一,不过国内会被拒绝访问,原因。。。你懂的)
sh -c "$(wget https://raw.github.com/robbyrussell/oh-my-zsh/master/tools/install.sh -O -)"

sh -c "$(curl -fsSL https://raw.github.com/robbyrussell/oh-my-zsh/master/tools/install.sh)"
2)方式二:Git
git://github.com/robbyrussell/oh-my-zsh.git ~/.oh-my-zsh2、配置主题
1)打开终端,编辑 ~/.zshrc
vi ~/.zshrc添加
ZSH_THEME="agnoster"更多的主题,请查看该链接
四、oh_my_zsh插件安装
1、安装autojump
功能:实现目录间快速跳转,想去哪个目录直接 j + 目录名
1)命令安装
brew install autojump2)vim ~/.zshrc # 在文件里找到plugins,添加
plugins=(autojump)

# 在文件末尾添加
[[ -s $(brew --prefix)/etc/profile.d/autojump.sh ]] && . $(brew --prefix)/etc/profile.d/autojump.sh
source $ZSH/oh-my-zsh.sh

#其中ZSH为:
export ZSH="/Users/chenjialin/.oh-my-zsh"
3)最后
source ~/.zshrc2、安装 zsh-syntax-highlighting
功能:日常用的命令会高亮显示,命令错误显示红色
1)使用homebrew命令安装
git clone git://github.com/zsh-users/zsh-syntax-highlighting ~/.oh-my-zsh/custom/plugins/zsh-syntax-highlighting
2)安装成功后,在vi ~/.zshrc中添加plugins、source
plugins=(
  autojump
  zsh-syntax-highlighting
)
source $ZSH/custom/plugins/zsh-syntax-highlighting/zsh-syntax-highlighting.zsh
3)最后,source ~/.zshrc
3、安装 zsh-autosuggestions
功能:输入命令时可提示自动补全(灰色部分),然后按键盘 → (上下左右的右键,不是tab键)即可补全
1)git安装
git clone https://github.com/zsh-users/zsh-autosuggestions ~/.oh-my-zsh/custom/plugins/zsh-autosuggestions
2)vi ~/.zshrc文件,找到plugins配置,增加zsh-autosuggestions插件。
plugins=(
  autojump
  zsh-autosuggestions
  zsh-syntax-highlighting
)
3)最后,source ~/.zshr
五、优化oh_my_zsh主题的显示
注:该优化主要是针对"agnoster",仅供参考
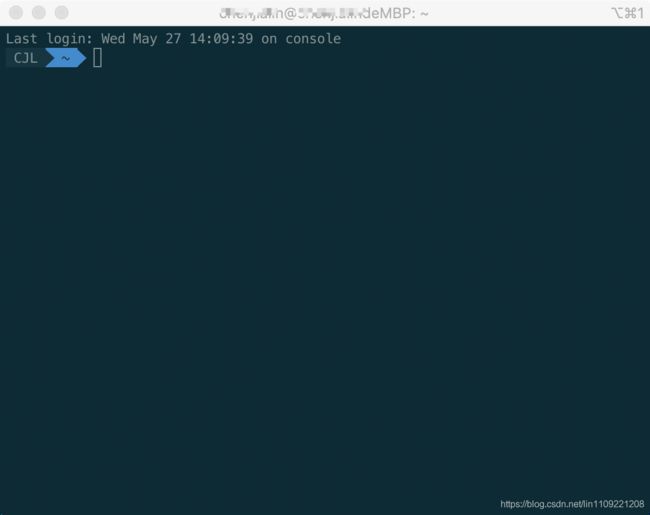
原本终端~前的显示是:user(用户名)@hosts(主机名),现在需要更改为 只显示用户名(也可自定义的用户名)
1)vi ~/.zshrc文件,添加
export USER="CJL"
DEFAULT_USER="$(whoami)"
2)找到主题的文件,路径为
/Users/(家目录名称)/.oh-my-zsh/themes/agnoster.zsh-theme

注:主要看.oh-my-zsh是放在什么位置
3)找到prompt_context()
prompt_segment black default "%(!.%{%F{yellow}%}.)%n@%m"

修改为

prompt_segment black default "%(!.%{%F{yellow}%}.)$USER"
4)source ~/.zshrc,最后显示的即为1)中配置的 USER,如图所示: