部署lnmp架构
部署lnmp架构
- 1. lnmp简介
- 2. 安装nginx
-
- 2.1下载nginx的源码包
- 2.2 解决nginx的依赖
- 2.3 解压nginx的rpm包
- 2.4 创建系统用户nginx
- 2.5 创建日志存放目录
- 2.6 编译安装
- 2.7 提供service文件,使用systemctl控制nginx
- 3. 安装mysql
-
- 3.1 安装依赖包
- 3.2 下载MySQL的tar包
- 3.3 创建MySQL用户和组
- 3.4 为了后面操作方便将mysql-5.7.32-linux-glibc2.12-x86_64目录改名或做成软连接都可以
- 3.5 MySQL的属主和属组
- 3.6 添加环境变量
- 3.7 配置MySQL数据库的lib库文件
- 3.8 创建MySQL的数据目录,并修改其属主和属组
- 3.9 初始化数据库
- 3.10 生成MySQL配置文件
- 3.11 配置服务启动的脚本
- 3.12 配置系统服务使用systemctl来管理MySQL
- 4. 安装php
-
- 4.1 下载php的tar包并解压
- 4.2 编译安装php
- 4.3 配置环境变量
- 4.4 配置php-fpm文件
- 4.5 配置系统服务使用systemctl来管理PHP
- 4.6 创建php访问界面
- 4.6 修改nginx配置文件
1. lnmp简介
LNMP是指一组通常一起使用来运行动态网站或者服务器的自由软件名称首字母缩写。L指Linux,N指Nginx,M一般指MySQL,也可以指MariaDB,P一般指PHP,也可以指Perl或Python。
LNMP代表的就是:Linux系统下Nginx+MySQL+PHP这种网站服务器架构
linux是Unix计算机操作系统的统称,是目前最流行的免费的操作系统,代表有Debian、centos、ubuntu、fedora、gentoo等。
Nginx是一个高性能的HTTP和反向代理服务器,也是一个IMAP/POP3/SMTP代理服务器。
Mysql是一个小型关系型数据库管理系统
PHP是一种在服务器端执行的嵌入HTML文档的脚本语言
这四种软件均为免费开源软件,组合到一起,成为一个免费、高效、扩展性强的网站服务系统。
环境说明
| 系统 | IP |
|---|---|
| Redhat8.2 | 192.168.182.143 |
2. 安装nginx
2.1下载nginx的源码包
[root@localhost ~]# wget http://nginx.org/download/nginx-1.20.1.tar.gz
2.2 解决nginx的依赖
yum -y install pcre-devel pcre gcc gcc-c++ openssl-devel zlib zlib-devel make vim wget openssl openssl-devel gd-devel
2.3 解压nginx的rpm包
[root@localhost ~]# tar -xzf nginx-1.20.1.tar.gz -C /usr/local
2.4 创建系统用户nginx
[root@localhost ~]# useradd -r -M -s /sbin/nologin nginx
2.5 创建日志存放目录
[root@localhost ~]# mkdir -p /var/log/nginx
[root@localhost ~]# chown -R nginx.nginx /var/log/nginx
2.6 编译安装
[root@localhost nginx-1.20.1]# ./configure \
--prefix=/usr/local/nginx \
--user=nginx \
--group=nginx \
--with-debug \
--with-http_ssl_module \
--with-http_realip_module \
--with-http_image_filter_module \
--with-http_gunzip_module \
--with-http_gzip_static_module \
--with-http_stub_status_module \
--http-log-path=/var/log/nginx/access.log \
--error-log-path=/var/log/nginx/error.log

[root@localhost nginx-1.20.1]# make && make install
2.7 提供service文件,使用systemctl控制nginx
cat > /usr/lib/systemd/system/nginx.service << EOF
[Unit]
Description=Nginx server daemon
After=network.target

[Service]
Type=forking
ExecStart=/usr/local/nginx/sbin/nginx
ExecStop=/usr/local/nginx/sbin/nginx -s quit
ExecReload=/bin/kill -HUP \$MAINPID

[Install]
WantedBy=multi-user.target
EOF

// 执行完上面的命令之后再执行下面的命令,使systemctl命令生效
systemctl daemon-reload
systemctl enable --now nginx.service
3. 安装mysql
3.1 安装依赖包
[root@localhost opt]# yum -y install gcc gcc-c++ make zlib zlib-devel pcre pcre-devel openssl openssl-devel ncurses-compat-libs perl ncurses-devel cmake
3.2 下载MySQL的tar包
[root@localhost opt]# wget https://downloads.mysql.com/archives/get/p/23/file/mysql-5.7.34-linux-glibc2.12-x86_64.tar.gz -C packages

[root@localhost opt]# tar xf packages/mysql-5.7.34-linux-glibc2.12-x86_64.tar.gz -C /usr/local/
3.3 创建MySQL用户和组
[root@localhost opt]# useradd -r -M -s /sbin/nologin mysql
3.4 为了后面操作方便将mysql-5.7.32-linux-glibc2.12-x86_64目录改名或做成软连接都可以
[root@localhost local]# mv mysql-5.7.34-linux-glibc2.12-x86_64/ mysql
3.5 MySQL的属主和属组
[root@localhost local]# pwd
/usr/local
[root@localhost local]# chown -R mysql.mysql mysql
3.6 添加环境变量
[root@localhost local]# echo 'export PATH=/usr/local/mysql/bin:$PATH' > /etc/profile.d/mysql.sh
[root@localhost local]# source /etc/profile.d/mysql.sh
3.7 配置MySQL数据库的lib库文件
[root@localhost local]# vim /etc/ld.so.conf.d/mysql.conf
[root@localhost local]# cat /etc/ld.so.conf.d/mysql.conf
/usr/local/mysql/lib
[root@localhost local]# ldconfig
3.8 创建MySQL的数据目录,并修改其属主和属组
[root@localhost local]# mkdir -p /opt/data
[root@localhost local]# chown -R mysql.mysql /opt/data/
3.9 初始化数据库
[root@localhost ~]# mysqld --initialize-insecure --user mysql --datadir /opt/data/
3.10 生成MySQL配置文件
[root@localhost local]# cat > /etc/my.cnf << EOF
[mysqld]
basedir = /usr/local/mysql
datadir = /opt/data
socket = /tmp/mysql.sock
port = 3306
pid-file = /opt/data/mysql.pid
user = mysql
skip-name-resolve
EOF
3.11 配置服务启动的脚本
[root@localhost ~]# vim /usr/local/mysql/support-files/mysql.server
找到basedir和datadir然后添加下面的内容
basedir=/usr/local/mysql
datadir=/opt/data
3.12 配置系统服务使用systemctl来管理MySQL
[root@localhost ~]# cp /usr/lib/systemd/system/sshd.service /usr/lib/systemd/system/mysqld.service
[root@localhost ~]# cat /usr/lib/systemd/system/mysqld.service
[Unit]
Description=mysql server daemon
After=network.target

[Service]
Type=forking
ExecStart=/usr/local/mysql/support-files/mysql.server start
ExecStop=/usr/local/mysql/support-files/mysql.server stop
ExecReload=/bin/kill -HUP $MAINPID

[Install]
WantedBy=multi-user.target

[root@localhost ~]# systemctl daemon-reload
[root@localhost ~]# systemctl enable --now mysqld.service
设置数据库密码
[root@localhost local]# mysql
Welcome to the MySQL monitor.  Commands end with ; or \g.
Your MySQL connection id is 2
Server version: 5.7.34 MySQL Community Server (GPL)

Copyright (c) 2000, 2021, Oracle and/or its affiliates.

Oracle is a registered trademark of Oracle Corporation and/or its
affiliates. Other names may be trademarks of their respective
owners.

Type 'help;' or '\h' for help. Type '\c' to clear the current input statement.

mysql> set password = password("1");
Query OK, 0 rows affected, 1 warning (0.00 sec)
4. 安装php
需要网络仓库:curl -o /etc/yum.repos.d/CentOS-Base.repo https://mirrors.aliyun.com/repo/Centos-8.repo

[root@localhost local]# yum -y install libxml2 libxml2-devel openssl openssl-devel bzip2 bzip2-devel libcurl libcurl-devel libicu-devel libjpeg libjpeg-devel libpng libpng-devel openldap-devel  pcre-devel freetype freetype-devel gmp gmp-devel libmcrypt libmcrypt-devel readline readline-devel libxslt libxslt-devel mhash mhash-devel php-mysqlnd libsqlite3x-devel libzip-devel http://mirror.centos.org/centos/8-stream/PowerTools/x86_64/os/Packages/oniguruma-devel-6.8.2-2.el8.x86_64.rpm
4.1 下载php的tar包并解压
可以去官网下载:https://www.php.net/downloads
[root@localhost opt]# https://www.php.net/distributions/php-8.0.11.tar.gz

[root@localhost opt]# tar xf packages/php-8.0.11.tar.xz -C /usr/local/
4.2 编译安装php
[root@localhost php-8.0.11]# ./configure --prefix=/usr/local/php8  --with-config-file-path=/etc --enable-fpm --disable-debug --disable-rpath --enable-shared --enable-soap --with-openssl --enable-bcmath --with-iconv --with-bz2 --enable-calendar --with-curl --enable-exif  --enable-ftp --enable-gd --with-jpeg --with-zlib-dir --with-freetype --with-gettext --enable-mbstring --enable-pdo --with-mysqli=mysqlnd --with-pdo-mysql=mysqlnd --with-readline --enable-shmop --enable-simplexml --enable-sockets --with-zip --enable-mysqlnd-compression-support --with-pear --enable-pcntl --enable-posix

[root@localhost php-8.0.11]# make && make install
4.3 配置环境变量
[root@localhost ~]# echo 'export PATH=/usr/local/php8/bin:$PATH' > /etc/profile.d/php.sh
[root@localhost ~]# source /etc/profile.d/php.sh
4.4 配置php-fpm文件
[root@localhost php-8.0.11]# cp php.ini-production /etc/php.ini
cp:是否覆盖'/etc/php.ini'? y

[root@localhost fpm]# pwd
/usr/local/php-8.0.11/sapi/fpm
[root@localhost fpm]# cp init.d.php-fpm /etc/init.d/php-fpm

[root@localhost php-8.0.11]# chmod +x /etc/rc.d/init.d/php-fpm

[root@localhost php-8.0.11]# cp /usr/local/php8/etc/php-fpm.conf.default /usr/local/php8/etc/php-fpm.conf
[root@localhost php-8.0.11]# cp /usr/local/php8/etc/php-fpm.d/www.conf.default /usr/local/php8/etc/php-fpm.d/www.conf
[root@localhost php-8.0.11]# service php-fpm start
Starting php-fpm  done
4.5 配置系统服务使用systemctl来管理PHP
[root@localhost ~]# cp /usr/lib/systemd/system/mysqld.service /usr/lib/systemd/system/php-fpm.service
[root@localhost ~]# vim /usr/lib/systemd/system/php-fpm.service
[root@localhost ~]# cat /usr/lib/systemd/system/php-fpm.service
[Unit]
Description=php server daemon
After=network.target

[Service]
Type=forking
ExecStart=/etc/init.d/php-fpm start
ExecStop=/etc/init.d/php-fpm stop
ExecReload=/bin/kill -HUP $MAINPID

[Install]
WantedBy=multi-user.target

[root@localhost ~]# pkill php-fpm
[root@localhost ~]# systemctl enable --now php-fpm.service
Synchronizing state of php-fpm.service with SysV service script with /usr/lib/systemd/systemd-sysv-install.
Executing: /usr/lib/systemd/systemd-sysv-install enable php-fpm
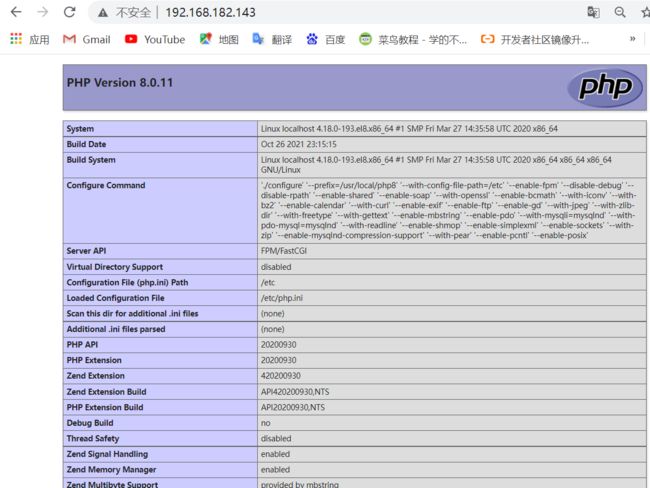
4.6 创建php访问界面
[root@localhost html]# cat index.php

[root@localhost html]# pwd
/usr/local/nginx/html
4.6 修改nginx配置文件
[root@localhost conf]# vim nginx.conf
43         location / {
 44             root   html;
 45             index index.php index.html index.htm;
 46         }

[root@localhost conf]# vim nginx.conf
[root@localhost conf]# pwd
/usr/local/nginx/conf
 65         location ~ \.php$ {
 66             root           html;
 67             fastcgi_pass   127.0.0.1:9000;
 68             fastcgi_index  index.php;
 69             fastcgi_param  SCRIPT_FILENAME  $document_root$fastcgi_script_name;  //这个地方写你你PHP页面的路径,可写绝对路径,但是最好写变量
 70             include        fastcgi_params;
 71         }