商城项目03_人人前后端项目、逆向工程、common工程搭建、coupon以及各个微服务工程搭建
文章目录
- ①. 人人前后端项目
- ②. 人人项目-逆向工程
- ③. common工程搭建
- ④. coupon、member、ware、order代码导入
①. 人人前后端项目
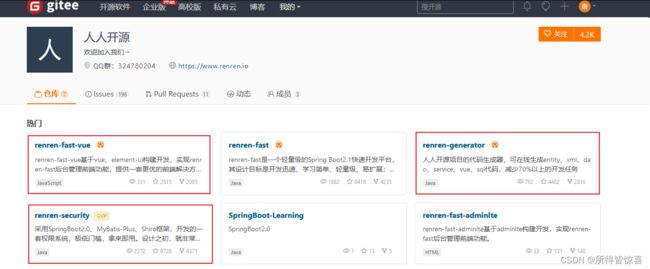
git clone https://gitee.com/renrenio/renren-fast.git
git clone https://gitee.com/renrenio/renren-fast-vue.git
-
②. 下载到了桌面,我们把renren-fast移动到我们的项目文件夹(删掉.git文件),而renren-vue是用VSCode打开的(后面再弄)

-
③. 在IDEA项目里的pom.xml添加一个renrnen-fast
    <modules>
        <module>gulimall-productmodule>
        <module>gulimall-waremodule>
        <module>gulimall-ordermodule>
        <module>gulimall-couponmodule>
        <module>gulimall-membermodule>

        <module>renren-fastmodule>
    modules>
-
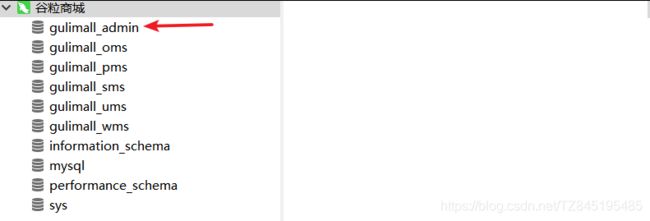
④. 然后打开renren-fast/db/mysql.sql,复制全部,在sqlyog中创建库guli-admin,粘贴刚才的内容执行

-
⑤. 然后修改项目里renren-fast中的application.yml,修改application-dev.yml中的数库库的url,通常把localhost修改为192.168.56.10即可。然后该对后面那个数据库


-
⑥. 然后运行该java项目下的RenrenApplication
浏览器输入http://localhost:8080/renren-fast/ 得到{“msg”:“invalid token”,“code”:401}就代表无误

-
⑦. 将前端工程拷贝到我们的gulimall的根目录下,分别执行如下命令即可(需要提前安装好node)
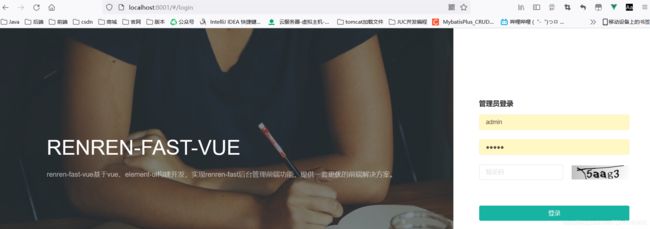
在浏览器上打开如下网址http://localhost:8001
默认密码admin admin
npm install
npm run dev
- ⑧. 如果报错,可以执行如下的操作
# 指定node-sass版本,这句等价于修改package.json文件了。
# 注意不要指定4.9.2了
npm install  node-sass@4.14
#安装其他依赖:
npm install
# 启动项目:
npm run dev
②. 人人项目-逆向工程
-
①. 逆向工程搭建(git clone https://gitee.com/renrenio/renren-generator.git)
-
②. 下载到桌面后,同样把里面的.git文件删除,然后移动到我们IDEA项目目录中,同样配置好pom.xml
<modules>
    <module>gulimall-coupon</module>
    <module>gulimall-member</module>
    <module>gulimall-order</module>
    <module>gulimall-product</module>
    <module>gulimall-ware</module>
    <module>renren-fast</module>
    <module>renren-generator</module>
</modules>
- ③. 在maven中刷新一下,让项目名变粗体,稍等下面进度条完成。修改application.yml
server:
  port: 80

# mysql
spring:
  datasource:
    type: com.alibaba.druid.pool.DruidDataSource
    #MySQL配置
    driverClassName: com.mysql.cj.jdbc.Driver
    url: jdbc:mysql://192.168.56.10:3306/gulimall_pms?useUnicode=true&characterEncoding=UTF-8&useSSL=false&serverTimezone=Asia/Shanghai
    username: root
    password: root
#代码生成器,配置信息
mainPath=com.atguigu
#包名
package=com.atguigu.gulimall
#模块名
moduleName=product
#作者信息
author=tangzhi
#Email
email=845195485@qq.com
#表前缀
tablePrefix=pms_
- ④. 运行RenrenApplication。如果启动不成功(可能是你的端口被占用了)
在网页上下方点击每页显示50个(pms库中的表),以让全部都显示,然后点击全部,点击生成代码。下载了压缩包解压压缩包,把main放到gulimall-product的同级目录下

- ⑤. 生成压缩包解压后,为main文件夹加一堆sql。将main文件夹复制到对应目录,代替原有main文件夹

③. common工程搭建
- ①. 然后在项目上右击(在项目上右击很重要)new modules— maven—然后在name上输入gulimall-common。在pom.xml中也自动添加了
gulimall-common
<dependency>
    <groupId>com.baomidougroupId>
    <artifactId>mybatis-plus-boot-starterartifactId>
    <version>3.3.2version>
dependency>

<dependency>
    <groupId>org.projectlombokgroupId>
    <artifactId>lombokartifactId>
    <version>1.18.8version>
dependency>

<dependency>
    <groupId>org.apache.httpcomponentsgroupId>
    <artifactId>httpcoreartifactId>
    <version>4.4.13version>
dependency>
<dependency>
    <groupId>commons-langgroupId>
    <artifactId>commons-langartifactId>
    <version>2.6version>
dependency>
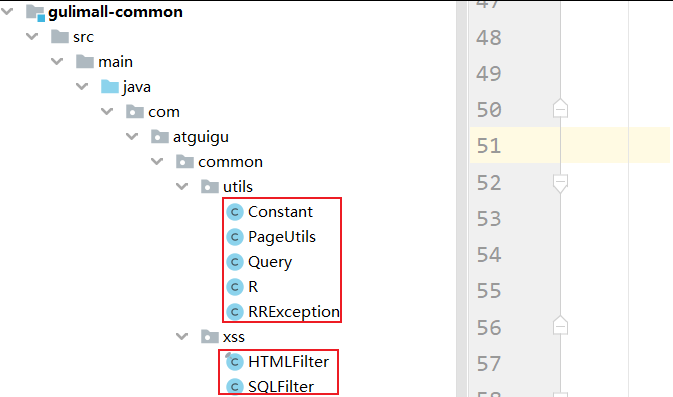
- ②. 我们把每个微服务里公共的类和依赖放到common里
<dependency>
    <groupId>com.atguigu.gulimallgroupId>
    <artifactId>gulimall-commonartifactId>
    <version>0.0.1-SNAPSHOTversion>
dependency>
-
④. 我们会发现生产的代码的controller中会有shiro的权限控制,这个时候我们在renren-generator的模板中将这些注释掉,重新生成即可
-
⑤. 在product服务中整合mybatis-plus进行整合
- 导入依赖(我们将依赖引入到commom工程中)
- 配置
(1.配置数据源(导入数据库驱动、在application.yml配置数据相关信息)
2.配置mybatisplus对应的信息(使用@MapperScan、告诉mybatis-plus sql映射文件在哪里)
3.(可配可不配) 设置自增主键在application.yml中)
在common工程导入如下jar包

<dependency>
    <groupId>mysqlgroupId>
    <artifactId>mysql-connector-javaartifactId>
    <version>8.0.17version>
dependency>

<dependency>
    <groupId>javax.servletgroupId>
    <artifactId>servlet-apiartifactId>
    <version>2.5version>
    <scope>providedscope>
dependency>
在product项目的resources目录下新建application.yml
(注意这里一定要设置字符集utf8)
# DataSource Config
spring:
  datasource:
    driver-class-name: com.mysql.jdbc.Driver
    url: jdbc:mysql://192.168.56.10:3306/gulimall_pms?serverTimezone=CTT&useUnicode=true&characterEncoding=utf-8&allowMultiQueries=true
    username: root
    password: root
# sql映射文件位置
mybatis-plus:
  # classpath*:/mapper/**/*.xml 表示不止扫描自己类路径下的mapper,其他引入的mapper也会进行扫描
  # classpath*:/mapper/**/*.xml 只扫描自己的路径下
  mapper-locations: classpath:/mapper/**/*.xml
  # 在实体类中对应数据库中的主键id属性上标注注解TableId(type='xxx')即可完成主键配置
  # @TableId(type = IdType.AUTO)
  # private Long id
  # 如下代码是mybatisplus中配置自增主键(MybatisPlus提供了全局配置,在配置文件中配置主键策略即可实现。)
  global-config:
    db-config:
      id-type: auto
//测试通过
@SpringBootTest
class gulimallProductApplicationTests {
    @Autowired
    BrandService brandService;

    @Test
    void contextLoads() {
        BrandEntity brandEntity = new BrandEntity();
        brandEntity.setName("华为");
        brandService.save(brandEntity);
        System.out.println("保存成功");
    }
}
④. coupon、member、ware、order代码导入
- ①. 优惠券服务。重新打开generator逆向工程,修改generator.properties
# 主目录
mainPath=com.atguigu
#包名
package=com.atguigu.gulimall
#模块名
moduleName=coupon
#作者
autho=tangzhi
#email
email=845195485@qq.com
#表前缀(类名不会包含表前缀) # 我们的pms数据库中的表的前缀都pms
# 如果写了表前缀,每一张表对于的javaBean就不会添加前缀了
tablePrefix=sms_
- ②. 修改yml数据库信息
spring:
  datasource:
    type: com.alibaba.druid.pool.DruidDataSource
    #MySQL配置
    driverClassName: com.mysql.cj.jdbc.Driver
    url: jdbc:mysql://192.168.56.10:3306/gulimall_sms?useUnicode=true&characterEncoding=UTF-8&useSSL=false&serverTimezone=Asia/Shanghai
    username: root
    password: root
-
③. 将生成的代码导入到各个微服务项目中(这里我们提前设置好各个微服务的端口号)
优惠券服务coupon(7000) 、用户服务member(8000)、订单服务order(9000)
商品服务product(10000)、 存储服务ware(11000) -
④. 启动微服务进行测试(响应成功表示修改成功)
http://localhost:7000/coupon/coupon/list -
⑤. 关于member、ware、order的代码导入都按照这个步骤进行


