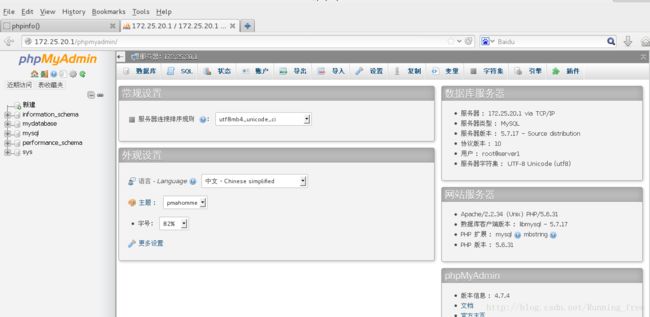
LAMP环境简单搭建
一、简介
LAMP 是Linux Apache MySQL PHP的简写,其实就是把Apache, MySQL以及PHP安装在Linux系统上,组成一个环境来运行php的脚本语言。Apache是最常用的WEB服务软件,而MySQL是比较小型的数据库软件,下面我们就来构建这个LAMP环境。
二、Apache安装
1.下载apache
- 官网地址:http://www.apache.org/
- 官网下载地址:http://mirror.bit.edu.cn/apache/httpd/
- wget http://mirror.bit.edu.cn/apache/httpd/httpd-2.2.34.tar.bz2
2.编译安装
[root@server1 ~]# useradd www
[root@server1 ~]# ls
anaconda-ks.cfg  httpd-2.2.34.tar.bz2  install.log  install.log.syslog
[root@server1 ~]# tar -xjf httpd-2.2.34.tar.bz2
[root@server1 ~]# ls
anaconda-ks.cfg  httpd-2.2.34.tar.bz2  install.log.syslog
httpd-2.2.34     install.log
[root@server1 ~]# cd httpd-2.2.34

[root@server1 httpd-2.2.34]# ./configure --prefix=/usr/local/apache --with-included-apr --enable-so --enable-deflate=shared --enable-expires=shared --enable-rewrite=shared --enable-static-support --disable-userdir

checking whether to enable mod_include... yes (default)
checking whether to enable mod_filter... yes (default)
checking whether to enable mod_substitute... no
checking whether to enable mod_charset_lite... no
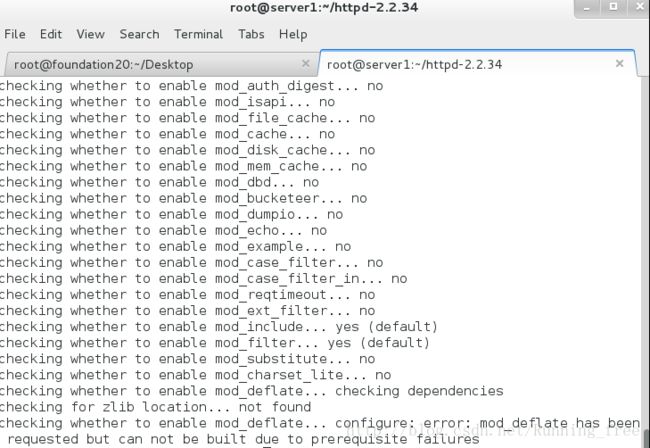
checking whether to enable mod_deflate... checking dependencies
checking for zlib location... not found
checking whether to enable mod_deflate... configure: error: mod_deflate has been requested but can not be built due to prerequisite failures        ##报错缺少zlib


[root@server1 httpd-2.2.34]# yum install -y zlib-devel.x86_64       ##缺少zlib,yum安装
[root@server1 httpd-2.2.34]# ./configure --prefix=/usr/local/apache --with-included-apr --enable-so --enable-deflate=shared --enable-expires=shared --enable-rewrite=shared --enable-static-support --disable-userdir
[root@server1 httpd-2.2.34]# make
[root@server1 httpd-2.2.34]# make install三、安装PHP
1.下载php
- 官网地址:http://www.php.net/
- 官网下载地址:http://php.net/downloads.php#v5.6.31
- wget http://cn2.php.net/distributions/php-5.6.31.tar.bz2
2.编译安装
[root@server1 ~]# yum install -y libxml2-devel.x86_64 openssl-devel.x86_64 bzip2-devel.x86_64 bzip2-devel.x86_64 t1lib.x86_64 libjpeg-turbo-devel.x86_64 libpng-devel.x86_64 freetype-devel.x86_64

[root@server1 ~]# ls
anaconda-ks.cfg  httpd-2.2.34  httpd-2.2.34.tar.bz2  install.log  install.log.syslog  php-5.6.31.tar.bz2
[root@server1 ~]# tar -xjf php-5.6.31.tar.bz2
[root@server1 ~]# cd php-5.6.31
[root@server1 php-5.6.31]# ./configure --help

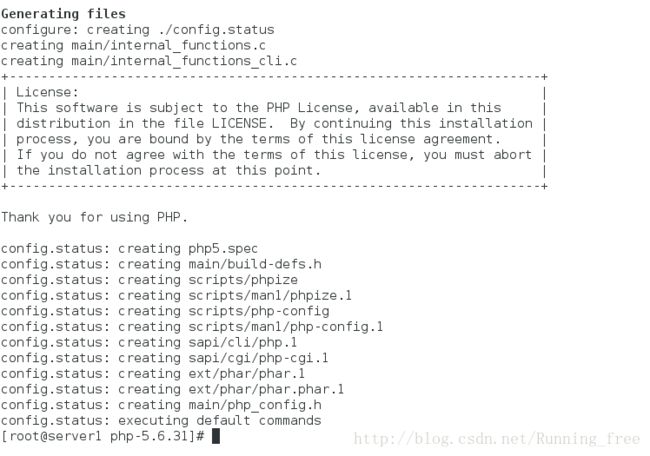
[root@server1 php-5.6.31]# ./configure --prefix=/usr/local/php \
> --with-apxs2=/usr/local/apache/bin/apxs \
> --with-config-file-path=/usr/local/php/etc \
> --with-mysql=/usr/local/mysql \
> --with-libxml-dir \
> --with-gd \
> --with-jpeg-dir \
> --with-png-dir \
> --with-freetype-dir \
> --with-iconv-dir \
> --with-zlib-dir  \
> --with-bz2 \
> --with-openssl \
> --with-mcrypt \
> --enable-soap \
> --enable-gd-native-ttf \
> --enable-ftp \
> --enable-mbstring \
> --enable-sockets \
> --enable-exif \
> --disable-ipv6


checking for working memcmp... yes
checking for stdarg.h... (cached) yes
checking for mcrypt support... yes
configure: error: mcrypt.h not found. Please reinstall libmcrypt.       ##提示找不到mcrypt.h,需要安装libmcrypt

[root@server1 php-5.6.31]#cd
[root@server1 ~]# ls
anaconda-ks.cfg       install.log                       php-5.6.31
httpd-2.2.34          install.log.syslog                php-5.6.31.tar.bz2
httpd-2.2.34.tar.bz2  libmcrypt-2.5.8-9.el6.x86_64.rpm

[root@server1 ~]# wget http://www6.atomicorp.com/channels/atomic/centos/6/x86_64/RPMS/libmcrypt-2.5.7-5.el6.art.x86_64.rpm
[root@server1 ~]# wget http://www6.atomicorp.com/channels/atomic/centos/6/x86_64/RPMS/libmcrypt-devel-2.5.7-5.el6.art.x86_64.rpm
[root@server1 ~]# yum install -y libmcrypt-2.5.8-9.el6.x86_64.rpm libmcrypt-devel-2.5.7-5.el6.art.x86_64.rpm
##再继续[root@server1 php-5.6.31]# make ##可以喝杯茶了
[root@server1 php-5.6.31]# make test
[root@server1 php-5.6.31]# make install
[root@server1 php-5.6.31]# mkdir /usr/local/php/etc
[root@server1 php-5.6.31]# cp php.ini-dist /usr/local/php/etc/php.ini这里安装完成了,如果要测试可以用以下方式
[root@server1 ~]# yun install -y httpd.x86_64
[root@server1 ~]# service httpd start
[root@server1 ~]# vim /var/www/html/index.php
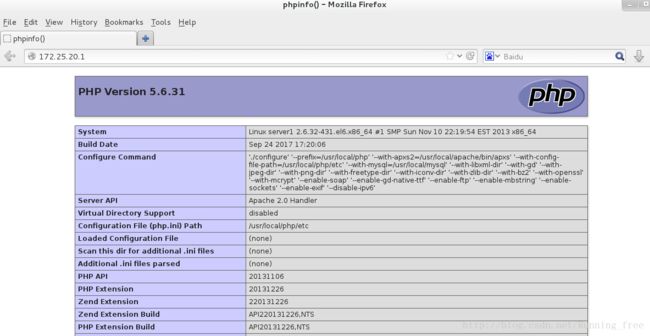
浏览器输入ip看到php的欢迎页面即为成功,由于我后面要进行apache源码编译安装,这里不做测试了
四、apache结合php
Apache主配置文件为:/usr/local/apache2/conf/httpd.conf
[root@server1 ~]# cd /usr/local/apache/conf/
[root@server1 conf]# ls
extra  httpd.conf  httpd.conf.bak  magic  mime.types  original
[root@server1 conf]# vim httpd.conf

310     AddType application/x-gzip .tgz
311     AddType application/x-httpd-php .php    ##注意 .php 前有一个空格

170
171     DirectoryIndex index.html index.htm index.php
172

391 # Server-pool management (MPM specific)
392 Include conf/extra/httpd-mpm.conf

406 # Real-time info on requests and configuration
407 Include conf/extra/httpd-info.conf
408
409 # Virtual hosts
410 Include conf/extra/httpd-vhosts.conf

418 # Various default settings
419 Include conf/extra/httpd-default.conf
配置apache的进程管理以及虚拟主机
1. 配置Apache进程管理
配置文件为:/usr/local/apache/conf/extra/httpd-mpm.conf
[root@server1 conf]# vim /usr/local/apache/conf/extra/httpd-mpm.conf

    ServerLimit          2048    新添加
    StartServers          5
    MinSpareServers      5
    MaxSpareServers      10
    MaxClients           1024 默认最大为256,设置为超过256必须增加有ServerLimit
    MaxRequestsPerChild   0
2. 配置Apache虚拟主机
配置文件为:/usr/local/apache/conf/extra/httpd-vhosts.conf
[root@server1 conf]# mkdir -p /myapache/www
[root@server1 conf]# vim /usr/local/apache/conf/extra/httpd-vhosts.conf

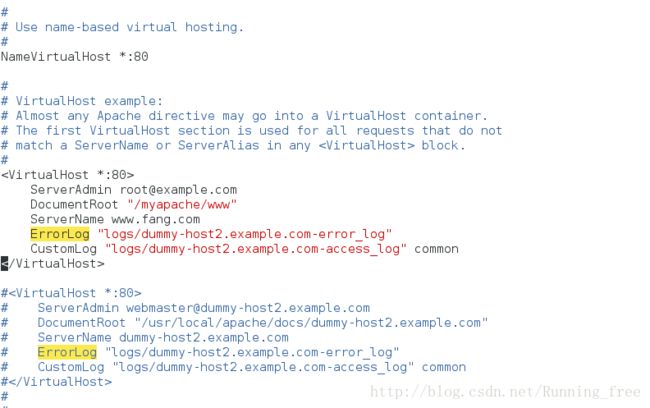
*:80>
    ServerAdmin root@example.com
    DocumentRoot "/myapache/www"
    ServerName www.fang.com
    ErrorLog "logs/dummy-host2.example.com-error_log"
    CustomLog "logs/dummy-host2.example.com-access_log" common
</VirtualHost>
说明:
ServerAdmin 参数后为管理员email
DocumentRoot 指的是域名文件存放的目录
ServerName 域名
ErrorLog 是域名错误日志
CustomLog 是域名访问日志
[root@server1 ~]# vim /usr/local/apache/conf/httpd.conf

103 #ServerName www.example.com:80
104 ServerName www.fang.com:80
3.配置Apache缺省httpd设置
配置文件为:/usr/local/apache/conf/extra/httpd-default.conf
[root@server1 conf]# vim /usr/local/apache/conf/extra/httpd-default.conf

#KeepAlive On
KeepAlive Off
4.配置Apache的访问权限
vim /usr/local/apache/conf/httpd.conf

119 <Directory />
120     Options FollowSymLinks
121     AllowOverride None
122     Order deny,allow
123     #Deny from all
124     Allow from all
125 </Directory>
5.配置Apache的运行账户
vim  /usr/local/apache/conf/httpd.conf

 70 #User daemon
 71 #Group daemon
 72 User www
 73 Group www
配置完上述内容之后,启动Apache,浏览器输入ip测试访问
[root@server1 ~]# echo "" > /myapache/www/index.php
[root@server1 conf]# ln -s /usr/local/apache/bin/apachectl /etc/init.d/
[root@server1 conf]# /etc/init.d/apachectl start
LAMP 架构简单架设
以上实现的是LAP(Linux + Apache + PHP),下面我们将进行LAMP的架设
1.安装mysql
源码编译过程较长,写在一起略显臃肿,故单独拿出来了,请移步笔者的另一篇博客《MySQL5.7.17源码编译安装与配置 》(传送门:http://t.cn/R0VhqKq)
2.启动mysql
[root@server1 ~]# /etc/init.d/mysqld status
 ERROR! MySQL is not running
[root@server1 ~]# /etc/init.d/mysqld start
Starting MySQL. SUCCESS!
[root@server1 ~]# netstat -tulnp | grep :3306      ##检查启动结果
tcp        0      0 :::3306                     :::*                        LISTEN      2281/mysqld

mysqladmin -u root password ‘mypasswd’      ##修改密码(非必须,,这里只是方便你设置成自己容易记住的密码)
3.安装配置phpMyAdmin
安装好MySQL,Apache及PHP后,为了可视化的管理MySQL数据库,我们可以安装phpMyAdmin。到其官网下载最新版本:https://www.phpmyadmin.net/
[root@server1 ~]# unzip phpMyAdmin-4.7.4-all-languages.zip
[root@server1 ~]# mv phpMyAdmin-4.7.4-all-languages/* /myapache/www/
[root@server1 phpmyadmin]# cp libraries/config.default.php config.inc.php - phpMyAdmin的配置
我们通过身份验证模式可以有两种配置方案,http和cookie身份验证模式。在这两种模式下,用户必须先在一个登录窗 口里输入MySQL数据库的有效用户名和密码,才能使用phpMyAdmin程序。这种做法有两个明显的好处;首先,因为MySQL数据库的密码没有出现在config.inc.php文件里,所以身份验证过程更加安全;其次,允许以不同的用户身份登录对自己的数据库进行管理。这两种身份验证模式尤其适合数据库中多个用户账号的情况。
第二种方案是,config身份验证模式。这种情况下,密码以明文形式保存在config.inc.php文件里。只需要把MySQL用户 名和密码直接写入到config.inc.php文件即可。这样,在登录phpMyAdmin时就不会提示输入用户名和密码了,而只直接用 config.inc.php文件里写入的用户登录 。如果只是在一个本地测试系统上使用phpMyAdmin,可以使用这种模式。
1)、http身份验证模式
如果想让phpMyAdmin使用HTTP身份验证模式,首先需要在config.inc.php文件做如下修改:
[root@server1 phpmyadmin]# vim config.inc.php

$cfg['Servers'][$i]['auth_type'] = 'http';

[root@server1 phpmyadmin]# /etc/init.d/apachectl restart
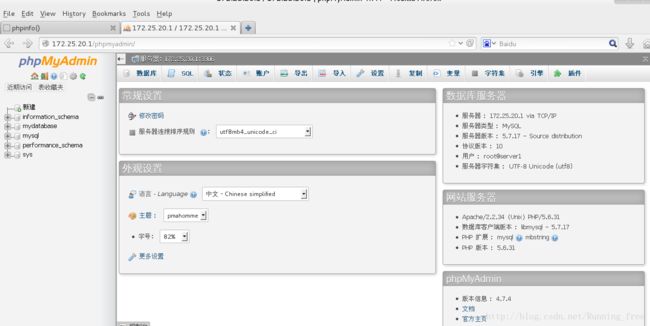
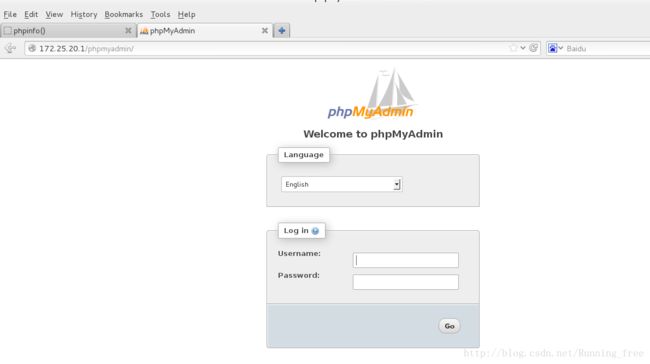
当完成设置之后,我们启动phpMyAdmin时,屏幕上将弹出一个WEB浏览器对话框,需要在这个对话框里输入MySQL用户名和密码,才能进入 phpMyAdmin操作界面。如下图示
登陆过程中可能会报错 #1130 - Host ‘server1’ is not allowed to connect to this MySQL server
如图
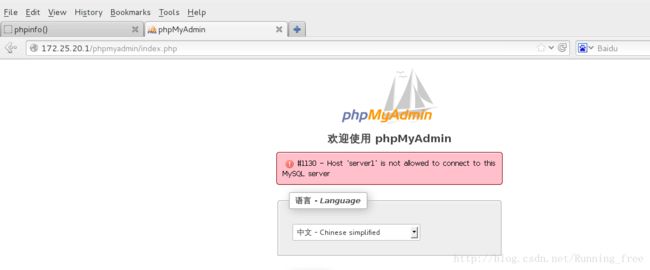
出现这种情况可能是你的帐号不允许从远程登陆,只能在localhost登陆。这个时候只要在mysqql的那台主机,登入mysql后,更改 “mysql” 数据库里的 “user” 表里的 “host” 项,从”localhost”改称”%”即可
[root@server1 ~]# mysql -uroot -pmypasswd
mysql> use mysql;
Reading table information for completion of table and column names
You can turn off this feature to get a quicker startup with -A

Database changed
mysql> select host, user from user;     ##查看一下,果然如此
+-----------+-----------+
| host      | user      |
+-----------+-----------+
| localhost | mysql.sys |
| localhost | root      |
+-----------+-----------+
2 rows in set (0.00 sec)

mysql> update user set host = '%' where user = 'root'  and host='localhost';        ##修改登陆权限
Query OK, 1 row affected (0.00 sec)
Rows matched: 1  Changed: 1  Warnings: 0

mysql> select host, user from user;
+-----------+-----------+
| host      | user      |
+-----------+-----------+
| %         | root      |
| localhost | mysql.sys |
+-----------+-----------+
2 rows in set (0.00 sec)

mysql> exit
Bye
[root@server1 ~]# /etc/init.d/mysqld restart
再登陆就ok了
2)、cookie身份验证模式
cookie身份验证模式是HTTP身份验证模式的补充,不能使用HTTP身份验证模式的场合都可以使用它。cookie身份验证模式要求用户必须允许来自phpMyAdmin的cookie进入自己的计算机。即用户需要在浏览器中开启客户端的cookie功能。
如果想让phpMyAdmin使用cookie身份验证模式,除了必须修改config.inc.php文件里的auth_type语句外, 还必须向blowfish_secret参数提供一个字符串。这个字符串可以是任意的,目的是在把登录时使用的用户和密码存储在客户端电脑上的 cookie之前,系统将会使用这个字符串对它们进行加密。在config.inc.php中修改的内容如下:
[root@server1 phpmyadmin]# vim config.inc.php

$cfg['blowfish_secret'] = 'asdfghjkl';
$cfg['Servers'][$i]['auth_type'] = 'cookie';

[root@server1 phpmyadmin]# /etc/init.d/apachectl restart3)、config身份验证模式
[root@server1 phpmyadmin]# vim config.inc.php

$cfg['Servers'][$i]['auth_type'] = 'config';
$cfg['Servers'][$i]['user'] = 'root';
$cfg['Servers'][$i]['password'] = 'mypasswd';

[root@server1 phpmyadmin]# /etc/init.d/apachectl restart