由ModuleNotFoundError: No module named ‘_ssl‘引发的一场血案
本人需要在服务器上(用户)安装cutadapt软件,安装该软件需要用到下面这个命令,非常明显使用python软件,通过pip插件线上安装cutadapt软件,于是开始了两周的拉锯战
服务器版本Red Hat Enterprise Linux Server release 6.6,老掉牙的那种
python -m pip install --user --upgrade cutadapt失败操作如下:
安装python,简单的流程化安装,网上很多教程,但是这些安装命令并不适用python3.8、python3.9等,当然最重要的是不适用服务器Linux版本。
1.需要提前安装必要模块,这些模块是运行python必须的。但是服务器上一般都有,只是可能版本比较低
yum -y install zlib zlib-devel
yum -y install bzip2 bzip2-devel
yum -y install ncurses ncurses-devel
yum -y install readline readline-devel
yum -y install openssl openssl-devel
yum -y install openssl-static
yum -y install xz lzma xz-devel
yum -y install sqlite sqlite-devel
yum -y install gdbm gdbm-devel
yum -y install tk tk-devel
yum -y install libffi libffi-devel
此时我就要呵呵了,用户无法运行yum命令,必须要root账号,幸亏是自己家的服务器,能够get到密码
但是的但是,用yum安装仍然报错“镜像上找不到相关模块”,然后就是搜各种教程,找到了比较有用的,链接如下:
https://blog.csdn.net/pysense/article/details/99736639
https://blog.csdn.net/kk185800961/article/details/45418985
以为安装流程一顿操作,修改镜像源就结束了吗?Too yong too simple
目前国内两个重要的镜像源:阿里镜像源和网易镜像源
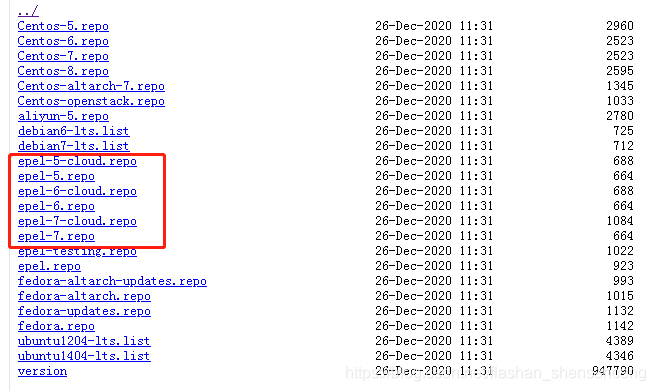
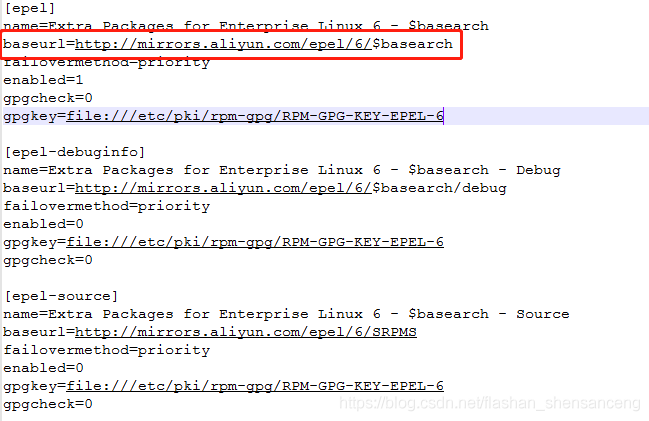
按照安装教程中下载符合服务器版本的epel-6.repo(左图),重新设置yum镜像源,仍然报错,打开该文件网址中的链接(右图),只有README文件,文件内容说网址迁移了(哔了狗了)。
ATTENTION
======================================
The contents of this directory have been moved to our archives available at:

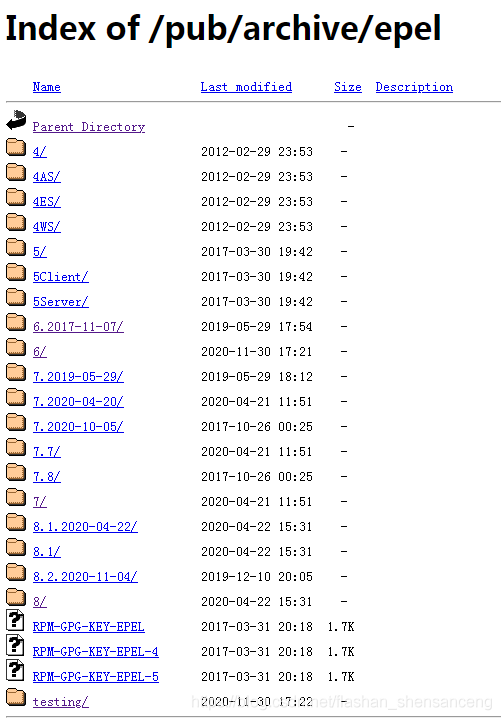
http://archives.fedoraproject.org/pub/archive/epel/

If you are having troubles finding something there please stop by #epel on irc.freenode.net
转战到以上网址,如下图,找到了package文件夹,但是感觉里边的模块很少。
总结一下:找到了四个可以下载模块的网站,但是由于本人不会设置.repo文件(改了网址之后不停地报错),就不了了之了。
PS:企业版sever4、5、6完全停止维护,所以在两个国内镜像里边完全没有相关模块。
四个有效网址:
https://archives.fedoraproject.org/pub/
http://ftp.sjtu.edu.cn/
ftp://ftp.redhat.com/
https://downloads.redhat.com/
2. 利用rpm -qa | grep
3.硬着头皮安装python,已经第N次试错
按照网上众多python安装教程,流程如下:
wget https://www.python.org/ftp/python/3.9.2/Python-3.9.2.tgz
tar zxvf Python-3.9.2.tgz
cd Python-3.9.2
./configure -prefix=/home/hanjiangang/local/python3.9.2
make
make install
运行python3.9一切正常,但是运行python -m pip install --user --upgrade cutadapt,报错:ModuleNotFoundError: No module named '_ssl',该原因是没有安装ssl模块,所以我又开始用root账号安装openssl。
4.安装openssl
由于无法使用yum安装,只能采取源码安装的方式
参考:python环境设置ssl - 简书
##下载openssl文件
wget https://www.openssl.org/source/openssl-1.1.1a.tar.gz
tar -xzvf openssl-1.1.1a.tar.gz  ##解压

#编译安装,安装路径为/usr/local/openssl
./config shared zlib  --prefix=/usr/local/openssl && make && make install
./config -t
make depend

#进入/usr/local,执行以下命令
ln -s openssl ssl  ##创立链接

#在/etc/ld.so.conf文件的最后面,添加如下内容:
/usr/local/openssl/lib

#执行以下命令
ldconfig

#设置OPESSL的环境变量,在etc/profile文件最后一行添加:
export OPENSSL=/usr/local/openssl/bin
export PATH=$OPENSSL:$PATH:$HOME/bin

ssl
5. 第N+1次安装python
修改Python3.9/Module文件夹中setup文件,修改内容如下
# Socket module helper for socket(2)
_socket socketmodule.c #安装socket模块,源码为socketmodule.c

# Socket module helper for SSL support; you must comment out the other
# socket line above, and possibly edit the SSL variable:
SSL=/usr/local/ssl
_ssl _ssl.c \         #安装ssl模块,源码为ssl.c
	-DUSE_SSL -I$(SSL)/include -I$(SSL)/include/openssl \
	-L$(SSL)/lib -lssl -lcrypto
查阅了众多资料和configure -help命令的许多参数,优化了Python3.9的安装命令.需要注意的是,最好是使用root账户安装,因为需要调用/usr/local目录
wget https://www.python.org/ftp/python/3.9.2/Python-3.9.2.tgz #下载python3.9
tar zxvf Python-3.9.2.tgz #解压
cd Python-3.9.2
./configure --prefix=/home/hanjiangang/software/python3 安装目录前缀
            --with-openssl=/usr/local #预先安装openssl目录
            --enable-optimizations #优化安装
            --with-ssl-default-suites=python #默认安装python自带的ssl,
#有些搞不清楚--with-openssl和--with-ssl-default-suites命令的区别,但是我仍然一起运行
make
make install
安装完成后提示信息如下,尤其注意最后两行安排失败的模块,为之后的报错埋下伏笔
WARNING: The script easy_install-3.9 is installed in '/home/hanjiangang/software/python3/bin' which is not on PATH.
  Consider adding this directory to PATH or, if you prefer to suppress this warning, use --no-warn-script-location.
  WARNING: The scripts pip3 and pip3.9 are installed in '/home/hanjiangang/software/python3/bin' which is not on PATH.
  Consider adding this directory to PATH or, if you prefer to suppress this warning, use --no-warn-script-location.

Python build finished successfully!
The necessary bits to build these optional modules were not found:
_hashlib              _sqlite3              _ssl
To find the necessary bits, look in setup.py in detect_modules() for the module's name.


The following modules found by detect_modules() in setup.py, have been
built by the Makefile instead, as configured by the Setup files:
_abc                  atexit                pwd
time


Failed to build these modules:
_bz2                  _ctypes
OK,此时打开python,导入ssl模块,不会报错
python3.9
import ssl
6.运行最初代码:
python -m pip install --user --upgrade cutadapt报错!!报错!!报错!!
NO ModuleNotFoundError: No module named '_ctypes',呵呵!!该报错是因为缺少glibc-2.14,安装
该问题解决后继续运行上边代码。继续报错
ModuleNotFoundError: No module named _bz2
这个问题耗时N天,最终也无法解决,与安装最后提示信息呼应上了
7.感言
对于版本较低Linux系统,尤其是Redhat企业版4、5、6已经完全停止维护的版本基本上可以放弃通过这种方式安装python了。此外,这种安装方式也不适合非root用户。之后我采用了另一种方法成功的安装了python,并且成功运行,详见另一篇文章。希望我遇到的问题可以给同样困惑的伙伴一些灵感,虽然我并没有用这种方式成功安装python。


