seaborn从入门到精通03-绘图功能实现01-关系绘图
seaborn从入门到精通03-绘图功能实现01-关系绘图
-
- 总结
- 参考
- 关系-分布-分类
- 关系绘图-Visualizing statistical relationships
-
- 散点图表示变量关系-replot
-
- 案例1-关系散点图replot
- 案例2-添加hue参数和style参数
- 案例3-添加size参数和sizes参数
- 案例4-添加col和row参数
- 案例5-添加col_wrap
- 散点图表示变量关系-scatter
-
- 案例1-结合子图绘制散点图
- 案例2-指定hue分类,style样式,size大小
- 线图绘制变量关系-relplot
-
- 读取数据-flights dataset
- 案例1-折线图基于replot
- 线图绘制变量关系-lineplot
-
- 读取数据-flights dataset
- 案例1-折线图基于replot-单线
- 案例2-折线图基于lineplot-多线
- 案例3-折线图基于lineplot-显示置信区间
- 案例4-折线图-指定方向
总结
本文主要是seaborn从入门到精通系列第3篇,本文介绍了seaborn的绘图功能实现,本文是关系绘图,同时介绍了较好的参考文档置于博客前面,读者可以重点查看参考链接。本系列的目的是可以完整的完成seaborn从入门到精通。重点参考连接
![]()
参考
seaborn官方
seaborn官方介绍
seaborn可视化入门
【宝藏级】全网最全的Seaborn详细教程-数据分析必备手册(2万字总结)
Seaborn常见绘图总结
关系-分布-分类
relational “关系型”
distributional “分布型”
categorical “分类型”
关系绘图-Visualizing statistical relationships
Statistical analysis is a process of understanding how variables in a dataset relate to each other and how those relationships depend on other variables. Visualization can be a core component of this process because, when data are visualized properly, the human visual system can see trends and patterns that indicate a relationship.
统计分析是一个理解数据集中的变量如何相互关联以及这些关系如何依赖于其他变量的过程。可视化可以是这个过程的核心组成部分,因为当数据被正确地可视化时,人类的视觉系统可以看到表明关系的趋势和模式。
We will discuss three seaborn functions in this tutorial. The one we will use most is relplot(). This is a figure-level function for visualizing statistical relationships using two common approaches: scatter plots and line plots. relplot() combines a FacetGrid with one of two axes-level functions:
我们将在本教程中讨论三个seaborn函数。我们将使用最多的一个是relplot()。这是一种用两种常见方法可视化统计关系的数字级函数:scatter plots 和line plots。relplot()结合了一个由两个轴级函数之一的FacetGrid:scatterplot() (with kind=“scatter”; the default)
lineplot() (with kind=“line”)
As we will see, these functions can be quite illuminating because they use simple and easily-understood representations of data that can nevertheless represent complex dataset structures. They can do so because they plot two-dimensional graphics that can be enhanced by mapping up to three additional variables using the semantics of hue, size, and style.
正如我们所看到的,这些函数可以很有启发性,因为它们使用简单易懂的数据表示,而数据可以表示复杂的数据集结构。它们可以这样做,因为它们绘制二维图形,可以通过使用色相、大小和样式的语义映射到三个额外的变量。
import numpy as np
import pandas as pd
import matplotlib.pyplot as plt
import seaborn as sns
sns.set_theme(style="darkgrid")
散点图表示变量关系-replot
参考:http://seaborn.pydata.org/generated/seaborn.relplot.html
seaborn.relplot(data=None, *, x=None, y=None, hue=None, size=None, style=None, units=None, row=None, col=None, col_wrap=None,
row_order=None, col_order=None, palette=None, hue_order=None, hue_norm=None, sizes=None, size_order=None, size_norm=None,
markers=None, dashes=None, style_order=None, legend='auto', kind='scatter', height=5, aspect=1, facet_kws=None, **kwargs)
在所有的seaborn绘图时,里面的参数是众多的,但是不用担心,大部分参数是相同的,只有少部分存在差异,有些通过对单词的理解就可知道其含义,这里我只根据每个具体的图形重要的参数做一些解释,并简单的介绍这些常用参数的含义。
x,y:容易理解就是你需要传入的数据,一般为dataframe中的列;
hue:也是具体的某一可以用做分类的列,作用是分类;
data:是你的数据集,可要可不要,一般都是dataframe;
style:绘图的风格(后面单独介绍);
size:绘图的大小(后面介绍);
palette:调色板(后面单独介绍);
markers:绘图的形状(后面介绍);
ci:允许的误差范围(空值误差的百分比,0-100之间),可为‘sd’,则采用标准差(默认95);
n_boot(int):计算置信区间要使用的迭代次数;
alpha:透明度;
x_jitter,y_jitter:设置点的抖动程度。
import numpy as np
import pandas as pd
import matplotlib.pyplot as plt
import seaborn as sns
sns.set_theme(style="darkgrid")

tips = sns.load_dataset("tips",cache=True,data_home=r'.\seaborn-data')
tips.head()
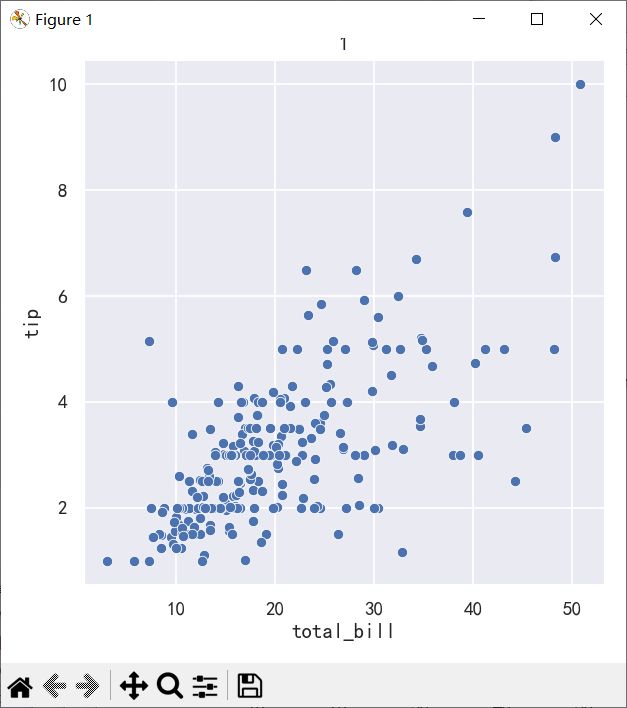
案例1-关系散点图replot
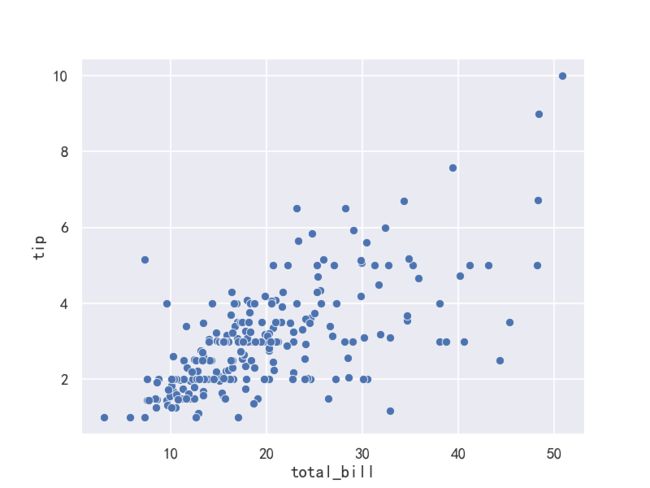
ax =sns.relplot(data=tips, x="total_bill", y="tip")
ax.figure.set_size_inches(5,5)
plt.title("1")
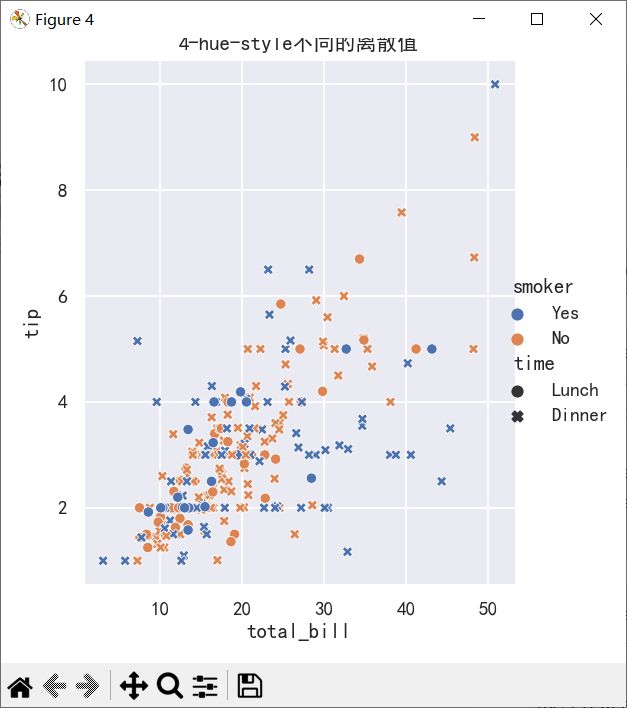
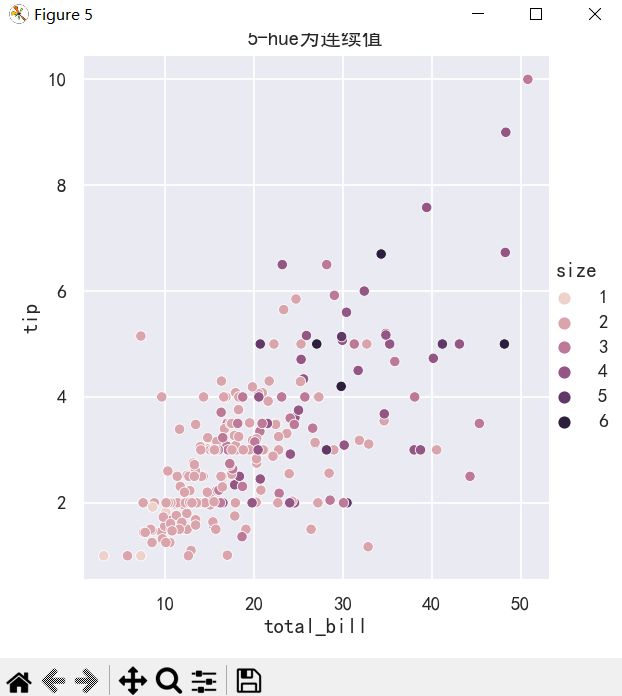
案例2-添加hue参数和style参数
# hue参数是用来控制第三个变量的颜色显示的
ax=sns.relplot(data=tips, x="total_bill", y="tip", hue="smoker")
ax.figure.set_size_inches(5,5)
plt.title("2-hue-分类")
# hue参数是用来控制第三个变量的颜色显示的 style为标记样式
ax=sns.relplot(
    data=tips,
    x="total_bill", y="tip", hue="smoker", style="smoker"
)
ax.figure.set_size_inches(5,5)

plt.title("3-hue-style-相同的离散值")
ax=sns.relplot(
    data=tips,
    x="total_bill", y="tip", hue="smoker", style="time",
)
ax.figure.set_size_inches(5,5)
plt.title("4-hue-style不同的离散值")
ax=sns.relplot(
    data=tips, x="total_bill", y="tip", hue="size",
)
ax.figure.set_size_inches(5,5)
plt.title("5-hue为连续值")

plt.show()
案例3-添加size参数和sizes参数
sns.relplot(
    data=tips, x="total_bill", y="tip",
    size="size", sizes=(15, 200)
)
ax.figure.set_size_inches(5,5)
plt.title("6-指定点大小以及点范围")
案例4-添加col和row参数
col和row,可以将图根据某个属性的值的个数分割成多列或者多行。比如在以上图的基础之上我们想要把Lunch(午餐)和Dinner(晚餐)分割成两个图来显示,再在row上添加一个新的变量,比如把性别按照行显示出来,那么可以通过以下代码来实现:
ax=sns.relplot(x="total_bill",y="tip",hue="day",
            col="time",row="sex",data=tips)
# ax.figure.set_size_inches(5,5)
plt.suptitle("7-指定col和row")
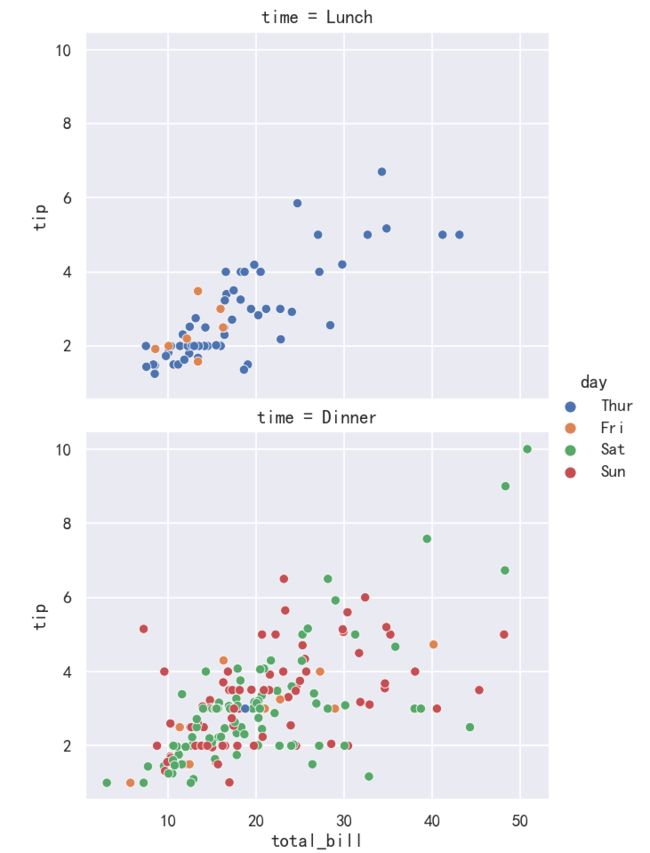
案例5-添加col_wrap
有时候我们的图有很多,默认情况下会在一行中全部展示出来,那么我们可以通过col_wrap来指定具体多少列。
sns.relplot(x="total_bill",y="tip",hue="day",
            col="time",col_wrap=1,data=tips)
散点图表示变量关系-scatter
参考:
http://seaborn.pydata.org/generated/seaborn.scatterplot.html
seaborn.scatterplot(data=None, *, x=None, y=None, hue=None, size=None, style=None, palette=None, hue_order=None,
hue_norm=None, sizes=None, size_order=None, size_norm=None, markers=True, style_order=None, legend='auto', ax=None, **kwargs)
案例1-结合子图绘制散点图
fig,axes=plt.subplots(1,1)
ax = sns.scatterplot(x="total_bill", y="tip", data=tips,ax=axes)
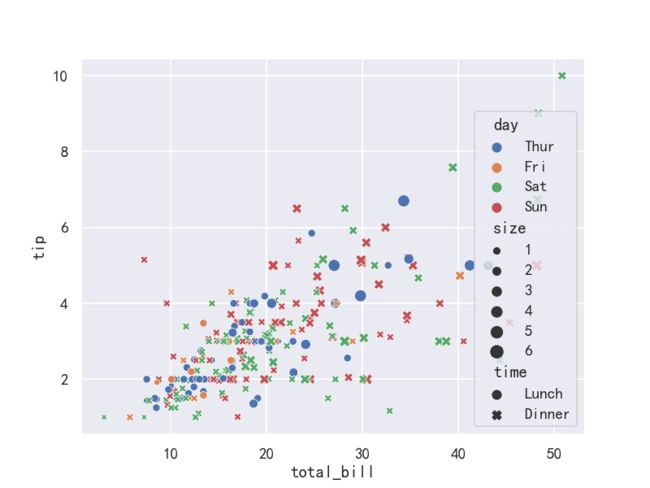
案例2-指定hue分类,style样式,size大小
fig,axes=plt.subplots(1,1)

ax = sns.scatterplot(x="total_bill", y="tip",hue="day",
 style="time",size='size',data=tips,ax=axes)
线图绘制变量关系-relplot
读取数据-flights dataset
flights dataset航班数据集有10年的每月航空乘客数据:
import numpy as np
import pandas as pd
import matplotlib.pyplot as plt
import matplotlib as  mpl
import seaborn as sns
sns.set_theme(style="darkgrid")

mpl.rcParams['font.sans-serif']=['SimHei']
mpl.rcParams['axes.unicode_minus']=False

flights = sns.load_dataset("flights",cache=True,data_home=r'.\seaborn-data')
flights.head()
year month passengers
0 1949 Jan 112
1 1949 Feb 118
2 1949 Mar 132
3 1949 Apr 129
4 1949 May 121
案例1-折线图基于replot
may_flights = flights.query("month == 'May'")
sns.relplot(data=may_flights, x="year", y="passengers",kind="line")
线图绘制变量关系-lineplot
参考:http://seaborn.pydata.org/generated/seaborn.lineplot.html
seaborn.lineplot(data=None, *, x=None, y=None, hue=None, size=None, style=None, units=None, palette=None, hue_order=None,
hue_norm=None, sizes=None, size_order=None, size_norm=None, dashes=True, markers=None, style_order=None, estimator='mean',
errorbar=('ci', 95), n_boot=1000, seed=None, orient='x', sort=True, err_style='band', err_kws=None, legend='auto',
ci='deprecated', ax=None, **kwargs)
读取数据-flights dataset
flights dataset航班数据集有10年的每月航空乘客数据:
import numpy as np
import pandas as pd
import matplotlib.pyplot as plt
import matplotlib as  mpl
import seaborn as sns
sns.set_theme(style="darkgrid")

mpl.rcParams['font.sans-serif']=['SimHei']
mpl.rcParams['axes.unicode_minus']=False

flights = sns.load_dataset("flights",cache=True,data_home=r'.\seaborn-data')
flights.head()
year month passengers
0 1949 Jan 112
1 1949 Feb 118
2 1949 Mar 132
3 1949 Apr 129
4 1949 May 121
案例1-折线图基于replot-单线
may_flights = flights.query("month == 'May'")
sns.lineplot(data=may_flights, x="year", y="passengers")
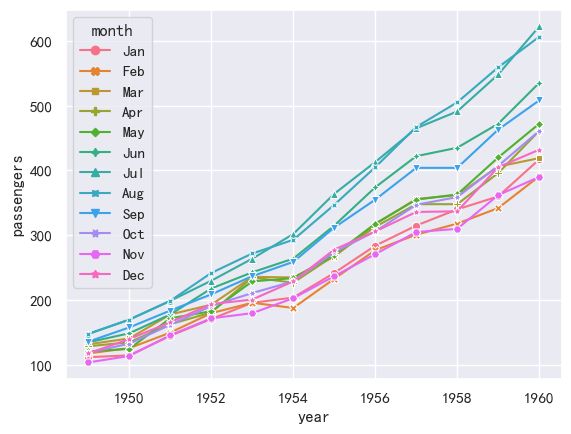
案例2-折线图基于lineplot-多线
#使用标记而不是破折号来识别组
ax = sns.lineplot(x="year", y="passengers",hue="month", style="month",
markers=True, dashes=False, data=flights)
案例3-折线图基于lineplot-显示置信区间
以长期模式传递整个数据集将对重复值(每年)进行聚合,以显示平均值和95%置信区间:
ax = sns.lineplot(x="year", y="passengers",data=flights)

置信区间是使用自举计算的,对于较大的数据集,这可能是时间密集型的。因此可以禁用它们:
ax = sns.lineplot(x="year", y="passengers",data=flights,errorbar=None,)
另一个很好的选择,特别是对于较大的数据,是通过绘制标准偏差而不是置信区间来表示每个时间点的分布分布:
ax = sns.lineplot(x="year", y="passengers",data=flights,errorbar="sd",)
案例4-折线图-指定方向
使用orient参数沿图的垂直维度进行聚合和排序:
sns.lineplot(data=flights, x="passengers", y="year", orient="y")

