Spring实例化Bean的三种方法
在面向对象的程序中,要想调用某个类的成员方法,就需要先实例化该类的对象。在 Spring 中,实例化 Bean 有三种方式,分别是构造器实例化、静态工厂方式实例化和实例工厂方式实例化。本节将针对这三种方式分别进行讲解。
构造器实例化
构造器实例化是指 Spring 容器通过 Bean 对应的类中默认的构造函数实例化 Bean。下面通过案例演示如何使用构造器实例化 Bean。
1. 创建项目并导入 JAR 包
在 MyEclipse 中创建一个名称为 springDemo02 的 Web 项目,然后将 Spring 支持和依赖的 JAR 包复制到项目的 lib 目录中,并发布到类路径下。
2. 创建实体类
在项目的 src 目录下创建一个名为 com.mengma.instance.constructor 的包,在该包下创建一个实体类 Person1,如下所示。
package com.mengma.instance.constructor;
public class Person1 {
}
3. 创建 Spring 配置文件
在 com.mengma.instance.constructor 包下创建 Spring 的配置文件 applicationContext.xml,编辑后如下所示。
在上述配置中,定义了一个 id 为 person1 的 Bean,其中 class 属性指定了其对应的类为 Person1。
4. 创建测试类
在 com.mengma.instance.constructor 包下创建一个名为 InstanceTest1 的测试类,编辑后如下所示。
package com.mengma.instance.constructor;
import org.junit.Test;
import org.springframework.context.ApplicationContext;
import org.springframework.context.support.ClassPathXmlApplicationContext;
public class InstanceTest1 {
@Test
public void test() {
// 定义Spring配置文件的路径
String xmlPath = "com/mengma/instance/constructor/ApplicationContext.xml";
// 初始化Spring容器,加载配置文件,并对bean进行实例化
ApplicationContext applicationContext = new ClassPathXmlApplicationContext(
xmlPath);
// 通过容器获取id为person1的实例
System.out.println(applicationContext.getBean("person1"));
}
}
上述文件中,首先在 test() 方法中定义了 Spring 配置文件的路径,然后 Spring 容器会加载配置文件。在加载的同时,Spring 容器会通过实现类 Person1 中默认的无参构造函数对 Bean 进行实例化。
5. 运行程序并查看结果
使用 JUnit 测试运行 test() 方法,运行成功后,控制台的输出结果如图 1 所示。
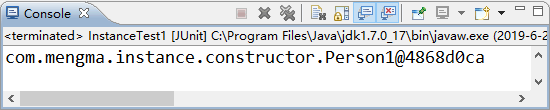
图 1 输出结果
从图 1 的输出结果中可以看出,Spring 容器已经成功对 Bean 进行了实例化,并输出了结果。
注意:为了方便读者的学习,本节中的所有配置文件和 Java 文件都根据知识点放置在同一个包中。在实际开发中,为了方便管理和维护,建议将这些文件根据类别放置在不同目录中。
静态工厂方式实例化
在 Spring 中,也可以使用静态工厂的方式实例化 Bean。此种方式需要提供一个静态工厂方法创建 Bean 的实例。下面通过案例演示如何使用静态工厂方式实例化 Bean。
1. 创建实体类
在项目的 src 目录下创建一个名为 com.mengma.instance.static_factory 的包,并在该包下创建一个实体类 Person2,该类与 Person1 相同,不需要添加任何成员。
2. 创建静态工厂类
在 com.mengma.instance.static_factory 包下创建一个名为 MyBeanFactory 的类,并在该类中创建一个名为 createBean() 的静态方法,用于创建 Bean 的实例,如下所示。
package com.mengma.instance.static_factory;
public class MyBeanFactory {
// 创建Bean实例的静态工厂方法
public static Person2 createBean() {
return new Person2();
}
}
3. 创建 Spring 配置文件
在 com.mengma.instance.static_factory 包下创建 Spring 的配置文件 applicationContext.xml,编辑后如下所示。
上述代码中,定义了一个 id 为 person2 的 Bean,其中 class 属性指定了其对应的工厂实现类为 MyBeanFactory,而 factory-method 属性用于告诉 Spring 容器调用工厂类中的 createBean() 方法获取 Bean 的实例。
4. 创建测试类
在 com.mengma.instance.static_factory 包下创建一个名为 InstanceTest2 的测试类,编辑后如下所示。
package com.mengma.instance.static_factory;
import org.junit.Test;
import org.springframework.context.ApplicationContext;
import org.springframework.context.support.ClassPathXmlApplicationContext;
public class InstanceTest2 {
@Test
public void test() {
// 定义Spring配置文件的路径
String xmlPath = "com/mengma/instance/static_factory/applicationContext.xml"; // 初始化Spring容器,加载配置文件,并对bean进行实例化
ApplicationContext applicationContext = new ClassPathXmlApplicationContext(
xmlPath);
// 通过容器获取id为person2实例
System.out.println(applicationContext.getBean("person2"));
}
}
5. 运行程序并查看结果
使用 JUnit 测试运行 test() 方法,运行成功后,控制台的输出结果如图 2 所示。
从图 2 的输出结果中可以看出,使用静态工厂的方式也成功对 Bean 进行了实例化。
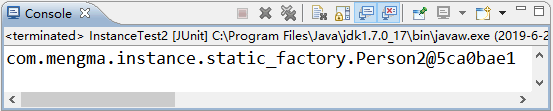
图 2 输出结果
实例工厂方式实例化
在 Spring 中,还有一种实例化 Bean 的方式就是采用实例工厂。在这种方式中,工厂类不再使用静态方法创建 Bean 的实例,而是直接在成员方法中创建 Bean 的实例。
同时,在配置文件中,需要实例化的 Bean 也不是通过 class 属性直接指向其实例化的类,而是通过 factory-bean 属性配置一个实例工厂,然后使用 factory-method 属性确定使用工厂中的哪个方法。下面通过案例演示实例工厂方式的使用。
1. 创建实体类
在项目的 src 目录下创建一个名为 com.mengma.instance.factory 的包,在该包下创建一个 Person3 类,该类与 Person1 类相同,不需要添加任何成员。
2. 创建实例工厂类
在 com.mengma.instance.factory 包下创建一个名为 MyBeanFactory 的类,编辑后如下所示。
package com.mengma.instance.factory;
public class MyBeanFactory {
public MyBeanFactory() {
System.out.println("person3工厂实例化中");
}
// 创建Bean的方法
public Person3 createBean() {
return new Person3();
}
}
上述代码中,使用默认无参的构造方法输出 person3 工厂实例化中语句,使用 createBean 成员方法创建 Bean 的实例。
3. 创建 Spring 配置文件
在 com.mengma.instance.factory 包下创建 Spring 的配置文件 applicationContext.xml,如下所示。
上述代码中,首先配置了一个实例工厂 Bean,然后配置了需要实例化的 Bean。在 id 为 person3 的 Bean 中,使用 factory-bean 属性指定一个实例工厂,该属性值就是实例工厂的 id 属性值。使用 factory-method 属性确定使用工厂中的 createBean() 方法。
4. 创建测试类
在 com.mengma.instance.factory 包下创建一个名为 InstanceTest3 的测试类,编辑后如下所示。
package com.mengma.instance.factory;
import org.junit.Test;
import org.springframework.context.ApplicationContext;
import org.springframework.context.support.ClassPathXmlApplicationContext;
public class InstanceTest3 {
@Test
public void test() {
// 定义Spring配置文件的路径
String xmlPath = "com/mengma/instance/factory/applicationContext.xml"; // 初始化Spring容器,加载配置文件,并对bean进行实例化
// 初始化Spring容器,加载配置文件,并对bean进行实例化
ApplicationContext applicationContext = new ClassPathXmlApplicationContext(
xmlPath);
// 通过容器获取id为person3实例
System.out.println(applicationContext.getBean("person3"));
}
}
5. 运行程序并查看结果
使用 JUnit 测试运行 test() 方法,运行成功后,控制台的输出结果如图 3 所示。
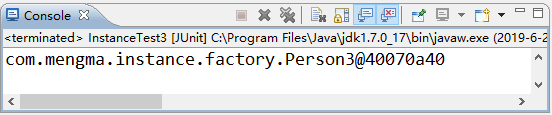
图 3 输出结果
从图 3 的输出结果中可以看出,使用实例工厂的方式也同样对 Bean 进行了实例化。