Vue Router路由常用功能总结
Vue Router路由常用功能总结
- 一、前言
- 二、安装
-
- 1. vueCLI安装
- 2. npm安装
- 三、路由配置及使用:
-
- 1. 基本配置:
- 2. 动态路由:
- 3. 嵌套路由:
- 四、编程式的导航
- 五、重定向
-
- 1. 基础知识
- 2. 搭配嵌套路由使用例子
- 六、HTML5 History 模式
-
- 1. hash模式
- 2. history模式
- 七、导航守卫
-
- 1. 铺垫知识
- 2. 全局前置守卫
- 3. 路由独享的守卫
- 4. 组件内的守卫
- 八、路由元信息
一、前言
Vue Router是vue的核心插件之一 。Vue Router路由常常用于对组件进行映射与跳转。如此更方便我们实现不同页面组件的切换而实现传统网页a链接跳转的相似功能,也支持我们对子组件进行管理、放置。
注:文章用于记录总结Vue Router路由常用功能,案例基于vue2编写。详细介绍可见下方文档:
Vue Router(v3.x)
二、安装
1. vueCLI安装
推荐在使用vue脚手架安装项目时选择上路由配置;或可以以项目插件的形式添加 Vue Router,控制台输入如下命令:
vue add router
2. npm安装
若项目已经创建好后,则可以使用npm的安装方法,控制台输入如下命令等待即可完成安装:
npm install vue-router
三、路由配置及使用:
1. 基本配置:
- “path” 用于配置访问路径
- “name” 用于给该路由命名
- “component” 表示需要映射的组件
import Vue from 'vue'
import VueRouter from 'vue-router'
//组件懒加载形式导入
const Home = () => import('../views/Home.vue')
const About = () => import('../views/About.vue')

Vue.use(VueRouter)

const routes = [
  {
    path: '/',
    name: 'Home',
    component: Home
  },
  {
    path: '/about',
    name: 'About',
    component: About
  }
]

const router = new VueRouter({
  routes
})

export default router
- router-link 链接到一个路由可以使用 “path” 和 "name"的不同方法
<router-link to="/Home">Home</router-link> |
<router-link :to="{name:'About'}">About</router-link>
2. 动态路由:
我们有时需要把匹配某种模式下的路由映射到同个组件中,例如有一个商品详情的组件,我们需要让不同的商品id都映射到这个组件中,此时就需要用到动态路由。
- 一个“路径参数”使用冒号 : 标记。当匹配到一个路由时,参数值会被设置到 this.$route.params,可以在每个组件内使用。
{
  path: '/DynamicRouting/:id',
  name: 'DynamicRouting',
  component: DynamicRouting
}
在页面组件中跳转路由时需要配置传递的同名参数值:
- 拼接 url 传递参数值
- 或 “params” 中传递参数值
<router-link to="/DynamicRouting/1">DynamicRouting1router-link> |
<router-link :to="{name:'DynamicRouting',params: { id: 2 }}">DynamicRouting2router-link> |
<template>

  <div class="DynamicRouting">
    <h1>This is an DynamicRouting{{this.$route.params.id}} pageh1>
  div>
template>
3. 嵌套路由:
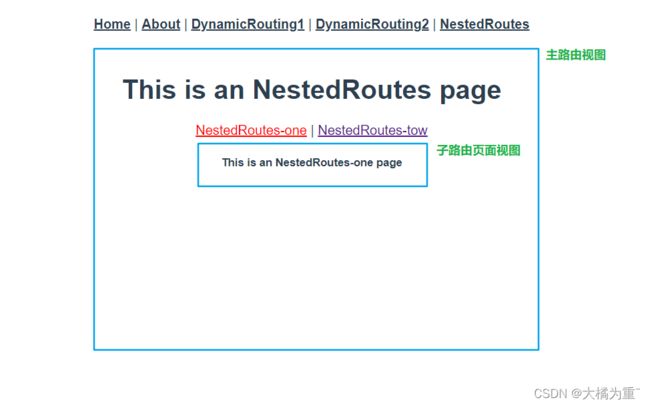
当我们的页面需要多层嵌套的组件组合而成时,便需要使用到嵌套路由。
- 在 router 的 index.js 文件中,通过给主路由添加children 项,可实现嵌套路由
- 注意:子路由的 “path” 项无需 “/” 前缀
- 在该主路由组件中设置,可用于加载自己的嵌套路由
- 若在 router-link 直接填写地址,则需要填写完整地址
{
  path: '/NestedRoutes',
  name: 'NestedRoutes',
  component: NestedRoutes,
  // "children" 配置嵌套的路由
  children:[
    {
      path: 'NestedRoutes-one',
      name: 'NestedRoutes-one',
      component: NestedRoutes_one
    },
    {
      path: 'NestedRoutes-tow',
      name: 'NestedRoutes-tow',
      component: NestedRoutes_tow
    }
  ]
}
<template>
  <div class="NestedRoutes">
    <h1>This is an NestedRoutes pageh1>
    <router-link to="/NestedRoutes/NestedRoutes-one">NestedRoutes-onerouter-link> |
    <router-link :to="{name:'NestedRoutes-tow'}">NestedRoutes-towrouter-link>

    <router-view/>
  div>
template>
四、编程式的导航
| 编程形式 | 操作 |
|---|---|
| this.$router.push(…) | 方法会向 history 栈添加一个新的记录,当用户点击浏览器后退按钮时,则回到之前的 URL |
| this.$router.replace(…) | 不会向 history 添加新记录,而是替换掉当前的 history 记录 |
| this.$router.go(n) | 意思是在 history 记录中向前或者后退n步 |
| 例子: |
// 字符串
this.$router.push('/home')
// 对象
this.$router.push({ path: '/home' })
// 命名的路由
this.$router.push({ name: 'user', params: { userId: '123' }})
// 字符串
this.$router.replace('/home')
// 对象
this.$router.replace({ path: '/home' })
// 命名的路由
this.$router.replace({ name: 'user', params: { userId: '123' }})
// 在浏览器记录中前进一步,等同于 history.forward()
router.go(1)
// 后退一步记录,等同于 history.back()
router.go(-1)
五、重定向
1. 基础知识
- 通过给路由配置 “redirect” 字段用于对当前路由地址进行更改,重新定位到另一地址
如:
//当用户访问 /home时,URL 将会被替换成 /about,然后匹配路由为 /about
{
  path: '/home',
  name: 'Home',
  component: Home,
  redirect:to=>{
    return '/about'
  }
}
2. 搭配嵌套路由使用例子
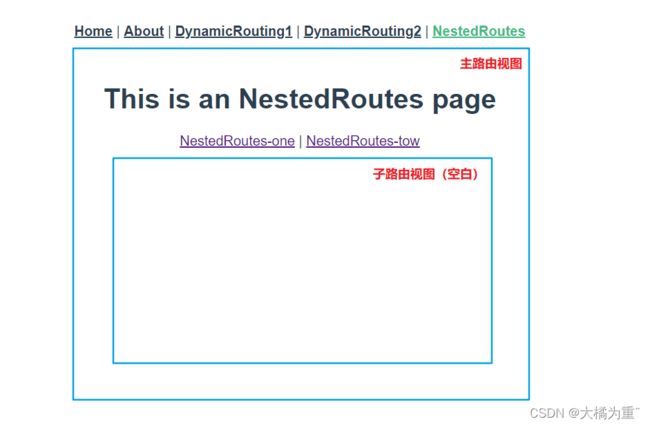
当页面配置了嵌套路由时,点击跳转该子路由的主路由时会出行主路由页面 “router-view视图” 空白的情况,如:

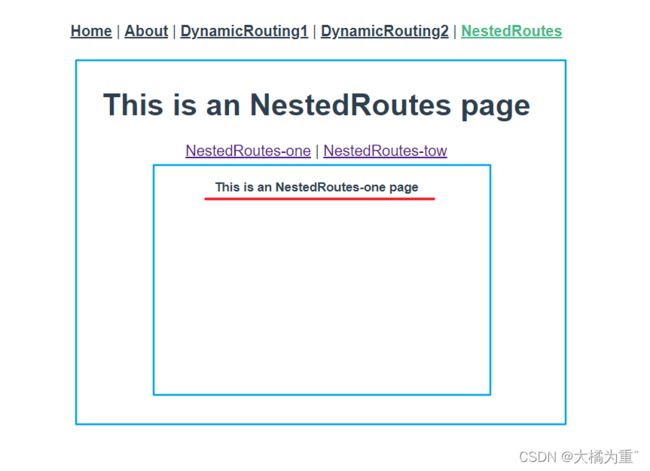
这是因为子路由并未被映射渲染,可以通过路由重定向的方法完善该问题:
{
  path: '/NestedRoutes',
  name: 'NestedRoutes',
  component: NestedRoutes,
  //重定向到第一个子路由
  redirect: to => {
    return '/NestedRoutes/NestedRoutes-one'
  },
  // "children" 配置嵌套路由
  children:[
    {
      path: 'NestedRoutes-one',
      name: 'NestedRoutes-one',
      component: NestedRoutes_one,
      meta: {
        title: "NestedRoutes_tow",
        flag:true,
      }
    },
    {
      path: 'NestedRoutes-tow',
      name: 'NestedRoutes-tow',
      component: NestedRoutes_tow,
      meta: {
        title: "NestedRoutes_tow",
        flag: false
      }
    }
  ]
六、HTML5 History 模式
1. hash模式
vue-router 默认 hash 模式 —— 使用 URL 的 hash 来模拟一个完整的 URL,于是当 URL 改变时,页面不会重新加载。
- 使用hash模式,地址中永远带着#号
const router = new VueRouter({
  routes
})
2. history模式
- 使用history模式,地址中不会带着#号,较为美观
- 应用部署上线时需要后端做相应设置,否则将会出行页面服务端404的问题。
const router = new VueRouter({
  mode: 'history',
  routes
})
七、导航守卫
1. 铺垫知识
导航守卫的参数意义如下
-
to: 即将要进入的目标路由对象
-
from: 当前导航正要离开的路由
-
next(): 调用该方法用来定义路由跳转规则,调用方法如下:
| 类型 | 操作 |
|---|---|
| next() | 允许当前的跳转进行 |
| next(‘/’) 、next({ path: ‘/’ }) | 跳转到一个不同的地址,当前的导航被中断,然后进行一个新的导航 |
2. 全局前置守卫
router.beforeEach((to, from, next) => {
  // 进行相关配置
})
3. 路由独享的守卫
{
  path: '/about',
  name: 'About',
  component: About,
  beforeEnter: (to, from, next) => {
  	// 进行相关配置
  }
},
4. 组件内的守卫
beforeRouteEnter(to, from, next) {
    // 在渲染该组件的对应路由被 confirm 前调用(组件创建前调用)
    // 不能获取组件实例 `this`
    // 因为当守卫执行前,组件实例还没被创建
    console.log("beforeRouteEnter",to,from);
    next()
  },
  beforeRouteUpdate(to, from, next) {
    // 在当前路由改变,但是该组件被复用时调用
    // 举例来说,对于一个带有动态参数的路径 /foo/:id,在 /foo/1 和 /foo/2 之间跳转的时候,由于会渲染同样的 Foo 组件,因此组件实例会被复用。而这个钩子就会在这个情况下被调用。
    // 可以访问组件实例 `this`
    console.log("beforeRouteUpdate",to,from);
    next()
  },
  beforeRouteLeave(to, from, next) {
    // 导航离开该组件的对应路由时调用
    // 可以访问组件实例 `this`
    console.log("beforeRouteLeave",to,from);
    next()
  }
注:以上导航守卫是我自己常用的部分,其它导航守卫的详细知识可见官方文档 “导航守卫 | Vue Router”
八、路由元信息
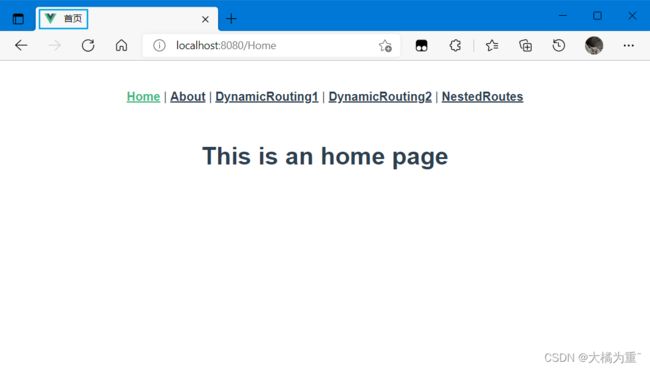
- 定义路由的时候可以配置 meta 字段用于自定义我们需要的参数信息
例:
{
  path: '/home',
  name: 'Home',
  component: Home,
  meta: {
    title: "首页"
  }
},
搭配导航守卫可实现多种功能,如实时渲染页面head的title信息:
router.beforeEach((to, from, next) => {
  document.title = to.meta.title
  next()
})

还可以实现登录验证的相关配置,该例子可见 “前端vue3+token实现用户认证”
提示:文章到此结束,本文仅为个人学习记录,若有错误的地方请大家指出。


