常见问题任务(汇总一)
目录
vue
1.vue项目中导出表格
2.使用轮播展示数据
3.全局事件总线的运用
4.获取焦点元素上移,加阴影
5. 使用echarts
6.添加加载的进度条
7.使用ant-design-vue(vue2)
8. 使用轮播vue-awesome-swiper
9.登录保存密码功能
uniapp
1.动态背景图
2.动态背景图加图片,背景图遮罩效果
3.v-if多层判断
4.按照汉字首字母排序分组
5 .使用uniapp全局事件总线
6.文字过多只显示两行,多余用省略号表示
7.uniapp去除滚动条的方法
8.检验手机号的正则表达
9.stroe的模块化(简单)
10.关于页面直接使用slice()
11.Cannot read property '0' of undefined"
12.uni-app scroll-view去除滚动条
13.过滤的使用
jquery
1.jquery点击按钮切换样式
2.动态生成一下内容,如果国籍是中国则使标题国籍前面加c
vue
1.vue项目中导出表格
npm install --save xlsx file-saver
创建文件
// 在新创建的文件下引入
// 导出表格
import FileSaver from 'file-saver'
import * as XLSX from 'xlsx'
export default {
  // 导出Excel表格
  exportExcel (name, tableName) {
    // name表示生成excel的文件名     tableName表示表格的id
    var sel = XLSX.utils.table_to_book(document.querySelector(tableName))
    var selIn = XLSX.write(sel, { bookType: 'xlsx', bookSST: true, type: 'array' })
    try {
      FileSaver.saveAs(new Blob([selIn], { type: 'application/octet-stream' }), name)
    } catch (e) {
      if (typeof console !== 'undefined') console.log(e, selIn)
    }
    return selIn
  }
}
刚开始用如果只是
import XLSX from 'xlsx'
会报一个错误
Cannot read properties of undefined (reading 'utils')"
只要加上 * as 就可以了
// 在main.js中引入
import htmltoexcel from './excel/htmltotxcel'
Vue.prototype.$htmltoexcels = htmltoexcel
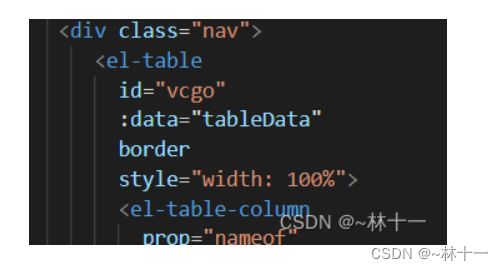
在要导出的表格加id
定义一个方法
exportexcel () {
this.$htmltoexcels.exportExcel('mocj设置.xlsx', '#vcgo')
}
就可以调用这个方法
2.使用轮播展示数据
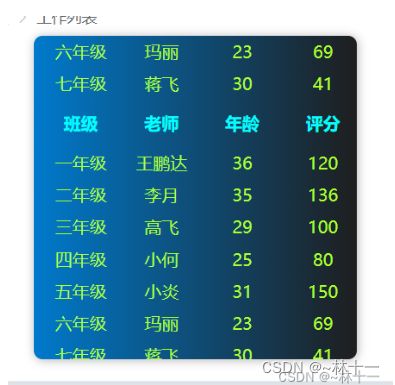
显示效果是往上一直无缝滚动
//安装vue-seamless-scroll插件
npm install vue-seamless-scroll --save
//在mian.js文件中引入
import scroll from 'vue-seamless-scroll'
Vue.use(scroll)
组名
组长
年龄
评分
-
{{item.group}}
{{item.captain}}
{{item.age}}
{{item.integral}}
  computed: {
    classOption () {
      return {
        step: 2, // 数值越大速度滚动越快
        limitMoveNum: 3, // 开启无缝滚动的数据量 设置(数值<=页面展示数据条数不滚)(超过页面展示条数滚动)
        openWatch: true, // 开启数据实时监控刷新dom
        singleHeight: 40,
        waitTime: 1 // 单行停顿时间(singleHeight,waitTime)
      }
    }
  }
其他配置可以查看文档chenxuan0000
3.全局事件总线的运用
// main.js中
new Vue({
  router,
  store,
  render: h => h(App),
  beforeCreate () {
    Vue.prototype.$bus = this // 事件总线
  }
}).$mount('#app')

// 在这里定义 this.$bus.$on('changecolor', data => {
// console.log(data)
this.bgcolor = data
})
// 可以写到methods或者mounted中4.获取焦点元素上移,加阴影
类似商城类
	.box1{
			width: 50px;
			height: 50px;
			background-color: red;
			border-radius: 50%;
			transition: .2s;
		}
		.box1:hover{
			transform: translateY(-10px);
			box-shadow: 1px 1px 9px rgba(0, 0, 0, .3);
		}
5. 使用echarts
实现上述效果
npm install echarts --save
main.js
import * as Echarts from 'echarts'
Vue.prototype.echarts = Echarts
Vue.use(Echarts)
相应页面

html部分


 mounted () {
//调用
    this.drawChart()
    this.showleft()
    this.showright()
  },
js部分
 async showleft () {
      // 发起请求拿数据
      const res = await this.$axios.get('/user/payinforleft')
      this.leftlist = res.data.data[0].leftlist
      // console.log(res.data.status)
      if (res.data.status !== 200) {
        return
      }
      // console.log('1')
      // this.$refs.left 可以直接访问页面res=left的部分
      const myechart = this.echarts.init(this.$refs.left)
      const option = {
        legend: {},
        tooltip: {},
        dataset: {
          dimensions: ['product', '新增用户', '活跃用户'],
          source: this.leftlist
        },
        xAxis: { type: 'category' },
        yAxis: {},
        // Declare several bar series, each will be mapped
        // to a column of dataset.source by default.
        series: [{ type: 'bar' }, { type: 'bar' }]
      }
      myechart.setOption(option)
    },
    async showright () {
      const res = await this.$axios.get('/user/payinforright')
      // console.log(res)
      if (res.data.status !== 200) {
        return
      }
      this.rightlist = res.data.data[0].rightlist
      const myechart = this.echarts.init(this.$refs.right)
      const option = {
        title: {
          text: '',
          subtext: 'Fake Data',
          left: 'center'
        },
        tooltip: {
          trigger: 'item'
        },
        legend: {
          orient: 'vertical',
          left: 'left'
        },
        series: [
          {
            name: 'Access From',
            type: 'pie',
            radius: '50%',
            data: this.rightlist,
            emphasis: {
              itemStyle: {
                shadowBlur: 10,
                shadowOffsetX: 0,
                shadowColor: 'rgba(0, 0, 0, 0.5)'
              }
            }
          }
        ]
      }
      myechart.setOption(option)
    },
6.添加加载的进度条
使用第三方组件库nprogress
下载
npm install --save nprogress
有多种方式在路由中使用,或者在axios中使用
import axios from 'axios'
import 'nprogress/nprogress.css' // 导入样式,否则看不到效果
import nProgress from 'nprogress'


nProgress.configure({ showSpinner: false }) // 显示右上角螺旋加载提示
// axios.create({
//   baseURL: '/api',
//   timeout: 5000
// })
axios.interceptors.request.use(config => {
  nProgress.start() // 开始
  return config
})
axios.interceptors.response.use(res => {
  nProgress.done() //结束
  return res.data
}, err => {
  return Promise.reject(new Error(err))
})
然后分别在请求和响应使用提供的方法即可。
7.使用ant-design-vue(vue2)
如果使用官方下载命令
npm install ant-design-vue --save
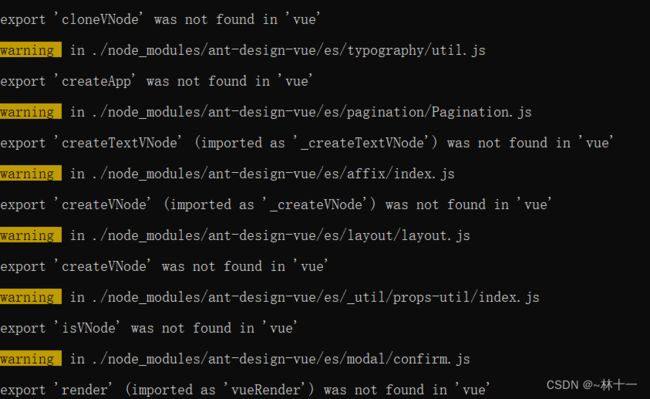
分析原因:
后来当创建vue3项目时才能使用官网的命令安装,发现是版本不兼容的问题,官网的安装指令只适用于vue3,而在创建选择vue的时候选择的是vue2.x,并不兼容最新版本的ant-desing-vue
安装指定版本的ant-design-vue UI框架(当项目为vue2项目时)解决方案:
npm i --save [email protected]
// npm i --save [email protected] (或者)
需要指定版本 然后全局引入即可
8. 使用轮播vue-awesome-swiper
npm install [email protected] --save
main.js


// 引入轮播插件:vue-awesome-swiper
import VueAwesomeSwiper from 'vue-awesome-swiper'
import 'swiper/dist/css/swiper.css'

Vue.use(VueAwesomeSwiper /* { default global options } */)
相应页面使用
![]()
swiperOption: {
// 配置项:出现轮播图下面的滑动点
pagination: '.swiper-pagination',
// 循环播放
loop: true,
// 自动轮播,单位ms
autoplay: 5000
// paginationHide: false
},
// 轮播图数据源
swiperList: [
{
id: '0001',
imgUrl: 'http://cdfan.gitee.io/myadmin-resources/img/login-background2.png'
},
{
id: '0002',
imgUrl: 'http://cdfan.gitee.io/myadmin-resources/img/login-background1.png'
},
{
id: '0003',
imgUrl: 'http://cdfan.gitee.io/myadmin-resources/img/login-background3.png'
}
]9.登录保存密码功能
登录后刷新页面数据还存在
created () {
    this.getdatabg()
    this.getCookie()
  },
// 登录设置
    async handleSubmit (e) {
      // console.log(this.formInline)
      const res = await this.$axios.post('/user/login', this.formInline)
      console.log(res)
      if (res.status === 200) {
        console.log('登录成功')
        if (this.formInline.merber) {
          this.setCookie(this.formInline.account, this.formInline.password, 7)
        } else {
          this.clearCookie()
        }
      }
    },
    // 是否保存密码
    handleChange (e) {
      this.formInline.merber = e.target.checked
      // console.log(a)
    },
    // 保存密码
    setCookie (cname, cpwd, cdays) {
      var curDate = new Date()
      curDate.setTime(curDate.getTime() + 24 * 60 * 60 * 1000 * cdays)
      var codeName = window.btoa(unescape(encodeURIComponent(cname)))
      var codePwd = window.btoa(unescape(encodeURIComponent(cpwd)))
      // var isChecked = window.btoa(unescape(encodeURIComponent(cname)))
      window.document.cookie = 'username' + '=' + codeName + ';Expires=' + curDate.toGMTString()
      window.document.cookie = 'password' + '=' + codePwd + ';Expires=' + curDate.toGMTString()
      window.document.cookie = 'isChecked' + '=' + this.formInline.merber + ';Expires=' + curDate.toGMTString()
    },
    // 获取数据
    getCookie () {
      var flag = document.cookie
      if (flag.length > 0) {
        var arr = flag.split(';')
        console.log(arr)
        for (var i = 0; i < arr.length; i++) {
          var arr2 = arr[i].split('=')
          // console.log(arr2[0])
          const arr3 = arr2[0].trim()
          if (arr3 === 'username') {
            this.formInline.account = decodeURIComponent(escape(window.atob(arr2[1])))
          } else if (arr3 === 'password') {
            this.formInline.password = decodeURIComponent(escape(window.atob(arr2[1])))
            console.log(1)
          } else if (arr3 === 'isChecked') {
            this.formInline.merber = JSON.parse(arr2[1])
            console.log(this.formInline.merber)
          }
        }
      }
    },
    // 清除cookie
    clearCookie () {
      this.setCookie('', '', -1)
    }
这是仿照别人写的,中间出了点小问题,刚开始只有账号可以保存,另外两个没有显示,看了一下数据首先是===全等然后arr2[0]==='password'跟下一个的时候莫名其妙的出现空格导致数据不能同步所以做了去除空格处理
escape(charstring)方法
作用:对String对象进行编码,以便他们能够在所有计算机上可读
参数:参与编码的任意String对象或文字
返回值:返回一个包含了charstring内容的字符串值(Unicode格式)
①所有空格、标点、重音符号及其它非ASCII字符都用%xx(xx等于表示该字符的十六进制数)编码代替,如空格返回的是 "%20",>返回的是"%3e"。
②字符值大于255以%uxxxx格式存储。 escape方法不能够用来对统一资源标示码 (URI) 进行编码,对其编码应使用encodeURI和encodeURIComponent方法。
unescape(charstring)方法
作用:对escape方法进行编码过的字符串进行解码
参数:待解码的String对象 返回值:返回一个包含charstring内容的字符串值
①所有以%xx十六进制形式编码的字符都用ASCII字符集中字符代替。
②所有以%uxxxx格式(Unicode字符)编码的字符用十六进制编码xxxx的Unicode字符代替,如"%3e"返回">","%3d"返回"="。unescape方法不能用于解码统一资源标识码 (URI),对其编码可使用decodeURI和decodeURIComponent方法。
参考自:
vue项目登录记住密码_一起搞前端的博客-CSDN博客_vue 密码登录
10.Redirected when going from "/login" to "/home" via a navigation guard.
vue路由跳转错误:Error: Redirected when going from “/login“ to “/home“ via a navigation guard._weixin_44039043的博客-CSDN博客
uniapp
1.动态背景图
如图:背景是通过发送信息获取而来的,就不能把背景写死,需要通过动态设置
2.动态背景图加图片,背景图遮罩效果
需要把获取过来的数据同一张图片及当做背景,又要当做图片,背景有遮罩效果
								{{item.mess.length}}

								{{item.zan}}
3.v-if多层判断
同一个页面,通过切换显示想要的结果,第一张显示三个数据,第二张显示两张数据,第三张显示一个数据
					{{photoform.ce}}相册
					{{photoform.photo}}照片
					{{photoform.video}}视频
4.按照汉字首字母排序分组
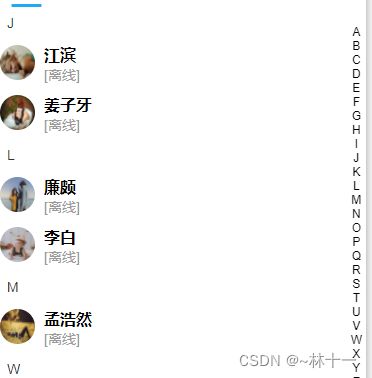
实现类似这种效果,结合vant
安装第三方插件:js-pinyin - npm
npm install js-pinyin
在需要使用到的vue页面引入 import Pinyin from 'js-pinyin'
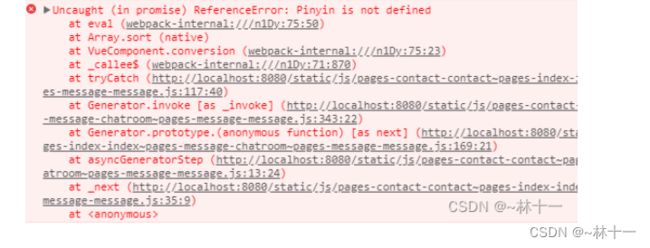
如果在main.js中引入会报错
具体方法可以参照一下代码块
// 获取的数据,这里面是对象,也可以数组里面是字符串
data: [
		{
			id: 1,
			firend: '李白',
			newtime: '上午8:30',
			ava: 'https://cdn.pixabay.com/photo/2019/04/11/12/40/easter-4119709__340.jpg',
			list: [
				{
					left: '在干嘛',
					right: '无聊呀',
					timer: '12:30'
				},
				{
					left: '太难了',
					right: '对呀'
				}
			]
		},
		{
			id: 2,
			firend: '王伟',
			newtime: '上午9:35',
			ava: 'https://cdn.pixabay.com/photo/2018/01/05/07/05/people-3062246__340.jpg',
			list: [
				{
					left: '美女',
					right: '在那',
					timer: '12:30'
				},
				{
					left: '天好可怜',
					right: '对呀'
				}
			]
		},
		{
			id: 3,
			firend: '江滨',
			newtime: '下午14:30',
			ava: 'https://cdn.pixabay.com/photo/2018/04/03/20/26/woman-3287956__340.jpg',
			list: [
				{
					left: '打游戏吗',
					right: '打呀',
					timer: '12:30'
				},
				{
					left: '上号',
					right: '好的'
				}
			]
		},
		{
			id: 4,
			firend: '孟浩然',
			newtime: '下午18:30',
			ava: 'https://cdn.pixabay.com/photo/2016/10/14/23/17/girl-lying-on-the-grass-1741487__340.jpg',
			list: [
				{
					left: '打王者',
					right: '来',
					timer: '12:30'
				},
				{
					left: '快点',
					right: '好的'
				}
			]
		},
		{
			id: 5,
			firend: '姜子牙',
			newtime: '下午20:30',
			ava: 'https://cdn.pixabay.com/photo/2016/02/06/17/29/wedding-1183271__340.jpg',
			list: [
				{
					left: '发工资了吗',
					right: '没有',
					timer: '12:30'
				},
				{
					left: '啥时候发呀',
					right: '不知道'
				}
			]
		},
		{
			id: 6,
			firend: '廉颇',
			newtime: '上午10:30',
			ava: 'https://cdn.pixabay.com/photo/2019/12/09/08/06/couple-4682956__340.jpg',
			list: [
				{
					left: '打王者',
					right: '来',
					timer: '12:30'
				},
				{
					left: '快点',
					right: '好的'
				}
			]
		}
	]
async getlist(){
				const {data} = await this.$axios.get('/user/message')
				console.log(data)
				let that = this
				if(data.status==200){
					let list = data.data
					that.conversion(list)
				}
			},
			conversion(origin){
				// let origin =['上饶', '上海', '深圳', '广州', '武汉', '十堰', '天津', '北京']
				origin = origin.sort((pre, next) => Pinyin.getFullChars(pre.firend).localeCompare(Pinyin.getFullChars(next.firend)))
				    const newArr = []
				    origin.map(item => {
				        // 取首字母
				        const key = Pinyin.getFullChars(item.firend).charAt(0)
				        const index = newArr.findIndex(subItem => subItem.key === key)
				        if (index < 0) {
				            newArr.push({
				                key: key,
				                list: [item]
				            })
				        } else {
				            newArr[index].list.push(item)
				        }
				    })
					console.log(newArr)
				    return newArr
			}
5 .使用uniapp全局事件总线
// main.js
Vue.prototype.$eventbus = new Vue()
//方法中调用
this.$eventbus.$emit('amsg',i)

//修改地方
mounted() {
			this.$eventbus.$on('amsg',(e)=>{
				// console.log('置顶效果',e)
				this.eventtop(e)
			})
			this.$eventbus.$on('delamsg',(e)=>{
				// console.log('置顶效果',e)
				this.deleventtop(e)
			})
			var a = this.$store.state.messlist
			// console.log(a)
		},
6.文字过多只显示两行,多余用省略号表示
    text-overflow: ellipsis;  /* 超出部分省略号 */
	word-break: break-all;  /* break-all(允许在单词内换行。) */
	display: -webkit-box; /* 对象作为伸缩盒子模型显示 */
	-webkit-box-orient: vertical; /* 设置或检索伸缩盒对象的子元素的排列方式 */
	-webkit-line-clamp: 2; /* 显示的行数 */
	max-height: 80rpx; /*固定最大高度*/
    overflow: hidden;
7.uniapp去除滚动条的方法
scroll-view ::-webkit-scrollbar {
	    display: none !important;
	    width: 0 !important;
	    height: 0 !important;
	    -webkit-appearance: none;
	    background: transparent;
	}
网上也有其他办法但是我这没生效
8.检验手机号的正则表达
let phone =/^(13[0-9]|14[01456879]|15[0-35-9]|16[2567]|17[0-8]|18[0-9]|19[0-35-9])\d{8}$/

if(!phone.test(this.account)){
		console.log('请输入正确手机号')
}
9.stroe的模块化(简单)
创建文件夹store
export const savepath = (state, val)=>{
	state.username = val
}

//创建mutations.js文件
export const savepath = (context,val)=>{
context.commit('savepath',val)
}
// 穿件actions.js文件export default{
username: '张三'
}
//创建state.js文件import vue from 'vue'
import vuex from 'vuex'
import state from './state'
import * as actions from './actions'
import * as mutations from './mutations'
vue.use(vuex)
export default new vuex.Store({
state,
actions,
mutations
})
// 创建index.js文件,引入之前创建的文件import store from './store/index'
Vue.prototype.$store = store
export function createApp() {
const app = createSSRApp(App)
return {
app,
store
}
}
// 在main.js文件中引入demo(){
this.$store.dispatch('savepath','125')
let a =this.$store.state.username
console.log(a)
}
//在页面正常使用即可,不用弄命名空间跟名字,简化10.关于页面直接使用slice()
页面直接使用slice时
需要加一些判断,不加判断虽然也可以显示,但是会报这个错误。
判断是否有这个user.gift 如果有则使用,如果没有则使用一个空数组。
11.Cannot read property '0' of undefined"
报错代码
修改后数据正常渲染,但是会报一些错误,都需要给他加一个判断,报错就消失了。跟上一个类似。
12.uni-app scroll-view去除滚动条
	/deep/::-webkit-scrollbar {
		display: none;
		width: 0;
		height: 0;
	}

当前页面加深度选择器
13.过滤的使用
给出一串数字,只显示开头与结尾部分,中间使用符号隔开(使用的局部过滤)
{{125369899658|formatedata}}
filters: {
			formatedata(vals){
				let val = vals+''
				let first = val.substring(0,3)
				let last = val.substring(val.length-3)
				return first +'****' + last
			}
	}

自定义的是数字所以先转化成字符串,用substring方法,val.length-3表示这个字符串的最后一位往前数三位。
jquery
1.jquery点击按钮切换样式
实现点击两个按钮的切换
css:
	.fui-cell-info {
		display: flex;
	}

	.fui-cell-a {
		padding: 4px 18px;
		border: 1px solid #68c8ff;
		border-radius: 8px;
	}

	.fui-cell-b {
		margin-right: 9px;
	}

	.add-fui-cel-info {
		background-color: #68c8ff;
		color: #fff;
	}
html:
左
右
js:
$(function () {
	$(".fui-cell-a").click(function () {
		$(".fui-cell-a").eq($(this).index()).addClass("add-fui-cel-info").siblings().removeClass("add-fui-cel-info");
		var area = $('.add-fui-cel-info').attr('value');
	})
})
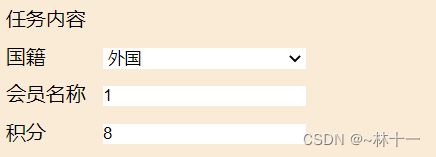
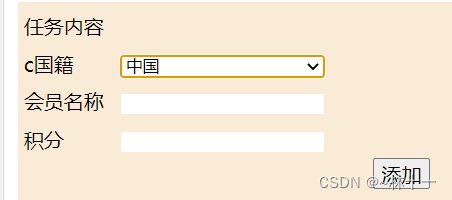
2.动态生成一下内容,如果国籍是中国则使标题国籍前面加c
目标
$(function(){
var index = 1
$(".addbtn").click(function(){
if(index>=8) return
index++
$(".ban").append(
`
`
)
})
$("body").on('change','select',function(){
$("select").each(function(i,item){
console.log(item.value)
if(item.value==0){
$("select").eq(i).prev().text('c国籍')
}else{
$("select").eq(i).prev().text('国籍')
}
})
})
$(".sub").click(function(){
var world = []
var name = []
var fen = []
$("select").each(function(i,item){
// console.log(item.value)
if(item.value==''){
alert('填写国籍'+i)
}
world.push(item.value)
})
$(".inp").each(function(i,item){
// console.log(item.value)
if(item.value==''){
alert('填写会员名称'+i)
}
name.push(item.value)
})
$(".ji").each(function(i,item){
// console.log(item.value)
if(item.value==''){
alert('填写积分'+i)
}
fen.push(item.value)
})
console.log(world,name,fen)
})
})
	*{
		margin: 0;
		padding: 0;

	}
	.nav span:nth-of-type(3){
		visibility: hidden;
	}
	.nav{
		display: flex;
		justify-content: space-between;
		background-color: aqua;
		padding: 5px;
	}
	.bann{
		padding: 5px;
		margin: 10px;
		background-color: antiquewhite;
	}
	.lineheight{
		line-height: 30px;
	}
	.gu{
		display: inline-block;
		width: 73px;
	}
	input{
		outline: none;
		border: none;
	}
	select{
		border: none;
		width: 47%;
	}
	.add{
		text-align: right;
	}
	.addbtn{
		margin-right: 20px;
		padding: 0px 5px;
		font-size: 16px;
	}
	.sub{
		margin-top: 10px;
		width: 100%;
		padding: 7px 0;
		border: none;
		background-color: aqua;
	}
