Spring Security
一 SpringSecurity 框架简介
1.1 概要
Spring 是非常流行和成功的 Java 应用开发框架,Spring Security 正是 Spring 家族中的成员。Spring Security 基于 Spring 框架,提供了一套 Web 应用安全性的完整解决方案。
正如你可能知道的关于安全方面的两个主要区域是“认证”和“授权”(或者访问控
制),一般来说,Web 应用的安全性包括用户认证(Authentication)和用户授权
(Authorization)两个部分,这两点也是 Spring Security 重要核心功能。
- 用户认证指的是:验证某个用户是否为系统中的合法主体,也就是说用户能否访问该系统。用户认证一般要求用户提供用户名和密码。系统通过校验用户名和密码来完成认证过程。通俗点说就是系统认为用户是否能登录。
- )用户授权指的是验证某个用户是否有权限执行某个操作。在一个系统中,不同用户所具有的权限是不同的。比如对一个文件来说,有的用户只能进行读取,而有的用户可以进行修改。一般来说,系统会为不同的用户分配不同的角色,而每个角色则对应一系列的权限。通俗点讲就是系统判断用户是否有权限去做某些事情。
1.2 历史
“Spring Security 开始于 2003 年年底,““spring 的 acegi 安全系统”。 起因是 Spring
开发者邮件列表中的一个问题,有人提问是否考虑提供一个基于 spring 的安全实现。
Spring Security 以“The Acegi Secutity System for Spring” 的名字始于 2013 年晚些
时候。一个问题提交到 Spring 开发者的邮件列表,询问是否已经有考虑一个机遇 Spring的安全性社区实现。那时候 Spring 的社区相对较小(相对现在)。实际上 Spring 自己在2013 年只是一个存在于 ScourseForge 的项目,这个问题的回答是一个值得研究的领域,虽然目前时间的缺乏组织了我们对它的探索。
考虑到这一点,一个简单的安全实现建成但是并没有发布。几周后,Spring 社区的其他成员询问了安全性,这次这个代码被发送给他们。其他几个请求也跟随而来。到 2014 年一月大约有 20 万人使用了这个代码。这些创业者的人提出一个 SourceForge 项目加入是为了,这是在 2004 三月正式成立。
在早些时候,这个项目没有任何自己的验证模块,身份验证过程依赖于容器管理的安全性和 Acegi 安全性。而不是专注于授权。开始的时候这很适合,但是越来越多的用户请求额外的容器支持。容器特定的认证领域接口的基本限制变得清晰。还有一个相关的问题增加新的容器的路径,这是最终用户的困惑和错误配置的常见问题。
Acegi 安全特定的认证服务介绍。大约一年后,Acegi 安全正式成为了 Spring 框架的子项目。1.0.0 最终版本是出版于 2006 -在超过两年半的大量生产的软件项目和数以百计的改进和积极利用社区的贡献。
Acegi 安全 2007 年底正式成为了 Spring 组合项目,更名为"Spring Security"。
1.3 同款产品对比
1.3.1 Spring Security
Spring 技术栈的组成部分。
https://spring.io/projects/spring-security
通过提供完整可扩展的认证和授权支持保护你的应用程序。
SpringSecurity 特点:
- 和 Spring 无缝整合。
- 全面的权限控制。
- 专门为 Web 开发而设计。
- 旧版本不能脱离 Web 环境使用。
- 新版本对整个框架进行了分层抽取,分成了核心模块和 Web 模块。单独引入核心模块就可以脱离 Web 环境。
- 重量级。
1.3.2 Shiro
Apache 旗下的轻量级权限控制框架。
特点:
- 轻量级。Shiro 主张的理念是把复杂的事情变简单。针对对性能有更高要求的互联网应用有更好表现。
- 通用性。
- 好处:不局限于 Web 环境,可以脱离 Web 环境使用。
- 缺陷:在 Web 环境下一些特定的需求需要手动编写代码定制。
Spring Security 是 Spring 家族中的一个安全管理框架,实际上,在 Spring Boot 出现之前,Spring Security 就已经发展了多年了,但是使用的并不多,安全管理这个领域,一直是 Shiro 的天下。
相对于 Shiro,在 SSM 中整合 Spring Security 都是比较麻烦的操作,所以,Spring
Security 虽然功能比 Shiro 强大,但是使用反而没有 Shiro 多(Shiro 虽然功能没有
Spring Security 多,但是对于大部分项目而言,Shiro 也够用了)。
自从有了 Spring Boot 之后,Spring Boot 对于 Spring Security 提供了自动化配置方
案,可以使用更少的配置来使用 Spring Security。
因此,一般来说,常见的安全管理技术栈的组合是这样的:
- SSM + Shiro
- Spring Boot/Spring Cloud + Spring Security
以上只是一个推荐的组合而已,如果单纯从技术上来说,无论怎么组合,都是可以运行的。
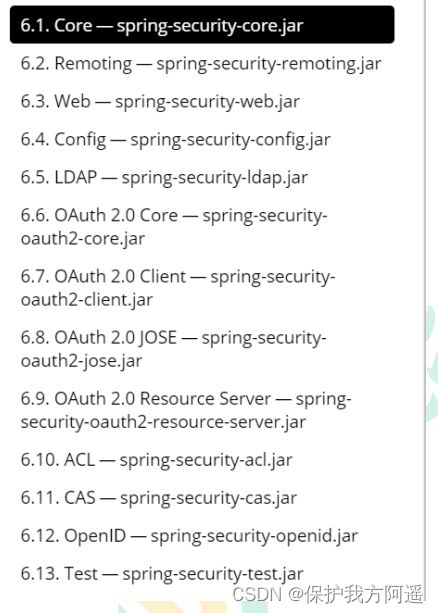
1.4 模块划分
二 SpringSecurity 入门案例
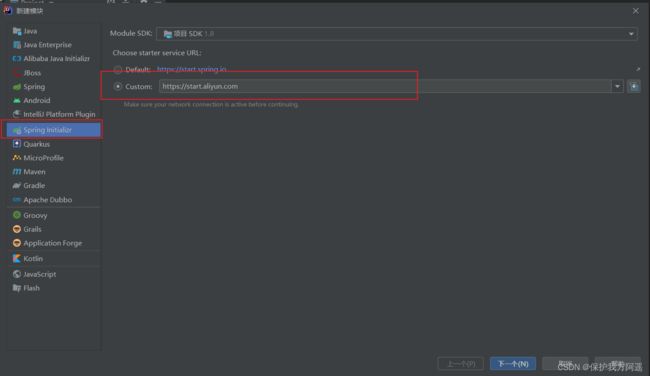
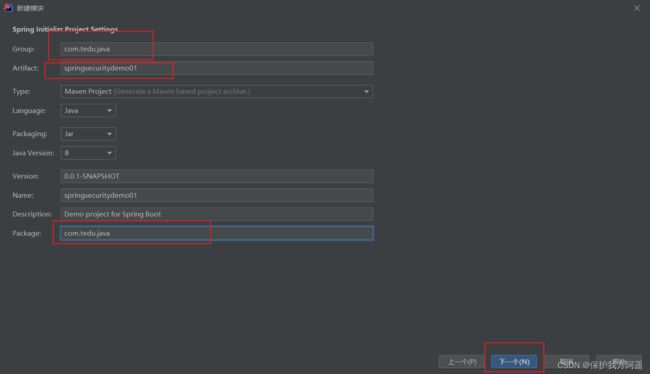
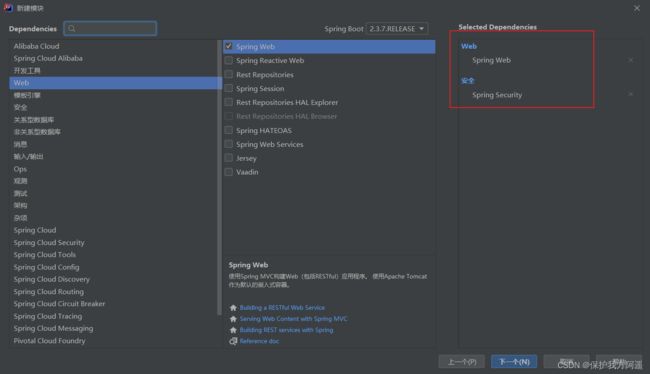
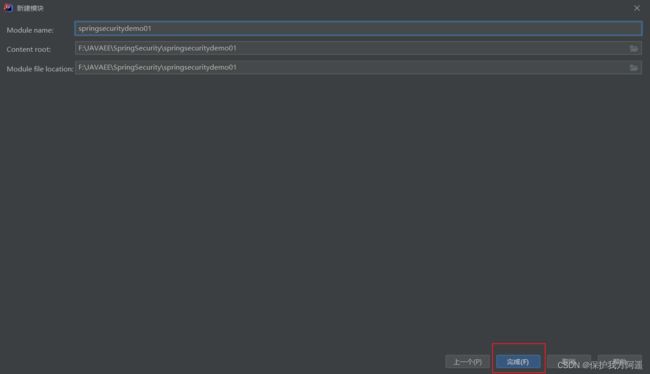
2.1 创建一个项目
2.2 添加一个配置类
package com.tedu.java.config;

import org.springframework.context.annotation.Configuration;
import org.springframework.security.config.annotation.web.builders.HttpSecurity;
import org.springframework.security.config.annotation.web.configuration.WebSecurityConfigurerAdapter;

/**
 * @author: zyy
 * @date: 2022/9/3 11:48
 * @description: TODO
 * @version: 1.0
 * @描述:
 **/
//表示该类为一个配置类
@Configuration
public class SecurityConfig extends WebSecurityConfigurerAdapter {
    @Override
    protected void configure(HttpSecurity http) throws Exception {
        http.formLogin()//表单登录
        .and().authorizeRequests()//认证配置
        .anyRequest()//任何请求
        .authenticated();//都需要身份验证
    }
}
2.3 运行这个项目
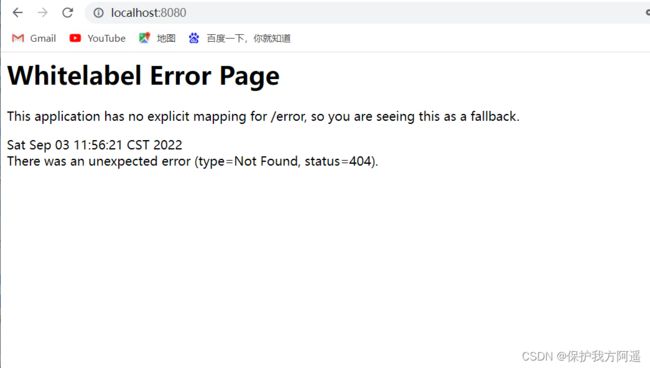
访问 localhost:8080:
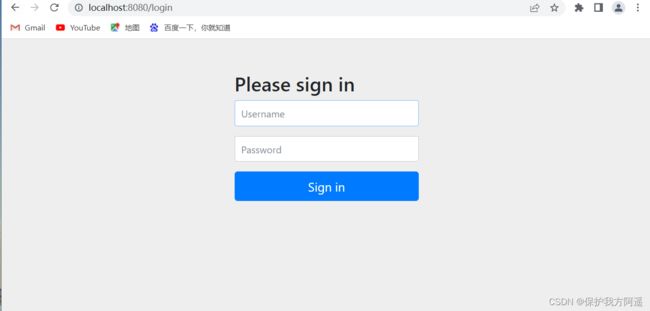 默认的用户名:user;
密码在项目启动的时候在控制台会打印,注意每次启动的时候密码都回发生变化!
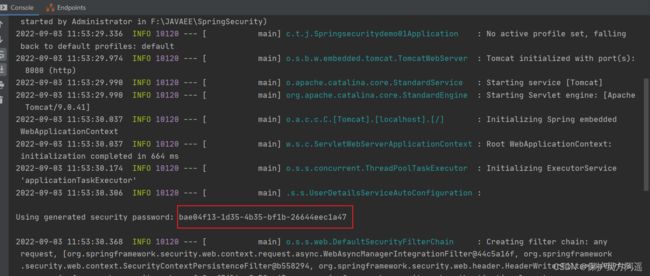 输入用户名,密码,这样表示可以访问了,404 表示我们没有这个控制器,但是我们可以访问了。
2.4 权限管理中的相关概念
2.4.1 主体
英文单词:principal
使用系统的用户或设备或从其他系统远程登录的用户等等。简单说就是谁使用系
统谁就是主体。
2.4.2 认证
英文单词:authentication
权限管理系统确认一个主体的身份,允许主体进入系统。简单说就是“主体”证明自己是谁。
笼统的认为就是以前所做的登录操作。
2.4.3 授权
英文单词:authorization
将操作系统的“权力”“授予”“主体”,这样主体就具备了操作系统中特定功能的能力。
所以简单来说,授权就是给用户分配权限。
2.5 添加一个控制器进行访问
package com.tedu.java.controller;

import org.springframework.web.bind.annotation.GetMapping;
import org.springframework.web.bind.annotation.RestController;

/**
 * @author: zyy
 * @date: 2022/9/3 12:01
 * @description: TODO
 * @version: 1.0
 * @描述:
 **/
@RestController
public class IndexController {
    @GetMapping("/index")
    public String index(){
        return "success";
    }
}
2.6 SpringSecurity 基本原理
SpringSecurity 本质是一个过滤器链:
从启动是可以获取到过滤器链:
org.springframework.security.web.context.request.async.WebAsyncManagerIntegrationFilter
org.springframework.security.web.context.SecurityContextPersistenceFilter
org.springframework.security.web.header.HeaderWriterFilter
org.springframework.security.web.csrf.CsrfFilter
org.springframework.security.web.authentication.logout.LogoutFilter
org.springframework.security.web.authentication.UsernamePasswordAuthenticationFilter
org.springframework.security.web.authentication.ui.DefaultLoginPageGeneratingFilter
org.springframework.security.web.authentication.ui.DefaultLogoutPageGeneratingFilter
org.springframework.security.web.savedrequest.RequestCacheAwareFilter
org.springframework.security.web.servletapi.SecurityContextHolderAwareRequestFilter
org.springframework.security.web.authentication.AnonymousAuthenticationFilter
org.springframework.security.web.session.SessionManagementFilter
org.springframework.security.web.access.ExceptionTranslationFilter
org.springframework.security.web.access.intercept.FilterSecurityInterceptor
代码底层流程:重点看三个过滤器:
2.6.1 FilterSecurityInterceptor
是一个方法级的权限过滤器, 基本位于过滤链的最底部。
public void invoke(FilterInvocation fi) throws IOException, ServletException {
		if ((fi.getRequest() != null)
				&& (fi.getRequest().getAttribute(FILTER_APPLIED) != null)
				&& observeOncePerRequest) {
			// filter already applied to this request and user wants us to observe
			// once-per-request handling, so don't re-do security checking
			fi.getChain().doFilter(fi.getRequest(), fi.getResponse());
		}
		else {
			// first time this request being called, so perform security checking
			if (fi.getRequest() != null && observeOncePerRequest) {
				fi.getRequest().setAttribute(FILTER_APPLIED, Boolean.TRUE);
			}

			InterceptorStatusToken token = super.beforeInvocation(fi);//表示查看之前的 filter 是否通过。

			try {
				fi.getChain().doFilter(fi.getRequest(), fi.getResponse());//表示真正的调用后台的服务。
			}
			finally {
				super.finallyInvocation(token);
			}

			super.afterInvocation(token, null);
		}
	}
2.6.2 ExceptionTranslationFilter
是个异常过滤器,用来处理在认证授权过程中抛出的异常。
public void doFilter(ServletRequest req, ServletResponse res, FilterChain chain)
			throws IOException, ServletException {
		HttpServletRequest request = (HttpServletRequest) req;
		HttpServletResponse response = (HttpServletResponse) res;

		try {
			chain.doFilter(request, response);

			logger.debug("Chain processed normally");
		}
		catch (IOException ex) {
			throw ex;
		}
		catch (Exception ex) {
			// Try to extract a SpringSecurityException from the stacktrace
			Throwable[] causeChain = throwableAnalyzer.determineCauseChain(ex);
			RuntimeException ase = (AuthenticationException) throwableAnalyzer
					.getFirstThrowableOfType(AuthenticationException.class, causeChain);

			if (ase == null) {
				ase = (AccessDeniedException) throwableAnalyzer.getFirstThrowableOfType(
						AccessDeniedException.class, causeChain);
			}

			if (ase != null) {
				if (response.isCommitted()) {
					throw new ServletException("Unable to handle the Spring Security Exception because the response is already committed.", ex);
				}
				handleSpringSecurityException(request, response, chain, ase);
			}
			else {
				// Rethrow ServletExceptions and RuntimeExceptions as-is
				if (ex instanceof ServletException) {
					throw (ServletException) ex;
				}
				else if (ex instanceof RuntimeException) {
					throw (RuntimeException) ex;
				}

				// Wrap other Exceptions. This shouldn't actually happen
				// as we've already covered all the possibilities for doFilter
				throw new RuntimeException(ex);
			}
		}
	}
2.6.3 UsernamePasswordAuthenticationFilter
对/login 的 POST 请求做拦截,校验表单中用户名,密码。
public Authentication attemptAuthentication(HttpServletRequest request,
			HttpServletResponse response) throws AuthenticationException {
		if (postOnly && !request.getMethod().equals("POST")) {
			throw new AuthenticationServiceException(
					"Authentication method not supported: " + request.getMethod());
		}

		String username = obtainUsername(request);
		String password = obtainPassword(request);

		if (username == null) {
			username = "";
		}

		if (password == null) {
			password = "";
		}

		username = username.trim();

		UsernamePasswordAuthenticationToken authRequest = new UsernamePasswordAuthenticationToken(
				username, password);

		// Allow subclasses to set the "details" property
		setDetails(request, authRequest);

		return this.getAuthenticationManager().authenticate(authRequest);
	}
2.7 UserDetailsService 接口讲解
当什么也没有配置的时候,账号和密码是由 Spring Security 定义生成的。而在实际项目中账号和密码都是从数据库中查询出来的。 所以我们要通过自定义逻辑控制认证逻辑。
如果需要自定义逻辑时,只需要实现 UserDetailsService 接口即可。接口定义如下:
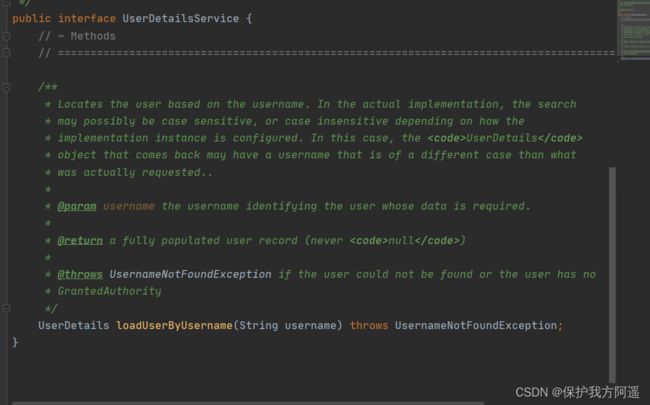 返回值 UserDetails :
这个类是系统默认的用户“主体”:
/*
 * Copyright 2004, 2005, 2006 Acegi Technology Pty Limited
 *
 * Licensed under the Apache License, Version 2.0 (the "License");
 * you may not use this file except in compliance with the License.
 * You may obtain a copy of the License at
 *
 *      https://www.apache.org/licenses/LICENSE-2.0
 *
 * Unless required by applicable law or agreed to in writing, software
 * distributed under the License is distributed on an "AS IS" BASIS,
 * WITHOUT WARRANTIES OR CONDITIONS OF ANY KIND, either express or implied.
 * See the License for the specific language governing permissions and
 * limitations under the License.
 */

package org.springframework.security.core.userdetails;

import org.springframework.security.core.Authentication;
import org.springframework.security.core.GrantedAuthority;

import java.io.Serializable;
import java.util.Collection;

/**
 * Provides core user information.
 *
 *
 * Implementations are not used directly by Spring Security for security purposes. They
 * simply store user information which is later encapsulated into {@link Authentication}
 * objects. This allows non-security related user information (such as email addresses,
 * telephone numbers etc) to be stored in a convenient location.
 *
 * Concrete implementations must take particular care to ensure the non-null contract
 * detailed for each method is enforced. See
 * {@link org.springframework.security.core.userdetails.User} for a reference
 * implementation (which you might like to extend or use in your code).
 *
 * @see UserDetailsService
 * @see UserCache
 *
 * @author Ben Alex
 */
public interface UserDetails extends Serializable {
	// ~ Methods
	// ========================================================================================================

	/**
	 * Returns the authorities granted to the user. Cannot return null.
	 *
	 * @return the authorities, sorted by natural key (never null)
	 */
	Collection getAuthorities();

	/**
	 * Returns the password used to authenticate the user.
	 *
	 * @return the password
	 */
	String getPassword();

	/**
	 * Returns the username used to authenticate the user. Cannot return null.
	 *
	 * @return the username (never null)
	 */
	String getUsername();

	/**
	 * Indicates whether the user's account has expired. An expired account cannot be
	 * authenticated.
	 *
	 * @return true if the user's account is valid (ie non-expired),
	 * false if no longer valid (ie expired)
	 */
	boolean isAccountNonExpired();

	/**
	 * Indicates whether the user is locked or unlocked. A locked user cannot be
	 * authenticated.
	 *
	 * @return true if the user is not locked, false otherwise
	 */
	boolean isAccountNonLocked();

	/**
	 * Indicates whether the user's credentials (password) has expired. Expired
	 * credentials prevent authentication.
	 *
	 * @return true if the user's credentials are valid (ie non-expired),
	 * false if no longer valid (ie expired)
	 */
	boolean isCredentialsNonExpired();

	/**
	 * Indicates whether the user is enabled or disabled. A disabled user cannot be
	 * authenticated.
	 *
	 * @return true if the user is enabled, false otherwise
	 */
	boolean isEnabled();
}
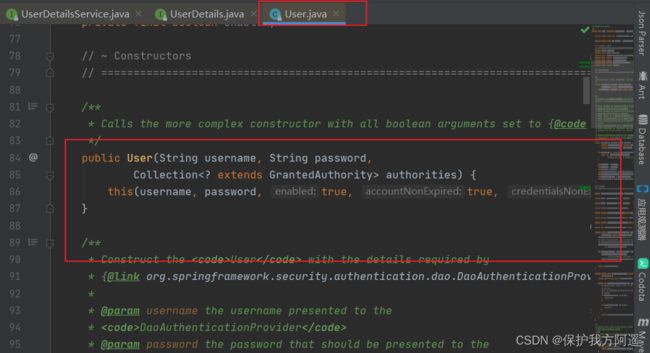
以下是 UserDetails 实现类
 以后我们只需要使用 User 这个实体类即可!
 方法参数 username
表示用户名。此值是客户端表单传递过来的数据。默认情况下必须叫 username,否则无法接收。
2.8 PasswordEncoder 接口讲解
package org.springframework.security.crypto.password;
public interface PasswordEncoder {

	//表示把参数按照特定的解析规则进行解析
	String encode(CharSequence rawPassword);

	// 表示验证从存储中获取的编码密码与编码后提交的原始密码是否匹配。如果密码匹配,则返回true;如果不匹配,则返回 false。第一个参数表示需要被解析的密码。第二个
       参数表示存储的密码。

	boolean matches(CharSequence rawPassword, String encodedPassword);
	// 表示如果解析的密码能够再次进行解析且达到更安全的结果则返回 true,否则返回false。默认返回 false。
	default boolean upgradeEncoding(String encodedPassword) {
		return false;
	}
}
接口实现类
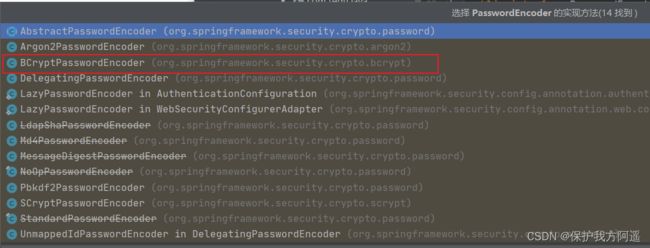
BCryptPasswordEncoder 是 Spring Security 官方推荐的密码解析器,平时多使用这个解析器。
BCryptPasswordEncoder 是对 bcrypt 强散列方法的具体实现。是基于 Hash 算法实现的单向加密。可以通过 strength 控制加密强度,默认 10。
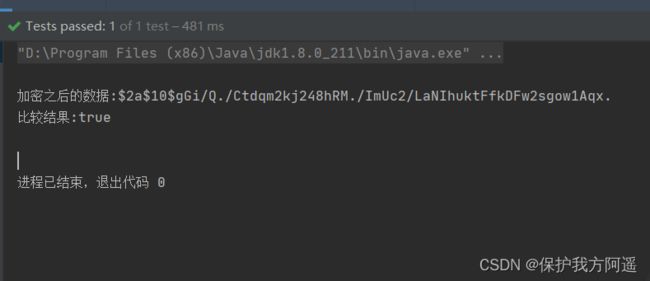
2.8.1 查用方法演示
@Test
    public void test01(){
        //创建密码解析器
        BCryptPasswordEncoder encoder = new BCryptPasswordEncoder();
        //对密码进行加密
        String s = encoder.encode("zyyzyjzyw");
        //打印加密之后的数据
        System.out.println("加密之后的数据:"+s);
        //判断原字符加密后和加密之前是否匹配
        boolean flag = encoder.matches("zyyzyjzyw", s);
        //打印比较结果
        System.out.println("比较结果:"+flag);
    }
2.9 SpringBoot 对 Security 的自动配置
https://docs.spring.io/spring-security/site/docs/5.3.4.RELEASE/reference/html5/#servlet-hello
三 SpringSecurity Web 权限方案
3.1 设置登录系统的账号、密码
方式一:在 application.properties
spring.security.user.name=zyy
spring.security.user.password=123456
方式二:编写类实现接口
编写配置类SpringSecurityConfig
package com.tedu.java.config;

import org.springframework.context.annotation.Bean;
import org.springframework.context.annotation.Configuration;
import org.springframework.security.crypto.bcrypt.BCryptPasswordEncoder;
import org.springframework.security.crypto.password.PasswordEncoder;

/**
 * @author: zyy
 * @date: 2022/9/4 10:28
 * @description: TODO
 * @version: 1.0
 * @描述:
 **/
@Configuration
public class SpringSecurityConfig {
    //注入PasswordEncoder类到spring容器中
    @Bean
    public PasswordEncoder passwordEncoder(){
        return new BCryptPasswordEncoder();
    }
}
编写LoginService 实现UserDetailsService 对设置用户名和密码。
package com.tedu.java.service;

import org.springframework.security.core.authority.AuthorityUtils;
import org.springframework.security.core.userdetails.User;
import org.springframework.security.core.userdetails.UserDetails;
import org.springframework.security.core.userdetails.UserDetailsService;
import org.springframework.security.core.userdetails.UsernameNotFoundException;
import org.springframework.stereotype.Service;

/**
 * @author: zyy
 * @date: 2022/9/4 10:30
 * @description: TODO
 * @version: 1.0
 * @描述:
 **/
@Service
public class LoginService implements UserDetailsService {

    @Override
    public UserDetails loadUserByUsername(String username) throws UsernameNotFoundException {
        if(!"admin".equalsIgnoreCase(username)){
            throw new UsernameNotFoundException("用户名不存在!");
        }
        //设置密码的密文  用户名为admin 密码为zyyzyjzyw
        String pwd = "$2a$10$gW4d1erazml3lGvKuLDJKeGUlsBJksLKz1/wwiypPwV/PY0Gf700q";
        //权限
        return new User(username,pwd, AuthorityUtils.commaSeparatedStringToAuthorityList("admin"));
    }
}
3.2 实现数据库认证来完成用户登录
完成自定义登录
3.2.1 准备 sql
CREATE TABLE users(
id BIGINT PRIMARY KEY AUTO_INCREMENT,
username VARCHAR(20) UNIQUE NOT NULL,
PASSWORD VARCHAR(100)
);

-- 密码 123456
INSERT INTO users VALUES(1,'张san','123456');
-- 密码 123456
INSERT INTO users VALUES(2,'李si','123456');

CREATE TABLE menu(
id BIGINT PRIMARY KEY AUTO_INCREMENT,
NAME VARCHAR(20),
url VARCHAR(100),
parentid BIGINT,
permission VARCHAR(20)
);
INSERT INTO menu VALUES(1,'系统管理','',0,'menu:system');
INSERT INTO menu VALUES(2,'用户管理','',0,'menu:user');

CREATE TABLE ROLE(
id BIGINT PRIMARY KEY AUTO_INCREMENT,
NAME VARCHAR(20)
);
INSERT INTO ROLE VALUES(1,'管理员');
INSERT INTO ROLE VALUES(2,'普通用户');

CREATE TABLE role_user(
uid BIGINT,
rid BIGINT
);
INSERT INTO role_user VALUES(1,1);
INSERT INTO role_user VALUES(2,2);

CREATE TABLE role_menu(
`mid` BIGINT,
rid BIGINT
);
INSERT INTO role_menu VALUES(1,1);
INSERT INTO role_menu VALUES(2,2);
3.2.2 添加依赖
            org.springframework.boot
            spring-boot-starter-web


            org.springframework.boot
            spring-boot-starter-security


            org.springframework.boot
            spring-boot-starter-test
            test


            com.baomidou
            mybatis-plus-boot-starter
            3.0.5


            mysql
            mysql-connector-java


            org.projectlombok
            lombok
3.2.3 制作实体类
package com.tedu.java.pojo;

import lombok.Data;

/**
 * @author: zyy
 * @date: 2022/9/4 10:58
 * @description: TODO
 * @version: 1.0
 * @描述:
 **/
@Data
public class Users {
    private Integer id;
    private String username;
    private String password;
}
3.2.4 整合 MybatisPlus 制作 mapper
package com.tedu.java.mapper;

import com.baomidou.mybatisplus.core.mapper.BaseMapper;
import com.tedu.java.pojo.Users;

/**
 * @author: zyy
 * @date: 2022/9/4 11:00
 * @description: TODO
 * @version: 1.0
 * @描述:
 **/
public interface UsersMapper extends BaseMapper {
}
3.2.5 配置连接数据库源
配置文件添加数据库配置
#mysql 数据库连接
spring.datasource.driver-class-name=com.mysql.cj.jdbc.Driver
spring.datasource.url=jdbc:mysql://localhost:3306/springsecurity?serverTimezone=GMT%2B8
spring.datasource.username=root
spring.datasource.password=123456
3.2.6 制作登录实现类
package com.tedu.java.service;

import com.baomidou.mybatisplus.core.conditions.query.QueryWrapper;
import com.tedu.java.mapper.UsersMapper;
import com.tedu.java.pojo.Users;
import org.springframework.beans.factory.annotation.Autowired;
import org.springframework.security.core.GrantedAuthority;
import org.springframework.security.core.authority.AuthorityUtils;
import org.springframework.security.core.userdetails.User;
import org.springframework.security.core.userdetails.UserDetails;
import org.springframework.security.core.userdetails.UserDetailsService;
import org.springframework.security.core.userdetails.UsernameNotFoundException;
import org.springframework.security.crypto.bcrypt.BCryptPasswordEncoder;
import org.springframework.stereotype.Service;

import java.util.List;

/**
 * @author: zyy
 * @date: 2022/9/4 11:03
 * @description: TODO
 * @version: 1.0
 * @描述:
 **/
@Service("userDetailsService")
public class MyUserDetailsService implements UserDetailsService {
    @Autowired
    private UsersMapper usersMapper;
    @Override
    public UserDetails loadUserByUsername(String username) throws UsernameNotFoundException {
        QueryWrapper queryWrapper = new QueryWrapper();
        queryWrapper.eq("username",username);
        Users users = usersMapper.selectOne(queryWrapper);
        if(users==null){
            throw new UsernameNotFoundException("用户名不存在!!!");
        }
        System.out.println(users);
        List role = AuthorityUtils.commaSeparatedStringToAuthorityList("role");
        return new User(users.getUsername(),
                new BCryptPasswordEncoder().encode(users.getPassword()),role);

    }
}
3.2.7 编辑配置类
package com.tedu.java.config;

import org.springframework.context.annotation.Bean;
import org.springframework.context.annotation.Configuration;
import org.springframework.security.config.annotation.web.builders.HttpSecurity;
import org.springframework.security.config.annotation.web.configuration.WebSecurityConfigurerAdapter;
import org.springframework.security.crypto.bcrypt.BCryptPasswordEncoder;
import org.springframework.security.crypto.password.PasswordEncoder;

/**
 * @author: zyy
 * @date: 2022/9/4 11:16
 * @description: TODO
 * @version: 1.0
 * @描述:
 **/
@Configuration
public class SecurityConfig extends WebSecurityConfigurerAdapter {
    //注入PasswordEncoder类到spring容器中
    @Bean
    public PasswordEncoder passwordEncoder(){
        return new BCryptPasswordEncoder();
    }
    @Override
    protected void configure(HttpSecurity http) throws Exception {
        http.formLogin()//表单登录
                .and().authorizeRequests()//认证配置
                .anyRequest()//任何请求
                .authenticated();//都需要身份验证
    }
}
3.2.8 在启动类上添加@mapperScan
package com.tedu.java;

import org.mybatis.spring.annotation.MapperScan;
import org.springframework.boot.SpringApplication;
import org.springframework.boot.autoconfigure.SpringBootApplication;

@SpringBootApplication
@MapperScan("com.tedu.java.mapper")
public class Springsecuritydemo02Application {

    public static void main(String[] args) {
        SpringApplication.run(Springsecuritydemo02Application.class, args);
    }
}
3.2.10 controller
package com.tedu.java.controller;

import org.springframework.stereotype.Controller;
import org.springframework.web.bind.annotation.GetMapping;
import org.springframework.web.bind.annotation.RequestMapping;
import org.springframework.web.bind.annotation.ResponseBody;

/**
 * @author 47132
 */
@Controller
@RequestMapping("/test")
public class LoginTroller {

    @GetMapping("/hello")
    @ResponseBody
    public String hello() {
        return "hello security";
    }

    @GetMapping("/index")
    @ResponseBody
    public String index() {
        return "hello index";
    }
}
3.2.9 测试访问
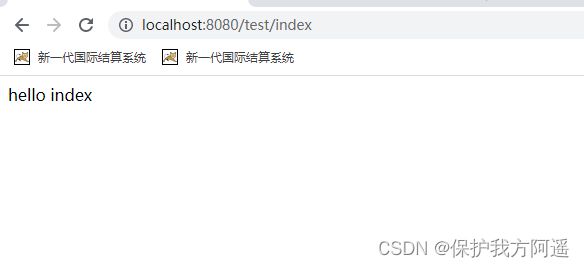
在浏览器输入:http://localhost:8080/test/index
输入用户名:zhangSan
密码:123456
3.3 未认证请求跳转到登录页
3.3.1. 引入前端模板依赖
            org.springframework.boot
            spring-boot-starter-thymeleaf
3.3.2 引入登录页面
在templates目录下创建success.html
    Title


登录成功
3.3.3 编写控制器
package com.tedu.java.controller;

import org.springframework.stereotype.Controller;
import org.springframework.web.bind.annotation.GetMapping;
import org.springframework.web.bind.annotation.ResponseBody;

/**
 * @author 47132
 */
@Controller
public class SuccessController {
    @GetMapping("/index")
    public String index(){
        return "success";
    }
    @GetMapping("findAll")
    @ResponseBody
    public String findAll(){
        return "findAll";
    }
}
3.3.4 编写配置类放行登录页面以及静态资源
package com.tedu.java.config;

import org.springframework.context.annotation.Bean;
import org.springframework.context.annotation.Configuration;
import org.springframework.security.config.annotation.web.builders.HttpSecurity;
import org.springframework.security.config.annotation.web.configuration.WebSecurityConfigurerAdapter;
import org.springframework.security.crypto.bcrypt.BCryptPasswordEncoder;
import org.springframework.security.crypto.password.PasswordEncoder;

/**
 * @author 47132
 */
@Configuration
public class SecurityConfig extends WebSecurityConfigurerAdapter {

    @Bean
    public PasswordEncoder passwordEncoder(){
        return new BCryptPasswordEncoder();
    }

    @Override
    protected void configure(HttpSecurity http) throws Exception {
      http.authorizeRequests()
              // 表示配置请求路径
              .antMatchers("/index")
              .permitAll()//制定URL 无需保护
        .anyRequest()//其他请求
        .authenticated();//需要认证
    }
}
3.3.5 测试
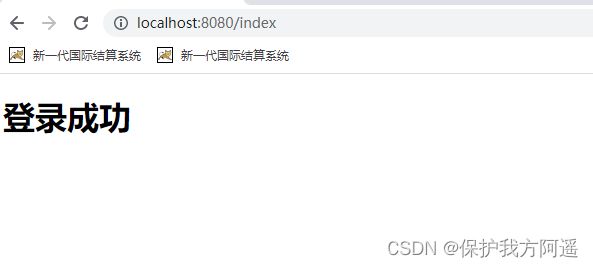
在浏览器输入:http://localhost:8080/index
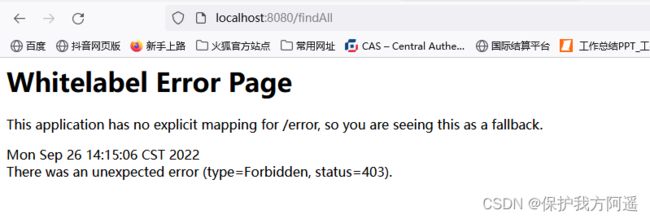
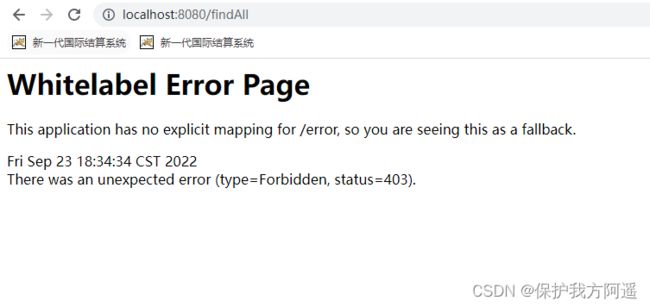
访问 localhost:8080/findAll 会提示 403 错误 表示没有这个权限。
3.3.6 设置未授权的请求跳转到登录页
3.3.6.1 配置类
SecurityConfig类:
package com.tedu.java.config;

import org.springframework.context.annotation.Bean;
import org.springframework.context.annotation.Configuration;
import org.springframework.security.config.annotation.web.builders.HttpSecurity;
import org.springframework.security.config.annotation.web.configuration.WebSecurityConfigurerAdapter;
import org.springframework.security.crypto.bcrypt.BCryptPasswordEncoder;
import org.springframework.security.crypto.password.PasswordEncoder;

/**
 * @author 47132
 */
@Configuration
public class SecurityConfig extends WebSecurityConfigurerAdapter {

    @Bean
    public PasswordEncoder passwordEncoder(){
        return new BCryptPasswordEncoder();
    }

    @Override
    protected void configure(HttpSecurity http) throws Exception {
        //配置认证
        http.formLogin()
                .loginPage("/login.html")
                .loginProcessingUrl("/user/login")
                .defaultSuccessUrl("/test/index")
                .failureUrl("/fail.html")
                .permitAll();
      http.authorizeRequests()
              // 表示配置请求路径
              .antMatchers("/index")
              .permitAll()//制定URL 无需保护
        .anyRequest()//其他请求
        .authenticated();//需要认证
        //关闭csrf
        http.csrf().disable();
    }
}
3.3.6.2 控制器
LoginTroller 类:
package com.tedu.java.controller;

import org.springframework.stereotype.Controller;
import org.springframework.web.bind.annotation.GetMapping;
import org.springframework.web.bind.annotation.RequestMapping;
import org.springframework.web.bind.annotation.ResponseBody;

/**
 * @author 47132
 */
@Controller
@RequestMapping("/test")
public class LoginTroller {

    @GetMapping("/hello")
    @ResponseBody
    public String hello() {
        return "hello security";
    }

    @GetMapping("/index")
    @ResponseBody
    public String index() {
        return "hello index";
    }
}
3.3.6.2 引入页面
在static目录下创建fail.html和login.html
login.html:
Title
fail.html
    Title


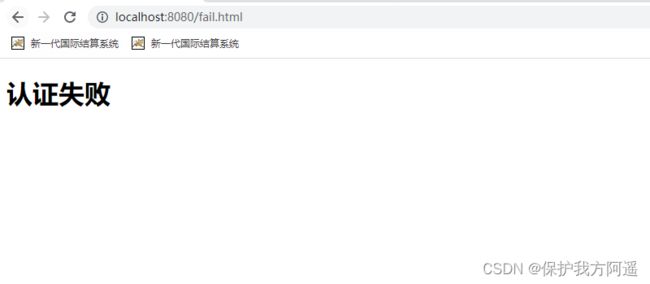
认证失败
注:注意:页面提交方式必须为 post 请求,所以上面的页面不能使用,用户名,密码必须为username,password!!!!
原因:在执行登录的时候会走一个过滤器 UsernamePasswordAuthenticationFilter
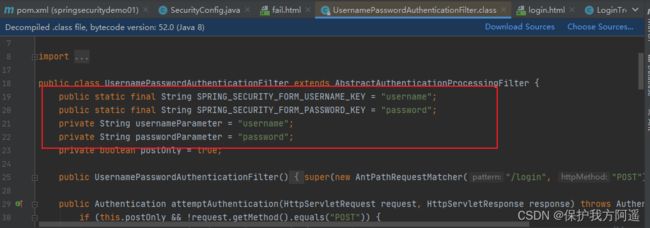
如果修改配置可以调用 usernameParameter()和 passwordParameter()方法。
例如:
用户名:

密码:
在配置类SecurityConfig中重写的configure(HttpSecurity http)方法中添加:
http.formLogin().usernameParameter("loginAcct").passwordParameter("userPswd");
3.3.6.3 测试
在浏览中输入:http://localhost:8080/test/hello
输错用户名或者密码:
3.4 基于角色或权限进行访问控制
3.4.1 hasAuthority 方法
如果当前的主体具有指定的权限,则返回 true,否则返回 false。
- 修改配置类
package com.tedu.java.config;

import org.springframework.context.annotation.Bean;
import org.springframework.context.annotation.Configuration;
import org.springframework.security.config.annotation.web.builders.HttpSecurity;
import org.springframework.security.config.annotation.web.configuration.WebSecurityConfigurerAdapter;
import org.springframework.security.crypto.bcrypt.BCryptPasswordEncoder;
import org.springframework.security.crypto.password.PasswordEncoder;

/**
 * @author 47132
 */
@Configuration
public class SecurityConfig extends WebSecurityConfigurerAdapter {

    @Bean
    public PasswordEncoder passwordEncoder(){
        return new BCryptPasswordEncoder();
    }

    @Override
    protected void configure(HttpSecurity http) throws Exception {
        //配置认证
        http.formLogin()
                .loginPage("/login.html")
                .loginProcessingUrl("/user/login")
                .defaultSuccessUrl("/test/index")
                .failureUrl("/fail.html")
                .permitAll();
      http.authorizeRequests()
              // 表示配置请求路径
              .antMatchers("/index")
              .permitAll()//制定URL 无需保护
              //需要用户带有admins权限
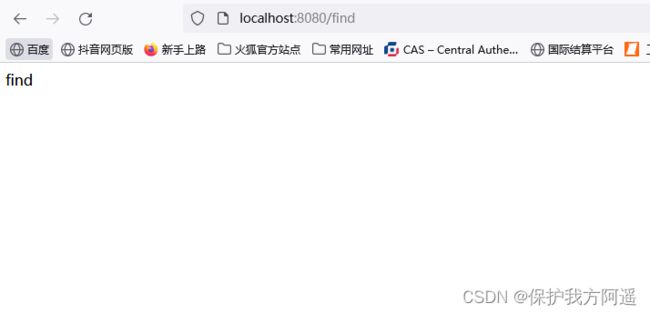
              .antMatchers("/find").hasAuthority("admins")
        .anyRequest()//其他请求
        .authenticated();//需要认证
        //关闭csrf
        http.csrf().disable();
    }
}
- 添加一个控制器
 @GetMapping("/find")
    @ResponseBody
    public String find(){
        return "find";
    }
- 给用户登录主体赋予权限
package com.tedu.java.service;


import com.tedu.java.dao.UsersMapper;
import com.tedu.java.pojo.Users;
import org.springframework.beans.factory.annotation.Autowired;
import org.springframework.security.core.GrantedAuthority;
import org.springframework.security.core.authority.AuthorityUtils;
import org.springframework.security.core.userdetails.User;
import org.springframework.security.core.userdetails.UserDetails;
import org.springframework.security.core.userdetails.UserDetailsService;
import org.springframework.security.core.userdetails.UsernameNotFoundException;
import org.springframework.security.crypto.bcrypt.BCryptPasswordEncoder;
import org.springframework.stereotype.Service;

import java.util.List;

@Service("userDetailsService")
public class LoginService implements UserDetailsService {
    @Autowired
    private UsersMapper usersMapper;
    @Override
    public UserDetails loadUserByUsername(String username) throws UsernameNotFoundException {
      Users users = usersMapper.selectUsersByName(username);
        if(users==null){
            throw new UsernameNotFoundException("用户名不存在!!");
        }
        System.out.println(users);
        //给登录用户赋予admins权限
       List authorityList = AuthorityUtils.commaSeparatedStringToAuthorityList("admin,admins");
        return new User(username,new BCryptPasswordEncoder().encode(users.getPassword()), authorityList);
    }
}
3.4.2 hasAnyAuthority 方法
如果当前的主体有任何提供的角色(给定的作为一个逗号分隔的字符串列表)的话,返回
true.
- 修改配置类
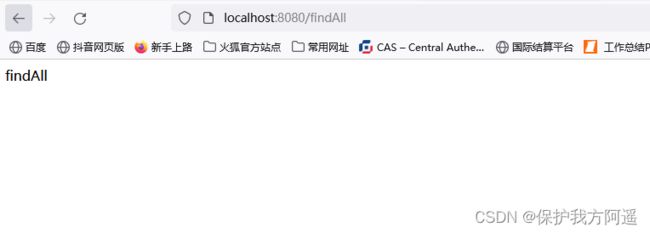
.antMatchers("/findAll").hasAnyAuthority("admin")
- 添加一个控制器
@GetMapping("/findAll")
@ResponseBody
public String findAll(){
        return "findAll";
    }
- 给用户登录主体赋予权限
List authorityList = AuthorityUtils.commaSeparatedStringToAuthorityList("admin,admins");
3.4.3 hasRole 方法
如果用户具备给定角色就允许访问,否则出现 403。
如果当前主体具有指定的角色,则返回 true。
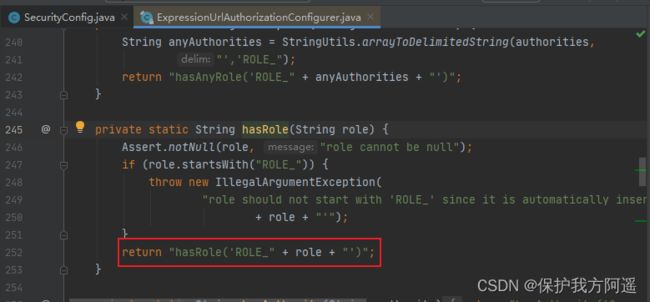
- 底层源码:
private static String hasRole(String role) {
		Assert.notNull(role, "role cannot be null");
		if (role.startsWith("ROLE_")) {
			throw new IllegalArgumentException(
					"role should not start with 'ROLE_' since it is automatically inserted. Got '"
							+ role + "'");
		}
		return "hasRole('ROLE_" + role + "')";
	}
- 给用户添加角色:
List authorityList = AuthorityUtils.commaSeparatedStringToAuthorityList("admin,admins,ROLE_role");
- 修改配置文件:
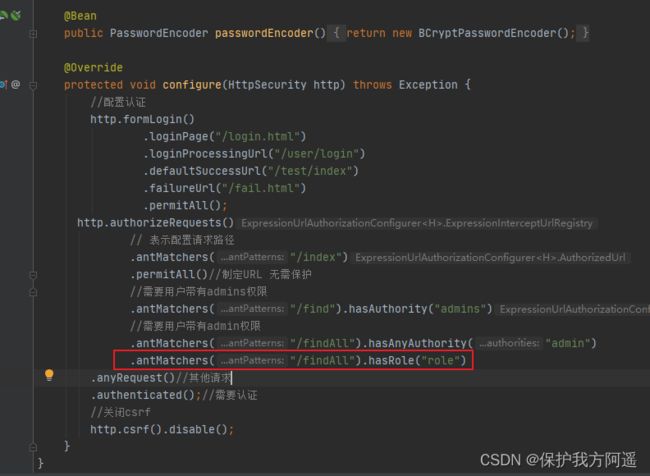
注意配置文件中不需要添加”ROLE_“,因为上述的底层代码会自动添加与之进行匹配。
.antMatchers("/findAll").hasRole("role")
3.4.3 hasAnyRole
表示用户具备任何一个条件都可以访问。
- 给用户添加角色:
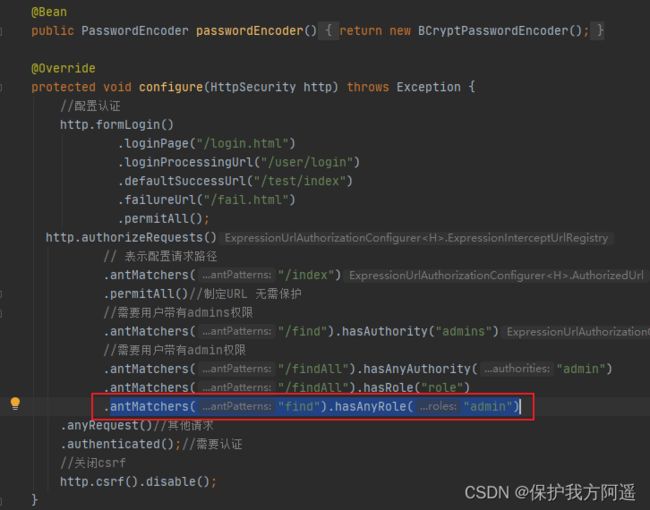
List authorityList = AuthorityUtils.commaSeparatedStringToAuthorityList("admin,admins,ROLE_role,ROLE_admin");
- 修改配置文件:
antMatchers("find").hasAnyRole("admin")
3.5 基于数据库实现权限认证
3.5.1 添加实体类
- Menu
package com.tedu.java.pojo;

import lombok.Data;

/**
 * @author 47132
 */
@Data
public class Menu {
    private Long id;
    private String name;
    private String url;
    private Long parentId;
    private String permission;
}
- Role
package com.tedu.java.pojo;

import lombok.Data;

/**
 * @author 47132
 */
@Data
public class Role {
    private Long id;
    private String name;
}
3.5.2 编写接口与实现类
- UsersMapper:
package com.tedu.java.dao;
import com.tedu.java.pojo.Menu;
import com.tedu.java.pojo.Role;
import com.tedu.java.pojo.Users;
import org.springframework.stereotype.Component;
import java.util.List;
/**
* @author 47132
*/
@Component
public interface UsersMapper{
Users selectUsersByName(String username);
/**
* 根据用户id 查询用户角色
*/
List selectRoleByUserId(Long userId);
/**
* 根据用户id 查询菜单
*/
List UserInfoMapper.xml:
3.5.3 application.yml
# 应用名称
spring.application.name=springsecuritydemo01
# 应用服务 WEB 访问端口
server.port=8080
#mysql 数据库连接
spring.datasource.driver-class-name=com.mysql.cj.jdbc.Driver
spring.datasource.url=jdbc:mysql://localhost:3306/security?serverTimezone=GMT%2B8
spring.datasource.username=root
spring.datasource.password=123456
mybatis.type-aliases-package=com.tedo.java.pojo
mybatis.mapper-locations=classpath:/mapper/*.xml
spring.thymeleaf.cache=false
spring.mvc.hiddenmethod.filter.enabled=true
3.5.4 逻辑层
UsersServiceImpl:
package com.tedu.java.service;
import com.tedu.java.dao.UsersMapper;
import com.tedu.java.pojo.Menu;
import com.tedu.java.pojo.Role;
import com.tedu.java.pojo.Users;
import org.springframework.beans.factory.annotation.Autowired;
import org.springframework.security.core.GrantedAuthority;
import org.springframework.security.core.authority.SimpleGrantedAuthority;
import org.springframework.security.core.userdetails.User;
import org.springframework.security.core.userdetails.UserDetails;
import org.springframework.security.core.userdetails.UserDetailsService;
import org.springframework.security.core.userdetails.UsernameNotFoundException;
import org.springframework.stereotype.Service;
import java.util.ArrayList;
import java.util.List;
/**
* @author 47132
*/
@Service("userDetailsService")
public class UsersServiceImpl implements UserDetailsService {
@Autowired
private UsersMapper usersMapper;
@Override
public UserDetails loadUserByUsername(String userName) throws UsernameNotFoundException {
System.out.println("登录!!!!");
Users users = usersMapper.selectUsersByName(userName);
if(users==null){
System.out.println("用户不存在!!!!");
throw new UsernameNotFoundException("用户不存在你在");
}
//获取用户角色,菜单列表
List roleList = usersMapper.selectRoleByUserId(users.getId());
List 3.5.5 控制类
LoginController:
package com.tedu.java.controller;

import org.springframework.stereotype.Controller;
import org.springframework.web.bind.annotation.GetMapping;
import org.springframework.web.bind.annotation.ResponseBody;

/**
 * @author 47132
 */
@Controller
public class LoginController {
    @GetMapping("/index")
    public String index(){
        return "success";
    }
    @GetMapping("/findAll")
    @ResponseBody
    public String findAll(){
        return "findAll";
    }
    @GetMapping("/find")
    @ResponseBody
    public String find(){
        return "find";
    }
}
3.5.6 SpringSecurity配置类
package com.tedu.java.config;

import org.springframework.context.annotation.Bean;
import org.springframework.context.annotation.Configuration;
import org.springframework.security.config.annotation.web.builders.HttpSecurity;
import org.springframework.security.config.annotation.web.configuration.WebSecurityConfigurerAdapter;
import org.springframework.security.crypto.bcrypt.BCryptPasswordEncoder;
import org.springframework.security.crypto.password.PasswordEncoder;

/**
 * @author 47132
 */
@Configuration
public class SecurityConfig extends WebSecurityConfigurerAdapter {

    @Bean
    public PasswordEncoder passwordEncoder(){
        return new BCryptPasswordEncoder();
    }

    @Override
    protected void configure(HttpSecurity http) throws Exception {
        //配置认证
        http.formLogin()
                .loginPage("/login.html")
                .loginProcessingUrl("/user/login")
                .defaultSuccessUrl("/index")
                .failureUrl("/fail.html")
                .permitAll();
      http.authorizeRequests()
              // 表示配置请求路径
              .antMatchers("/index")
              .permitAll()//制定URL 无需保护
              .antMatchers("/findAll").hasRole("管理员")
              .antMatchers("/find").hasAnyAuthority("menu:system")
        .anyRequest()//其他请求
        .authenticated();//需要认证
        //关闭csrf
        http.csrf().disable();
    }
}
3.5.7 前端页面
- 在static目录下创建fail.html和login.html
login.html:
Title
fail.html:
    Title


认证失败
- 在templates目录下创建success.html
success.html:
    Title


登录成功
3.5.8 在启动类上添加@MapperScan注解‘’
package com.tedu.java;

import org.mybatis.spring.annotation.MapperScan;
import org.springframework.boot.SpringApplication;
import org.springframework.boot.autoconfigure.SpringBootApplication;

@SpringBootApplication
@MapperScan("com.tedu.java.dao")
public class Springsecuritydemo02Application {

    public static void main(String[] args) {
        SpringApplication.run(Springsecuritydemo02Application.class, args);
    }

}
3.5.8 使用管理员与非管理员进行测试
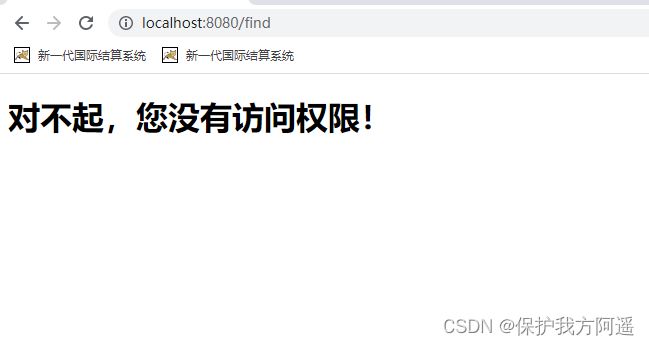
3.6 自定义 403 页面
3.6.1 修改访问配置类
http.exceptionHandling().accessDeniedPage("/unauth");
3.6.2 添加对应控制器
@GetMapping("/unauth")
    public String unAccept(){
        return "unauth";
    }
3.6.3 添加对应的前端页面
在templates包下创建unauth.html:
    Title


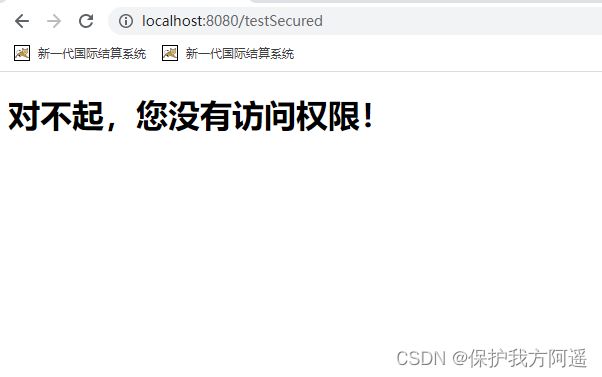
对不起,您没有访问权限!
3.6.4 测试
3.7 注解使用
3.7.1 @Secured
判断是否具有角色,另外需要注意的是这里匹配的字符串需要添加前缀“ROLE_“。
使用注解先要开启注解功能!
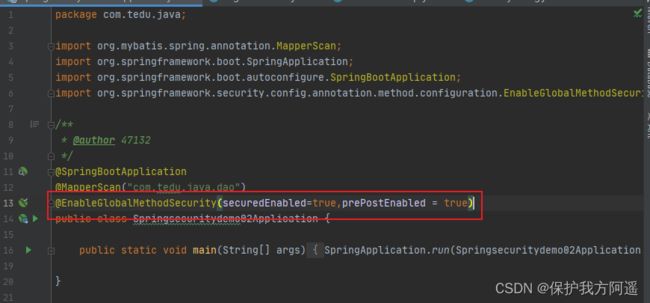
在启动类上添加@EnableGlobalMethodSecurity(securedEnabled=true)
@GetMapping("/testSecured")
    @ResponseBody
    @Secured({"ROLE_管理员"})
    public String helloUser(){
        return "hello user";
    }
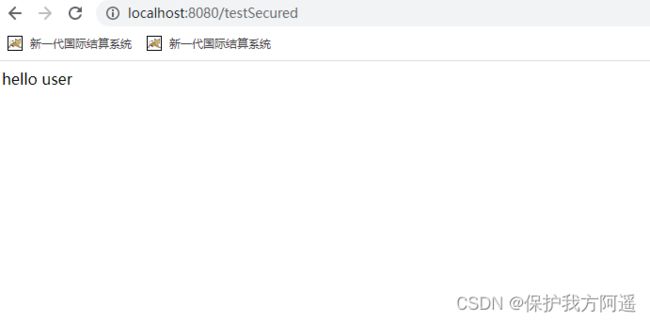
登录之后直接访问:http://localhost:8090/testSecured 控制器。
先使用liSI,再使用zhangS
![]()
3.7.2 @PreAuthorize
先开启注解功能:
在启动类上添加@EnableGlobalMethodSecurity(prePostEnabled = true)
@PreAuthorize:注解适合进入方法前的权限验证, @PreAuthorize 可以将登录用
户的 roles/permissions 参数传到方法中。
在控制器方法上添加注解:
@GetMapping("/testSecured")
    @ResponseBody
    //@Secured({"ROLE_管理员"})
    @PreAuthorize("hasAnyAuthority('menu:system')")
    public String helloUser(){
        return "hello user";
    }
3.7.3 @PostAuthorize
先开启注解功能:
在启动类上添加@EnableGlobalMethodSecurity(prePostEnabled = true)
@PostAuthorize 注解使用并不多,在方法执行后再进行权限验证,适合验证带有返回值
的权限。
@PostAuthorize 注解使用并不多,在方法执行后再进行权限验证,适合验证带有返回值
的权限。
在控制器方法上添加注解:
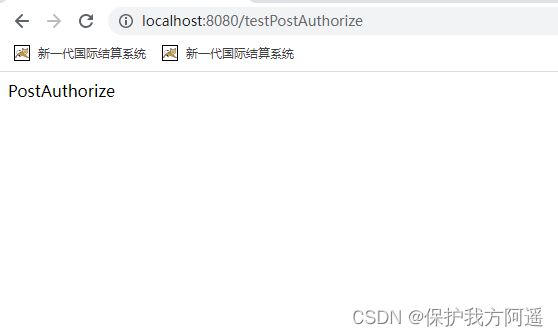
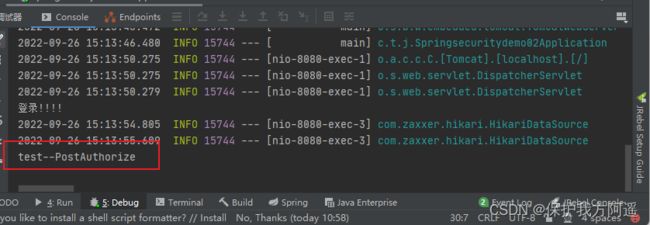
@RequestMapping("/testPostAuthorize")
@ResponseBody
@PostAuthorize("hasAnyAuthority('menu:system')")
public String preAuthorize(){
System.out.println("test--PostAuthorize");
return "PostAuthorize";
}
3.7.4 @PostFilter
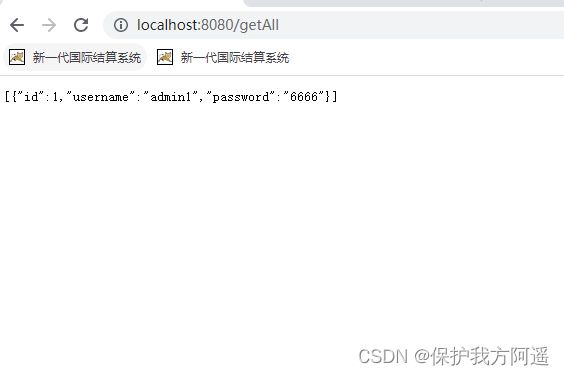
@PostFilter :权限验证之后对数据进行过滤 留下用户名是 admin1 的数据。
表达式中的 filterObject 引用的是方法返回值 List 中的某一个元素。
@RequestMapping("getAll")
@PreAuthorize("hasRole('ROLE_管理员')")
@PostFilter("filterObject.username == 'admin1'")
@ResponseBody
public List getAllUser(){
ArrayList list = new ArrayList<>();
list.add(new UserInfo(1l,"admin1","6666"));
list.add(new UserInfo(2l,"admin2","888"));
return list;
}
3.7.5 @PreFilter
@PreFilter: 进入控制器之前对数据进行过滤。
@RequestMapping("getTestPreFilter")
@PreAuthorize("hasRole('ROLE_管理员')")
@PreFilter(value = "filterObject.id%2==0")
@ResponseBody
public List getTestPreFilter(@RequestBody List
list){
list.forEach(t-> {
System.out.println(t.getId()+"\t"+t.getUsername());
});
return list;
}
3.7.6 权限表达式
https://docs.spring.io/spring-security/site/docs/5.3.4.RELEASE/reference/html5/#el-access
3.8 基于数据库的记住我
3.8.1 创建表
CREATE TABLE `persistent_logins` (
`username` varchar(64) NOT NULL,
`series` varchar(64) NOT NULL,
`token` varchar(64) NOT NULL,
`last_used` timestamp NOT NULL DEFAULT CURRENT_TIMESTAMP ON UPDATE
CURRENT_TIMESTAMP,
PRIMARY KEY (`series`)
) ENGINE=InnoDB DEFAULT CHARSET=utf8
3.8.2 编写配置类
package com.tedu.java.config;

import com.tedu.java.service.UsersServiceImpl;
import org.springframework.beans.factory.annotation.Autowired;
import org.springframework.context.annotation.Bean;
import org.springframework.context.annotation.Configuration;
import org.springframework.security.config.annotation.web.builders.HttpSecurity;
import org.springframework.security.config.annotation.web.configuration.WebSecurityConfigurerAdapter;
import org.springframework.security.crypto.bcrypt.BCryptPasswordEncoder;
import org.springframework.security.crypto.password.PasswordEncoder;
import org.springframework.security.web.authentication.rememberme.JdbcTokenRepositoryImpl;
import org.springframework.security.web.authentication.rememberme.PersistentTokenRepository;

import javax.sql.DataSource;

/**
 * @author 47132
 */
@Configuration
public class SecurityConfig extends WebSecurityConfigurerAdapter {
    @Autowired
    private DataSource dataSource;
    @Autowired
    private UsersServiceImpl usersService;
    @Autowired
    private PersistentTokenRepository tokenRepository;
    @Bean
    public PersistentTokenRepository persistentTokenRepository(){
        JdbcTokenRepositoryImpl jdbcTokenRepository = new JdbcTokenRepositoryImpl();
        //赋值数据源
        jdbcTokenRepository.setDataSource(dataSource);
        //自动创建表,第一次执行会创建,以后要执行就要删除掉
        jdbcTokenRepository.setCreateTableOnStartup(true);
        return jdbcTokenRepository;
    }
    @Bean
    public PasswordEncoder passwordEncoder(){
        return new BCryptPasswordEncoder();
    }

    @Override
    protected void configure(HttpSecurity http) throws Exception {
        http.exceptionHandling().accessDeniedPage("/unauth");
        //配置认证
        http.formLogin()
                .loginPage("/login.html")
                .loginProcessingUrl("/user/login")
                .defaultSuccessUrl("/index")
                .failureUrl("/fail.html")
                .permitAll();
      http.authorizeRequests()
              // 表示配置请求路径
              .antMatchers("/index","/user/login")
              .permitAll()//制定URL 无需保护
              .antMatchers("/findAll").hasRole("管理员")
              .antMatchers("/find").hasAnyAuthority("menu:system")
        .anyRequest()//其他请求
        .authenticated();//需要认证
        //开启记住我功能
        http.rememberMe().tokenRepository(tokenRepository).userDetailsService(usersService);
        //关闭csrf
        http.csrf().disable();
    }
}
3.8.3 页面添加记住我复选框
在login.html添加记住我框:
记住我:
此处:name 属性值必须位 remember-me.不能改为其他值。
3.8.4 使用张三进行登录测试
登录成功之后,关闭浏览器再次访问 http://localhost:8080/getAll,发现依然可以使用!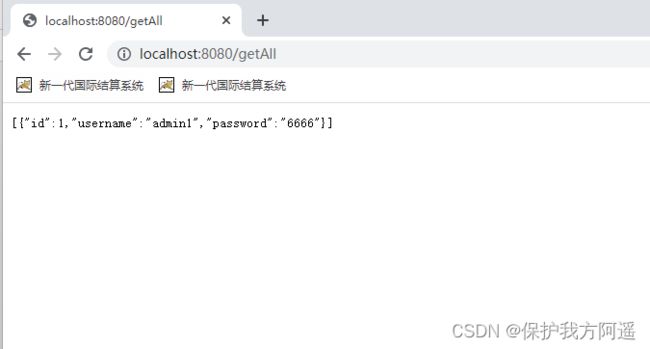
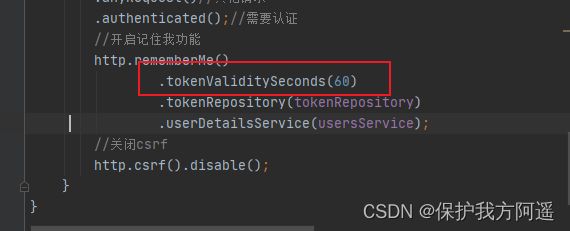
3.8.5 设置有效期
默认 2 周时间。但是可以通过设置状态有效时间,即使项目重新启动下次也可以正常登录。
在配置文件中设置
//开启记住我功能
        http.rememberMe()
                .tokenValiditySeconds(60)
                .tokenRepository(tokenRepository)
                .userDetailsService(usersService);
3.8.6 用户注销
在登录页面添加一个退出连接
success.html:
登录成功

退出
3.8.7 在配置类中添加退出映射地址
http.logout().logoutUrl("/logout").logoutSuccessUrl("/index").permitAll();
3.8.8 测试
退出之后,是无法访问需要登录时才能访问的控制器!
3.9 CSRF
3.9.1 CSRF 理解
跨站请求伪造(英语:Cross-site request forgery),也被称为 one-click
attack 或者 session riding,通常缩写为 CSRF 或者 XSRF, 是一种挟制用户在当前已登录的 Web 应用程序上执行非本意的操作的攻击方法。跟跨网站脚本(XSS)相比,XSS利用的是用户对指定网站的信任,CSRF 利用的是网站对用户网页浏览器的信任。
跨站请求攻击,简单地说,是攻击者通过一些技术手段欺骗用户的浏览器去访问一个自己曾经认证过的网站并运行一些操作(如发邮件,发消息,甚至财产操作如转账和购买商品)。由于浏览器曾经认证过,所以被访问的网站会认为是真正的用户操作而去运行。这利用了 web 中用户身份验证的一个漏洞:简单的身份验证只能保证请求发自某个用户的浏览器,却不能保证请求本身是用户自愿发出的。
从 Spring Security 4.0 开始,默认情况下会启用 CSRF 保护,以防止 CSRF 攻击应用程序,Spring Security CSRF 会针对PATCH,POST,PUT 和 DELETE 方法进行防护。
3.9.2 案例
在登录页面添加一个隐藏域:
关闭安全配置的类中的 csrf:
// http.csrf().disable();
3.9.3 Spring Security 实现 CSRF 的原理
- 生成 csrfToken 保存到 HttpSession 或者 Cookie 中。
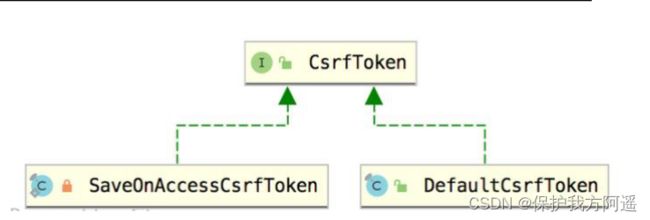
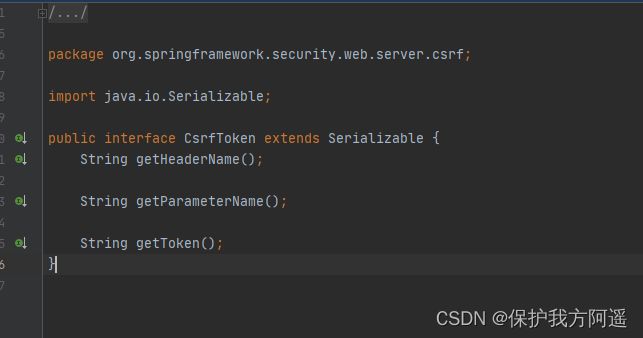
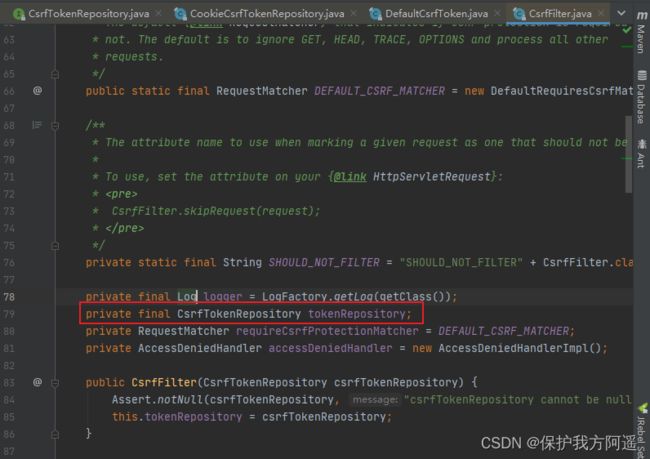
SaveOnAccessCsrfToken 类有个接口 CsrfTokenRepository。
 当前接口实类:HttpSessionCsrfTokenRepository,CookieCsrfTokenRepository。

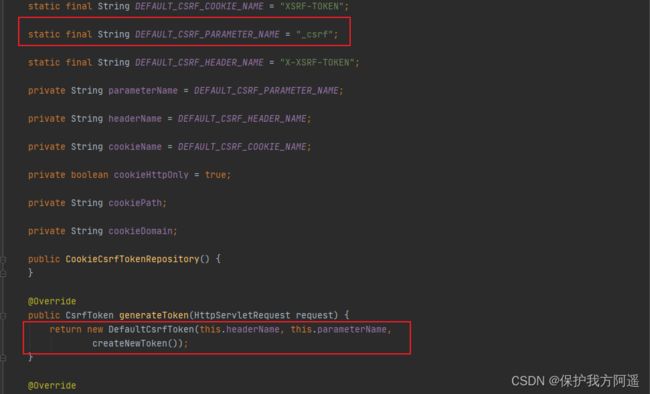
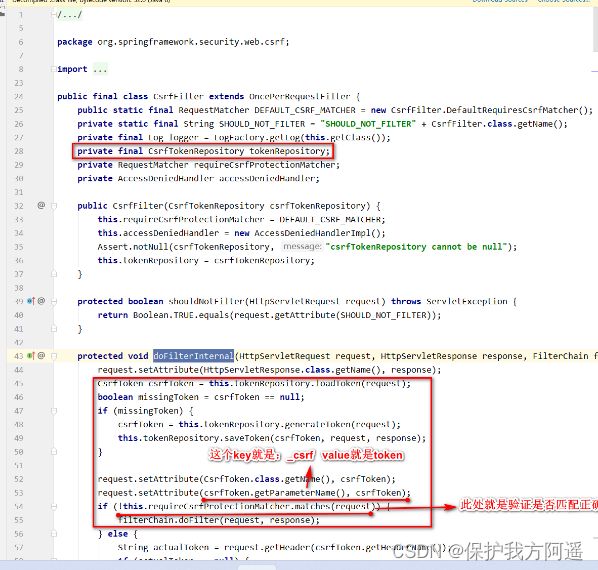
- 请求到来时,从请求中提取 csrfToken,和保存的 csrfToken 做比较,进而判断当前请求是否合法。主要通过 CsrfFilter 过滤器来完成。
四 SpringSecurity 原理总结
4.1 SpringSecurity 的过滤器介绍
SpringSecurity 采用的是责任链的设计模式,它有一条很长的过滤器链。现在对这条过滤
器链的 15 个过滤器进行说明:
- WebAsyncManagerIntegrationFilter:将 Security 上下文与 Spring Web 中用于处理异步请求映射的 WebAsyncManager 进行集成。
- SecurityContextPersistenceFilter:在每次请求处理之前将该请求相关的安全上下文信息加载到 SecurityContextHolder 中,然后在该次请求处理完成之后,将SecurityContextHolder 中关于这次请求的信息存储到一个“仓储”中,然后将SecurityContextHolder 中的信息清除,例如在 Session 中维护一个用户的安全信息就是这个过滤器处理的。
- HeaderWriterFilter:用于将头信息加入响应中。
- CsrfFilter:用于处理跨站请求伪造。
- LogoutFilter:用于处理退出登录。
- UsernamePasswordAuthenticationFilter:用于处理基于表单的登录请求,从表单中获取用户名和密码。默认情况下处理来自 /login 的请求。从表单中获取用户名和密码时,默认使用的表单 name 值为 username 和 password,这两个值可以通过设置这个过滤器的usernameParameter 和 passwordParameter 两个参数的值进行修改。
- DefaultLoginPageGeneratingFilter:如果没有配置登录页面,那系统初始化时就会配置这个过滤器,并且用于在需要进行登录时生成一个登录表单页面。
- BasicAuthenticationFilter:检测和处理 http basic 认证。
- RequestCacheAwareFilter:用来处理请求的缓存。
- SecurityContextHolderAwareRequestFilter:主要是包装请求对象 request。
- AnonymousAuthenticationFilter:检测 SecurityContextHolder 中是否存在Authentication 对象,如果不存在为其提供一个匿名 Authentication。
- SessionManagementFilter:管理 session 的过滤器。
- ExceptionTranslationFilter:处理 AccessDeniedException 和AuthenticationException 异常。
- FilterSecurityInterceptor:可以看做过滤器链的出口。
- RememberMeAuthenticationFilter:当用户没有登录而直接访问资源时, 从 cookie里找出用户的信息, 如果 Spring Security 能够识别出用户提供的 remember me cookie,用户将不必填写用户名和密码, 而是直接登录进入系统,该过滤器默认不开启。
4.2 SpringSecurity 基本流程
(4) CsrfFilter:用于处理跨站请求伪造。
(5)LogoutFilter:用于处理退出登录。
(6)UsernamePasswordAuthenticationFilter:用于处理基于表单的登录请求,从表单中
获取用户名和密码。默认情况下处理来自 /login 的请求。从表单中获取用户名和密码
时,默认使用的表单 name 值为 username 和 password,这两个值可以通过设置这个
过滤器的 usernameParameter 和 passwordParameter 两个参数的值进行修改。
(7)DefaultLoginPageGeneratingFilter:如果没有配置登录页面,那系统初始化时就会
配置这个过滤器,并且用于在需要进行登录时生成一个登录表单页面。
(8)BasicAuthenticationFilter:检测和处理 http basic 认证。
(9)RequestCacheAwareFilter:用来处理请求的缓存。
(10)SecurityContextHolderAwareRequestFilter:主要是包装请求对象 request。
(11)AnonymousAuthenticationFilter:检测 SecurityContextHolder 中是否存在
Authentication 对象,如果不存在为其提供一个匿名 Authentication。
(12)SessionManagementFilter:管理 session 的过滤器
(13)ExceptionTranslationFilter:处理 AccessDeniedException 和
AuthenticationException 异常。
(14)FilterSecurityInterceptor:可以看做过滤器链的出口。
(15)RememberMeAuthenticationFilter:当用户没有登录而直接访问资源时, 从 cookie
里找出用户的信息, 如果 Spring Security 能够识别出用户提供的 remember me cookie,
用户将不必填写用户名和密码, 而是直接登录进入系统,该过滤器默认不开启。
4.3 SpringSecurity 基本流程
Spring Security 采取过滤链实现认证与授权,只有当前过滤器通过,才能进入下一个
过滤器:
 绿色部分是认证过滤器,需要我们自己配置,可以配置多个认证过滤器。认证过滤器可以使用 Spring Security 提供的认证过滤器,也可以自定义过滤器(例如:短信验证)。认证过滤器要在 configure(HttpSecurity http)方法中配置,没有配置不生效。下面会重点介绍以下三个过滤器:
- UsernamePasswordAuthenticationFilter 过滤器:该过滤器会拦截前端提交的 POST 方式的登录表单请求,并进行身份认证。
- ExceptionTranslationFilter 过滤器:该过滤器不需要我们配置,对于前端提交的请求会直接放行,捕获后续抛出的异常并进行处理(例如:权限访问限制)。
- FilterSecurityInterceptor 过滤器:该过滤器是过滤器链的最后一个过滤器,根据资源权限配置来判断当前请求是否有权限访问对应的资源。如果访问受限会抛出相关异常,并由ExceptionTranslationFilter 过滤器进行捕获和处理。
4.4 SpringSecurity 认证流程
认证流程是在 UsernamePasswordAuthenticationFilter 过滤器中处理的,具体流程如下所示:
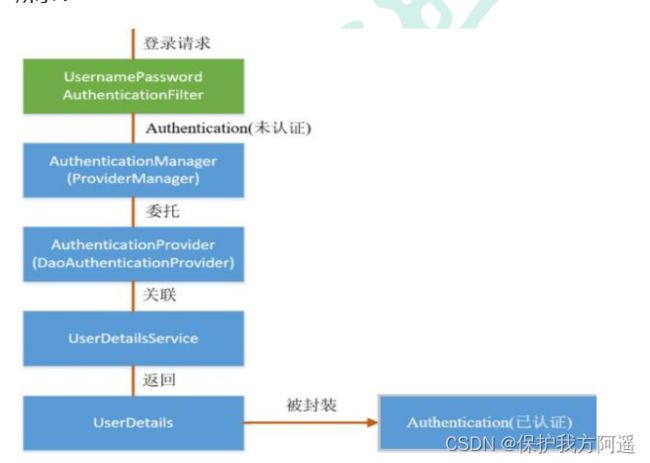
4.4.1 UsernamePasswordAuthenticationFilter 源码
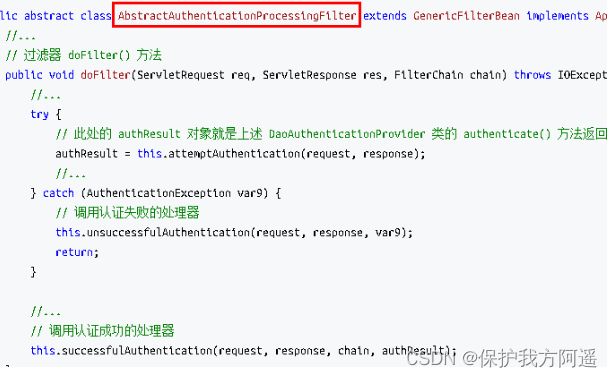
当前端提交的是一个 POST 方式的登录表单请求,就会被该过滤器拦截,并进行身份认证。该过滤器的 doFilter() 方法实现在其抽象父类。
AbstractAuthenticationProcessingFilter 中,查看相关源码:
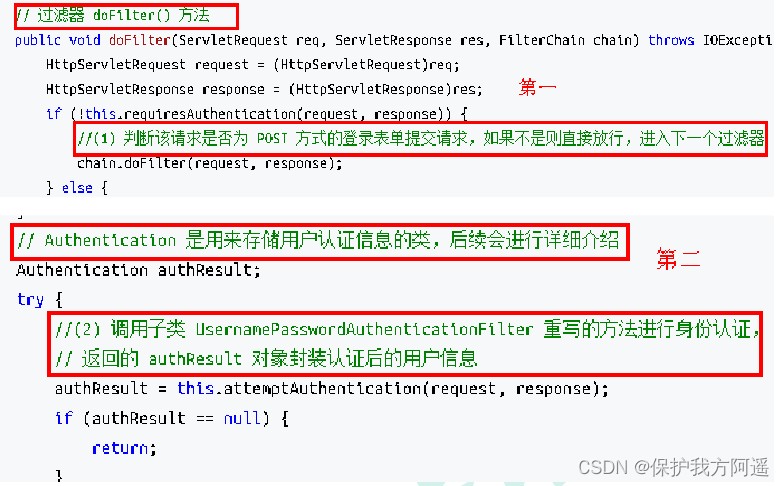


上述的 第二 过程调用了 UsernamePasswordAuthenticationFilter 的attemptAuthentication() 方法,源码如下:
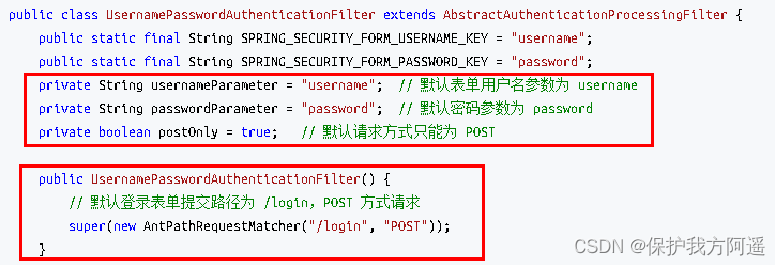
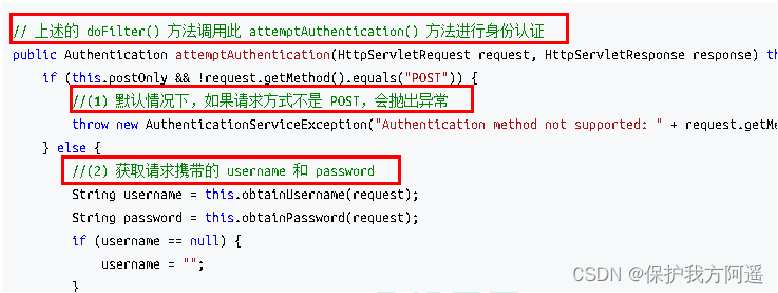

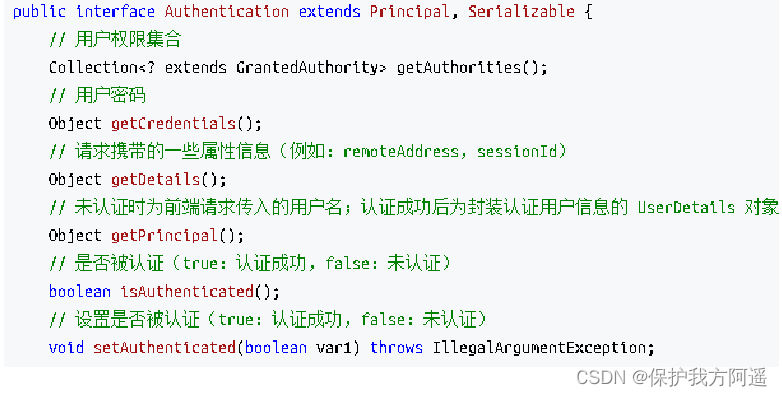
****上述的(3)过程创建的 UsernamePasswordAuthenticationToken 是Authentication 接口的实现类,该类有两个构造器,一个用于封装前端请求传入的未认证的用户信息,一个用于封装认证成功后的用户信息:
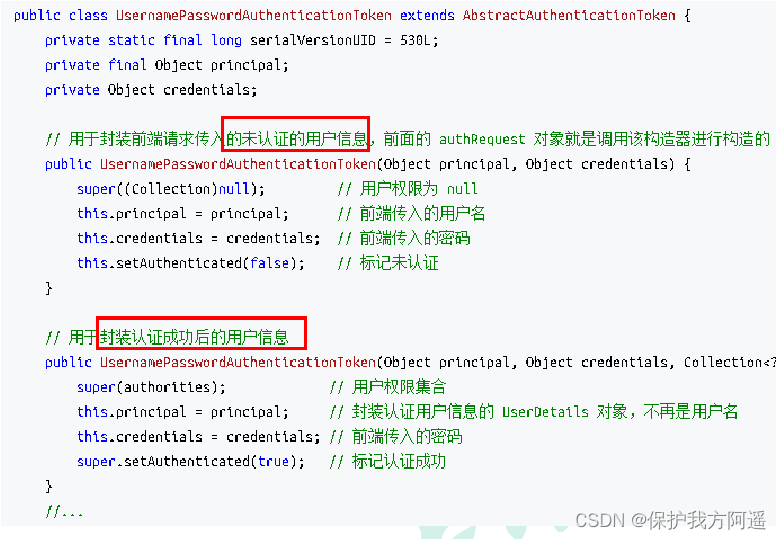
*** Authentication 接口的实现类用于存储用户认证信息,查看该接口具体定义:
4.4.2 ProviderManager 源码
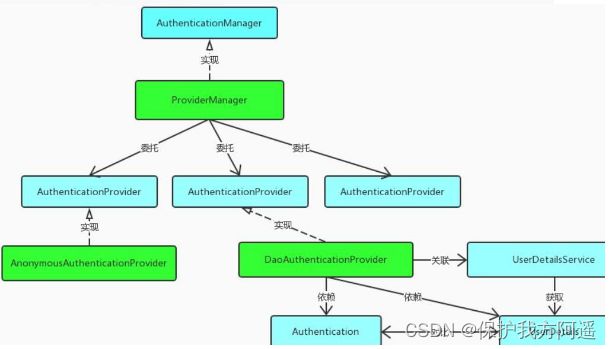
上述过程中,UsernamePasswordAuthenticationFilter 过滤器的attemptAuthentication() 方法的(5)过程将未认证的 Authentication 对象传入ProviderManager 类的 authenticate() 方法进行身份认证。
ProviderManager 是 AuthenticationManager 接口的实现类,该接口是认证相关的核心接口,也是认证的入口。在实际开发中,我们可能有多种不同的认证方式,例如:用户名+密码、邮箱+密码、手机号+验证码等,而这些认证方式的入口始终只有一个,那就是AuthenticationManager。在该接口的常用实现类 ProviderManager 内部会维护一个List列表,存放多种认证方式,实际上这是委托者模式(Delegate)的应用。每种认证方式对应着一个 AuthenticationProvider,AuthenticationManager 根据认证方式的不同(根据传入的 Authentication 类型判断)委托对应的 AuthenticationProvider 进行用户认证。
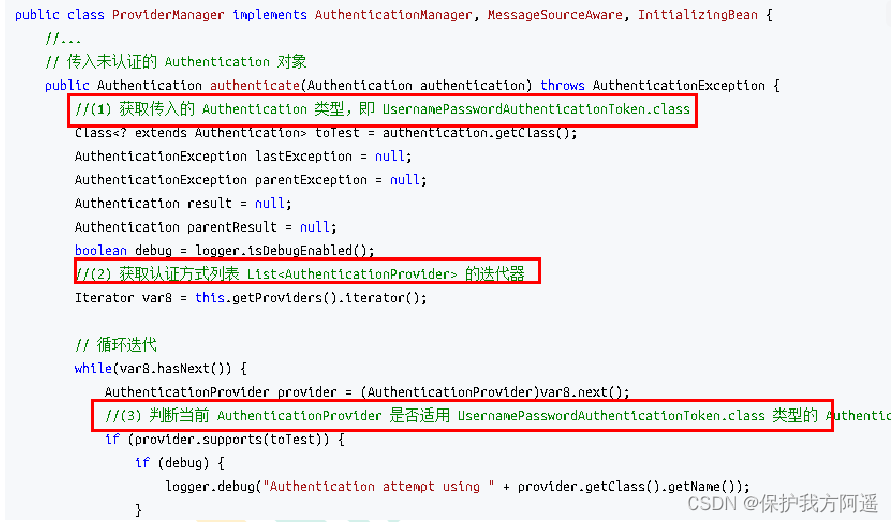
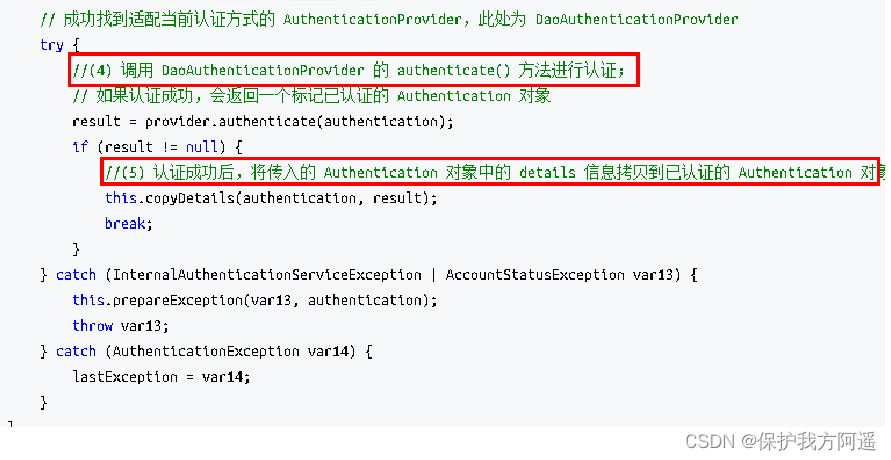
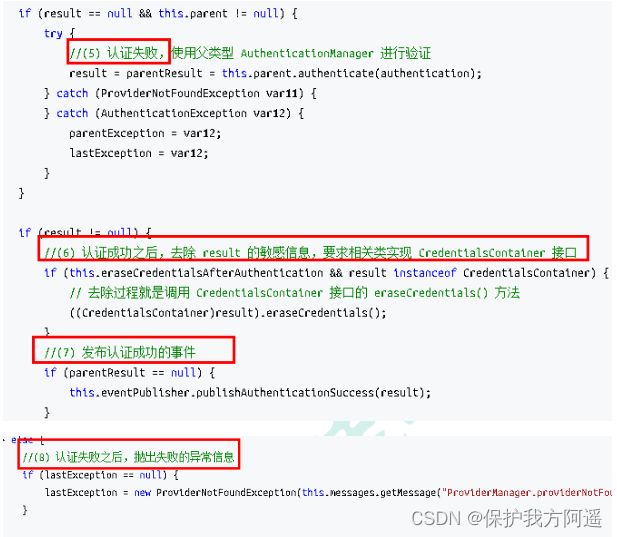
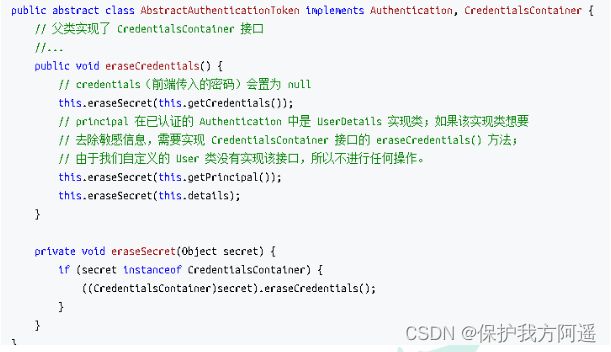
上述认证成功之后的(6)过程,调用 CredentialsContainer 接口定义的eraseCredentials() 方法去除敏感信息。查看UsernamePasswordAuthenticationToken 实现的 eraseCredentials() 方法,该方法实现在其父类中:
4.5 认证成功/失败处理
上述过程就是认证流程的最核心部分,接下来重新回到UsernamePasswordAuthenticationFilter 过滤器的 doFilter() 方法,查看认证成功/失败的处理:
查看successfulAuthentication()和unsuccessfulAuthentication()方法源码:
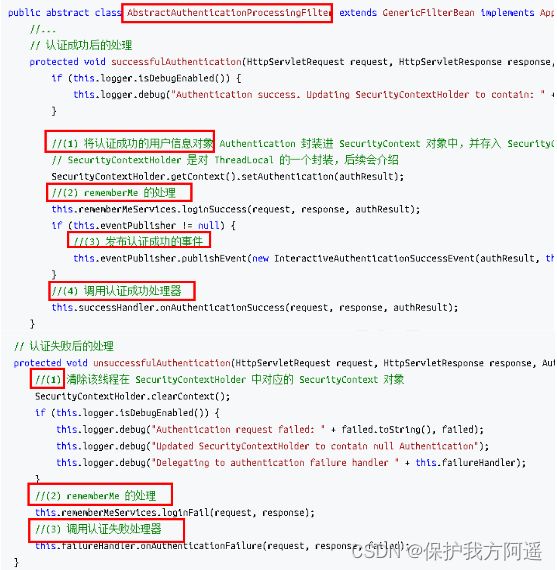
4.6 SpringSecurity 权限访问流程
上一个部分通过源码的方式介绍了认证流程,下面介绍权限访问流程,主要是对ExceptionTranslationFilter 过滤器和 FilterSecurityInterceptor 过滤器进行介绍。
4.6.1 ExceptionTranslationFilter 过滤器
该过滤器是用于处理异常的,不需要我们配置,对于前端提交的请求会直接放行,捕获后续抛出的异常并进行处理(例如:权限访问限制)。具体源码如下:
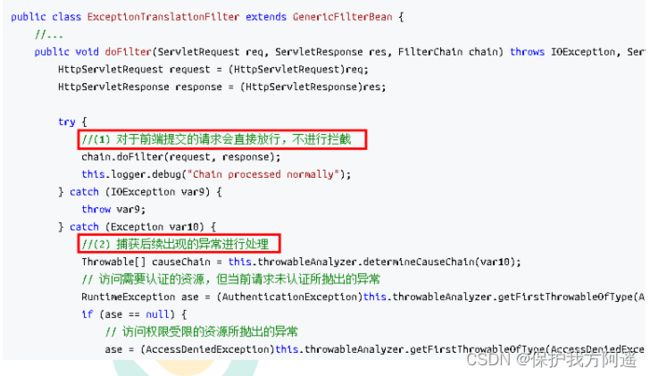
4.6.2 FilterSecurityInterceptor 过滤器
FilterSecurityInterceptor 是过滤器链的最后一个过滤器,该过滤器是过滤器链的最后一个过滤器,根据资源权限配置来判断当前请求是否有权限访问对应的资源。如果访问受限会抛出相关异常,最终所抛出的异常会由前一个过滤器。
ExceptionTranslationFilter 进行捕获和处理。具体源码如下:
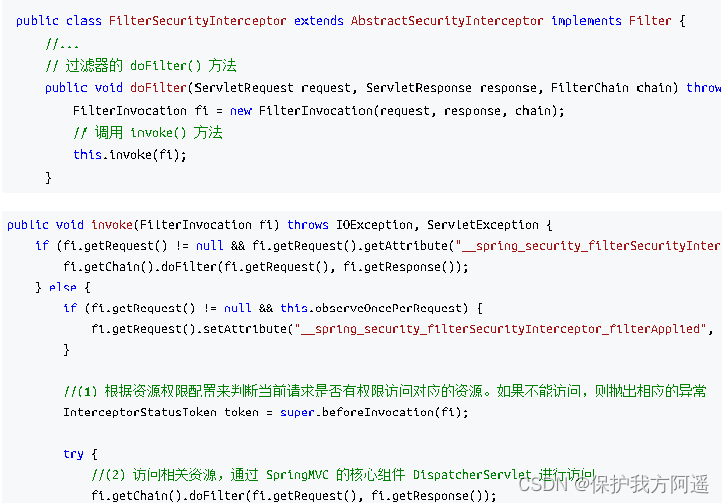
需要注意,Spring Security 的过滤器链是配置在 SpringMVC 的核心组件DispatcherServlet 运行之前。也就是说,请求通过 Spring Security 的所有过滤器,不意味着能够正常访问资源,该请求还需要通过 SpringMVC 的拦截器链。
4.7 SpringSecurity 请求间共享认证信息
一般认证成功后的用户信息是通过 Session 在多个请求之间共享,那么 Spring Security 中是如何实现将已认证的用户信息对象 Authentication 与 Session 绑定的进行具体分析。
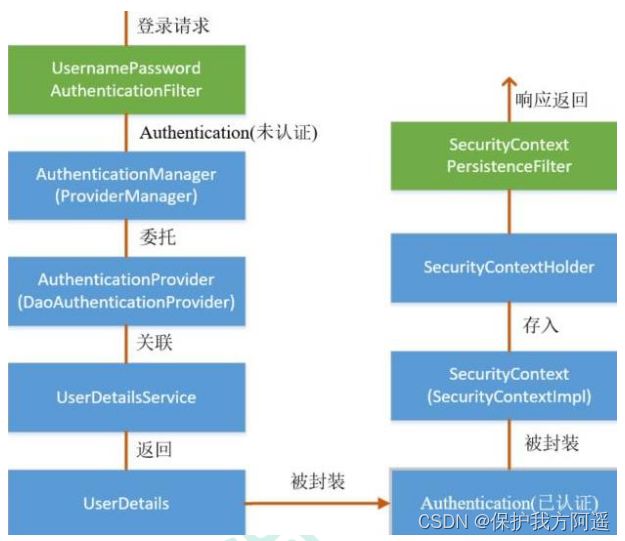
- 在前面讲解认证成功的处理方法 successfulAuthentication() 时,有以下代码:

- 查 看 SecurityContext 接 口 及 其 实 现 类 SecurityContextImpl , 该 类 其 实 就 是 对Authentication 的封装。
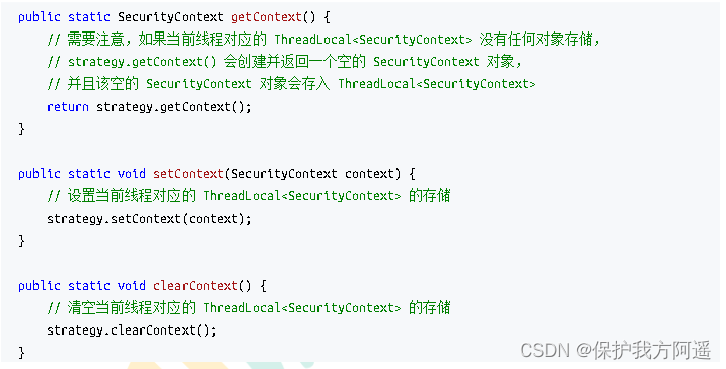
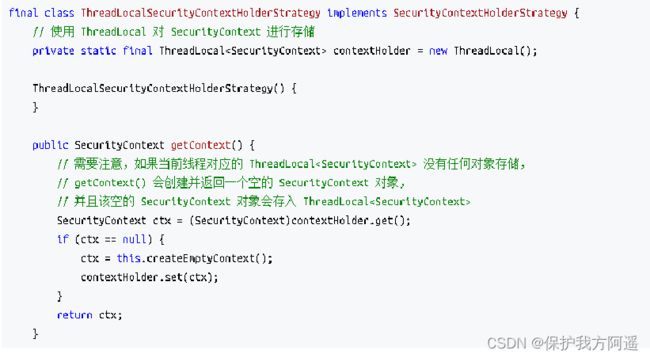
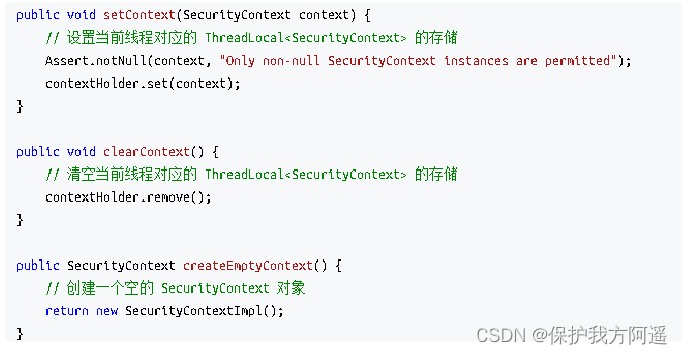
- 查 看 SecurityContextHolder 类 , 该 类 其 实 是 对 ThreadLocal 的 封 装 , 存 储
SecurityContext 对象。


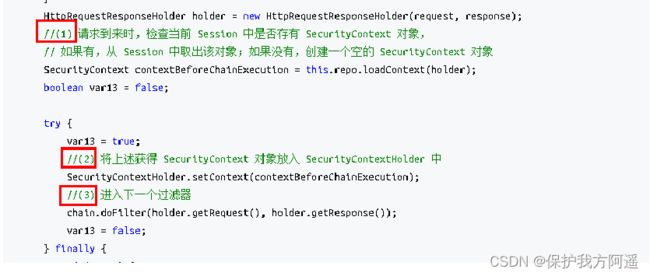
4.7.1 SecurityContextPersistenceFilter 过滤器
前面提到过,在 UsernamePasswordAuthenticationFilter 过滤器认证成功之后,会在认证成功的处理方法中将已认证的用户信息对象 Authentication 封装进SecurityContext,并存入 SecurityContextHolder。
之后,响应会通过 SecurityContextPersistenceFilter 过滤器,该过滤器的位置在所有过滤器的最前面,请求到来先进它,响应返回最后一个通过它,所以在该过滤器中处理已认证的用户信息对象Authentication 与 Session 绑定。
认证成功的响应通过 SecurityContextPersistenceFilter 过滤器时,会从SecurityContextHolder 中取出封装了已认证用户信息对象 Authentication 的SecurityContext,放进 Session 中。当请求再次到来时,请求首先经过该过滤器,该过滤器会判断当前请求的 Session 是否存有 SecurityContext 对象,如果有则将该对象取出再次放入 SecurityContextHolder 中,之后该请求所在的线程获得认证用户信息,后续的资源访问不需要进行身份认证;当响应再次返回时,该过滤器同样从 SecurityContextHolder 取出SecurityContext 对象,放入 Session 中。具体源码如下:

