Jenkins 部署微服务多节点发布及反向代理优化
文章目录
- 一、IDEA中修改application.yml
-
- 1. 配置单节点
- 2. gitlab仓库部署
- 二、harbor仓库部署
-
- 1. 安装docker
- 2. 安装docker-compose
- 3. 配置harbor
- 三、生产服务器部署 docker
- 四、Jenkins服务器部署
-
- 1. 安装mysql数据库
- 2. 部署Jenkins
- 3. 部署配置sonaqube代码检查
- 4. 创建项目,配置参数
- 5. Dockerfile编译、生成镜像
-
- 5.1 编译打包
- 5.2 构建镜像
- 5.3 镜像打标签
- 5.4 镜像上传harbor仓库
- 5.5 拉取镜像和发布
- 五、部署前端静态web网站
-
- 1. 部署nginx
- 2. 安装 NodeJS 插件
- 3. 配置nginx服务器
- 六、Jenkins集群部署
-
- 1. application.yml配置改集群
- 2. 配置集群项目的构建参数
- 3. 循环检查、打包编译制作镜像
- 4. 配置远程部署服务器
- 5. 添加循环构建
- 6. eureka中查看注册结果
- 七、配置反向代理
-
- 1. web2-server服务器部署nginx
- 2. 修改nginx配置文件
- 3. 修改前端Nginx的访问地址
- 4. 构建前端项目并访问查看结果
一、IDEA中修改application.yml
-
idea中修改微服务配置,先配置单节点,指定eureka的地址和数据库的地址
-
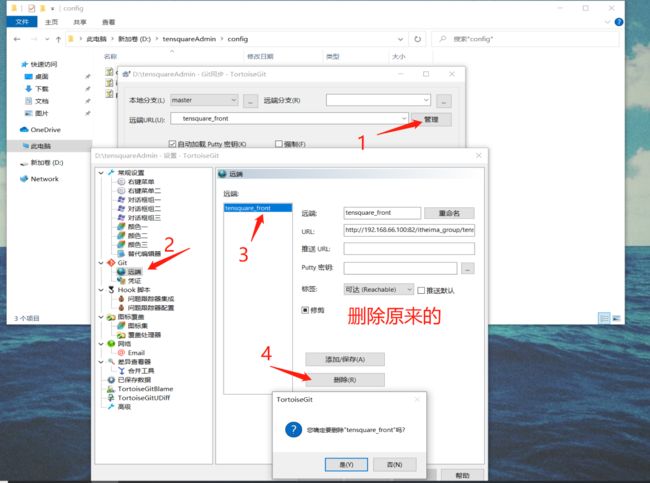
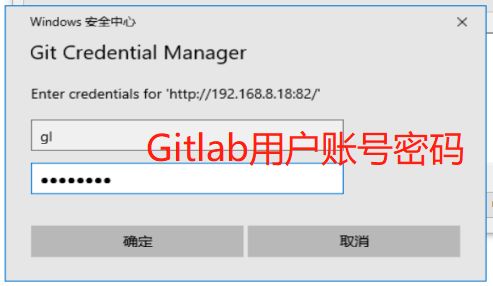
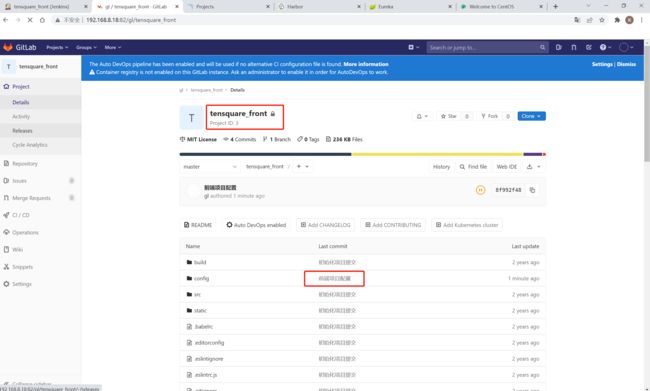
前端项目文件拖到D盘目录下,安装VScode,小乌龟,——》配置gitlab连接,提交上传前端项目
1. 配置单节点
单机版的配置
eureka:
# 单机版
server:
  port: 10086

#基本服务器信息
spring:
  application:
    name: eureka-server  #服务ID

#enreka服务器配置
eureka:
  client:
    fetch-registry: false    #单机版关闭enreka相互注册
    register-with-eureka: false
    service-url:
      defaultZone:  http://192.168.8.17:${server.port}/eureka #暴露eureka服务访问地址
  server:
    enable-self-preservation: false #关闭自我保护
tensquare-admin-service:
server:
  port: 9001
spring:
  application:
    name: tensquare-admin-service #指定服务名
  datasource:
    driverClassName: com.mysql.jdbc.Driver
    url: jdbc:mysql://192.168.8.19:3306/tensquare_user?characterEncoding=UTF8
    username: root
    password: abc123
  jpa:
    database: mysql
    show-sql: true

#Eureka配置
eureka:
  client:
    service-url:
      defaultZone: http://192.168.8.17:10086/eureka/
  instance:
    lease-renewal-interval-in-seconds: 5 # 每隔5秒发送一次心跳
    lease-expiration-duration-in-seconds: 10 # 10秒不发送就过期
    prefer-ip-address: true


 # jwt参数
jwt:
  config:
    key: itcast
    ttl: 1800000
tensquare-gathering:
server:
  port: 9002
spring:
  application:
    name: tensquare-gathering #指定服务名
  datasource:
    driverClassName: com.mysql.jdbc.Driver
    url: jdbc:mysql://192.168.8.19:3306/tensquare_gathering?characterEncoding=UTF8
    username: root
    password: abc123
  jpa:
    database: mysql
    show-sql: true
#Eureka客户端配置
eureka:
  client:
    service-url:
      defaultZone: http://192.168.8.17:10086/eureka/
  instance:
    lease-renewal-interval-in-seconds: 5 # 每隔5秒发送一次心跳
    lease-expiration-duration-in-seconds: 10 # 10秒不发送就过期
    prefer-ip-address: true
tensquare-zuul:
server:
  port: 10020 # 端口

# 基本服务信息
spring:
  application:
    name: tensquare-zuul # 服务ID

# Eureka配置
eureka:
  client:
    service-url:
      defaultZone: http://192.168.8.17:10086/eureka/
  instance:
    prefer-ip-address: true

# 修改ribbon的超时时间
ribbon:
  ConnectTimeout: 1500 # 连接超时时间,默认500ms
  ReadTimeout: 3000  # 请求超时时间,默认1000ms


# 修改hystrix的熔断超时时间
hystrix:
  command:
    default:
      execution:
        isolation:
          thread:
            timeoutInMillisecond: 2000 # 熔断超时时长,默认1000ms


# 网关路由配置
zuul:
  routes:
    admin:
      path: /admin/**
      serviceId: tensquare-admin-service
    gathering:
          path: /gathering/**
          serviceId: tensquare-gathering

 # jwt参数
jwt:
  config:
    key: itcast
    ttl: 1800000
2. gitlab仓库部署
hostnamectl set-hostname gitlab && su
yum install -y policycoreutils openssh-server openssh-clients.x86_64 postfix
systemctl start sshd && systemctl enable sshd
systemctl start postfix && systemctl enable postfix
rpm -ivh gitlab-ce-12.4.2-ce.0.el6.x86_64.rpm
vim /etc/gitlab/gitlab.rb

23 external_url 'http://192.168.8.20:82'
 1112 nginx['listen_port'] = 82


gitlab-ctl reconfigure
gitlab-ctl restart

http://192.168.8.20:82
访问Gitlab
修改管理员root密码,修改密码后,登录。
添加组web_demo,创建用户gl——》选择Edit退出修改密码
在组中点击Members——》添加用户gl到该组中
以刚才创建的gl用户登录 ,然后在用户组中创建新的项目
二、harbor仓库部署
192.168.8.20
1. 安装docker
hostnamectl set-hostname harbor && su

#安装依赖包
yum install -y yum-utils device-mapper-persistent-data lvm2

#设置阿里云镜像源
cd /etc/yum.repos.d/
yum-config-manager --add-repo https://mirrors.aliyun.com/docker-ce/linux/centos/docker-ce.repo

#安装 docker-ce 社区版
yum install -y docker-ce
systemctl start docker
systemctl enable docker

mkdir -p /etc/docker
#直接命令行输入以下内容:

tee /etc/docker/daemon.json <<-'EOF'
{
  "registry-mirrors": ["https://t466r8qg.mirror.aliyuncs.com"]
}
EOF

systemctl daemon-reload
systemctl restart docker

#网络优化
vim /etc/sysctl.conf
net.ipv4.ip_forward=1

sysctl -p
systemctl restart network
systemctl restart docker
docker version
2. 安装docker-compose
cd /usr/local/bin/
#docker-compose下载好拖进该目录中
chmod +x /usr/local/bin/docker-compose
docker-compose -version
tar zxvf harbor-offline-installer-v1.9.2.tgz -C /opt/
cd /opt/harbor
vim harbor.yml
#修改 hostname 和 port

hostname: 192.168.8.20
port: 85

./prepare
./install.sh
3. 配置harbor
访问 Harbor
http://192.168.8.20:85
默认账户密码:admin/Harbor12345
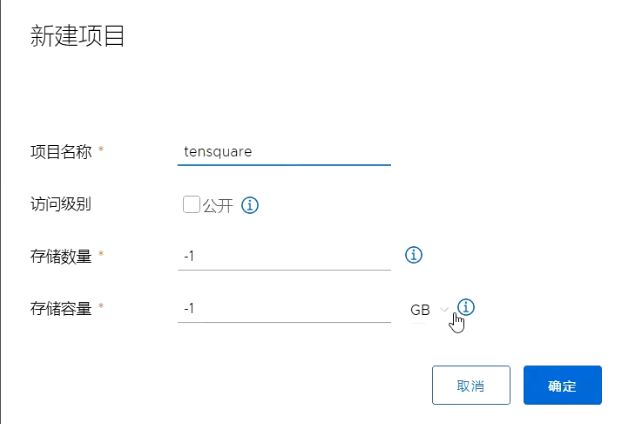
登录进去之后,首先创建项目
三、生产服务器部署 docker
生产服务器上需要部署docker和nginx,二个nginx一个做静态页面一个作为反向代理
web_server 192.168.8.17
web2_server 192.168.8.16
 hostnamectl set-hostname web_server && su
 hostnamectl set-hostname web2_server && su
yum install -y yum-utils device-mapper-persistent-data lvm2
cd /etc/yum.repos.d/
yum-config-manager --add-repo https://mirrors.aliyun.com/docker-ce/linux/centos/docker-ce.repo

#安装 docker-ce 社区版
yum install -y docker-ce
systemctl start docker
systemctl enable docker

mkdir -p /etc/docker

tee /etc/docker/daemon.json <<-'EOF'
{
  "registry-mirrors": ["https://t466r8qg.mirror.aliyuncs.com"]
}
EOF

#把Harbor地址加入到Docker信任列表(harbor仓库的docker中不需要配)
vim /etc/docker/daemon.json

{
  "registry-mirrors": ["https://t466r8qg.mirror.aliyuncs.com"],
"insecure-registries": ["192.168.8.20:85"]
}

systemctl daemon-reload
systemctl restart docker

#网络优化
vim /etc/sysctl.conf
net.ipv4.ip_forward=1

sysctl -p
systemctl restart network
systemctl restart docker
docker version
四、Jenkins服务器部署
192.168.8.19
1. 安装mysql数据库
mkdir /data
cd /data
#安装包拉进目录下 boost_1_59_0.tar.gz   mysql-5.7.17.tar.gz
cd ..
vim mysql.sh
#!/bin/bash

tar zxvf /data/mysql-5.7.17.tar.gz -C /opt
tar zxvf /data/boost_1_59_0.tar.gz -C /usr/local
mv /usr/local/boost_1_59_0 /usr/local/boost
yum -y install gcc gcc-c++ ncurses ncurses-devel bison cmake make git perl expat-devel pcre-devel pcre
useradd -s /sbin/nologin mysql
cd /opt/mysql-5.7.17/

cmake \
-DCMAKE_INSTALL_PREFIX=/usr/local/mysql \
-DMYSQL_UNIX_ADDR=/usr/local/mysql/mysql.sock \
-DSYSCONFDIR=/etc \
-DSYSTEMD_PID_DIR=/usr/local/mysql \
-DDEFAULT_CHARSET=utf8  \
-DDEFAULT_COLLATION=utf8_general_ci \
-DWITH_EXTRA_CHARSETS=all \
-DWITH_INNOBASE_STORAGE_ENGINE=1 \
-DWITH_ARCHIVE_STORAGE_ENGINE=1 \
-DWITH_BLACKHOLE_STORAGE_ENGINE=1 \
-DWITH_PERFSCHEMA_STORAGE_ENGINE=1 \
-DMYSQL_DATADIR=/usr/local/mysql/data \
-DWITH_BOOST=/usr/local/boost \
-DWITH_SYSTEMD=1

cd /opt/mysql-5.7.17/
make -j 4
make install
echo > /etc/my.cnf

cat > /etc/my.cnf<> /etc/profile
source /etc/profile

cd /usr/local/mysql/bin/
./mysqld --initialize-insecure --user=mysql --basedir=/usr/local/mysql --datadir=/usr/local/mysql/data

cp /usr/local/mysql/usr/lib/systemd/system/mysqld.service /usr/lib/systemd/system/
systemctl daemon-reload && systemctl start mysqld && systemctl enable mysqld
ln -s /usr/local/mysql/bin/mysql /usr/local/sbin/


pgrep "mysqld" &> /dev/null
if [ $? -eq 0 ];then
        echo -e "\033[32mmysqld服务运行正常\033[0m"
else
        echo -e "\033[31mmysqld服务运行异常,请检查\033[0m"
fi
sleep 2
echo ' '
echo -e "\033[32mMySQL 没有设置密码,执行 mysql 命令登录\033[0m"
2. 部署Jenkins
数据库已安装,未设密码
mysql
set password = password('abc123');
use mysql;
grant all privileges on *.* to 'root'@'%' identified by 'abc123' with grant option;
create database sonar;
show databases;
create database tensquare_gathering;
create database tensquare_user;
#导入脚本文件,先把文件放在root目录下
use tensquare_gathering;
source /root/tensquare_gathering.sql;

use tensquare_user;
source /root/tensquare_user.sql;
#部署sonarqube代码检查
yum install -y unzip
unzip sonarqube-6.7.4.zip
mkdir /opt/sonar
mv sonarqube-6.7.4/* /opt/sonar
useradd sonar
chown -R sonar.  /opt/sonar

vim /opt/sonar/conf/sonar.properties
#16行17行修改用户名和密码,26行取消注释
 16 sonar.jdbc.username=root
 17 sonar.jdbc.password=abc123

cd /opt/sonar/
su sonar ./bin/linux-x86-64/sonar.sh start
su sonar ./bin/linux-x86-64/sonar.sh status
tail -f /opt/sonar/logs/sonar.log
http://192.168.8.19:9000
默认账户密码:admin/admin
安装Jenkins
hostnamectl set-hostname jenkins && su
yum install java-1.8.0-openjdk* -y
rpm -ivh jenkins-2.277.4-1.1.noarch.rpm

vim /etc/sysconfig/jenkins

29 JENKINS_USER="root"
56 JENKINS_PORT="8888"

systemctl start jenkins
打开浏览器访问 http://192.168.8.19:8888
#获取Jenkins的密码
cat /var/lib/jenkins/secrets/initialAdminPassword
创建第一个管理员用户
修改插件地址
cd /var/lib/jenkins/updates
sed -i 's/http:\/\/updates.jenkins- ci.org\/download/https:\/\/mirrors.tuna.tsinghua.edu.cn\/jenkins/g' default.json && sed -i 's/http:\/\/www.google.com/https:\/\/www.baidu.com/g' default.json
web页面中更换站点URL路径
https://mirrors.tuna.tsinghua.edu.cn/jenkins/updates/update-center.json
安装所需插件,安装完以后需重启Jenkins
Chinese
Role-based Authorization Strategy
Credentials Binding
Git
Deploy to container
Pipeline
Gitlab
SonarQube Scanner
Extended Choice Parameter
NodeJS
Publish Over SSH
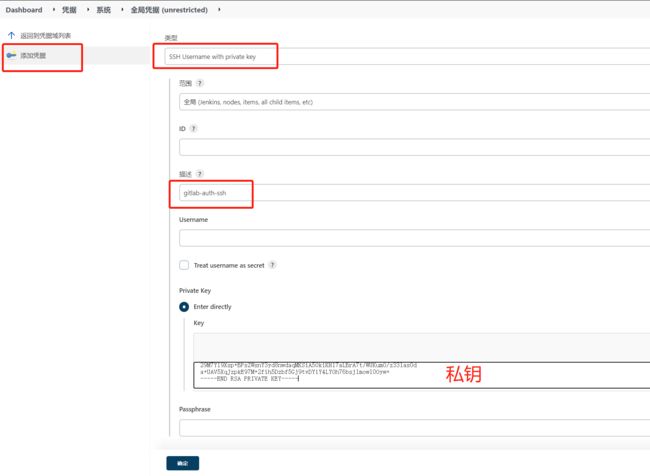
添加凭证
在 Jenkins 服务器上安装 Git工具
yum install git -y
git --version
password
![]()
SSH密钥类型
使用 root 用户生成公钥和私钥,在 /root/.ssh/目录保存了公钥和私钥
ssh-keygen -t rsa
cd .ssh/
cat id_rsa
cat id_rsa.pub
把生成的公钥放在 Gitlab 中,在 Jenkins 中添加凭证,配置私钥
安装配置maven
tar zxvf apache-maven-3.6.2-bin.tar.gz
mkdir -p /opt/maven
mv apache-maven-3.6.2/* /opt/maven

vim /etc/profile										#配置环境变量,末尾添加

export JAVA_HOME=/usr/lib/jvm/java-1.8.0-openjdk
export MAVEN_HOME=/opt/maven
export PATH=$PATH:$JAVA_HOME/bin:$MAVEN_HOME/bin

source /etc/profile
mvn -v
全局配置中添加JDK和Maven
JDK1.8
/usr/lib/jvm/java-1.8.0-openjdk
maven3.6.2
/opt/maven
系统设置中配置全局变量
#键
JAVA_HOME

#值
/usr/lib/jvm/java-1.8.0-openjdk
#键
M2_HOME

#值
/opt/maven
#键
PATH+EXTRA

#值
$M2_HOME/bin
修改 Maven 的配置文件,指定本地仓库地址为:/root/repo/
mkdir /root/repo
vim /opt/maven/conf/settings.xml

 54   /root/repo
158行,添加阿里云私服地址
      alimaven
      aliyun maven
      http://maven.aliyun.com/nexus/content/groups/public/
      central
3. 部署配置sonaqube代码检查
#授权远程登录,创建sonar库
grant all privileges on *.* to 'root'@'%' identified by 'abc123' with grant option;
create database sonar;
show databases;
yum install -y unzip
unzip sonarqube-6.7.4.zip
mkdir /opt/sonar
mv sonarqube-6.7.4/* /opt/sonar
useradd sonar
chown -R sonar.  /opt/sonar

vim /opt/sonar/conf/sonar.properties
内容如下:
 16 sonar.jdbc.username=root
 17 sonar.jdbc.password=abc123
 26 行取消注释

#启动sonar
cd /opt/sonar/
su sonar ./bin/linux-x86-64/sonar.sh start
su sonar ./bin/linux-x86-64/sonar.sh status
tail -f /opt/sonar/logs/sonar.log
http://192.168.8.19:9000
默认账户:admin/admin
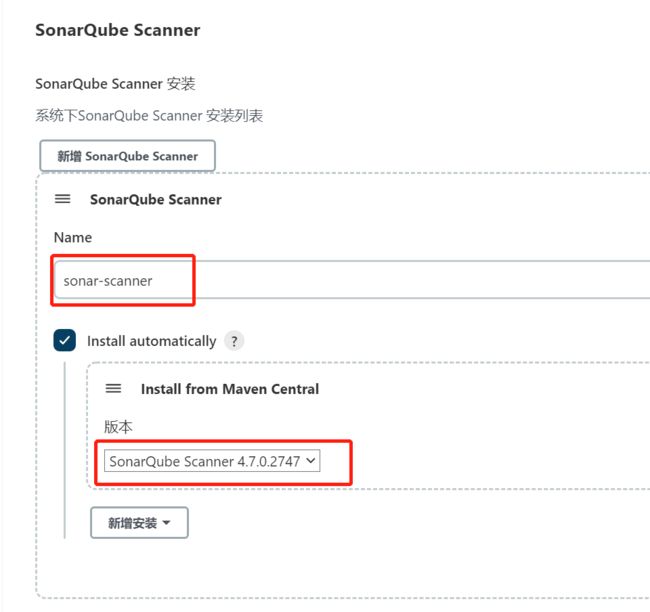
- Jenkins中的全局配置中添加sonarqube配置
sonar-scanner ——》选择最新版本安装
- jenkins中添加sonar凭证
选择文本类型
- Jenkins中系统配置中添加sonarqube配置
sonarqube
http://192.168.8.19:9000/
4. 创建项目,配置参数
tensquare_eureka_server
tensquare_zuul
tensquare_admin_service
tensquare_gathering
注册中心
服务网关
认证中心
活动微服务
选择scm方式进行构建
//定义gitlab的凭证
def git_auth="03757112-b3bd-4955-93ef-ad84869f39a9"
//定义gitlab的URL路径
def git_url="[email protected]:gl/tensquare_back.git"

node {
    stage('pull code') {
        //切换成变量,字符串符号使用双引号
        checkout([$class: 'GitSCM', branches: [[name: "*/${branch}"]], extensions: [], userRemoteConfigs: [[credentialsId: "${git_auth}", url: "${git_url}"]]])
    }
    stage('check code') {
            //定义SonarQubeScanner工具
            def scannerHome = tool 'sonar-scanner'
            //引用SonarQube系统环境
            withSonarQubeEnv('sonarqube') {
            sh """
                cd ${project_name}
                ${scannerHome}/bin/sonar-scanner
               """
               }
    }
}
5. Dockerfile编译、生成镜像
Jenkins上部署docker
yum install -y yum-utils device-mapper-persistent-data lvm2
cd /etc/yum.repos.d/
yum-config-manager --add-repo https://mirrors.aliyun.com/docker-ce/linux/centos/docker-ce.repo
yum install -y docker-ce
systemctl start docker
systemctl enable docker
mkdir -p /etc/docker

tee /etc/docker/daemon.json <<-'EOF'
{
  "registry-mirrors": ["https://t466r8qg.mirror.aliyuncs.com"],
"insecure-registries": ["192.168.8.20:85"]
}
EOF

systemctl daemon-reload
systemctl restart docker

vim /etc/sysctl.conf
net.ipv4.ip_forward=1
sysctl -p
systemctl restart network
systemctl restart docker
docker version
5.1 编译打包
修改Jenkinsfile文件,增加common工具的命令,添加编译打包命令
//定义gitlab的凭证
def git_auth="5b02eddd-da09-4cb3-83cc-c5b7a333b1cf"
//定义gitlab的URL路径
def git_url="[email protected]:gl/tensquare_back.git"

node {
    stage('pull code') {
        //切换成变量,字符串符号使用双引号
        checkout([$class: 'GitSCM', branches: [[name: "*/${branch}"]], extensions: [], userRemoteConfigs: [[credentialsId: "${git_auth}", url: "${git_url}"]]])
    }
    stage('check code') {
            //定义SonarQubeScanner工具
            def scannerHome = tool 'sonar-scanner'
            //引用SonarQube系统环境
            withSonarQubeEnv('sonarqube') {
            sh """
                cd ${project_name}
                ${scannerHome}/bin/sonar-scanner
               """
               }
    }
    //添加公共子工程
    stage('make package images') {
        sh "mvn -f tensquare_common clean install"
    }
    //编译打包微服务
    stage('make package') {
            sh "mvn -f ${project_name} clean package"
    }
}
构建测试结果
![]()
在构建tensquare_zuul服务网关的时候会报错,因为Jenkins服务器中并没有tensquare_paren工程,zuul需要依赖这个工程,需要传递父工程进Jenkins仓库中

cd /root/repo/com/tensquare/
#压缩包拖到目录下,解压缩,删除压缩包
unzip tensquare_parent.zip
rm -rf tensquare_parent.zip
重新构建查看结果
5.2 构建镜像
    //添加公共子工程
    stage('make package images') {
        sh "mvn -f tensquare_common clean install"
    }
    //编译打包微服务,制作镜像
    stage('make package') {
            sh "mvn -f ${project_name} clean package dockerfile:build"
    }
}
提交代码后构建进行测试
5.3 镜像打标签
修改Jenkinsfile文件,添加打标签代码
//镜像标签
def tag="latest"
//harbor的url地址
def harbor_url="192.168.8.20:85"
//镜像仓库名
def harbor_name="tensquare"


    //添加公共子工程
    stage('make package images') {
        sh "mvn -f tensquare_common clean install"
    }
    //编译打包微服务,制作镜像
    stage('make package') {
            sh "mvn -f ${project_name} clean package dockerfile:build"
            //定义镜像名称
                       def imageName="${project_name}:${tag}"
            //对镜像打标签
            sh "docker tag ${imageName} ${harbor_url}/${harbor_name}/${imageName}"
    }
}
构建后查看结果
5.4 镜像上传harbor仓库
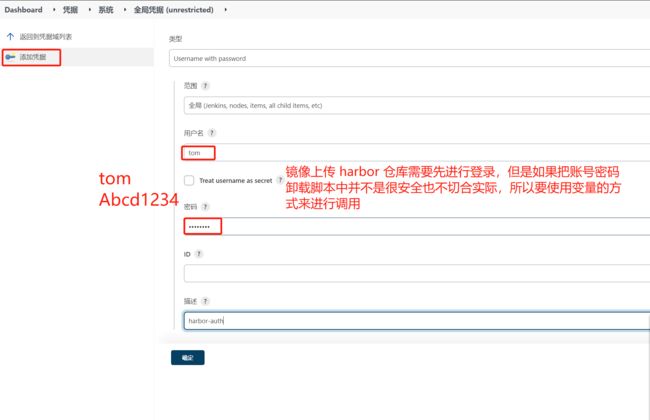
Jenkins中添加 harbor 的凭证
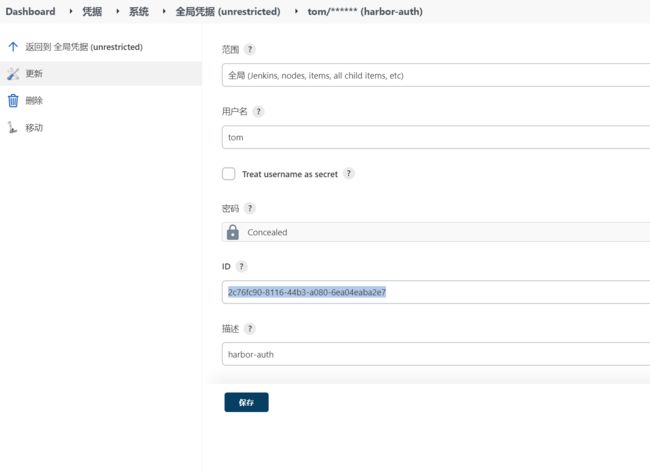
复制凭证中的id,jenkinsfile脚本的变量中会用到这个凭证的ID
2c76fc90-8116-44b3-a080-6ea04eaba2e7
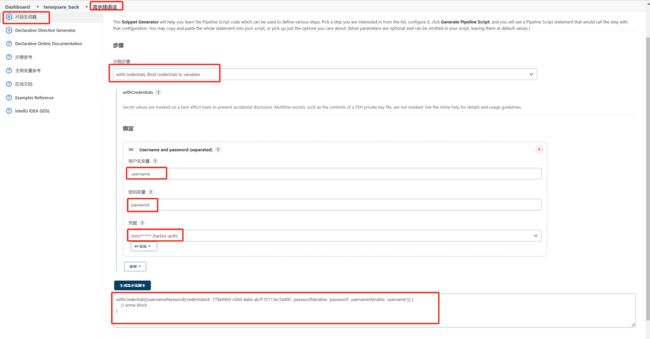
使用流水线语法中的片段生成器来生成代码,并把复制到Jenkinsfile脚本中进行更改参数
            //镜像推送到harbor
            withCredentials([usernamePassword(credentialsId: "${harbor_auth}", passwordVariable: 'password', usernameVariable: 'username')]) {
                //登录harbor
                sh "docker login -u ${username} -p ${password} ${harbor_url}"
                //镜像上传
                sh "docker push ${harbor_url}/${harbor_name}/${imageName}"
                sh "echo 镜像上传成功"
            }
    }
}
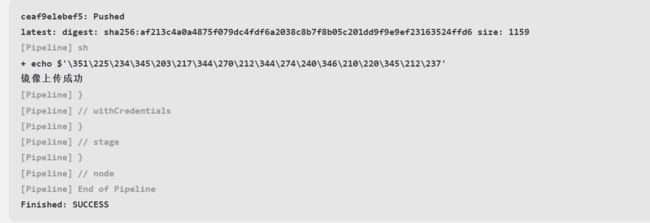
更改提交代码后,构建测试镜像上传
到此,所有微服务的镜像成功上传到harbor仓库中
5.5 拉取镜像和发布
安装 Publish Over SSH 插件,Publish Over SSH 插件可以实现远程发送Shell命令,安装完需要重启 Jenkins
Publish Over SSH
配置远程部署服务器
#拷贝公钥,从Jenkins服务器拷贝到生产服务器
ssh-copy-id 192.168.8.17
Jenkins 系统配置中添加远程服务器
拉到最下面进行配置
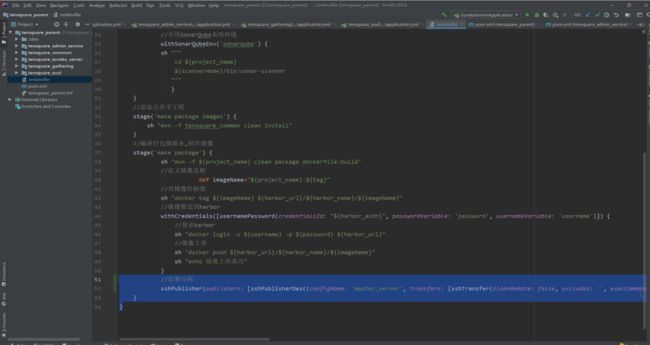
修改Jenkinsfile构建脚本生成远程调用模板代码
            //部署应用
            sshPublisher(publishers: [sshPublisherDesc(configName: 'master_server', transfers: [sshTransfer(cleanRemote: false, excludes: '', execCommand: "/opt/jenkins_shell/deploy.sh ${harbor_url} ${harbor_name} ${project_name} ${tag} ${port}", execTimeout: 120000, flatten: false, makeEmptyDirs: false, noDefaultExcludes: false, patternSeparator: '[, ]+', remoteDirectory: '', remoteDirectorySDF: false, removePrefix: '', sourceFiles: '')], usePromotionTimestamp: false, useWorkspaceInPromotion: false, verbose: false)])
    }
}
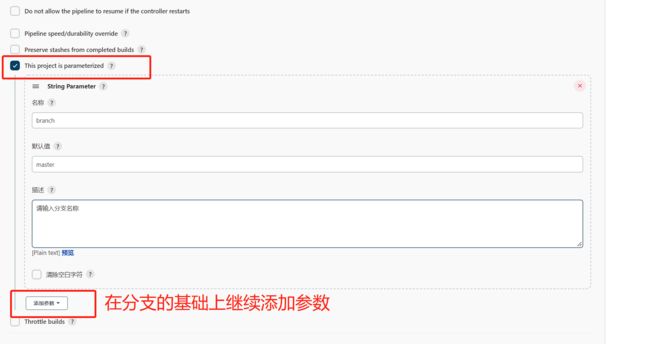
项目配置中添加端口新参数
部署脚本deploy.sh中的内容
#! /bin/sh

#接收外部参数
harbor_url=$1
harbor_project_name=$2
project_name=$3
tag=$4
port=$5

imageName=$harbor_url/$harbor_project_name/$project_name:$tag

echo "$imageName"

#查询容器是否存在,存在则删除
containerId=`docker ps -a | grep -w ${project_name}:${tag}  | awk '{print $1}'`
if [ "$containerId" !=  "" ] ; then
    #停掉容器
    docker stop $containerId

    #删除容器
    docker rm $containerId

 echo "成功删除容器"
fi

#查询镜像是否存在,存在则删除
imageId=`docker images | grep -w $project_name  | awk '{print $3}'`

if [ "$imageId" !=  "" ] ; then

    #删除镜像
    docker rmi -f $imageId

 echo "成功删除镜像"
fi

# 登录Harbor
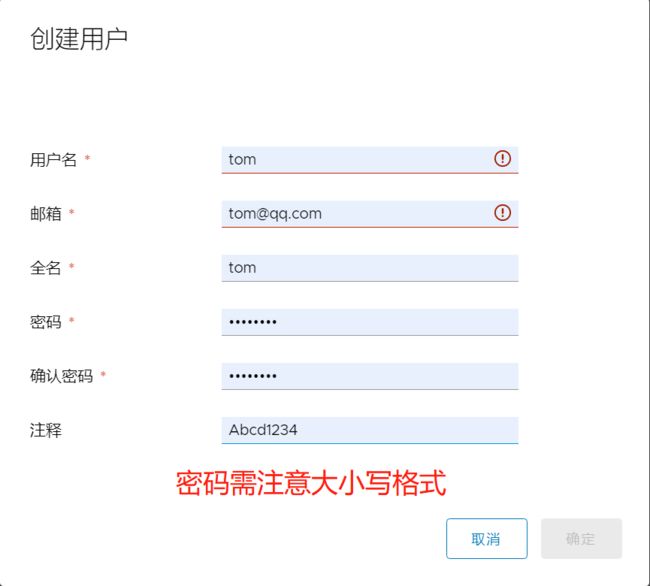
docker login -u tom -p Abcd1234 $harbor_url

# 下载镜像
docker pull $imageName

# 启动容器
docker run -di -p $port:$port $imageName

echo "容器启动成功"
在生产服务器上创建目录,并放入脚本
192.168.8.17
mkdir /opt/jenkins_shell
cd /opt/jenkins_shell/
vim deploy.sh
chmod +x deploy.sh
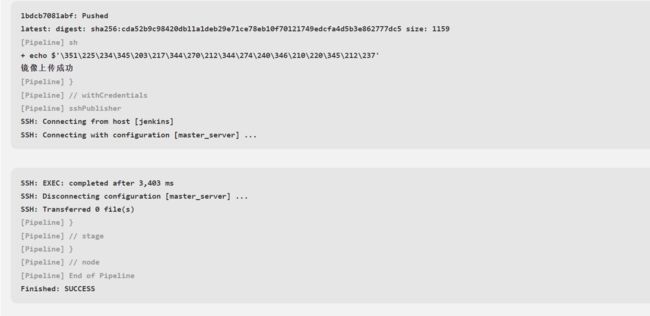
Jenkinsfile更改提交进行构建测试
http://192.168.8.17:10086/
访问查看是否注册成功
五、部署前端静态web网站
1. 部署nginx
生产服务器192.168.8.17上部署nginx服务器
yum install -y epel-release
yum -y install nginx

vim /etc/nginx/nginx.conf
#39行修改nginx的端口,默认80,改为9090

    server {
        listen       9090;
        listen       [::]:9090;
        server_name  _;
        root         /usr/share/nginx/html;

#启动Nginx
systemctl enable nginx
systemctl start nginx
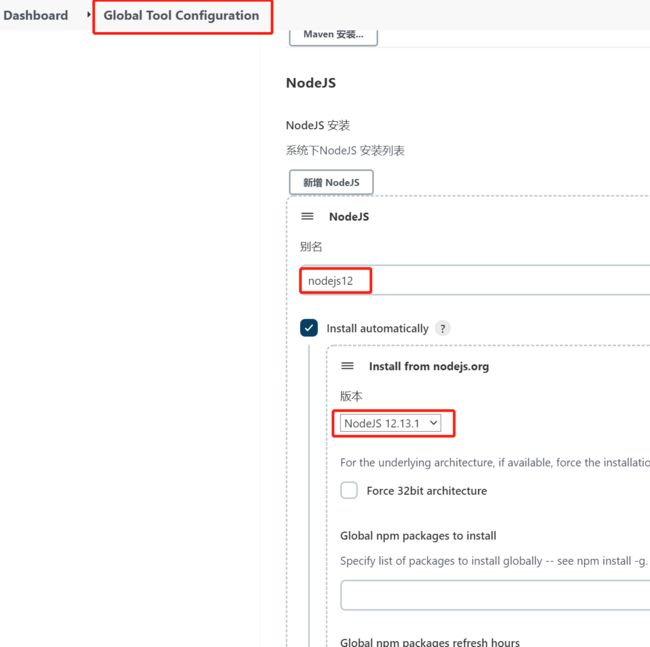
2. 安装 NodeJS 插件
3. 配置nginx服务器
使用声明式脚本代码
//Gitlab的凭证
def  git_auth="dbb2953a-0dab-46a2-b555-fdb7149c4641"

node {
    stage('pull code') {
        //切换成变量,字符串符号使用双引号
        checkout([$class: 'GitSCM', branches: [[name: "*/${branch}"]], extensions: [], userRemoteConfigs: [[credentialsId: "${git_auth}", url: '[email protected]:gl/tensquare_front.git']]])
    }

    stage('make package,deploy') {
            //使用nodejs的npm打包
            nodejs('nodejs12'){
                sh '''
                    npm install
                    npm run build
                '''
            }
            //远程部署
            sshPublisher(publishers: [sshPublisherDesc(configName: 'master_server', transfers: [sshTransfer(cleanRemote: false, excludes: '', execCommand: '', execTimeout: 120000, flatten: false, makeEmptyDirs: false, noDefaultExcludes: false, patternSeparator: '[, ]+', remoteDirectory: '/usr/share/nginx/html', remoteDirectorySDF: false, removePrefix: 'dist', sourceFiles: 'dist/**')], usePromotionTimestamp: false, useWorkspaceInPromotion: false, verbose: false)])
    }
}
前端项目中更改配置文件中的网关地址
配置小乌龟TortoiseGit,提交前端项目
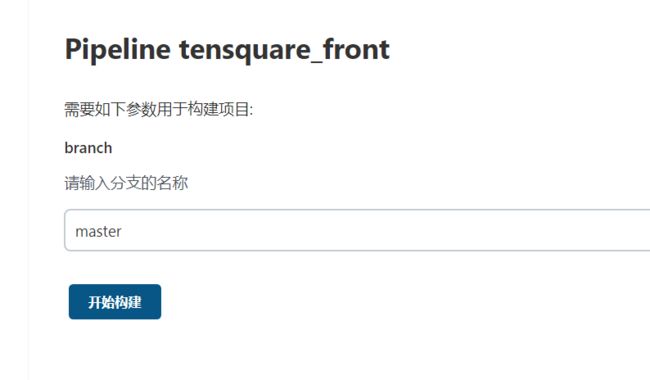
Jenkins中构建前端项目Pipeline tensquare_front并查看结果
http://192.168.8.17:9090/
admin/123456
六、Jenkins集群部署
1. application.yml配置改集群
在IDEA中的微服务里面application.yml更改集群的配置
eureka:
# 集群版
spring:
  application:
    name: EUREKA-HA


---
server:
  port: 10086
spring:
  # 指定profile=eureka-server1
  profiles: eureka-server1
eureka:
  instance:
    # 指定当profile=eureka-server1时,主机名是eureka-server1
    hostname: 192.168.8.17
  client:
    service-url:
      # 将自己注册到eureka-server1、eureka-server2这个Eureka上面去
      defaultZone: http://192.168.8.17:10086/eureka/,http://192.168.8.16:10086/eureka/

---
server:
  port: 10086
spring:
  profiles: eureka-server2
eureka:
  instance:
    hostname: 192.168.8.16
  client:
    service-url:
      defaultZone: http://192.168.8.17:10086/eureka/,http://192.168.8.16:10086/eureka/
tensquare-admin-service:
server:
  port: 9001
spring:
  application:
    name: tensquare-admin-service #指定服务名
  datasource:
    driverClassName: com.mysql.jdbc.Driver
    url: jdbc:mysql://192.168.8.19:3306/tensquare_user?characterEncoding=UTF8
    username: root
    password: abc123
  jpa:
    database: mysql
    show-sql: true

#Eureka配置
eureka:
  client:
    service-url:
      defaultZone: http://192.168.8.17:10086/eureka,http://192.168.8.16:10086/eureka
  instance:
    lease-renewal-interval-in-seconds: 5 # 每隔5秒发送一次心跳
    lease-expiration-duration-in-seconds: 10 # 10秒不发送就过期
    prefer-ip-address: true


 # jwt参数
jwt:
  config:
    key: itcast
    ttl: 1800000
tensquare-gathering:
server:
  port: 9002
spring:
  application:
    name: tensquare-gathering #指定服务名
  datasource:
    driverClassName: com.mysql.jdbc.Driver
    url: jdbc:mysql://192.168.8.19:3306/tensquare_gathering?characterEncoding=UTF8
    username: root
    password: abc123
  jpa:
    database: mysql
    show-sql: true
#Eureka客户端配置
eureka:
  client:
    service-url:
      defaultZone: http://192.168.8.17:10086/eureka,http://192.168.8.16:10086/eureka
  instance:
    lease-renewal-interval-in-seconds: 5 # 每隔5秒发送一次心跳
    lease-expiration-duration-in-seconds: 10 # 10秒不发送就过期
    prefer-ip-address: true
tensquare-zuul:
server:
  port: 10020 # 端口

# 基本服务信息
spring:
  application:
    name: tensquare-zuul # 服务ID

# Eureka配置
eureka:
  client:
    service-url:
      defaultZone: http://192.168.8.17:10086/eureka,http://192.168.8.16:10086/eureka
  instance:
    prefer-ip-address: true

# 修改ribbon的超时时间
ribbon:
  ConnectTimeout: 1500 # 连接超时时间,默认500ms
  ReadTimeout: 3000  # 请求超时时间,默认1000ms


# 修改hystrix的熔断超时时间
hystrix:
  command:
    default:
      execution:
        isolation:
          thread:
            timeoutInMillisecond: 2000 # 熔断超时时长,默认1000ms


# 网关路由配置
zuul:
  routes:
    admin:
      path: /admin/**
      serviceId: tensquare-admin-service
    gathering:
          path: /gathering/**
          serviceId: tensquare-gathering

 # jwt参数
jwt:
  config:
    key: itcast
    ttl: 1800000
对更改的配置进行代码提交
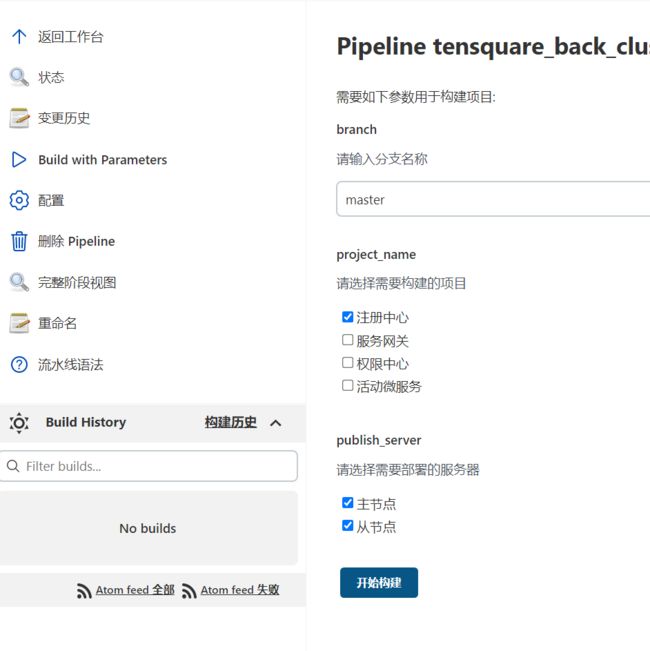
2. 配置集群项目的构建参数
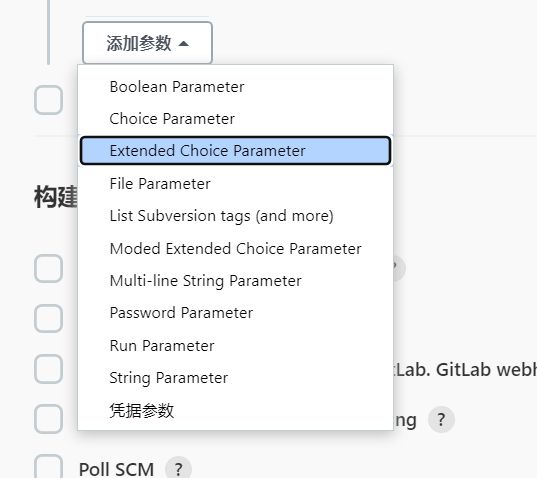
Jenkins中先安装Extended Choice Parameter插件
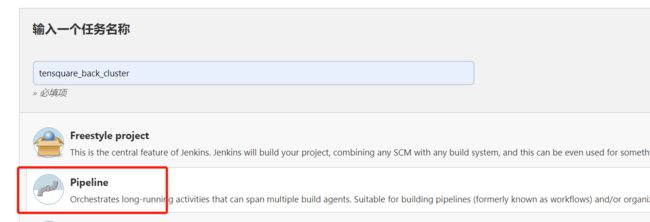
tensquare_back_cluster
使用scm流水线方式,配置项目参数
tensquare_eureka_server@10086,tensquare_zuul@10020,tensquare_admin_service@9001,tensquare_gathering@9002
注册中心,服务网关,权限中心,活动微服务
3. 循环检查、打包编译制作镜像
Jenkinsfile脚本中添加循环代码检查代码,循环打包编译制作镜像代码
//定义gitlab的凭证
def git_auth="5b02eddd-da09-4cb3-83cc-c5b7a333b1cf"
//定义gitlab的URL路径
def git_url="[email protected]:gl/tensquare_back.git"

//镜像标签
def tag="latest"
//harbor的url地址
def harbor_url="192.168.8.20:85"
//镜像仓库名
def harbor_name="tensquare"
//harbor凭证
def harbor_auth="2fc150d3-a81d-4430-ac5a-d523ed63d20c"


node {
    //选择微服务项目名称
    def selectedProjectNames="${project_name}".split(",")

    stage('pull code') {
        checkout([$class: 'GitSCM', branches: [[name: "*/${branch}"]], extensions: [], userRemoteConfigs: [[credentialsId: "${git_auth}", url: "${git_url}"]]])
    }
    stage('check code') {

    //循环检查
for(int i=0;i4. 配置远程部署服务器
从Jenkins服务器拷贝公钥到docker2远程服务器
ssh-copy-id 192.168.8.16
jenkins 系统配置中新增远程服务器192.168.8.16
项目中配置参数,添加构建参数——》多选框:部署服务器
5. 添加循环构建
修改Jenkinsfile脚本,添加循环构建代码
//定义gitlab的凭证
def git_auth="5b02eddd-da09-4cb3-83cc-c5b7a333b1cf"
//定义gitlab的URL路径
def git_url="[email protected]:gl/tensquare_back.git"

//镜像标签
def tag="latest"
//harbor的url地址
def harbor_url="192.168.8.20:85"
//镜像仓库名
def harbor_name="tensquare"
//harbor凭证
def harbor_auth="2fc150d3-a81d-4430-ac5a-d523ed63d20c"


 node {
     //选择的微服务项目名称
     def selectedProjectNames="${project_name}".split(",")
     //获取当前选择服务器
     def selectedServers="${publish_server}".split(",")

     stage('pull code') {
         checkout([$class: 'GitSCM', branches: [[name: "*/${branch}"]], extensions: [], userRemoteConfigs: [[credentialsId: "${git_auth}", url: "${git_url}"]]])
    }
     stage('check code') {

     //循环检查
     for (int i=0;i
提交修改的代码
编写deployCluster.sh部署脚本,放到两台生产服务器中并赋权
mkdir /opt/jenkins_shell
cd /opt/jenkins_shell/
#脚本放进此目录下
chmod +x deployCluster.sh
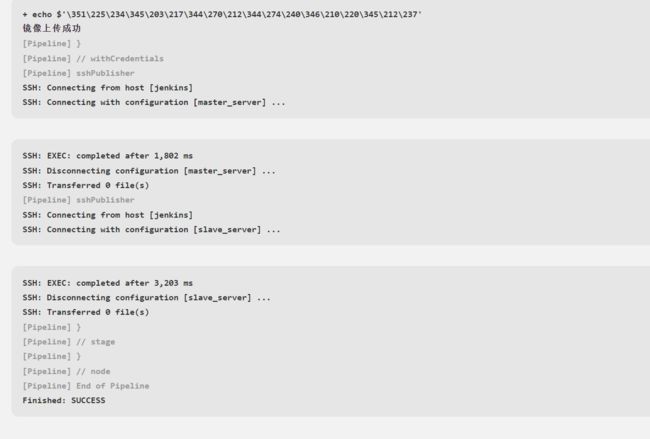
进行构建测试
构建剩下的服务
6. eureka中查看注册结果
http://192.168.8.17:10086/
http://192.168.8.16:10086/
七、配置反向代理
1. web2-server服务器部署nginx
192.168.8.16
yum install epel-release.noarch -y
yum install -y nginx
2. 修改nginx配置文件
vim /etc/nginx/nginx.conf

#37行添加反向代理服务器池,42行出修改端口号
    include /etc/nginx/conf.d/*.conf;
    upstream zuulServer{
        server 192.168.8.16:10020 weight=1;
        server 192.168.8.17:10020 weight=1;
    }
    server {
        listen       85;
        listen       [::]:85;
        server_name  _;
        root         /usr/share/nginx/html;


#49行出添加反向代理指向服务器池
        include /etc/nginx/default.d/*.conf;
        location / {
          proxy_pass http://zuulServer/;
        }


nginx -t
systemctl start nginx.service
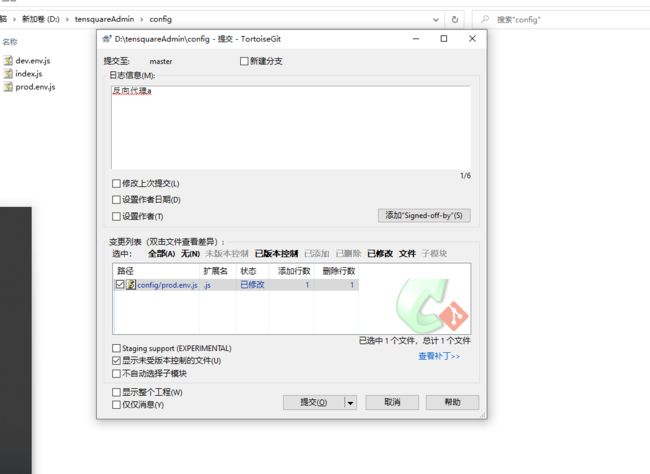
3. 修改前端Nginx的访问地址
地址改为反向代理的地址(web2-server服务器)+配置的85端口


