【Redis学习】SpringBoot集成Redis
总体概述
jedis-lettuce-RedisTemplate三者的联系
-
本地Java连接Redis常见问题
bind配置请注释掉
保护模式设置为no
Linux系统的防火墙设置
redis服务器的IP地址和密码是否正确
忘记写访问redis的服务端口号和auth密码
集成jedis
简介
Jedis Client是Redis官网推荐的一个面向java的客户端,库文件实现了对各类API进行封装调用。
步骤
-
建Module
-
改POM

-
写YML
-
主启动

-
业务类
public class JedisDemo {
    public static void main(String[] args) {
        // 1.connection获得,通过指定ip和端口号
        Jedis jedis = new Jedis("192.168.37.130", 6379);
        // 2.指定访问服务器的密码
        jedis.auth("123456");
        // 3.获得了jedis客户端,可以像jdbc一样,访问redis
        System.out.println(jedis.ping());

        //keys
        Set<String> keys = jedis.keys("*");
        System.out.println(keys);

        //string
        jedis.set("k3", "hello,jedis");
        System.out.println(jedis.get("k3"));
        System.out.println(jedis.ttl("k3"));
        jedis.expire("k3", 20);

        //list
        jedis.lpush("list", "11", "12", "13");
        List<String> list = jedis.lrange("list", 0, -1);
        list.forEach(System.out::println);

        //set
        jedis.sadd("set1", "a", "b", "c");
        System.out.println(jedis.smembers("set1"));
        jedis.srem("set1", "b");
        System.out.println(jedis.smembers("set1").size());

        //hash
        jedis.hset("hs1", "name", "Pycro");
        System.out.println(jedis.hgetAll("hs1"));
        Map<String, String> map = new HashMap<>();
        map.put("age", "12");
        map.put("gender", "male");
        map.put("email", "[email protected]");
        jedis.hset("hs1", map);
        System.out.println(jedis.hgetAll("hs1"));
        jedis.hdel("hs1", "age");
        System.out.println(jedis.hgetAll("hs1"));

        //zset
        jedis.zadd("zs1", 60, "z1");
        jedis.zadd("zs1", 70, "z2");
        jedis.zadd("zs1", 80, "z3");
        Map<String, Double> zMap = new HashMap<>();
        zMap.put("z4", 90.0);
        zMap.put("z5", 100.0);
        jedis.zadd("zs1", zMap);

        System.out.println(jedis.zrangeWithScores("zs1", 0, -1));
    }
}
/*
PONG
[hs1, zs1, set1, list]
hello,jedis
-1
13
12
11
13
12
11
13
12
11
13
12
11
[a, b, c]
2
{name=Pycro, gender=male, [email protected]}
{name=Pycro, gender=male, [email protected], age=12}
{name=Pycro, gender=male, [email protected]}
[[z1,60.0], [z2,70.0], [z3,80.0], [z4,90.0], [z5,100.0]]
*/
集成lettuce
简介
Lettuce是一个Redis的Java驱动包,Lettuce翻译为生菜,没错,就是吃的那种生菜,所以它的Logo长这样。


lettuce VS jedis
Jedis:开销大,线程不安全
Lettuce:开销小,线程安全
案例
-
改POM
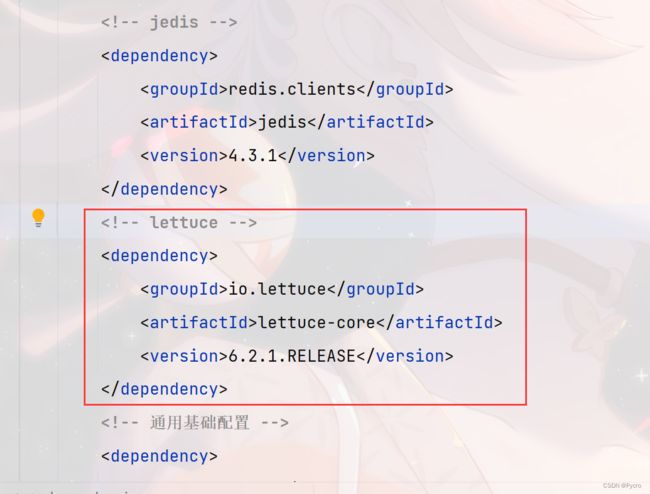
-
业务类
public class LettuceDemo {
    public static void main(String[] args) {
        //1.使用构建器链式编程builder出RedisURI
        RedisURI uri = RedisURI.Builder
                .redis("192.168.37.130")
                .withPort(6379)
                .withAuthentication("default", "123456")
                .build();
        //2.创建连接客户端
        RedisClient redisClient = RedisClient.create(uri);
        StatefulRedisConnection<String, String> conn = redisClient.connect();

        //3.通过conn创建操作的command
        RedisCommands<String, String> commands = conn.sync();

        //=====================================

        //keys
        List<String> keys = commands.keys("*");
        System.out.println("******************" + keys);

        //string
        commands.set("k5", "hello,lettuce");
        System.out.println("******************" + commands.get("k5"));

        //list
        System.out.println("******************" + commands.lrange("list", 0, -1));
        //hash
        System.out.println("******************" + commands.hgetall("hs1"));
        //set
        System.out.println("******************" + commands.smembers("set1"));
        //zset
        System.out.println("******************" + commands.zrange("zs1", 0, -1));
        //=====================================

        //4.各种关闭释放资源
        conn.close();
        redisClient.shutdown();
    }
}
RedisTemplate(推荐使用)
连接单机
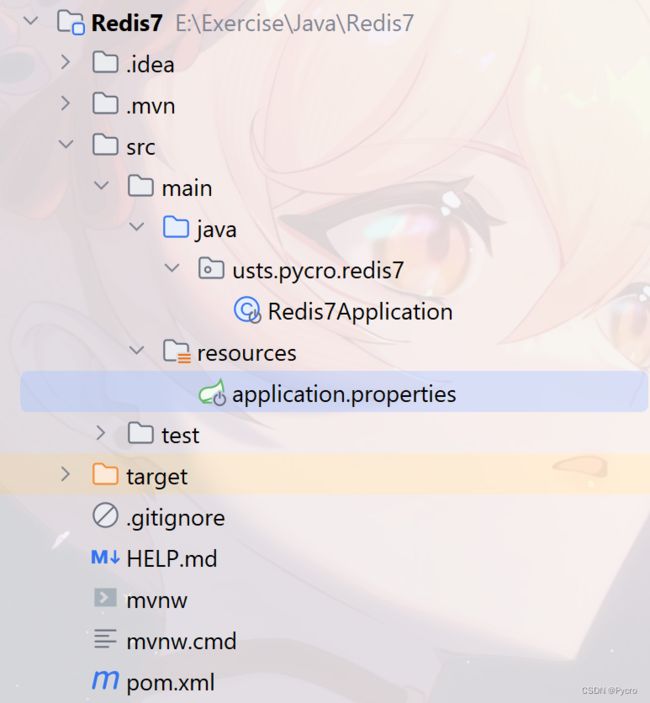
建Module
-
改POM
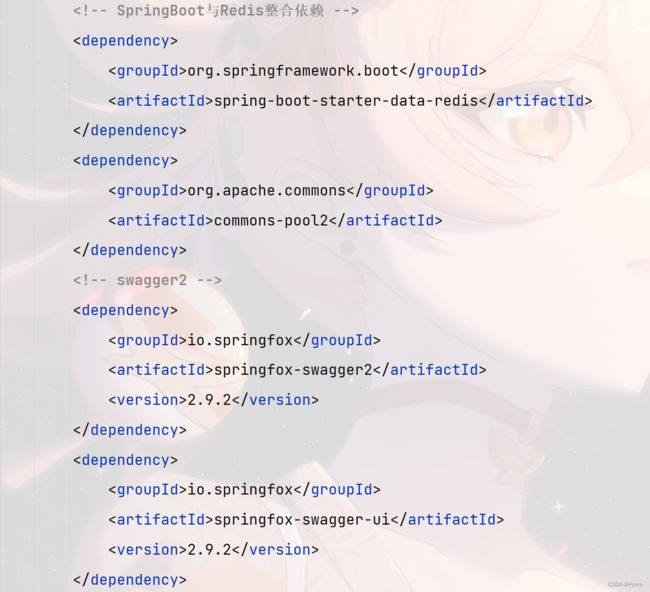
-
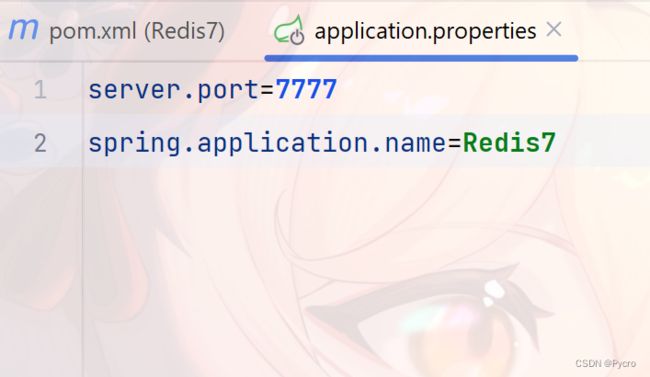
写YML
server.port=7777
spring.application.name=Redis7
# ===loggging===
logging.leve1.root=info
1ogging.leve1.usts.pycro.redis7=info
logging.pattern.console=%d{yyyy-M-dd HH:mm:ss.sSS} [%thread] %-5level %logger -%msg%n
1ogging.file.name=redis7.log
logging.pattern.file=%d{yyyy-MW-dd HH:mm:ss.sss} [%thread]%-5level %logger -%msg%n
# ===Swagger========
spring.swagger2.enabled=true
spring.mvc.pathmatch.matching-strategy=ant_path_matcher
# ======redis单机=======
spring.redis.database=0
spring.redis.host=centos
spring.redis.port=6379
spring.redis.password=123456
spring.redis.lettuce.pool.max-active=8
spring.redis.lettuce.poo1.max-wait=-1ms
spring.redis.lettuce.poo1.max-idle=8
spring.redis.lettuce.pool.min-idle=0
- 主启动
  @SpringBootApplication
  public class Redis7Application {

    public static void main(String[] args) {
        SpringApplication.run(Redis7Application.class, args);
    }

}
-
业务类
- 配置类
//故意先空着
package usts.pycro.redis7.config;

import org.springframework.beans.factory.annotation.Value;
import org.springframework.context.annotation.Bean;
import org.springframework.context.annotation.Configuration;
import springfox.documentation.builders.ApiInfoBuilder;
import springfox.documentation.builders.PathSelectors;
import springfox.documentation.builders.RequestHandlerSelectors;
import springfox.documentation.service.ApiInfo;
import springfox.documentation.spi.DocumentationType;
import springfox.documentation.spring.web.plugins.Docket;
import springfox.documentation.swagger2.annotations.EnableSwagger2;

import java.time.LocalDateTime;
import java.time.format.DateTimeFormatter;

/**
 * @author Pycro
 * @version 1.0
 * 2023-04-06 11:30 PM
 */
 @Configuration
 @EnableSwagger2
 public class SwaggerConfig {
    @Value("${spring.swagger2.enabled}")
    private Boolean enabled;

    @Bean
    public Docket createRestApi() {
        return new Docket(DocumentationType.SWAGGER_2)
                .apiInfo(apiInfo())
                .enable(enabled)
                .select()
                .apis(RequestHandlerSelectors.basePackage("usts.pycro.redis7")) //你自己的package
                .paths(PathSelectors.any())
                .build();
    }

    public ApiInfo apiInfo() {
        return new ApiInfoBuilder()
                .title("springboot利用swagger2构建api接口文档 " + "\t" + DateTimeFormatter.ofPattern("yyyy-MM-dd").format(LocalDateTime.now()))
                .description("springboot+redis整合,问题反馈邮件:[email protected]")
                .version("1.0")
                .termsOfServiceUrl("https://www.usts.edu.cn/")
                .build();
    }
 }
- service
package usts.pycro.redis7.service;


import lombok.extern.slf4j.Slf4j;
import org.springframework.data.redis.core.RedisTemplate;
import org.springframework.stereotype.Service;

import javax.annotation.Resource;
import java.util.UUID;
import java.util.concurrent.ThreadLocalRandom;

/**
 * @author Pycro
 * @version 1.0
 * 2023-04-07 9:16 AM
 */
    @Service
    @Slf4j
    public class OrderService {
    public static final String ORDER_KEY = "ord:";
    @Resource
    private RedisTemplate redisTemplate;

    public void addOrder() {
        int keyId = ThreadLocalRandom.current().nextInt(1000) + 1;
        String serialNo = UUID.randomUUID().toString();

        String key = ORDER_KEY + keyId;
        String value = "京东订单" + serialNo;
        redisTemplate.opsForValue().set(key, value);

        log.info("***key:{}", key);
        log.info("***value:{}", value);
    }

    public String getOrderById(Integer keyId) {
        return (String) redisTemplate.opsForValue().get(ORDER_KEY + keyId);
    }
    }
- controller
package usts.pycro.redis7.controller;
import io.swagger.annotations.Api;
import io.swagger.annotations.ApiOperation;
import lombok.extern.slf4j.Slf4j;
import org.springframework.web.bind.annotation.PathVariable;
import org.springframework.web.bind.annotation.RequestMapping;
import org.springframework.web.bind.annotation.RequestMethod;
import org.springframework.web.bind.annotation.RestController;
import usts.pycro.redis7.service.OrderService;
import javax.annotation.Resource;
/**
* @author Pycro
* @version 1.0
* 2023-04-07 9:26 AM
*/
@RestController
@Slf4j
@Api(tags = "订单接口")
public class OrderController {
@Resource
private OrderService orderService;
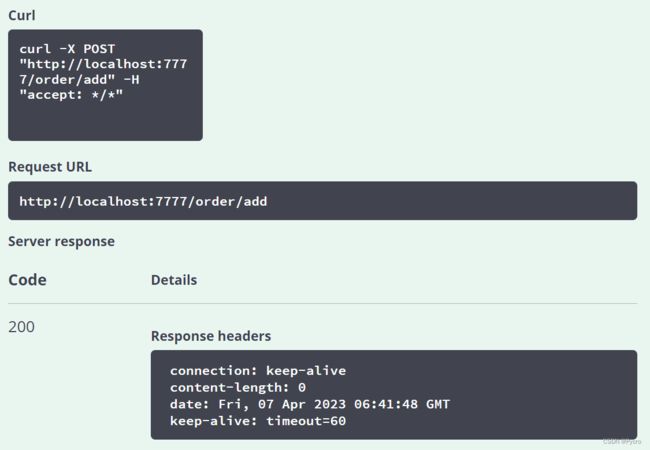
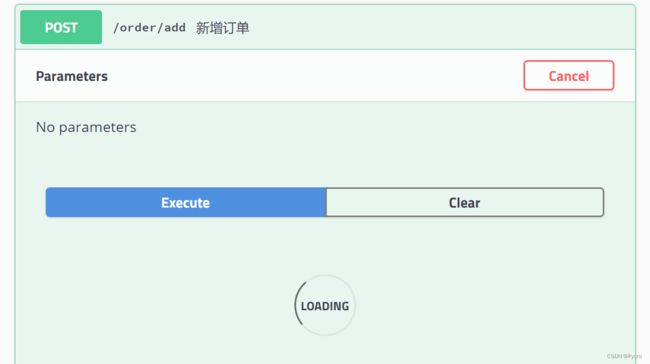
@ApiOperation("新增订单")
@RequestMapping(value = "/order/add", method = RequestMethod.POST)
public void addOrder() {
orderService.addOrder();
}
@ApiOperation("按照keyId查询订单")
@RequestMapping(value = "/order/{keyId}", method = RequestMethod.GET)
public void getOrderById(@PathVariable Integer keyId) {
orderService.getOrderById(keyId);
}
}
-
测试
地址:http://localhost:7777/swagger-ui.html#
-
序列化问题
解决方案1:使用StringRedisTemplate
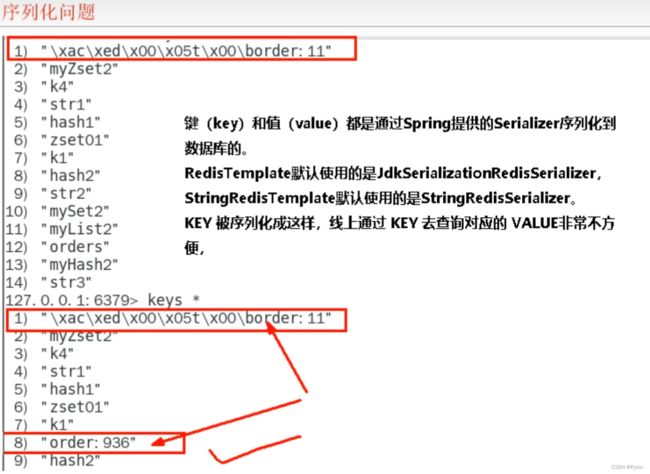
JDK序列化方式(默认)惹的祸,需要在RedisConfig中配置
-
package usts.pycro.redis7.config;

import org.springframework.context.annotation.Bean;
import org.springframework.context.annotation.Configuration;
import org.springframework.data.redis.connection.lettuce.LettuceConnectionFactory;
import org.springframework.data.redis.core.RedisTemplate;
import org.springframework.data.redis.serializer.GenericJackson2JsonRedisSerializer;
import org.springframework.data.redis.serializer.StringRedisSerializer;

/**
 * @author Pycro
 * @version 1.0
 * 2023-04-06 11:29 PM
 */
   @Configuration
   public class RedisConfig
   {
    /**
     * redis序列化的工具配置类,下面这个请一定开启配置
     * 127.0.0.1:6379> keys *
     * 1) "ord:102"  序列化过
     * 2) "\xac\xed\x00\x05t\x00\aord:102"   野生,没有序列化过
     * this.redisTemplate.opsForValue(); //提供了操作string类型的所有方法
     * this.redisTemplate.opsForList(); // 提供了操作list类型的所有方法
     * this.redisTemplate.opsForSet(); //提供了操作set的所有方法
     * this.redisTemplate.opsForHash(); //提供了操作hash表的所有方法
     * this.redisTemplate.opsForZSet(); //提供了操作zset的所有方法
     * @param lettuceConnectionFactory
     * @return
       */
       @Bean
       public RedisTemplate<String, Object> redisTemplate(LettuceConnectionFactory lettuceConnectionFactory)
       {
        RedisTemplate<String,Object> redisTemplate = new RedisTemplate<>();

        redisTemplate.setConnectionFactory(lettuceConnectionFactory);
        //设置key序列化方式string
        redisTemplate.setKeySerializer(new StringRedisSerializer());
        //设置value的序列化方式json,使用GenericJackson2JsonRedisSerializer替换默认序列化
        redisTemplate.setValueSerializer(new GenericJackson2JsonRedisSerializer());

        redisTemplate.setHashKeySerializer(new StringRedisSerializer());
        redisTemplate.setHashValueSerializer(new GenericJackson2JsonRedisSerializer());

        redisTemplate.afterPropertiesSet();

        return redisTemplate;
       }
         }
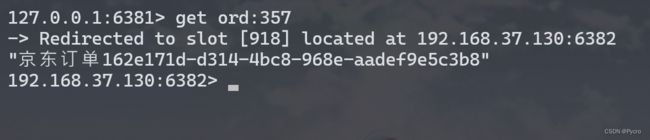
连接集群
-
启动redis集群6台实例
-
第一次改写YML
# ========redis集群========
spring.redis.password=123456
# 获取失败,最大重定向次数
spring.redis.cluster.max-redirects=3
spring.redis.lettuce.pool.max-active=8
spring.redis.lettuce.pool.max-wait=-1ms
spring.redis.lettuce.pool.max-idle=8
spring.redis.lettuce.pool.min-idle=0
spring.redis.cluster.nodes=centos:6381,centos:6382,centos:6383,centos:6384,centos:6385,centos:6386
-
直接通过微服务访问redis集群
http://localhost:7777/swagger-ui.html#/订单接口
一切OK

-
问题来了
人为模拟,master-6381机器意外宕机,手动shutdown
先对redis集群命令方式,手动验证各种读写命令,看看6384是否上位——Y
Redis Cluster集群能自动感知并自动完成主备切换,对应的slave6384会被选举为新的master
-
微服务客户端再次读写访问试试

-
故障现象
SpringBoot客户端没有动态感知到RedisCluster的最新集群信息
经典故障:Connection refused: no further information: /192.168.37.130:6381
-
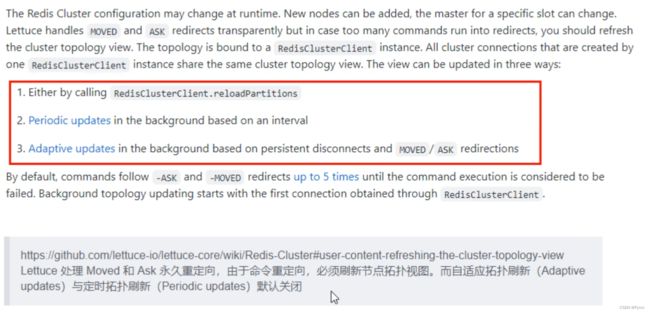
导致原因
SpringBoot 2.X版本, Redis默认的连接池采用Lettuce
当Redis集群节点发生变化后,Letture默认是不会刷新节点拓扑
-
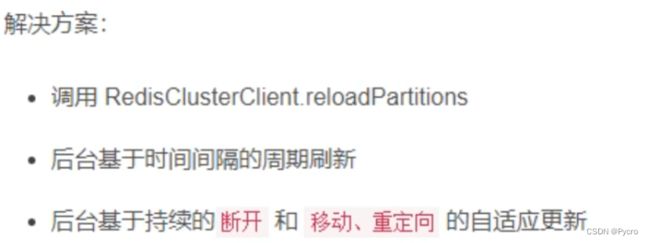
解决方案
-
排除lettuce采用jedis(不推荐)
-
重写连接工厂实例(极度不推荐)
-
刷新节点集群拓扑动态感应
-
-
第二次改写YML
-
-
#支持集群拓扑动态感应刷新,自适应拓扑刷新是否使用所有可用的更新,默认false关闭
spring.redis.lettuce.cluster.refresh.adaptive=true
#定时刷新
spring.redis.lettuce.cluster.refresh.period=2000