直线扫描转换——中点Bresenham扫描换算法(VS2022)
说明:本实验代码在vs2022下可正常运行,如需vc6.0版本请联系作者,本实验适配于计算机图形学新版(VC++ MFC )第二版
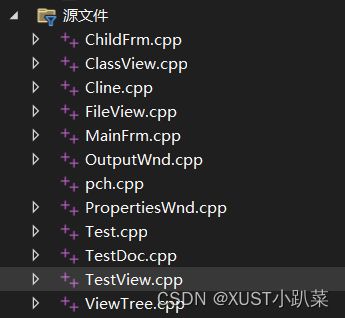
1.1创建MFC应用程序框架
建议创建项目时名称为:Test
源文件:Line.cpp
头文件:Line.h
其中TestView是框架下自带的,Test是项目名。
1.2设计实现直线绘制类
(1)实验原理
使用中点扫描转换算法进行直线绘制,需要根据斜率k值分别选择不同的误差项和初始值,除垂线外(k=+-∞),可分为k<-1,-1<=k<0,0<=k<=1和k>1四种情况,具体初始值,误差项和递推公式 可自己推,对于k=+-∞,可直接画出垂线,-1<=k<0和0<=k<=1时,X轴方向为主移动方向;k<-1和k>1时,Y轴方向为主移动方向。
(2)"Line.h"头文件的具体代码
#pragma once
class CP2
{
public:
	CP2();
	virtual~CP2();
	CP2(double, double);
public:
	double x;
	double y;
};

class CLine
{
public:
	CLine();
	virtual~CLine();
	void SetLineColor(COLORREF);
	void MoveTo(CP2);
	void MoveTo(double, double);
	void LineTo(CP2, CDC*);
	void LineTo(double, double, CDC*);
public:
	CP2 P0;
	CP2 P1;
	COLORREF clr;
};
1.3新建Line源文件
Line.cpp源文件代码实现:
#include"pch.h"
#include"Line.h"
#include"math.h"
#define Round(d) int(floor(d+0.5))

CP2::CP2()
{
	x = 0.0;
	y = 0.0;
};

CP2::~CP2()
{}

CP2::CP2(double x, double y)
{
	this->x = x;
	this->y = y;
};

CLine::CLine()
{}

CLine::~CLine()
{}

void CLine::SetLineColor(COLORREF color)
{
	clr = color;
}
void CLine::MoveTo(CP2 p0)
{
	P0 = p0;
}
void CLine::MoveTo(double x, double y)
{
	P0.x = x;
	P0.y = y;
}
void CLine::LineTo(double x, double y, CDC* pDC)
{
	CP2 p;
	p.x = x;
	p.y = y;


	LineTo(p, pDC);
}
void CLine::LineTo(CP2 p1, CDC* pDC)
{
	P1 = p1;
	CP2 p, t;
	if (fabs(P0.x - P1.x) < 1e-6)
	{
		if (P0.y > P1.y)
		{
			t = P0; P0 = P1; P1 = t;
		}
		for (p = P0; p.y < P1.y; p.y++)
		{
			pDC->SetPixelV(Round(p.x), Round(p.y), clr);
		}
	}
	else
	{
		double k, d;
		k = (P1.y - P0.y) / (P1.x - P0.x);
		if (k > 1.0)
		{
			if (P0.y > P1.y)
			{
				t = P0; P0 = P1; P1 = t;
			}
			d = 1 - 0.5 * k;
			for (p = P0; p.y < P1.y; p.y++)
			{
				pDC->SetPixelV(Round(p.x), Round(p.y), clr);
				if (d >= 0)
				{
					p.x++;
					d += 1 - k;
				}
				else
					d += 1;
			}
		}
		if (0.0 <= k && k <= 1.0)
		{
			if (P0.x > P1.x)
			{
				t = P0; P0 = P1; P1 = t;
			}
			d = 0.5 - k;
			for (p = P0; p.x < P1.x; p.x++)
			{
				pDC->SetPixelV(Round(p.x), Round(p.y), clr);
				if (d < 0)
				{
					p.y++;
					d += 1 - k;
				}
				else
					d -= k;
			}
		}


		if (k >= -1.0 && k < 0.0)
		{
			if (P0.x > P1.x)
			{
				t = P0; P0 = P1; P1 = t;
			}
			d = -0.5 - k;
			for (p = P0; p.x < P1.x; p.x++)
			{
				pDC->SetPixelV(Round(p.x), Round(p.y), clr);
				if (d > 0)
				{
					p.y--;
					d -= 1 + k;
				}
				else
					d -= k;
			}
		}
		if (k < -1.0)
		{
			if (P0.y > P1.y)
			{
				t = P0; P0 = P1; P1 = t;
			}
			d = -1 - 0.5 * k;
			for (p = P0; p.y > P1.y; p.y--)
			{
				pDC->SetPixelV(Round(p.x), Round(p.y), clr);
				if (d < 0)
				{
					p.x++;
					d -= 1 + k;
				}
				else
					d -= 1;
			}
		}
	}
	P0 = p1;
}
1.4调用直线类绘制菱形线框图
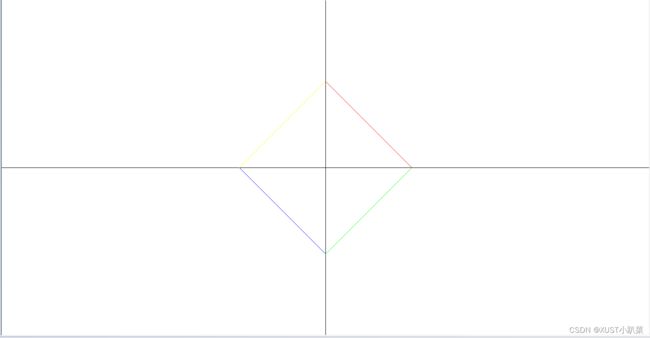
直接在CTestView::OnDraw()函数中进行菱形ABCD线框图绘制,只需要调用四次Cline类对象,分别AB,BC,CD,DA四条边,每条边只需要设置两个顶点坐标和颜色即可,具体实现代码如下:
void CTestView::OnDraw(CDC* pDC)
{
	CTestDoc* pDoc = GetDocument();
	ASSERT_VALID(pDoc);
	if (!pDoc)
		return;

	// TODO: 在此处为本机数据添加绘制代码
	CRect rect;
	GetClientRect(&rect);
	pDC->SetMapMode(MM_ANISOTROPIC);
	pDC->SetWindowExt(rect.Width(), rect.Height());
	pDC->SetViewportExt(rect.Width(), -rect.Height());
	pDC->SetViewportOrg(rect.Width() / 2, rect.Height() / 2);
	rect.OffsetRect(-rect.Width() / 2, -rect.Height() / 2);

	CLine* line = new CLine;
	line->SetLineColor(RGB(0, 0, 0));
	line->MoveTo(CP2(-rect.Width() / 2, 0));
	line->LineTo(CP2(rect.Width() / 2, 0), pDC);
	line->MoveTo(CP2(0, -rect.Height() / 2));
	line->LineTo(CP2(0, rect.Height() / 2), pDC);

	int a = 200;
	CP2 A(0, a);
	CP2 B(a, 0);
	CP2 C(0, -a);
	CP2 D(-a, 0);

	line->SetLineColor(RGB(255, 0, 0));
	line->MoveTo(A);
	line->LineTo(B, pDC);

	line->SetLineColor(RGB(0, 255, 0));
	line->LineTo(C, pDC);

	line->SetLineColor(RGB(0, 0, 255));
	line->LineTo(D, pDC);

	line->SetLineColor(RGB(255, 255, 0));
	line->LineTo(A, pDC);

	delete line;

}
提示:无需新建源文件,框架中含有TestView.cpp文件,在其中找到对应函数名进行修改即可。
运行结果:

