Python爬虫技术系列-05字符验证码识别
Python爬虫技术系列-05字符验证码识别
- 1. 光学文字识别
-
- 1.1 OCR概述
- 1.2 OCR识别库Tesseract下载安装
- 1.3 生成验证码图片
- 1.4 字符验证码识别
-
- 1.安装python识别验证码库:
- 2.验证码识别:
- 1.5 使用打码平台识别验证码
- 1.6 滑动验证码识别
1. 光学文字识别
1.1 OCR概述
OCR(Optical Character Recognition,光学字符识别)是指使用扫描仪或数码相机对文本资料进行扫描成图像文件,然后对图像文件进行分析处理,自动识别获取文字信息及版面信息的软件。一般情况下,对于字符型验证码的识别流程如下:主要过程可以分解为五个步骤:图片清理,字符切分,字符识别,恢复版面、后处理文字几个步骤。通过本章节学习联系搭建OCR环境,使用Tesseract平台对验证码进行识别。

在进行图片识别前,需要对验证码图片进行处理,包括灰度化和二值化。像素点是最小的图片单元,一张图片由很多像素点构成,一个像素点的颜色是由RGB三个值来表现的,所以一个像素点对应三个颜色向量矩阵,我们对图像的处理就是对这个像素点的操作。
图片的灰度化,就是让像素点矩阵中的每一个像素点满足 R=G=B,此时这个值叫做灰度值,白色为255,黑色为0。灰度转化一般公式为:R=G=B=处理前的。灰度转化一般公式为:R=G=B=处理前的,R0.3+G0.59+B*0.11。
图像的二值化,就是将图像的像素点矩阵中的每个像素点的灰度值设置为0(黑色)或255(白色),从而实现二值化,将整个图像呈现出明显的只有黑和白的视觉效果。原理是利用设定的一个阈值来判断图像像素是0还是255,一般小于阈值的像素点变为0,大于的变成255。这个临界灰度值就被称为阈值,阈值的设置很重要,阈值过大或过小都会对图片造成损坏。选择阈值的原则是:既要尽可能保存图片信息,又要尽可能减少背景和噪声的干扰。常用阈值选择的方法是:灰度平局值法:取127(0~255的中数,(0+255)/2=127);平均值法:计算像素点矩阵中的所有像素点的灰度值的平均值avg;迭代法:选择一个近似阈值作为估计值的初始值,然后进行分割图像,根据产生的子图像的特征来选取新的阈值,在利用新的阈值分割图像,经过多次循环,使得错误分割的图像像素点降到最小。
1.2 OCR识别库Tesseract下载安装
-
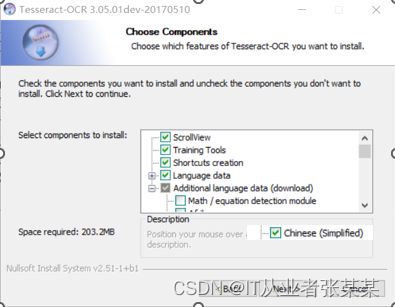
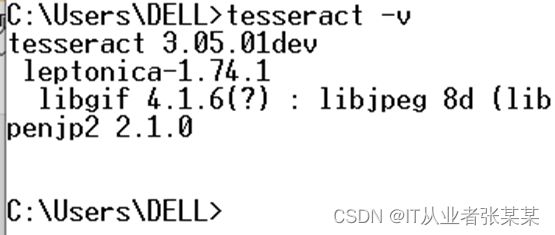
Tesseract下载安装:
- 下载地址:https://digi.bib.uni-mannheim.de/tesseract/
1.3 生成验证码图片
安装验证码库:
pip install captcha==0.4
生成验证码
from captcha.image import ImageCaptcha

img = ImageCaptcha()
image = img.generate_image('ABCD')
image.show()
image.save('captcha1.jpg')
1.4 字符验证码识别
1.安装python识别验证码库:
pip install pytesseract==0.3.10
pip install opencv-python==3.4.18.65
2.验证码识别:
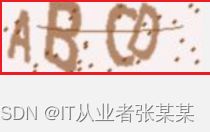
构建一个验证码:
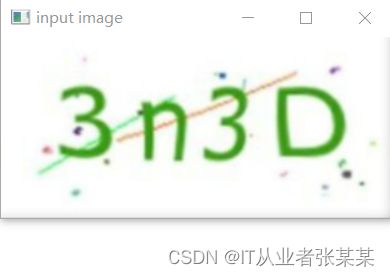
读者可以截图,然后另存为 3N3D.jpg
识别代码为:
import cv2 as cv
import pytesseract
from PIL import Image
def recognize_text(image):# 定义函数
    dst = cv.pyrMeanShiftFiltering(image, sp=10, sr=150) # 边缘保留滤波  去噪
    gray = cv.cvtColor(dst, cv.COLOR_BGR2GRAY) # 灰度图像
    ret, binary = cv.threshold(gray, 0, 255, cv.THRESH_BINARY_INV | cv.THRESH_OTSU) # 二值化
    erode = cv.erode(binary, None, iterations=2) # 形态学操作   腐蚀  膨胀
    dilate = cv.dilate(erode, None, iterations=1)
    cv.imshow('dilate', dilate)
    cv.bitwise_not(dilate, dilate) # 逻辑运算,背景设为白色,字体为黑,便于识别
    cv.imshow('binary-image', dilate)
    test_message = Image.fromarray(dilate) # 识别
    text = pytesseract.image_to_string(test_message)
    print(f'识别结果:{text}')

src = cv.imread('3N3D.jpg')
cv.imshow('input image', src)
recognize_text(src)
cv.waitKey(0)
cv.destroyAllWindows()
1.5 使用打码平台识别验证码
任务分析:
在很多网站都会使用验证码来进行反爬,所以为了能够更好的获取数据,需要了解如何使用打码平台爬虫中的验证码。
常见的打码平台:
http://www.ttshitu.com/
提供验证码图片7364.jpg
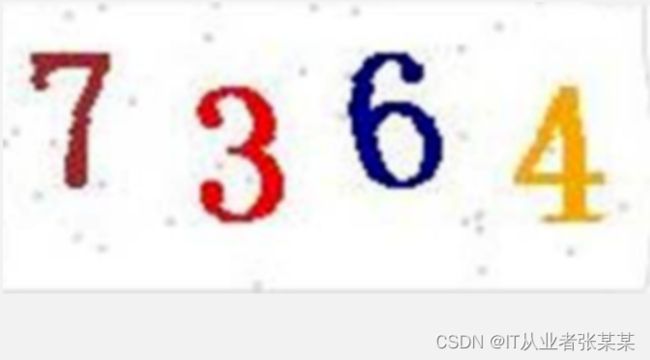 读者可以截图,然后另存为 7364.jpg
打码平台识别验证码
import json
import requests
import base64
from io import BytesIO
from PIL import Image
from sys import version_info

def base64_api(uname, pwd, img):  # 打码平台解析工具
    img = img.convert('RGB')
    buffered = BytesIO()
    img.save(buffered, format="JPEG")
    # result = None
    if version_info.major >= 3:
        b64 = str(base64.b64encode(buffered.getvalue()), encoding='utf-8')

    else:
        b64 = str(base64.b64encode(buffered.getvalue()))
    data = {"username": uname, "password": pwd, "image": b64}
    result = json.loads(requests.post("http://api.ttshitu.com/base64", json=data).text)

    if result['success']:
        return result["data"]["result"]
    else:
        return result["message"]
if __name__ == "__main__":
    img_path = "./7364.png"
    # img_path = "./captcha1.jpg"
    img = Image.open(img_path)
    # 这里用自己的用户名和密码
    result = base64_api(uname='XXXX', pwd='XXX', img=img)
    print("真正解析出来的值是:", result)
1.6 滑动验证码识别
任务分析:
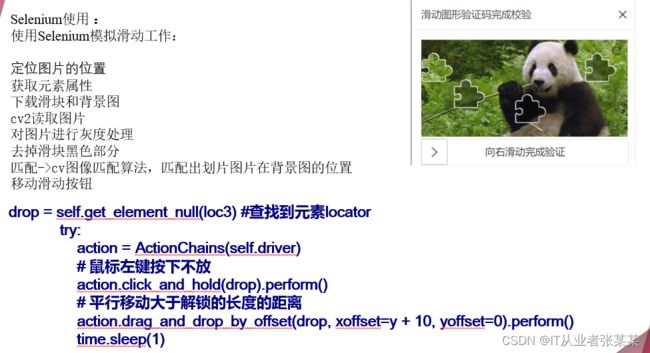
滑动验证码滑动拼图验证码在普通的滑块验证码上增加了随机的滑动距离,用户需要根据拼图缺口位置来决定滑块的滑动长度。解决它的方法也很直观,首先找到缺口的位置(通常只需要X轴的位置),然后拖动滑块即可。用python识别出滑块验证中的缺口位置。
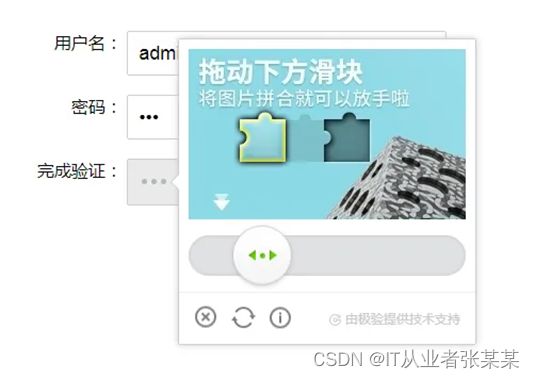
下载chrome浏览器驱动
http://chromedriver.storage.googleapis.com/index.html
选择对应的驱动
放在工程目录下
代码如下:
参考:selenium处理各类滑块验证码
# -*- coding: utf-8 -*-
import time

from PIL import Image, ImageChops
from selenium import webdriver
from selenium.webdriver import ChromeOptions, ActionChains

# 添加参数
options = ChromeOptions()
# options.add_argument('--headless')
# options.add_argument('--no-sanbox')

# 创建WebDriver对象
browser = webdriver.Chrome(options=options)
browser.get('http://www.porters.vip/captcha/jigsawCanvas.html')
browser.maximize_window()
time.sleep(2)

# 定位滑块
slide_btn = browser.find_element_by_id('jigsawCircle')
# 定位背景图
pre_img = browser.find_element_by_id('imagebox')
# 截取背景图
pre_img.screenshot('before.png')
# 事件对象
actionChains = ActionChains(browser)
# 点击滑块
actionChains.click_and_hold(slide_btn).perform()
time.sleep(1)
# 使用js隐藏方块
script = """
    var missblock = document.getElementById('missblock');
    missblock.style['visibility'] = 'hidden';
"""
browser.execute_script(script)
time.sleep(1)
# 再次截图
pre_img.screenshot('after.png')

# 使用PIL创建Image
before_img = Image.open('before.png').convert('RGB')
after_img = Image.open('after.png').convert('RGB')
# 使用ImageChops对比差异
different_place = ImageChops.difference(before_img, after_img)
diff_position = different_place.getbbox()

# 使用js显示方块
script = """
    var missblock = document.getElementById('missblock');
    missblock.style['visibility'] = '';
"""
browser.execute_script(script)
time.sleep(1)

# 观察网站滑块移动的长度和位置
actionChains.drag_and_drop_by_offset(slide_btn, diff_position[0] - 10, 0).perform()
time.sleep(2)

# 关闭
browser.close()
使用ImageChops.difference对比差异是发现getbbox()返回的是None,这里需要在打开图片是采用RGB的方式:Image.open(‘after.png’).convert(‘RGB’)


