- yolov8实战第七天——pyqt5-yolov8实现车牌识别系统(参考论文(约7000字)+环境配置+完整部署代码+代码使用说明+训练好的模型)
学术菜鸟小晨
yolov8实战100天pythonYOLOpyqt5车牌识别毕业设计论文
基于pyqt5-yolov8实现车牌识别系统,包括图片车牌识别,视频车牌识别,视频流车牌识别。效果展示(图片检测,检测到的内容添加到历史记录):效果展示(视频检测,视频车辆只会添加一条记录,下文更多实际应用中的优化策略):新增功能:批量图片检测(2024/5/7更新代码)
- 【JavaWeb学习Day25】
quo-te
JavaWebvue黑马
Web前端实战ElementPlus什么是ElementPlusElementPlus:是饿了么团队研发的,基于Vue3,面向设计师和开发者的组件库。组件:组成网页的部件,例如超链接、按钮、图片、表格、表单、分页条等等。官网:一个Vue3UI框架|ElementPlus快速入门准备工作:1.创建vue项目2.参照官方文档,安装ElementPlus组件库(在当前工程的目录下):npminstall
- 【ROS实战】02-ROS架构介绍
卓有成效的程序员
ROSROS机器人人工智能
1.简介你是否曾有过这样的疑问:我按照文档安装了ROS,依照要求写了一些示例节点(node)、消息(msg)和话题(topic),但觉得过程既麻烦又繁琐。也许你开始怀疑:为什么需要ROS?它到底帮我解决了什么问题?本文将通过一个简单的例子,介绍ROS的架构,阐明它解决了哪些问题,以及它如何帮助我们简化开发流程。2.移动案例假设我们要编写一个能够控制机器人移动的程序。随着程序的增多,我们需要进行模块
- AI时代个人财富增长实战指南:从零基础到精通变现的完整路径
A达峰绮
人工智能
(本文基于人工智能技术发展规律,结合互联网经济底层逻辑,为普通从业者构建系统性AI应用框架)一、建立AI认知基础:技术理解与工具掌握技术分类认知人工智能工具分为四大功能模块:自然语言处理(文本生成、对话交互)、计算机视觉(图像视频处理)、数据分析(预测建模)、自动化控制(流程优化)。建议新手首先掌握语言类工具的基础操作,逐步扩展到其他领域。工具操作逻辑通用AI工具通常包含三大核心功能模块:输入界面
- Sass:深度解析与实战应用
QQ828929QQ
sass前端css
在前端开发的浪潮中,CSS预处理器因其强大的功能和灵活性而备受推崇。其中,Sass(SyntacticallyAwesomeStylesheets)无疑是这些预处理器中的佼佼者。本文将深入解析Sass的核心概念、语法特性以及实战应用,并通过代码样例展示其强大的功能。Sass是什么?Sass(SyntacticallyAwesomeStylesheets)是一种CSS预处理器,它允许我们使用变量、嵌
- 【大模型书籍PDF】从零开始大模型开发与微调:基于PyTorch与ChatGLM (推荐)_从零开始大模型开发与微调 pdf
喝不喝奶茶丫
pytorch人工智能语言模型大模型转行大模型AI大模型微调
今天又来给大家推荐一本大模型方面的书籍。本书使用PyTorch2.0作为学习大模型的基本框架,以ChatGLM为例详细讲解大模型的基本理论、算法、程序实现、应用实战以及微调技术,为读者揭示大模型开发技术。本书配套示例源代码、PPT课件。(书籍分享)
- 大语言模型学习路线:从入门到实战
大模型官方资料
语言模型学习人工智能产品经理自然语言处理搜索引擎
大语言模型学习路线:从入门到实战在人工智能领域,大语言模型(LargeLanguageModels,LLMs)正迅速成为一个热点话题。本学习路线旨在为有基本Python编程和深度学习基础的学习者提供一个清晰、系统的大模型学习指南,帮助你在这一领域快速成长。本学习路线更新至2024年02月,后期部分内容或工具可能需要更新。适应人群已掌握Python基础具备基本的深度学习知识学习步骤本路线将通过四个核
- ESP32-C3模组上跑通MQTT(1)
蓝天居士
ESP32-C3ESP32ESP-IDFMQTT
本文内容参考:《ESP32-C3物联网工程开发实战》特此致谢!一、远程控制的介绍什么是远程控制?顾名思义,远程控制就是远距离控制,是指控制设备(如智能手机、计算机等网络设备)通过广域网控制被控设备的行为。远程控制不受地域的限制,比如某个人可以在异地(如公司、外地等)通过智能手机控制家中的智能灯。远程控制的控制设备和被控设备一版都需要连接到云服务器,控制设备发送的控制命令交由云服务器,再转发至被控设
- CSS动画:性能优化指南
双囍菜菜
前端随记css性能优化前端
CSS动画性能优化指南关键词:重排重绘、硬件加速、合成层、性能分析文章目录CSS动画性能优化指南一、浏览器渲染机制:理解性能瓶颈根源1.1像素管道(PixelPipeline)全流程1.2各阶段性能损耗对比二、性能分析实战:ChromeDevTools深度使用2.1性能问题定位四步法2.2关键指标解读三、六大核心优化策略3.1硬件加速的正确打开方式3.2避免布局颠簸(LayoutThrashing
- Caffeine vs Guava Cache:性能巅峰对决,谁才是 Java 本地缓存之王?
Julian.zhou
Java开发基础技能缓存java算法
CaffeinevsGuavaCache:性能巅峰对决,谁才是Java本地缓存之王?导语:在Java本地缓存的战场上,Caffeine和GuavaCache是开发者最常用的两大神器。但究竟谁的性能更胜一筹?为何Caffeine被称为“GuavaCache的终结者”?本文通过算法原理、并发性能、内存管理、实战测试四大维度,彻底揭秘两者的性能差异,文末附迁移指南和选型建议!一、核心差异:算法与淘汰策略
- 【颠覆性缓存架构】Caffeine双引擎缓存实战:CPU和内存双优化,命中率提升到92%,内存减少75%
Julian.zhou
架构相关Java开发基础技能算法缓存架构java
千万级QPS验证!Caffeine智能双缓存实现92%命中率,内存减少75%摘要:本文揭秘千万级流量场景下的缓存革命性方案!基于Caffeine打造智能双模式缓存系统,通过冷热数据分离存储与精准资源分配策略,实现CPU利用率降低60%、内存占用减少75%的惊人效果。文末附可复用的生产级代码!一、经典方案的致命陷阱:资源浪费之谜1.1真实事故现场案例回放:某电商大促期间,缓存集群CPU飙升至90%导
- 鸿蒙HarmonyOS应用开发 |鸿蒙技术分享HarmonyOS Next 深度解析:分布式能力与跨设备协作实战
一键难忘
harmonyos分布式华为HarmonyOSNext
鸿蒙技术分享:HarmonyOSNext深度解析:分布式能力与跨设备协作实战随着万物互联时代的到来,操作系统作为连接设备、应用与用户体验的核心,扮演着不可或缺的角色。华为最新发布的HarmonyOSNext(鸿蒙操作系统下一代版本)不仅在技术架构上实现了颠覆性升级,更在生态体验上迈向了一个新的高度。本文将从技术架构、生态优势和开发实践三个方面深入探讨HarmonyOSNext的技术特点,并通过一个
- Tinyflow AI 工作流编排框架 v0.0.7 发布
自不量力的A同学
人工智能
目前没有关于TinyflowAI工作流编排框架v0.0.7发布的相关具体信息。Tinyflow是一个轻量的AI智能体流程编排解决方案,其设计理念是“简单、灵活、无侵入性”。它基于WebComponent开发,前端支持与React、Vue等任何框架集成,后端支持Java、Node.js、Python等语言,助力传统应用快速AI转型。该框架代码库轻量,学习成本低,能轻松应对简单任务编排和复杂多模态推理
- Hilt 实战:从零到一实现 Android 依赖注入与网络请求
tangweiguo03051987
androidKotlin语法androidHiltKotlin
以下是一个完整的Hilt实战讲解,从基础概念到实际应用,逐步演示如何在Android项目中使用Hilt进行依赖注入。Hilt实战讲解1.什么是Hilt?Hilt是Android官方推荐的依赖注入(DI,DependencyInjection)框架,基于Dagger构建,专为Android设计。它简化了Dagger的使用,减少了模板代码,使依赖注入更加容易上手。2.Hilt的核心概念依赖注入(DI)
- Python 数据分析实战:宠物经济行业发展洞察
萧十一郎@
pythonpython数据分析宠物
目录一、案例背景二、代码实现2.1数据收集2.2数据探索性分析2.3数据清洗2.4数据分析2.4.1宠物用品用户满意度分析2.4.2宠物用品销售与价格关系分析2.4.3宠物经济行业未来发展预测三、主要的代码难点解析3.1数据收集3.2数据清洗-销售数据处理3.3数据分析-宠物用品用户满意度分析3.4数据分析-宠物用品销售与价格关系分析3.5数据可视化四、可能改进的代码4.1数据收集改进4.2数据清
- K8S集群新增和删除Node节点(K8s Cluster Adds and Removes Node Nodes)
Linux运维老纪
天涯海角k8s伴你同行kubernetes容器云原生云计算运维开发linux
实战:在已有K8S集群如何新增和删除Node节点在Kubernetes(K8S)集群中,Node节点是集群中的工作节点,它们运行着容器的实际实例。管理K8S集群中的Node节点,包括新增和删除节点,是一个常见且重要的操作,可以帮助你根据需求扩展或缩减集群的容量。本篇文章将分享一下如何在已有集群添加新节点和删除现有节点1新增节点到K8S集群新增节点可以分为准备节点、配置节点和将其加入集群三步。1.1
- Deepseek-R1-Distill-Llama-8B + Unsloth 中文医疗数据微调实战
LuckyAnJo
LLM相关llamapython自然语言处理人工智能
内容参考至博客与Bin_Nong1.环境搭建主要依赖的库(我的版本):torch==2.5.1unsloth==2025.2.15trl==0.15.2transformers==4.49.0datasets=3.3.1wandb==0.19.62.数据准备-medical_o1_sft_Chinese经过gpt-o1的包含cot(思考过程)的中文医疗问答数据,格式与内容如下:"Question"
- 用故事与视觉化打造“高光“统计报告:5个实战技巧
梦想画家
数据分析工程数据工程分析工程
你是否有过这样的经历?花费数小时整理的数据报告,却被同事评价为"又厚又臭"?别担心,这绝不是你的错——90%的统计报告都毁在不会讲故事。本文将带你用叙事经济学+视觉设计思维,把冷冰冰的数据变成让人欲罢不能的"数据故事会",掌握让数据开口说话的秘密。1.别让数据成了"睡美人":唤醒它的故事基因想象你正在给董事会讲一个悬疑剧:“去年Q2销售额神秘下滑(悬念),我们像福尔摩斯一样追查线索(行动),发现竟
- SQLMesh SCD Type 2 深度解析:时间戳与列级跟踪的实战指南
梦想画家
数据分析工程#python数据工程分析工程sqlmesh
在数据仓库架构中,缓慢变化维度(SlowlyChangingDimensions,SCD)是处理历史数据追踪的核心技术。SQLMesh作为新一代数据编织平台,其支持的SCDType2模型通过valid_from和valid_to双时间戳机制,为开发者提供了灵活的历史状态管理能力。本文将深入解析SQLMeshSCDType2的两种实现模式(基于时间戳与列级变更检测)、关键配置项及删除操作处理逻辑,让
- Tomcat从入门到精通:全方位深度解析与实战教程
墨瑾轩
一起学学Java【一】运维tomcatjava
一、Tomcat入门1.Tomcat简介ApacheTomcat,简称Tomcat,是一个开源的轻量级应用服务器,专为运行JavaServlet和JavaServerPages(JSP)技术设计。它是JavaWeb开发中最常用的Servlet容器之一,遵循JavaServlet和JavaServerPages规范,为开发者提供了一个稳定的、易于使用的部署环境。2.安装与启动安装下载最新版Tomca
- Vue3-笔记002-Ref与Reactive
·焱·
vue3学习笔记笔记vue.jsjavascript
002-Ref与Reactive-目录Refref案例ref与RefifRefshallowReftriggerRefcustomRefdom元素的refReactive与ref的共同点与ref的不同点数组的异步赋值问题readonlyshallowReactivetoReftoRefstoRawRef接受一个内部值并返回一个响应式且可变的ref对象。ref对象仅有一个.valueproperty
- Vue3-day3-Ref-Reactive
金串串
vue.jsjavascript前端
Ref:创建基本类型的响应式数据作用:定义响应式变量语法:letxxx=ref(初始值)返回值:一个RefImpl的实例对象,简称ref对象或者ref,ref对象的value属性是响应式的注意点:js中操作数据需要:xxx.value,但模板中不需要.value,直接使用即可。对于letname=ref('张三')来说,name不是响应式的,name.value是响应式的。代码段姓名:{{name
- 《Java线程池深度解析:从核心参数到饱和策略实战》
云之兕
java基础入门到精通java开发语言
"线程池核心数设置多少合适?为什么任务队列满了会导致OOM?如何设计可降级的异步任务系统?"本文通过电商秒杀场景贯穿线程池参数调优全过程,结合ThreadPoolExecutor源码解析核心机制,并给出动态线程池与监控报警的最佳实践。一、线程池核心参数关系图解graphLRA[提交任务]-->B{核心线程是否已满?}B-->|否|C[创建核心线程执行]B-->|是|D{队列是否已满?}D-->|否
- Python实战:开发经典猜拳游戏(石头剪刀布)
藍海琴泉
游戏
目录引言:为什么选择猜拳游戏作为入门项目?第一部分:基础知识点与代码实现1.游戏逻辑与流程2.代码分步实现2.1导入必要模块2.2定义游戏规则函数2.3生成计算机选择2.4判断胜负逻辑2.5主循环与交互3.代码运行效果示例第二部分:功能扩展与优化1.添加计分系统2.支持多轮游戏与退出选择3.增加图形化界面(可选)第三部分:进一步学习方向1.深化游戏功能2.学习相关知识3.书籍与资源推荐适合人群:编
- 蓝桥杯动态规划实战:从数字三角形到砝码称重
藍海琴泉
蓝桥杯动态规划职场和发展
适合人群:蓝桥杯备考生|算法竞赛入门者|DP学习实践者目录一、我的动态规划入门之路1.数字三角形:经典DP首战告捷2.砝码称重:背包问题的变形二、蓝桥杯高频算法考点三、蓝桥杯DP专项训练题四、备考建议一、我的动态规划入门之路1.数字三角形:经典DP首战告捷题目描述:从三角形的顶部到底部有很多条不同的路径。对于每条路径,把路径上面的数加起来可以得到一个和,你的任务就是找到最大的和(路径上的每一步只可
- Python函数完全解读:从零基础到高阶实战
藍海琴泉
python开发语言
目标读者:编程新手|转行者|需系统掌握函数用法的开发者目录一、函数是什么?为什么需要函数?二、函数基础语法详解1.定义与调用2.返回值:函数的输出结果3.参数传递机制4.案例:计算BMI指数三、变量作用域:理解局部与全局1.局部变量2.全局变量四、函数进阶:lambda与高阶函数1.lambda匿名函数2.高阶函数五、函数高级特性1.装饰器:增强函数功能2.递归函数六、实战案例:文件处理工具一、函
- element plus table树形数据,增、删、改子节点数据时,进行局部刷新,而不刷新整个页面
catino
vue.jsjavascriptelementui
...constlistLoading=ref(false)//保存节点映射的Mapconstmaps=reactive(newMap())constload=async(row,treeNode,resolve)=>{constpid=row.idmaps.set(pid,{row,treeNode,resolve})constpost_data={parent_id:row.id,}listL
- HarmonyOS NEXT开发实战教程:选择相册和拍照
幽蓝计划
harmonyos华为
今天的内容是介绍在鸿蒙开发中从相册选择照片,和调用相机拍照,并使用这两个功能实现朋友圈编辑页面。这部分内容没什么好废话的,都是固定用法,直接上代码。首先添加权限:ohos.permission.CAMERA选择相册:asyncgetAlbum(){constphotoSelectOptions=newphotoAccessHelper.PhotoSelectOptions();photoSelec
- HarmonyOS Next 企业级分布式办公应用实战:构建高效协同的办公新生态
lyc233333
harmonyos分布式华为
在数字化办公浪潮汹涌的当下,企业对于高效、便捷且协同性强的办公应用需求愈发迫切。华为鸿蒙HarmonyOSNext系统凭借其先进的分布式技术,为打造创新型企业级分布式办公应用提供了坚实的基础。本文将基于实际开发经验,深入剖析如何利用HarmonyOSNext构建企业级分布式办公应用,涵盖从需求分析到系统架构搭建,再到核心功能实现以及性能优化等关键环节。一、办公应用需求与系统架构搭建(一)企业级分布
- 【AI大模型应用开发】【RAG评估】0. 综述:一文了解RAG评估方法、工具与指标
同学小张
大模型人工智能笔记经验分享gptagiAIGC
大家好,我是同学小张,日常分享AI知识和实战案例欢迎点赞+关注,持续学习,持续干货输出。+v:jasper_8017一起交流,一起进步。微信公众号也可搜【同学小张】本站文章一览:前面我们学习了RAG的基本框架并进行了实践,我们也知道使用它的目的是为了改善大模型在一些方面的不足:如训练数据不全、无垂直领域数据、容易出现幻觉等。那么如何评估RAG的效果呢?本文我们来了解一下。文章目录推荐前置阅读0.R
- html页面js获取参数值
0624chenhong
html
1.js获取参数值js
function GetQueryString(name)
{
var reg = new RegExp("(^|&)"+ name +"=([^&]*)(&|$)");
var r = windo
- MongoDB 在多线程高并发下的问题
BigCat2013
mongodbDB高并发重复数据
最近项目用到 MongoDB , 主要是一些读取数据及改状态位的操作. 因为是结合了最近流行的 Storm进行大数据的分析处理,并将分析结果插入Vertica数据库,所以在多线程高并发的情境下, 会发现 Vertica 数据库中有部分重复的数据. 这到底是什么原因导致的呢?笔者开始也是一筹莫 展,重复去看 MongoDB 的 API , 终于有了新发现 :
com.mongodb.DB 这个类有
- c++ 用类模版实现链表(c++语言程序设计第四版示例代码)
CrazyMizzz
数据结构C++
#include<iostream>
#include<cassert>
using namespace std;
template<class T>
class Node
{
private:
Node<T> * next;
public:
T data;
- 最近情况
麦田的设计者
感慨考试生活
在五月黄梅天的岁月里,一年两次的软考又要开始了。到目前为止,我已经考了多达三次的软考,最后的结果就是通过了初级考试(程序员)。人啊,就是不满足,考了初级就希望考中级,于是,这学期我就报考了中级,明天就要考试。感觉机会不大,期待奇迹发生吧。这个学期忙于练车,写项目,反正最后是一团糟。后天还要考试科目二。这个星期真的是很艰难的一周,希望能快点度过。
- linux系统中用pkill踢出在线登录用户
被触发
linux
由于linux服务器允许多用户登录,公司很多人知道密码,工作造成一定的障碍所以需要有时踢出指定的用户
1/#who 查出当前有那些终端登录(用 w 命令更详细)
# who
root pts/0 2010-10-28 09:36 (192
- 仿QQ聊天第二版
肆无忌惮_
qq
在第一版之上的改进内容:
第一版链接:
http://479001499.iteye.com/admin/blogs/2100893
用map存起来号码对应的聊天窗口对象,解决私聊的时候所有消息发到一个窗口的问题.
增加ViewInfo类,这个是信息预览的窗口,如果是自己的信息,则可以进行编辑.
信息修改后上传至服务器再告诉所有用户,自己的窗口
- java读取配置文件
知了ing
1,java读取.properties配置文件
InputStream in;
try {
in = test.class.getClassLoader().getResourceAsStream("config/ipnetOracle.properties");//配置文件的路径
Properties p = new Properties()
- __attribute__ 你知多少?
矮蛋蛋
C++gcc
原文地址:
http://www.cnblogs.com/astwish/p/3460618.html
GNU C 的一大特色就是__attribute__ 机制。__attribute__ 可以设置函数属性(Function Attribute )、变量属性(Variable Attribute )和类型属性(Type Attribute )。
__attribute__ 书写特征是:
- jsoup使用笔记
alleni123
java爬虫JSoup
<dependency>
<groupId>org.jsoup</groupId>
<artifactId>jsoup</artifactId>
<version>1.7.3</version>
</dependency>
2014/08/28
今天遇到这种形式,
- JAVA中的集合 Collectio 和Map的简单使用及方法
百合不是茶
listmapset
List ,set ,map的使用方法和区别
java容器类类库的用途是保存对象,并将其分为两个概念:
Collection集合:一个独立的序列,这些序列都服从一条或多条规则;List必须按顺序保存元素 ,set不能重复元素;Queue按照排队规则来确定对象产生的顺序(通常与他们被插入的
- 杀LINUX的JOB进程
bijian1013
linuxunix
今天发现数据库一个JOB一直在执行,都执行了好几个小时还在执行,所以想办法给删除掉
系统环境:
ORACLE 10G
Linux操作系统
操作步骤如下:
第一步.查询出来那个job在运行,找个对应的SID字段
select * from dba_jobs_running--找到job对应的sid
&n
- Spring AOP详解
bijian1013
javaspringAOP
最近项目中遇到了以下几点需求,仔细思考之后,觉得采用AOP来解决。一方面是为了以更加灵活的方式来解决问题,另一方面是借此机会深入学习Spring AOP相关的内容。例如,以下需求不用AOP肯定也能解决,至于是否牵强附会,仁者见仁智者见智。
1.对部分函数的调用进行日志记录,用于观察特定问题在运行过程中的函数调用
- [Gson六]Gson类型适配器(TypeAdapter)
bit1129
Adapter
TypeAdapter的使用动机
Gson在序列化和反序列化时,默认情况下,是按照POJO类的字段属性名和JSON串键进行一一映射匹配,然后把JSON串的键对应的值转换成POJO相同字段对应的值,反之亦然,在这个过程中有一个JSON串Key对应的Value和对象之间如何转换(序列化/反序列化)的问题。
以Date为例,在序列化和反序列化时,Gson默认使用java.
- 【spark八十七】给定Driver Program, 如何判断哪些代码在Driver运行,哪些代码在Worker上执行
bit1129
driver
Driver Program是用户编写的提交给Spark集群执行的application,它包含两部分
作为驱动: Driver与Master、Worker协作完成application进程的启动、DAG划分、计算任务封装、计算任务分发到各个计算节点(Worker)、计算资源的分配等。
计算逻辑本身,当计算任务在Worker执行时,执行计算逻辑完成application的计算任务
- nginx 经验总结
ronin47
nginx 总结
深感nginx的强大,只学了皮毛,把学下的记录。
获取Header 信息,一般是以$http_XX(XX是小写)
获取body,通过接口,再展开,根据K取V
获取uri,以$arg_XX
&n
- 轩辕互动-1.求三个整数中第二大的数2.整型数组的平衡点
bylijinnan
数组
import java.util.ArrayList;
import java.util.Arrays;
import java.util.List;
public class ExoWeb {
public static void main(String[] args) {
ExoWeb ew=new ExoWeb();
System.out.pri
- Netty源码学习-Java-NIO-Reactor
bylijinnan
java多线程netty
Netty里面采用了NIO-based Reactor Pattern
了解这个模式对学习Netty非常有帮助
参考以下两篇文章:
http://jeewanthad.blogspot.com/2013/02/reactor-pattern-explained-part-1.html
http://gee.cs.oswego.edu/dl/cpjslides/nio.pdf
- AOP通俗理解
cngolon
springAOP
1.我所知道的aop 初看aop,上来就是一大堆术语,而且还有个拉风的名字,面向切面编程,都说是OOP的一种有益补充等等。一下子让你不知所措,心想着:怪不得很多人都和 我说aop多难多难。当我看进去以后,我才发现:它就是一些java基础上的朴实无华的应用,包括ioc,包括许许多多这样的名词,都是万变不离其宗而 已。 2.为什么用aop&nb
- cursor variable 实例
ctrain
variable
create or replace procedure proc_test01
as
type emp_row is record(
empno emp.empno%type,
ename emp.ename%type,
job emp.job%type,
mgr emp.mgr%type,
hiberdate emp.hiredate%type,
sal emp.sal%t
- shell报bash: service: command not found解决方法
daizj
linuxshellservicejps
今天在执行一个脚本时,本来是想在脚本中启动hdfs和hive等程序,可以在执行到service hive-server start等启动服务的命令时会报错,最终解决方法记录一下:
脚本报错如下:
./olap_quick_intall.sh: line 57: service: command not found
./olap_quick_intall.sh: line 59
- 40个迹象表明你还是PHP菜鸟
dcj3sjt126com
设计模式PHP正则表达式oop
你是PHP菜鸟,如果你:1. 不会利用如phpDoc 这样的工具来恰当地注释你的代码2. 对优秀的集成开发环境如Zend Studio 或Eclipse PDT 视而不见3. 从未用过任何形式的版本控制系统,如Subclipse4. 不采用某种编码与命名标准 ,以及通用约定,不能在项目开发周期里贯彻落实5. 不使用统一开发方式6. 不转换(或)也不验证某些输入或SQL查询串(译注:参考PHP相关函
- Android逐帧动画的实现
dcj3sjt126com
android
一、代码实现:
private ImageView iv;
private AnimationDrawable ad;
@Override
protected void onCreate(Bundle savedInstanceState)
{
super.onCreate(savedInstanceState);
setContentView(R.layout
- java远程调用linux的命令或者脚本
eksliang
linuxganymed-ssh2
转载请出自出处:
http://eksliang.iteye.com/blog/2105862
Java通过SSH2协议执行远程Shell脚本(ganymed-ssh2-build210.jar)
使用步骤如下:
1.导包
官网下载:
http://www.ganymed.ethz.ch/ssh2/
ma
- adb端口被占用问题
gqdy365
adb
最近重新安装的电脑,配置了新环境,老是出现:
adb server is out of date. killing...
ADB server didn't ACK
* failed to start daemon *
百度了一下,说是端口被占用,我开个eclipse,然后打开cmd,就提示这个,很烦人。
一个比较彻底的解决办法就是修改
- ASP.NET使用FileUpload上传文件
hvt
.netC#hovertreeasp.netwebform
前台代码:
<asp:FileUpload ID="fuKeleyi" runat="server" />
<asp:Button ID="BtnUp" runat="server" onclick="BtnUp_Click" Text="上 传" />
- 代码之谜(四)- 浮点数(从惊讶到思考)
justjavac
浮点数精度代码之谜IEEE
在『代码之谜』系列的前几篇文章中,很多次出现了浮点数。 浮点数在很多编程语言中被称为简单数据类型,其实,浮点数比起那些复杂数据类型(比如字符串)来说, 一点都不简单。
单单是说明 IEEE浮点数 就可以写一本书了,我将用几篇博文来简单的说说我所理解的浮点数,算是抛砖引玉吧。 一次面试
记得多年前我招聘 Java 程序员时的一次关于浮点数、二分法、编码的面试, 多年以后,他已经称为了一名很出色的
- 数据结构随记_1
lx.asymmetric
数据结构笔记
第一章
1.数据结构包括数据的
逻辑结构、数据的物理/存储结构和数据的逻辑关系这三个方面的内容。 2.数据的存储结构可用四种基本的存储方法表示,它们分别是
顺序存储、链式存储 、索引存储 和 散列存储。 3.数据运算最常用的有五种,分别是
查找/检索、排序、插入、删除、修改。 4.算法主要有以下五个特性:
输入、输出、可行性、确定性和有穷性。 5.算法分析的
- linux的会话和进程组
网络接口
linux
会话: 一个或多个进程组。起于用户登录,终止于用户退出。此期间所有进程都属于这个会话期。会话首进程:调用setsid创建会话的进程1.规定组长进程不能调用setsid,因为调用setsid后,调用进程会成为新的进程组的组长进程.如何保证? 先调用fork,然后终止父进程,此时由于子进程的进程组ID为父进程的进程组ID,而子进程的ID是重新分配的,所以保证子进程不会是进程组长,从而子进程可以调用se
- 二维数组 元素的连续求解
1140566087
二维数组ACM
import java.util.HashMap;
public class Title {
public static void main(String[] args){
f();
}
// 二位数组的应用
//12、二维数组中,哪一行或哪一列的连续存放的0的个数最多,是几个0。注意,是“连续”。
public static void f(){
- 也谈什么时候Java比C++快
windshome
javaC++
刚打开iteye就看到这个标题“Java什么时候比C++快”,觉得很好笑。
你要比,就比同等水平的基础上的相比,笨蛋写得C代码和C++代码,去和高手写的Java代码比效率,有什么意义呢?
我是写密码算法的,深刻知道算法C和C++实现和Java实现之间的效率差,甚至也比对过C代码和汇编代码的效率差,计算机是个死的东西,再怎么优化,Java也就是和C
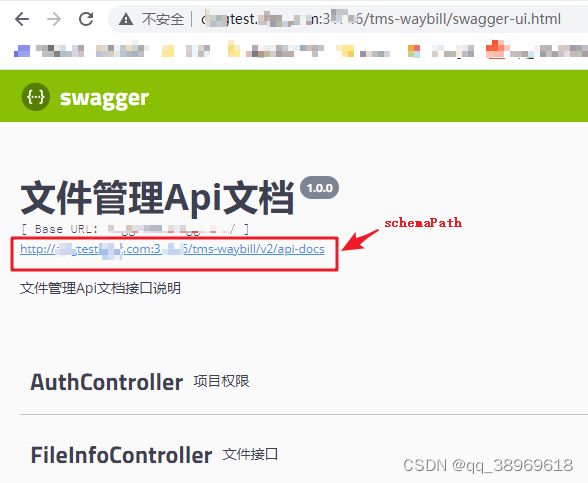 后端人员提供的接口路径页面xx.html
 系统自动生成的2个目录&api文件截图
  package.json中不同环境命令截图