采用多种方式实现项目的查询多级缓存(三)
3.实现多级缓存
多级缓存的实现离不开Nginx编程,而Nginx编程又离不开OpenResty。
3.1.安装OpenResty
OpenResty® 是一个基于 Nginx的高性能 Web 平台,用于方便地搭建能够处理超高并发、扩展性极高的动态 Web 应用、Web 服务和动态网关。具备下列特点:
- 具备Nginx的完整功能
- 基于Lua语言进行扩展,集成了大量精良的 Lua 库、第三方模块
- 允许使用Lua自定义业务逻辑、自定义库
官方网站: https://openresty.org/cn/

首先你的Linux虚拟机必须联网
1)安装开发库
首先要安装OpenResty的依赖开发库,执行命令:
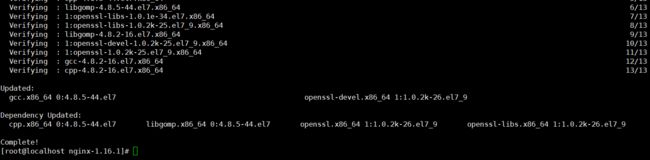
yum install -y pcre-devel openssl-devel gcc --skip-broken
2)安装OpenResty仓库
你可以在你的 CentOS 系统中添加 openresty 仓库,这样就可以便于未来安装或更新我们的软件包(通过 yum check-update 命令)。运行下面的命令就可以添加我们的仓库:
yum-config-manager --add-repo https://openresty.org/package/centos/openresty.repo
如果提示说命令不存在,则运行:
yum install -y yum-utils
然后再重复上面的命令
3)安装OpenResty
然后就可以像下面这样安装软件包,比如 openresty:
yum install -y openresty

4)安装opm工具
opm是OpenResty的一个管理工具,可以帮助我们安装一个第三方的Lua模块。
如果你想安装命令行工具 opm,那么可以像下面这样安装 openresty-opm 包:
yum install -y openresty-opm
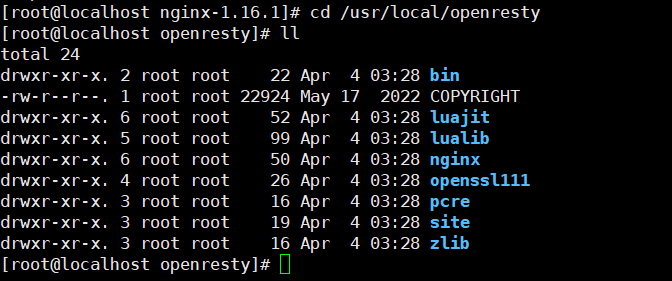
5)目录结构
默认情况下,OpenResty安装的目录是:/usr/local/openresty

看到里面的nginx目录了吗,OpenResty就是在Nginx基础上集成了一些Lua模块。
6)配置nginx的环境变量
打开配置文件:
vi /etc/profile
在最下面加入两行:
export NGINX_HOME=/usr/local/openresty/nginx
export PATH=${NGINX_HOME}/sbin:$PATH

NGINX_HOME:后面是OpenResty安装目录下的nginx的目录
然后让配置生效:
source /etc/profile
3.2.启动和运行
OpenResty底层是基于Nginx的,查看OpenResty目录的nginx目录,结构与windows中安装的nginx基本一致:

所以运行方式与nginx基本一致:
# 启动nginx
nginx
# 重新加载配置
nginx -s reload
# 停止
nginx -s stop
启动成功

nginx的默认配置文件注释太多,影响后续我们的编辑,这里将nginx.conf中的注释部分删除,保留有效部分。
修改/usr/local/openresty/nginx/conf/nginx.conf文件,内容如下:
#user  nobody;
worker_processes  1;
error_log  logs/error.log;

events {
    worker_connections  1024;
}

http {
    include       mime.types;
    default_type  application/octet-stream;
    sendfile        on;
    keepalive_timeout  65;

    server {
        listen       8081;
        server_name  localhost;
        location / {
            root   html;
            index  index.html index.htm;
        }
        error_page   500 502 503 504  /50x.html;
        location = /50x.html {
            root   html;
        }
    }
}

在Linux的控制台输入命令以启动nginx:
nginx
然后访问页面:http://192.168.150.101:8081,注意ip地址替换为你自己的虚拟机IP:

3.3.OpenResty快速入门
我们希望达到的多级缓存架构如图:

其中:
-
windows上的nginx用来做反向代理服务,将前端的查询商品的ajax请求代理到OpenResty集群
-
OpenResty集群用来编写多级缓存业务
3.3.1.反向代理流程
现在,商品详情页使用的是假的商品数据。不过在浏览器中,可以看到页面有发起ajax请求查询真实商品数据。
这个请求如下:
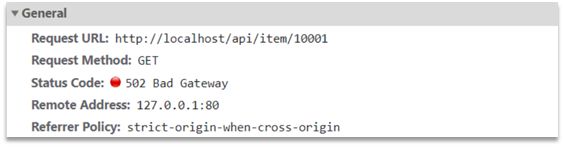
请求地址是localhost,端口是80,就被windows上安装的Nginx服务给接收到了。然后代理给了OpenResty集群:

我们需要在OpenResty中编写业务,查询商品数据并返回到浏览器。
但是这次,我们先在OpenResty接收请求,返回假的商品数据。
3.3.2.OpenResty监听请求
OpenResty的很多功能都依赖于其目录下的Lua库,需要在nginx.conf中指定依赖库的目录,并导入依赖:
1)添加对OpenResty的Lua模块的加载
修改/usr/local/openresty/nginx/conf/nginx.conf文件,在其中的http下面,添加下面代码:
#lua 模块
lua_package_path "/usr/local/openresty/lualib/?.lua;;";
#c模块
lua_package_cpath "/usr/local/openresty/lualib/?.so;;";
2)监听/api/item路径
修改/usr/local/openresty/nginx/conf/nginx.conf文件,在nginx.conf的server下面,添加对/api/item这个路径的监听:
location  /api/item {
    # 默认的响应类型
    default_type application/json;
    # 响应结果由lua/item.lua文件来决定
    content_by_lua_file lua/item.lua;
}
这个监听,就类似于SpringMVC中的@GetMapping("/api/item")做路径映射。
而content_by_lua_file lua/item.lua则相当于调用item.lua这个文件,执行其中的业务,把结果返回给用户。相当于java中调用service。
3.3.3.编写item.lua
1)在/usr/loca/openresty/nginx目录创建文件夹:lua

2)在/usr/loca/openresty/nginx/lua文件夹下,新建文件:item.lua

3)编写item.lua,返回假数据
item.lua中,利用ngx.say()函数返回数据到Response中
ngx.say('{"id":10001,"name":"SALSA AIR","title":"RIMOWA 21寸托运箱拉杆箱 SALSA AIR系列果绿色 820.70.36.4","price":17900,"image":"https://m.360buyimg.com/mobilecms/s720x720_jfs/t6934/364/1195375010/84676/e9f2c55f/597ece38N0ddcbc77.jpg!q70.jpg.webp","category":"拉杆箱","brand":"RIMOWA","spec":"","status":1,"createTime":"2019-04-30T16:00:00.000+00:00","updateTime":"2019-04-30T16:00:00.000+00:00","stock":2999,"sold":31290}')
4)重新加载配置
nginx -s reload
刷新商品页面:http://localhost/item.html?id=1001,即可看到效果:

3.4.请求参数处理
上一节中,我们在OpenResty接收前端请求,但是返回的是假数据。
要返回真实数据,必须根据前端传递来的商品id,查询商品信息才可以。
那么如何获取前端传递的商品参数呢?
3.4.1.获取参数的API
OpenResty中提供了一些API用来获取不同类型的前端请求参数:

3.4.2.获取参数并返回
在前端发起的ajax请求如图:

可以看到商品id是以路径占位符方式传递的,因此可以利用正则表达式匹配的方式来获取ID
1)获取商品id
修改/usr/loca/openresty/nginx/nginx.conf文件中监听/api/item的代码,利用正则表达式获取ID:
location ~ /api/item/(\d+) {
    # 默认的响应类型
    default_type application/json;
    # 响应结果由lua/item.lua文件来决定
    content_by_lua_file lua/item.lua;
}
2)拼接ID并返回
修改/usr/loca/openresty/nginx/lua/item.lua文件,获取id并拼接到结果中返回:
-- 获取商品id
local id = ngx.var[1]
-- 拼接并返回
ngx.say('{"id":' .. id .. ',"name":"SALSA AIR","title":"RIMOWA 29寸托运箱拉杆箱 SALSA AIR系列果绿色 820.70.36.4","price":17900,"image":"https://m.360buyimg.com/mobilecms/s720x720_jfs/t6934/364/1195375010/84676/e9f2c55f/597ece38N0ddcbc77.jpg!q70.jpg.webp","category":"拉杆箱","brand":"RIMOWA","spec":"","status":1,"createTime":"2019-04-30T16:00:00.000+00:00","updateTime":"2019-04-30T16:00:00.000+00:00","stock":2999,"sold":31290}')
3)重新加载并测试
运行命令以重新加载OpenResty配置:
nginx -s reload
刷新页面可以看到结果中已经带上了ID:
