李宏毅2023机器学习作业HW03解析和代码分享
ML2023Spring - HW3 相关信息:
课程主页
课程视频
Kaggle link
Sample code
HW03 视频
HW03 PDF
个人完整代码分享: GitHub | Gitee | GitCodeP.S. 即便 kaggle 上的时间已经截止,你仍然可以在上面提交和查看分数。但需要注意的是:在 kaggle 截止日期前你应该选择两个结果进行最后的Private评分。
每年的数据集size和feature并不完全相同,但基本一致,过去的代码仍可用于新一年的 Homework。代码仓库中关于HW03的代码暂时没有boss,仅为0.84666,最近繁琐事情太多,还在比赛,所以先上传分享思路
文章目录
- 任务目标(图像分类)
- 性能指标(Metric)
- 数据解析
-
- 数据下载(kaggle)
- Gradescope (Report)
-
- Q1. Augmentation Implementation
- Q2. Visual Representations Implementation
- Baselines
-
- Simple baseline (0.637)
- Medium baseline (0.700)
- Strong baseline (0.814)
- Boss baseline (0.874)
- 小坑
- 参考链接
任务目标(图像分类)
使用 CNN 进行图像分类
性能指标(Metric)
在测试集上的分类精度:
A c c = p r e d = = l a b e l l e n ( d a t a ) ∗ 100 % Acc = \frac{pred==label}{len(data)} * 100\% \nonumber Acc=len(data)pred==label∗100%
数据解析
- ./train (Training set): 图像命名的格式为 “x_y.png”,其中 x 是类别,含有 10,000 张被标记的图像
- ./valid (Valid set): 图像命名的格式为 “x_y.png”,其中 x 是类别,含有 3,643 张被标记的图像
- ./test (Testing set): 图像命名的格式为 “n.png”,n 是 id,含有 3,000 张未标记的图像
数据来源于 food-11 数据集,共有 11 类。
数据下载(kaggle)
To use the Kaggle API, sign up for a Kaggle account at https://www.kaggle.com. Then go to the ‘Account’ tab of your user profile (
https://www.kaggle.com/) and select ‘Create API Token’. This will trigger the download of/account kaggle.json, a file containing your API credentials. Place this file in the location~/.kaggle/kaggle.json(on Windows in the locationC:\Users\- you can check the exact location, sans drive, with\.kaggle\kaggle.json echo %HOMEPATH%). You can define a shell environment variableKAGGLE_CONFIG_DIRto change this location to$KAGGLE_CONFIG_DIR/kaggle.json(on Windows it will be%KAGGLE_CONFIG_DIR%\kaggle.json).-- Official Kaggle API
gdown 的链接如果挂了或者太慢,可以考虑使用 kaggle 的 api,流程非常简单,替换https://www.kaggle.com/,然后点击 Create New API Token,将下载下来的文件放去应该放的位置:
- Mac 和 Linux 放在
~/.kaggle - Windows 放在
C:\Users\\.kaggle
pip install kaggle
# 你需要先在 Kaggle -> Account -> Create New API Token 中下载 kaggle.json
# mv kaggle.json ~/.kaggle/kaggle.json
kaggle competitions download -c ml2023spring-hw3
unzip ml2023spring-hw3
Gradescope (Report)
from PIL import image什么是 PIL?
PIL (Python Image Library) 是 python 的第三方图像处理库,支持图像存储,显示和处理,能够处理几乎所有的图片格式。
PIL.Image 模块在 sample code 中用于加载图像。
Q1. Augmentation Implementation
需要完成至少 5 种 transform,这一步能让你熟悉 Data Augmentation 到底是在做什么。
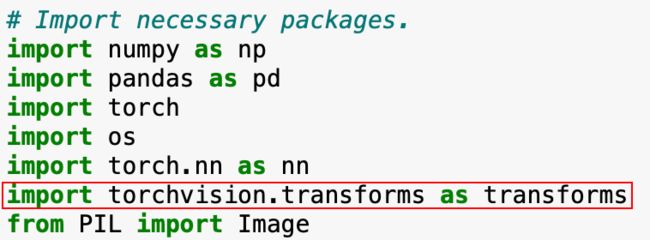
直接看代码部分,调用了 transforms 中的函数。
往回追溯:
可以看到 transforms 其实就是 torchvision.transforms。
torchvision.transforms 是 pytorch 中的图像预处理包,提供了常用的图像变换方式,可以通过 Compose 将多个变换步骤整合到一起,你可以查看这篇文章:torchvision.transforms 常用方法解析(含图例代码以及参数解释)进一步了解,最好是自行组合 5 个跑几次实验之后再偷懒。
下面的代码可以让你看到 train_tfm 究竟做了什么变换。
# I want to show you an example code of Q1. Augmentation Implementation that visualizes the effects of different image transformations.
import matplotlib.pyplot as plt

plt.rcParams["savefig.bbox"] = 'tight'

# You can change the file path to match your image
orig_img = Image.open('Q1/assets/astronaut.jpg')


def plot(imgs, with_orig=True, row_title=None, **imshow_kwargs):
    if not isinstance(imgs[0], list):
        # Make a 2d grid even if there's just 1 row
        imgs = [imgs]

    num_rows = len(imgs)
    num_cols = len(imgs[0]) + with_orig
    fig, axs = plt.subplots(nrows=num_rows, ncols=num_cols, squeeze=False)
    for row_idx, row in enumerate(imgs):
        row = [orig_img] + row if with_orig else row
        for col_idx, img in enumerate(row):
            ax = axs[row_idx, col_idx]
            ax.imshow(np.asarray(img), **imshow_kwargs)
            ax.set(xticklabels=[], yticklabels=[], xticks=[], yticks=[])

    if with_orig:
        axs[0, 0].set(title='Original image')
        axs[0, 0].title.set_size(8)
    if row_title is not None:
        for row_idx in range(num_rows):
            axs[row_idx, 0].set(ylabel=row_title[row_idx])

    plt.tight_layout()

# Create a list of five transformed images from the original image using the train_tfm function
demo = [train_tfm(orig_img) for i in range(5)]

# Convert the transformed images from tensors to PIL images
pil_img_demo = [Image.fromarray(np.moveaxis(img.numpy()*255, 0, -1).astype(np.uint8)) for img in demo]

# Plot the transformed images using the plot function
plot(pil_img_demo)
Q2. Visual Representations Implementation
下图是 Top/Mid/Bottom 的定义,你可以在 sample code 的最下面找到完成这个问题的代码。
根据你的模型修改其中的 index。
Baselines
Simple baseline (0.637)
- 运行所给的 sample code
Medium baseline (0.700)
-
做数据增强
RandomChoice 很好用,另外,lamda x:x 可以返回原图。
-
训练更长时间
根据 PDF 给出的参考训练时间,simple 是 0.5h,medium 是 1.5h,那么在这里我选择的是简单的将原来的 epoch *= 3,也就是 24 个 epoch 来进行最终的训练
Strong baseline (0.814)
-
使用预训练模型
这里你可能有疑惑:不是说不能使用预训练模型吗?
是的,你只能使用预训练模型的架构,不能使用预训练的权重,下面是不使用权重的参数设置。- Torchvision 版本 < 0.13 -> pretrained=False
- > 0.13 -> weights=None
模型对比 (160 epoch, 10 patience, ReduceLROnPlateau,使用了相当于原数据20倍的transforms) :
- 初始模型:0.80000
- resnet50: 0.732
- vgg16: 0.64733
- densenet121: 0.76533
- alexnet: 0.61866
- squeezenet: 0.64200
我觉得这一项的主要目的在于让你认识这些预训练模型的架构,因为可以看到,不使用预训练参数的情况下,实验结果并没有变得更好(使用预训练参数的话,以resnet50为例,仅使用预训练模型就可以轻松到达strong baseline,你可以试试,但不要用它来当作你的kaggle结果)。

但既然PDF中的hint仅仅只是使用预训练模型,我相信一定有什么地方可以调优,使得仅使用预训练模型架构就可以达到 strong baseline,简单对比了使用参数和不使用参数的情况下 acc 的提升情况,发现同样的 lr,使用预训练参数的时候上升幅度更大,所以我想了下:
- 有没有可能是我的 lr 太小了?调大试试
- 会不会是我的transforms不够,因为在我的代码中,5%的可能性不进行transforms,也就是说,20倍的数据增强。50倍试试
- Medium baseline的工作没做好,加TTA(Test Time Augmentation),将train_tfm用到测试集上试试
但上述方法都没有得到好的效果,最终我直接用最开始的CNN模型跑了200多个epoch完成了该strong baseline,这个坑以后来填,再耗在这更新来不及了 : )
Boss baseline (0.874)
-
Cross validation 交叉验证
-
Ensemble 模型集合
相关视频: ML Lecture 22: Ensemble ,如果没有科学上网,这里是两个相同视频的链接地址:bilibili,学校官网。
这两项确实有很大的提升,差不多有6个点,再修改一下原来的架构就行了。
小坑
- 注意你的 lr,我在做 cross validation 的时候,不小心将 lr 设置的过大,导致一开始学习的很差,还以为是数据集划分的索引问题,折腾了半天。
- 如果你将
train文件夹和valid文件夹下的内容合并成一个新的文件夹(为了做 cross validation),那么在做 K-fold 的时候,序号一定要 shuffle 去打乱,你只要默认打乱了,就不需要考虑太多,否则就会出现一种情况:验证集的标签有可能在训练集中不存在,那就意味着,你的模型可能几乎没见过验证集里面的 label,如果完全没见过,那 acc 甚至有可能是 0。下面是我当时疏忽导致的 bug:[外链图片转存失败,源站可能有防盗链机制,建议将图片保存下来直接上传(img-QdG5JLvc-1681389223934)(/Users/home/Library/Application%20Support/typora-user-images/image-20230407205208218.png)]
参考链接
Image Module - Pillow (PIL Fork) 9.4.0 documentation
TRANSFORMING AND AUGMENTING IMAGES


